


[Desktop Chassis] ProArt PA602 case fan (front/rear) disassembly and assembly instructions
Notice
1. Please wear gloves to protect your hands before disassembling and assembling, and pay attention to the corners of the parts to avoid scratches.
2. When the side panel is made of glass, please handle it with care when disassembling the side panel of the case to avoid collision/fall/stress.
3. When disassembling, please lay the casing flat on a flat surface to prevent the side panel from falling during disassembly and assembly.
Preparation
Phillips screwdriver PH2
Compatibility
Preinstall fans information please refer to specification page of product.
A. Front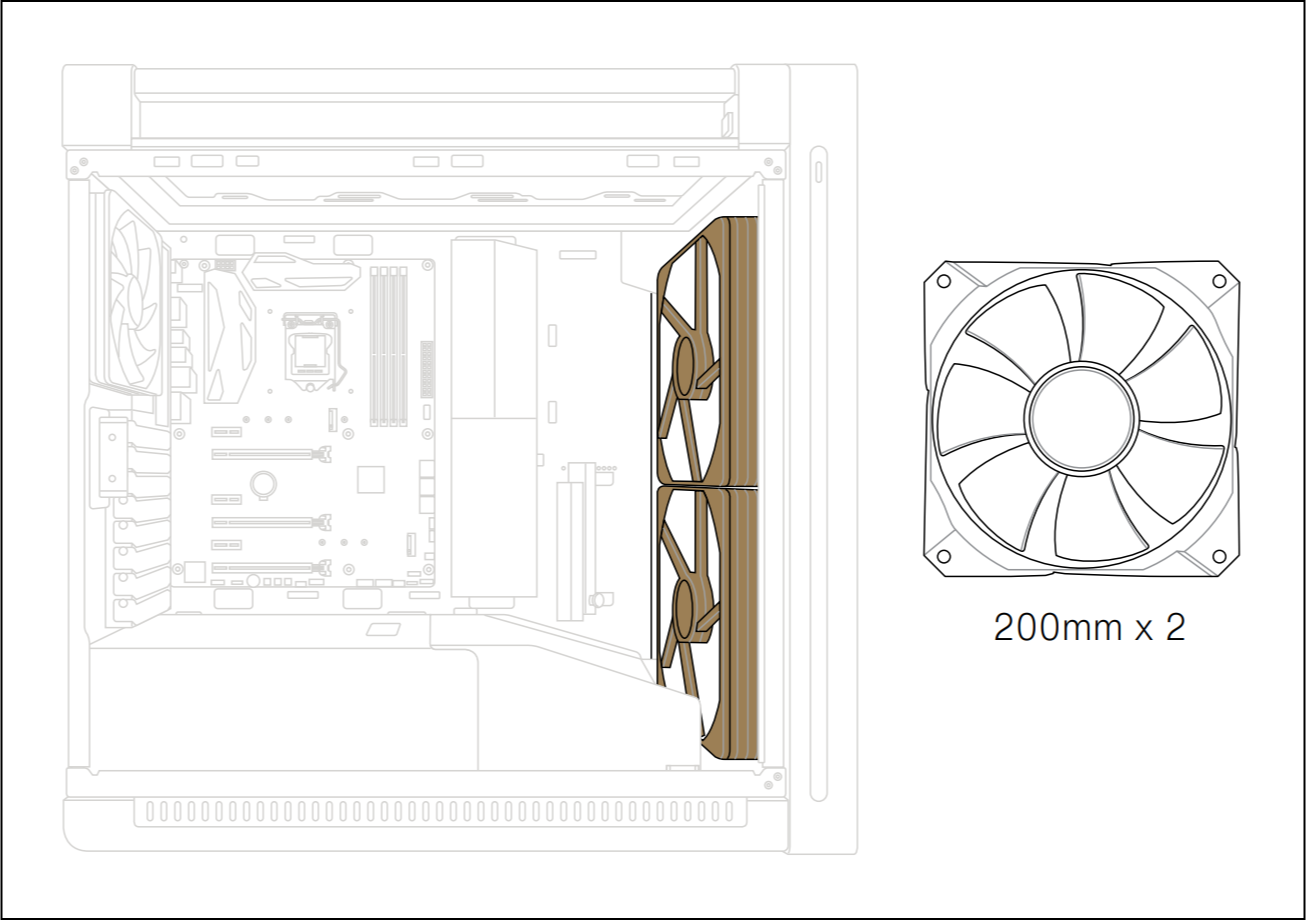
B. Top & rear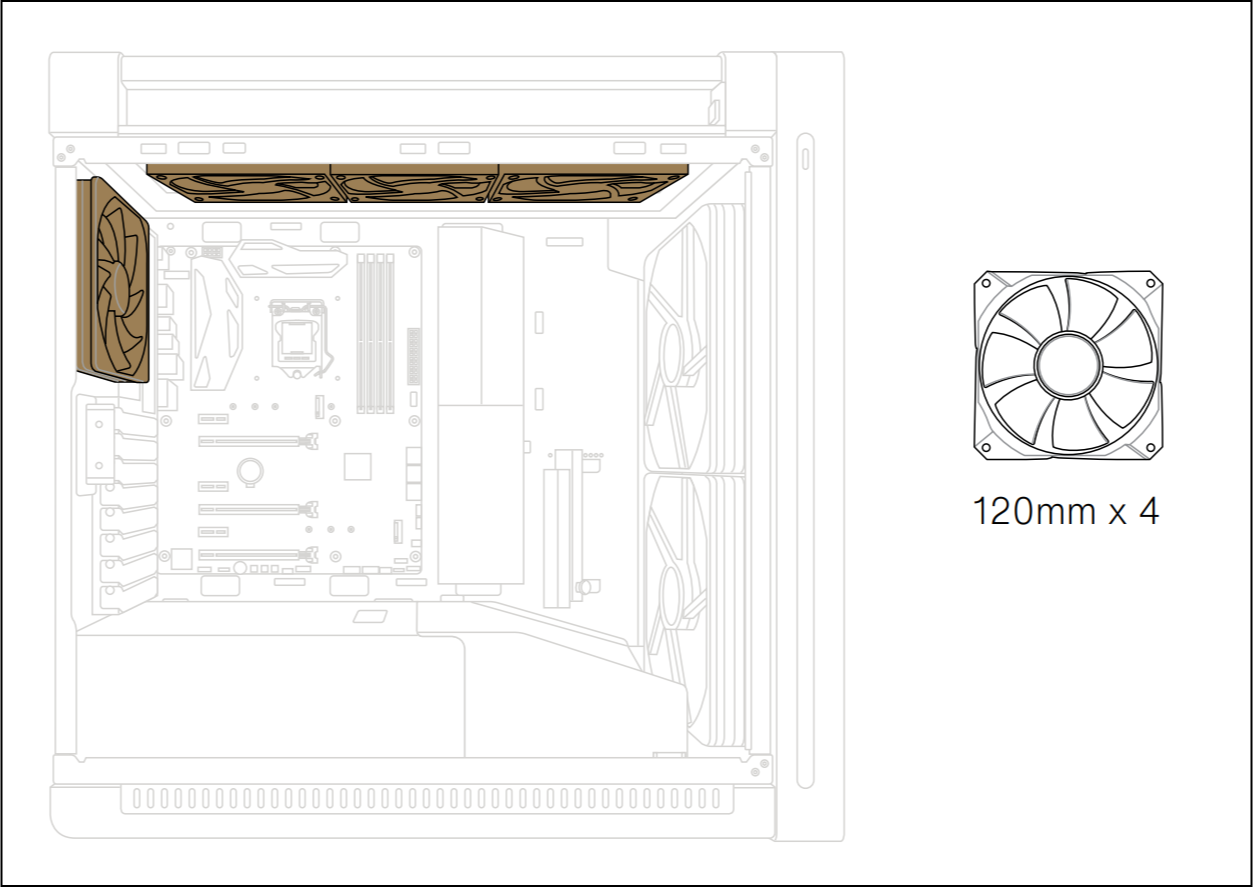

Step1. Open the both side panel and remove them.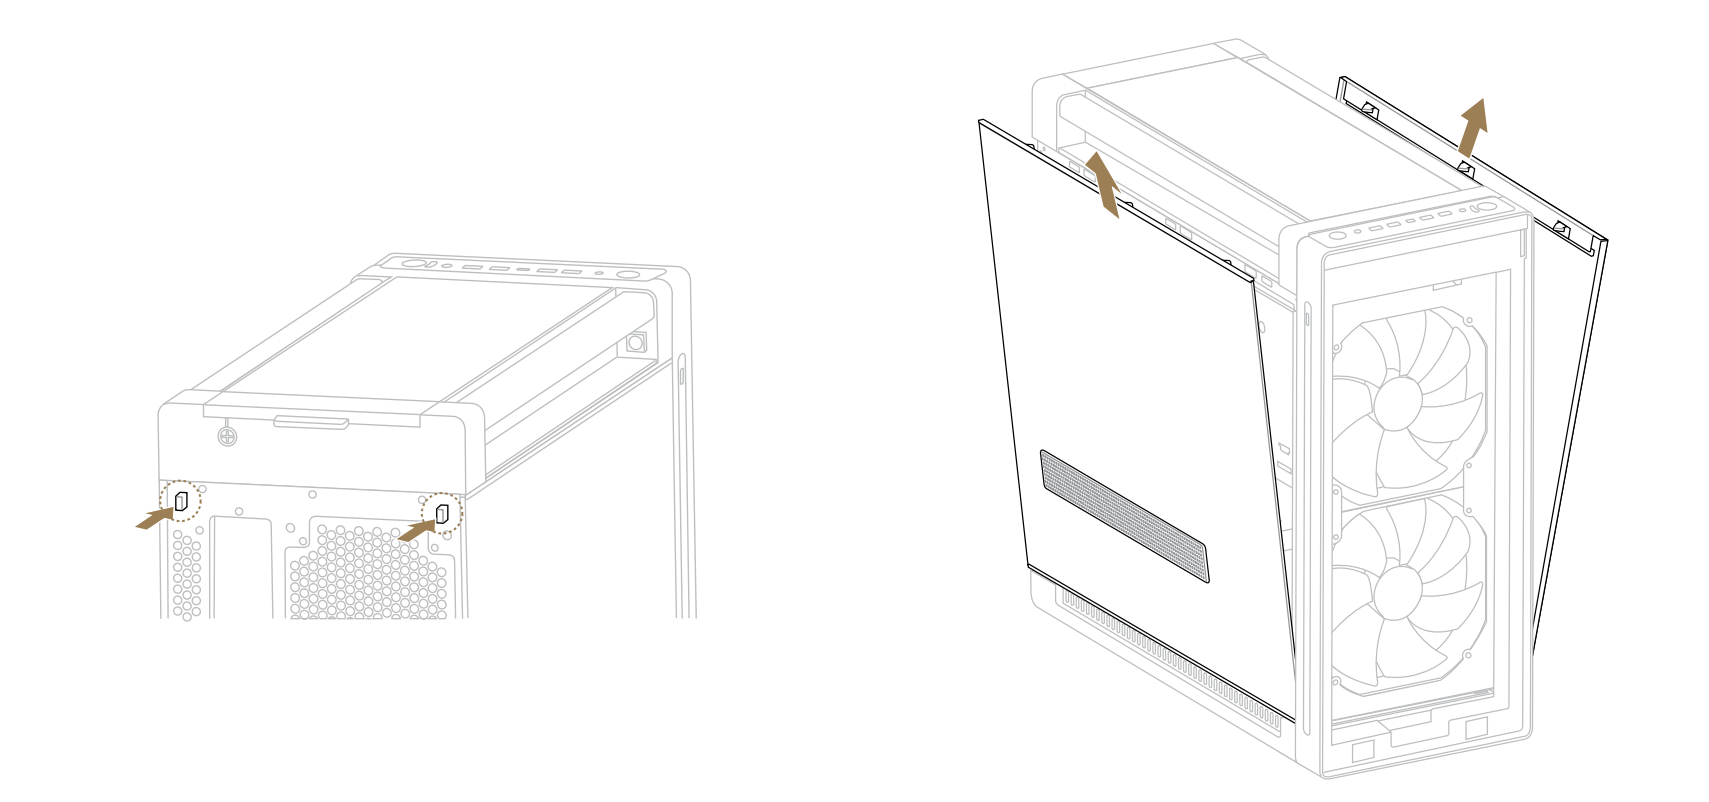
Step2. Remove fan connectors from fan hub.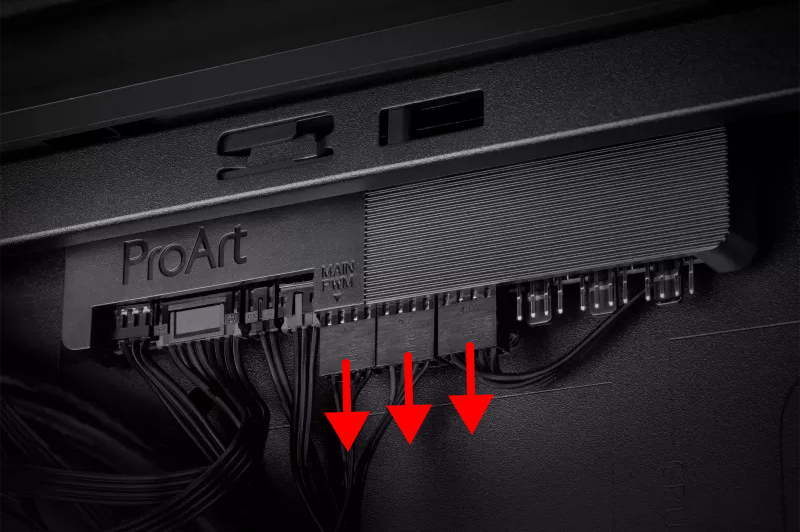
Step3. Release cable ties.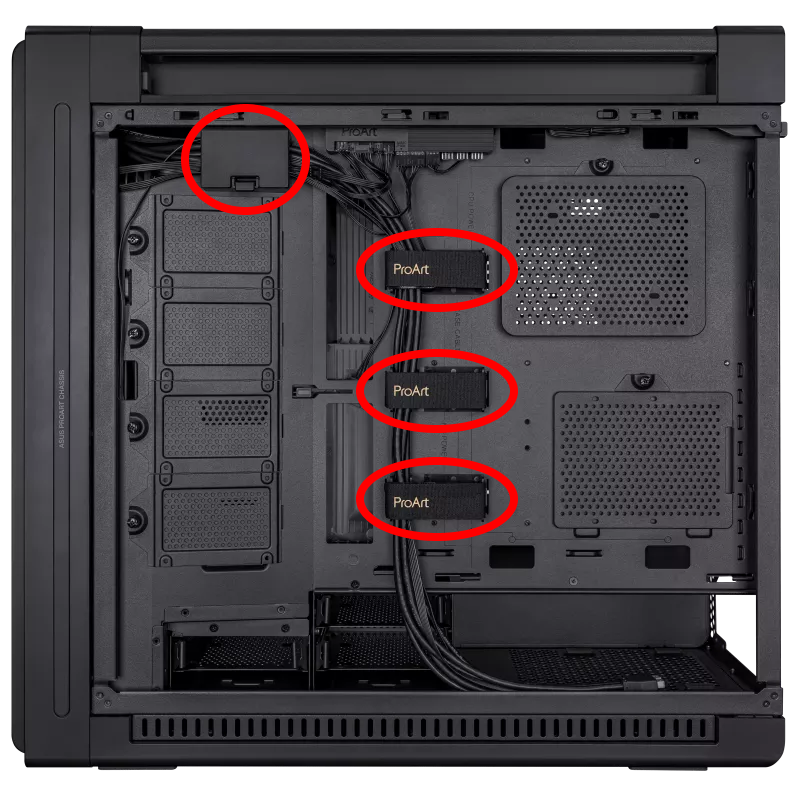
Step4. Replace Fan.
A. Front
(1) Press the latches on both sides of the front panel, and lift the front door frame upwards to remove it.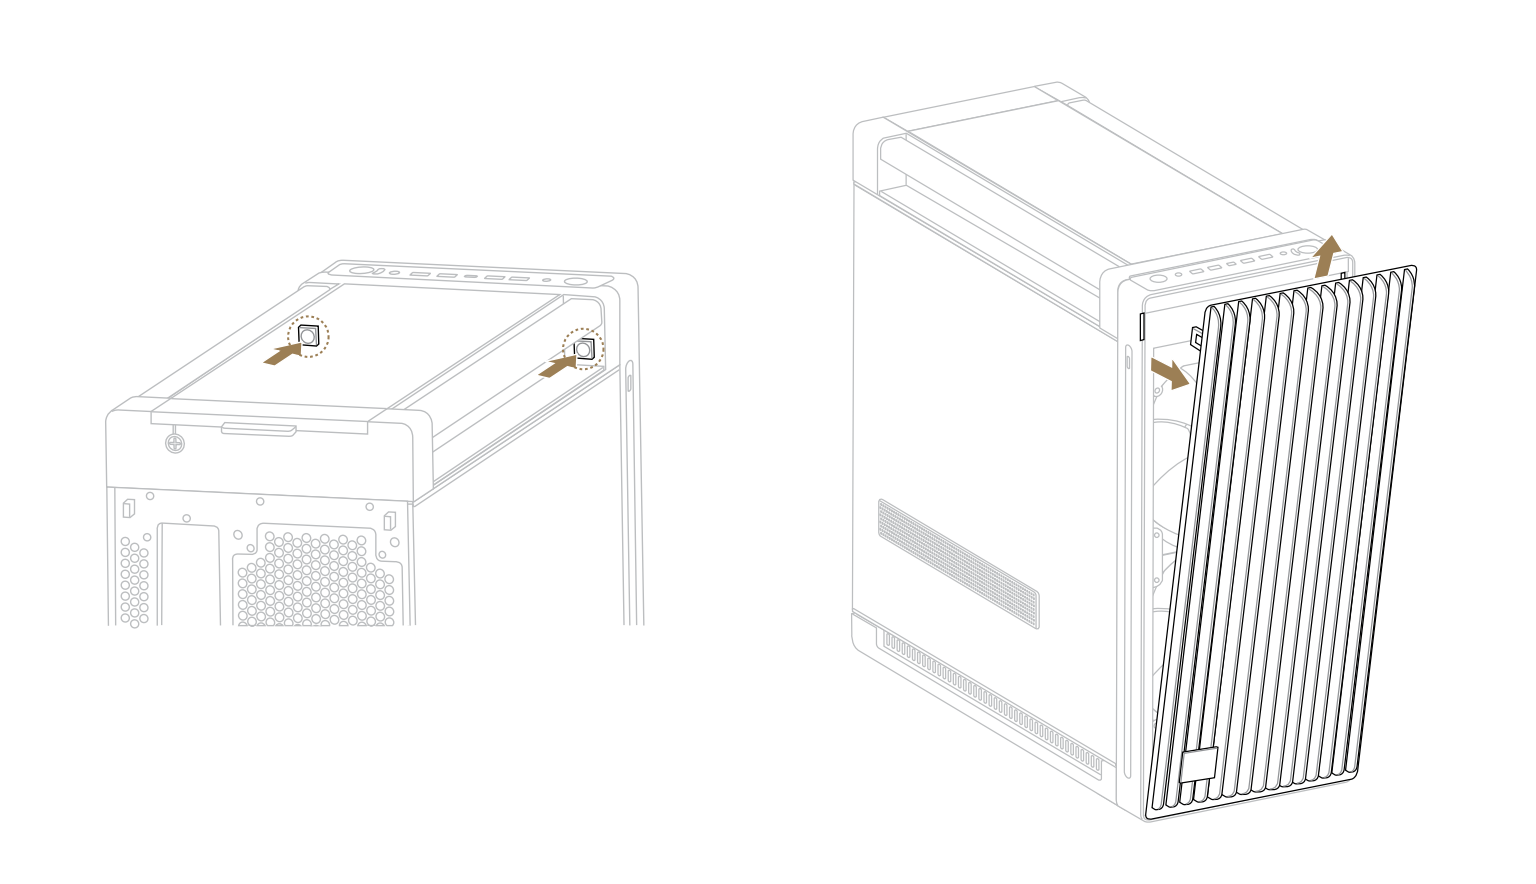
(2) Remove 4 screws on each fan, then replace the fan with a new one.
B. Rear
Remove 4 screws, then replace the fan with a new one.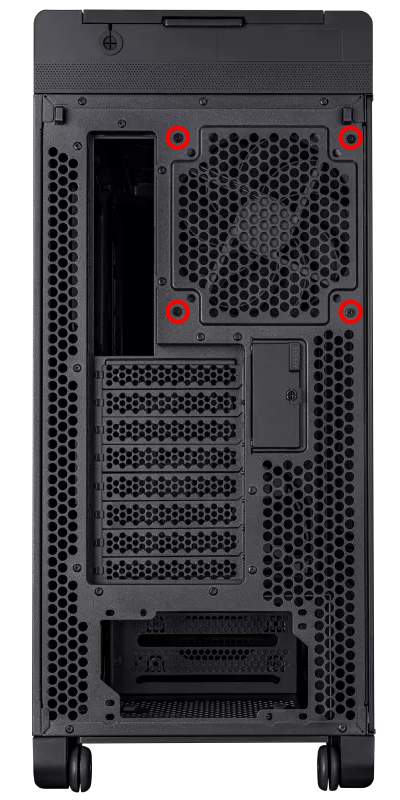
Visit ASUS official website to learn more about ProArt PA602 https://www.asus.com/motherboards-components/gaming-cases/proart/proart-pa602/
