


[Notebook] ZenVision - customizable 3.5'' OLED external screen - Introduction
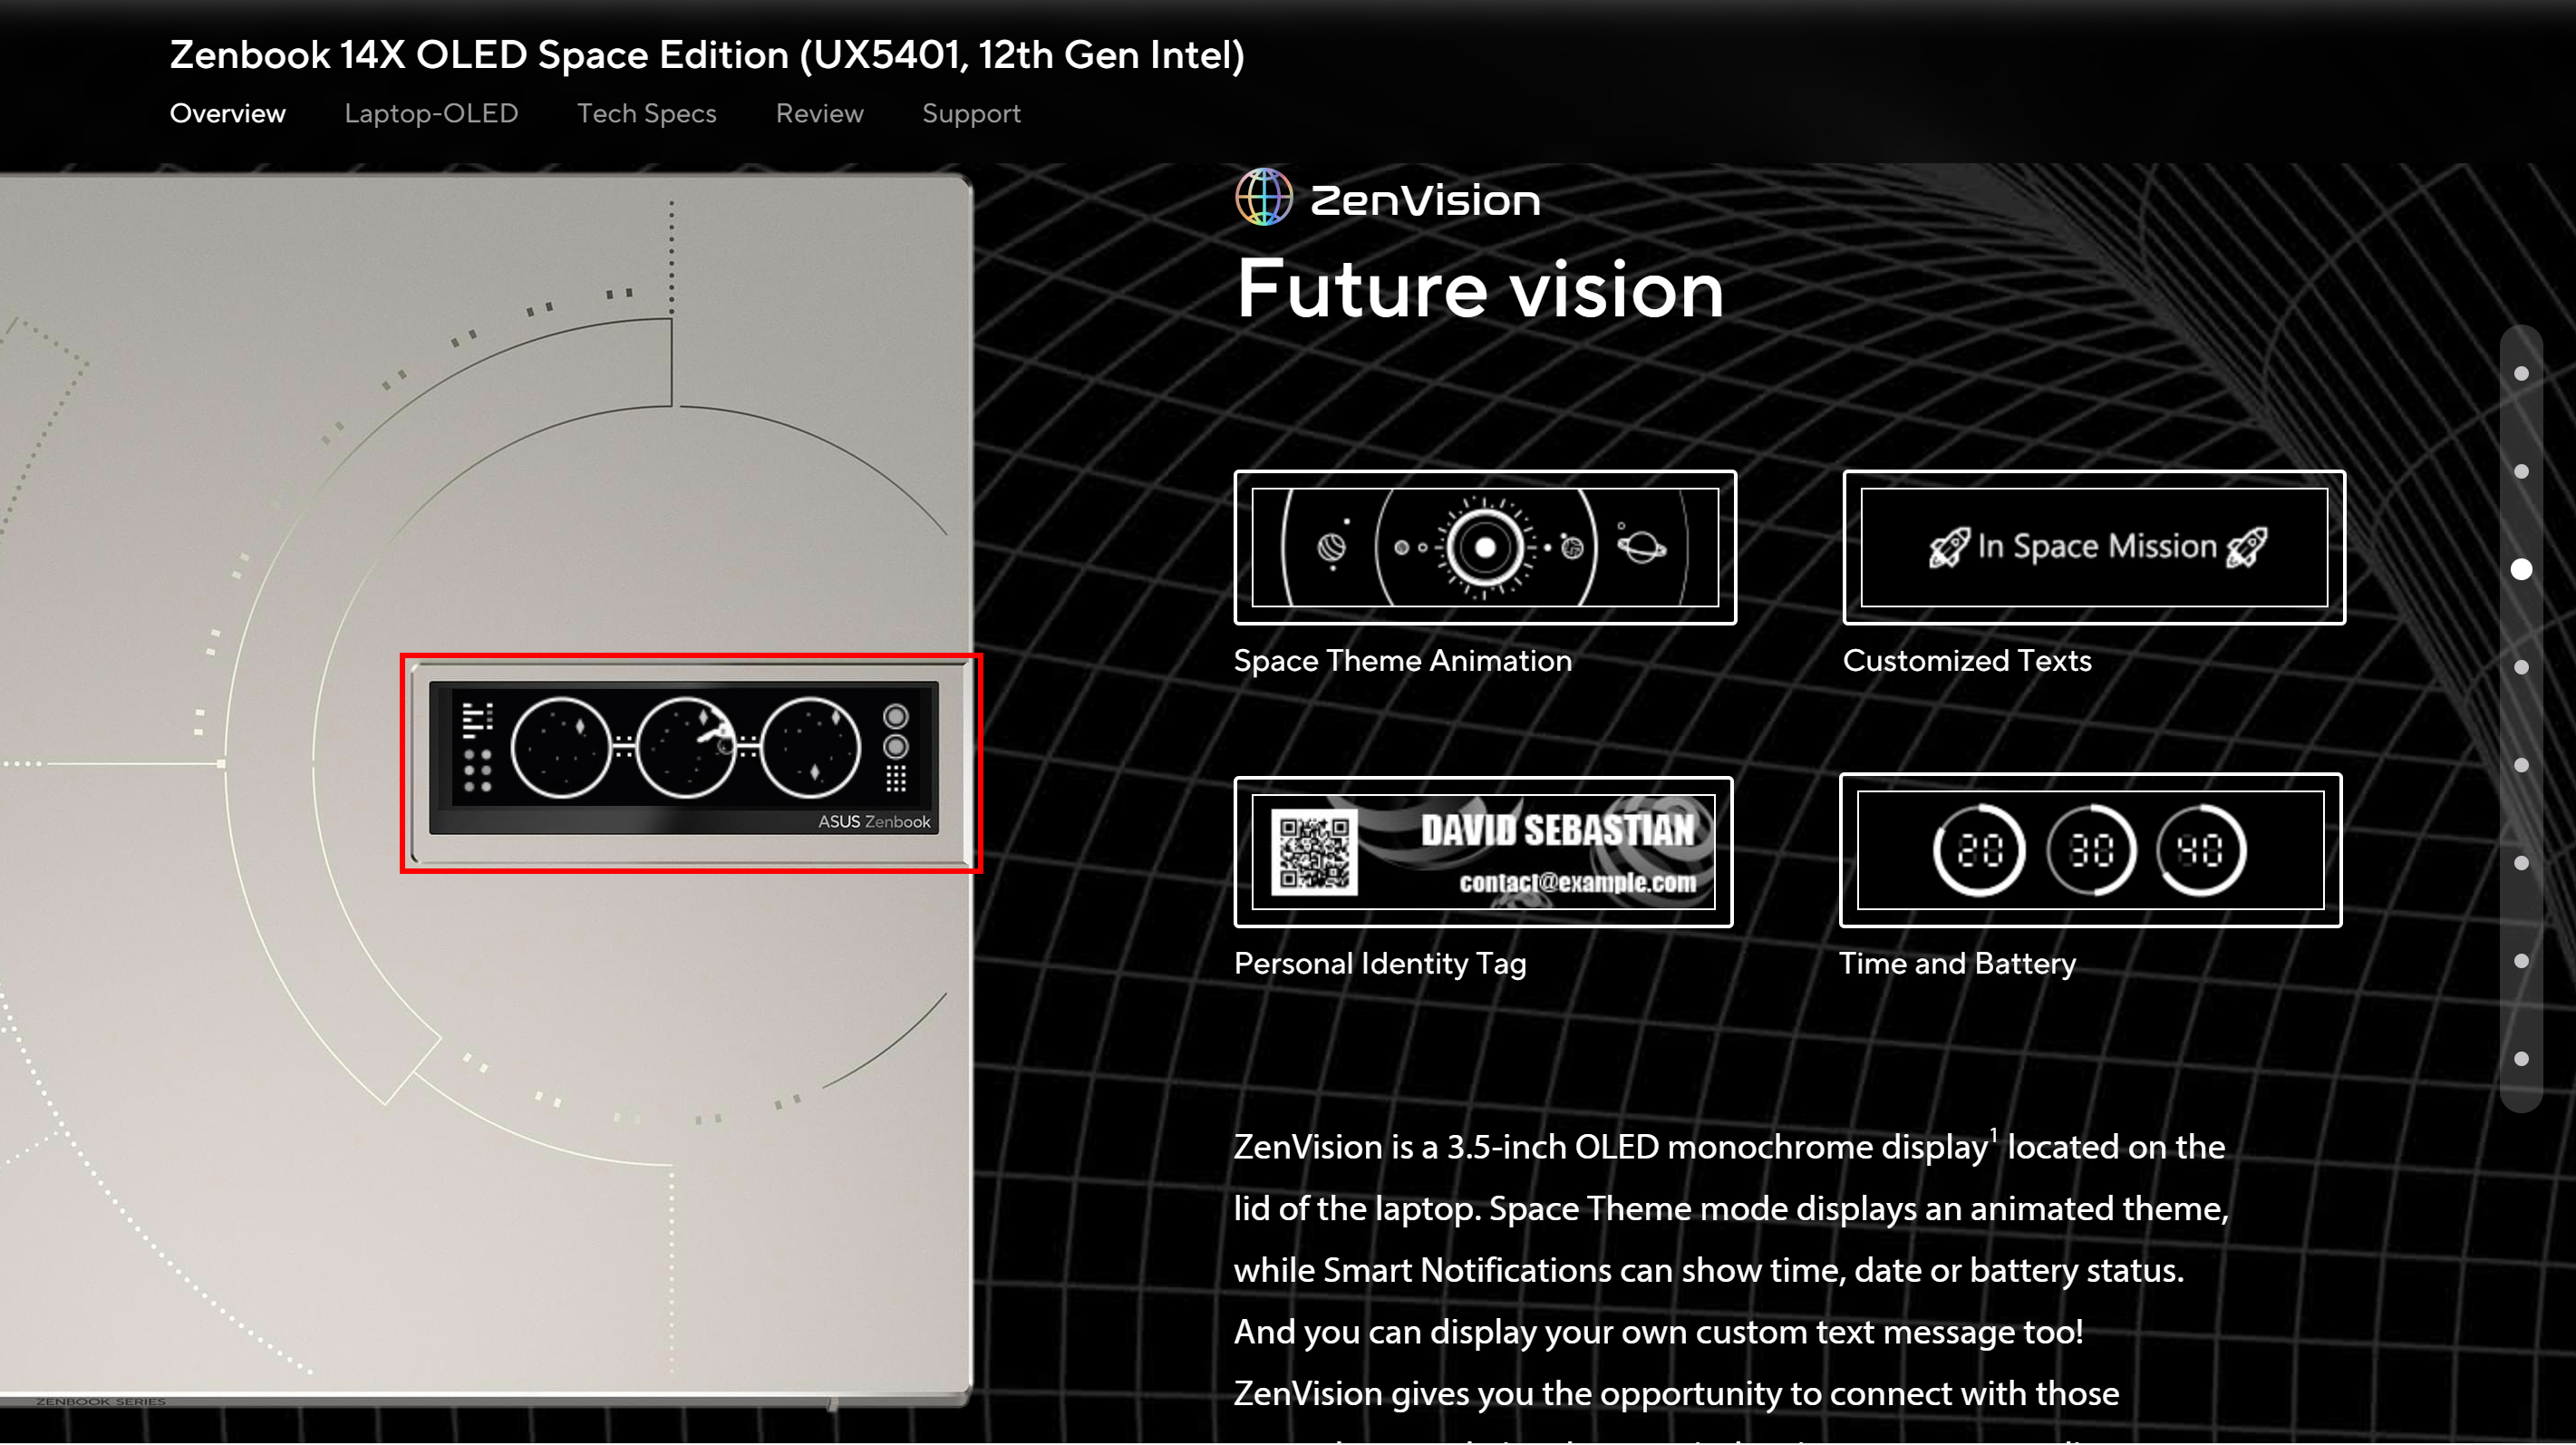
ZenVision is a 3.5-inch OLED monochrome screen located on the top of a laptop. Animated themes can be rendered to show the time, date, or battery status. You can also display a custom message! ZenVision gives you the opportunity to connect with the people around you and show your personality through this small window.

- System Requirements:
- How to open the OLED-screen control page
- Animations
- Text Mode
- Personal Label
- Settings
ZenVision requires computer hardware support, you can go to the official ASUS website and find out if computer supports this feature on computer's introduction page. For example, the following figure shows that the computer supports ZenVision.
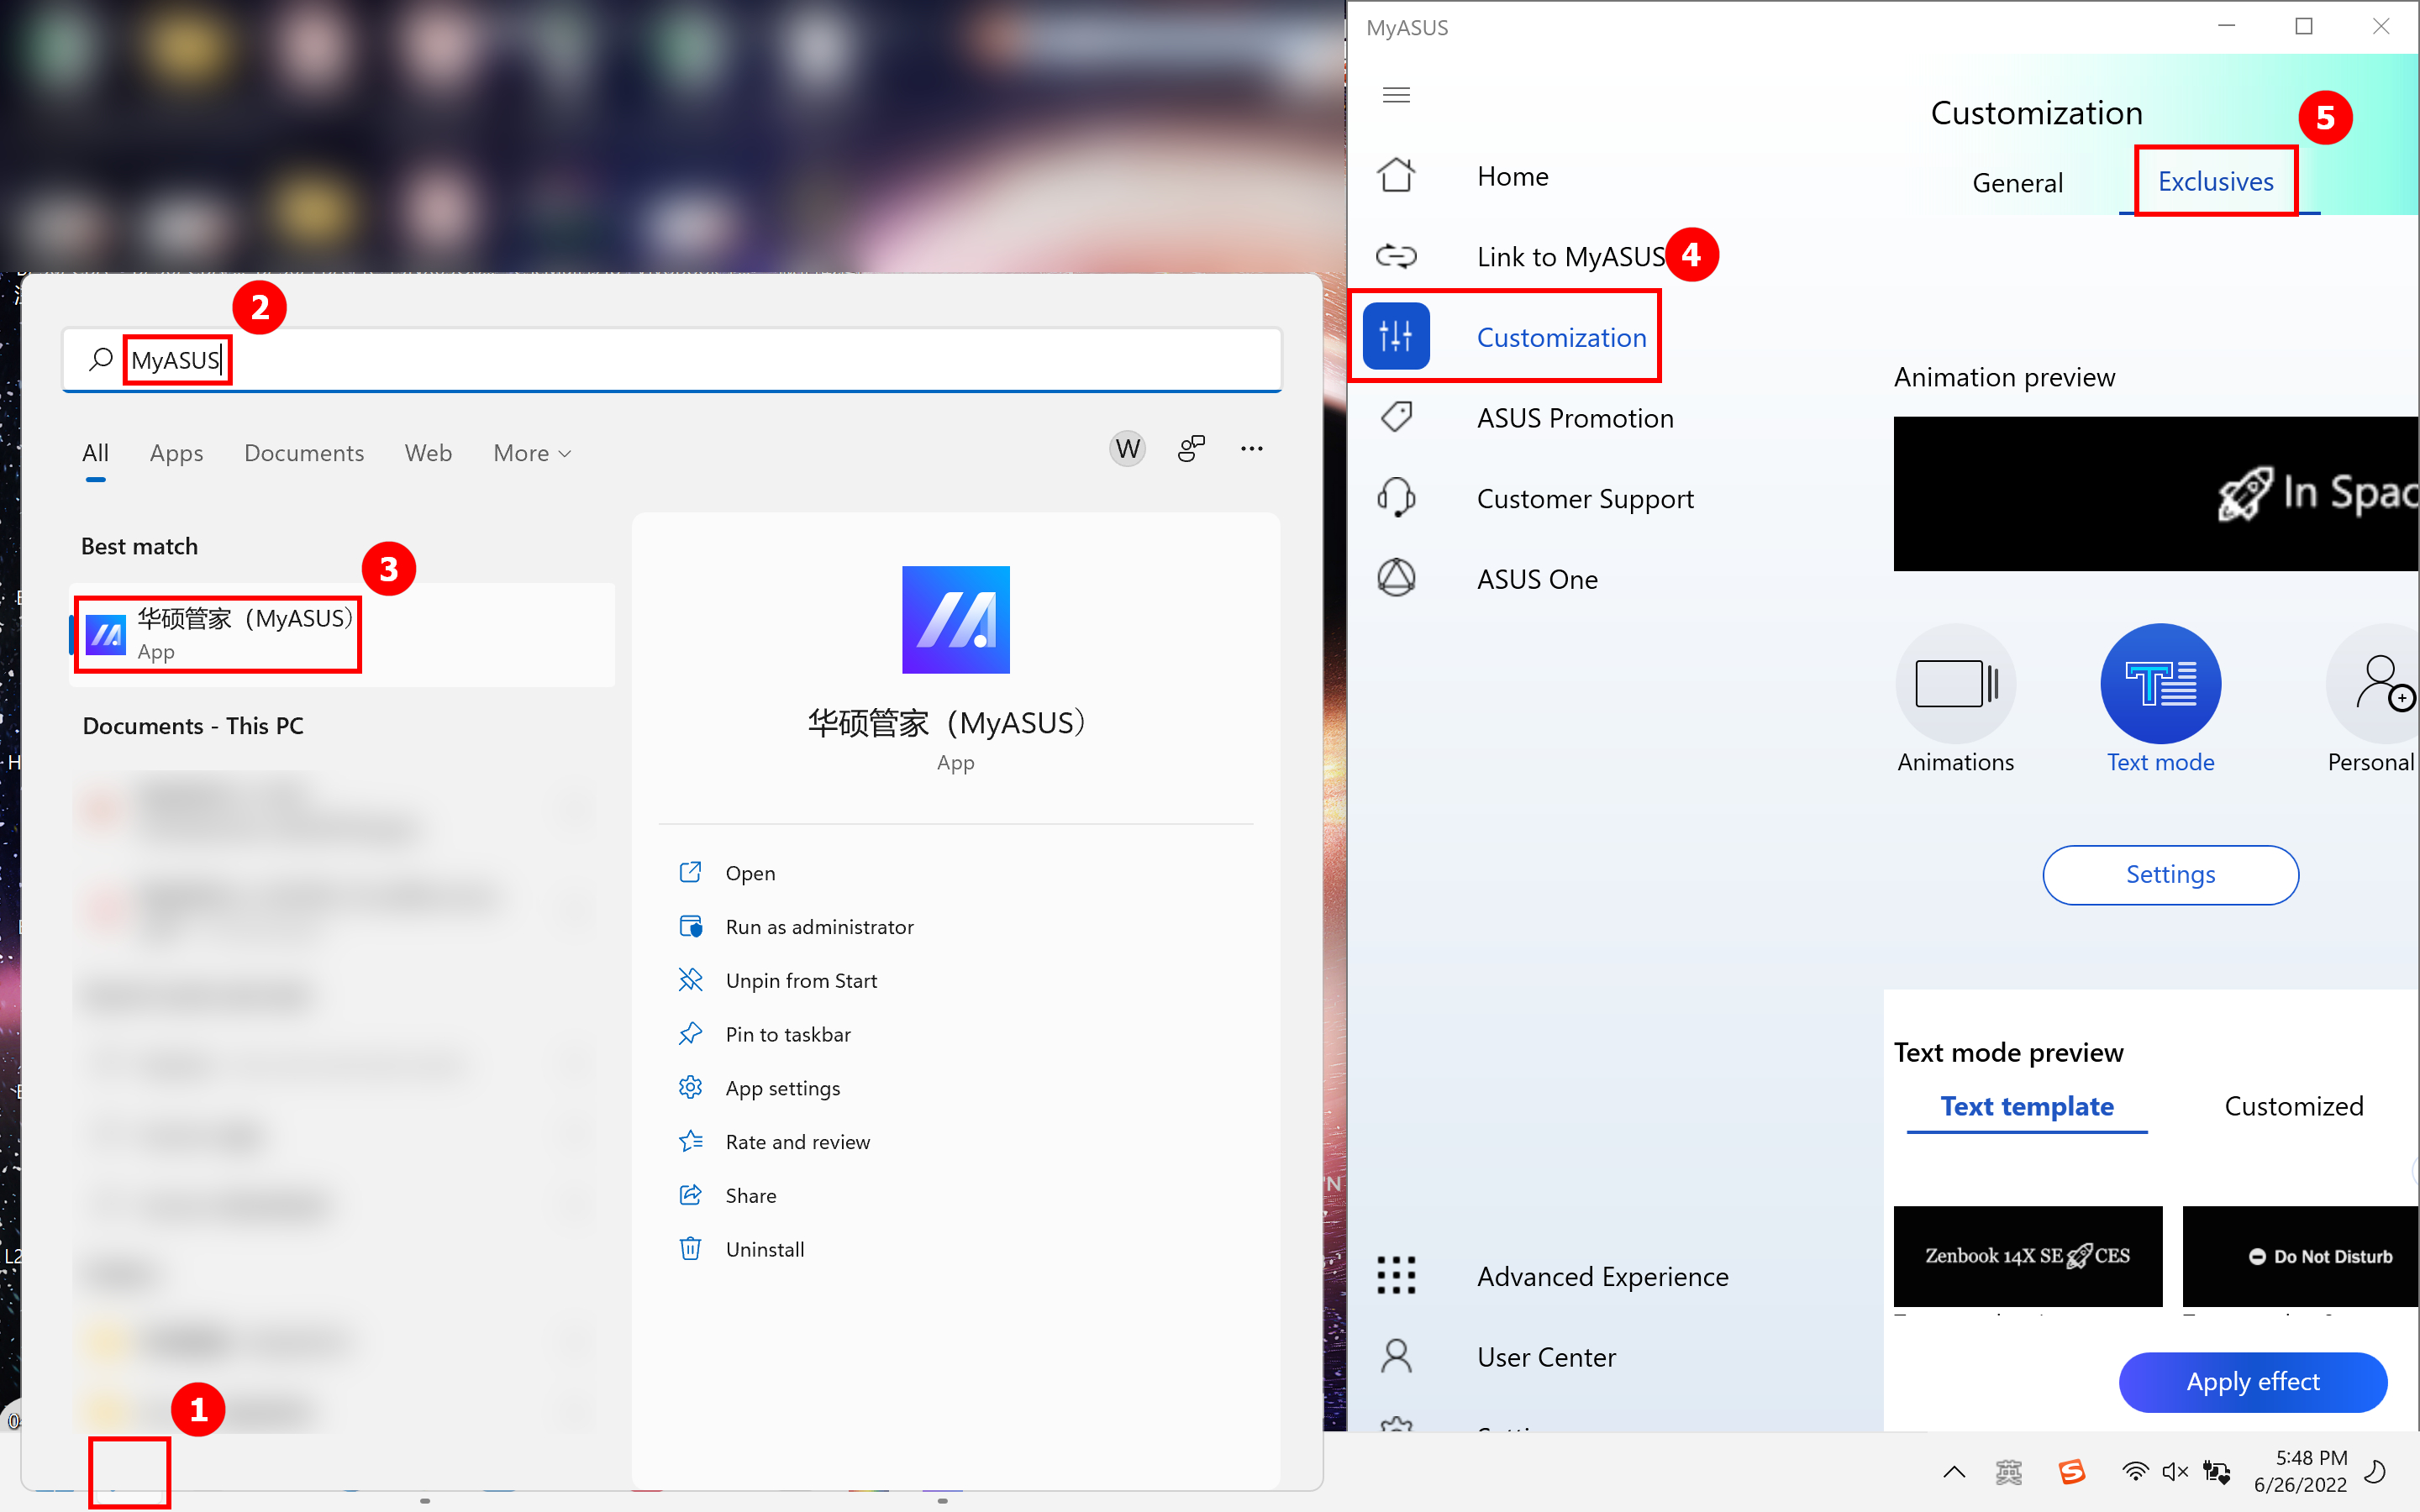
How to open the OLED-screen control page
Search for ①[MyASUS] in the search bar in the lower left corner of the desktop, input ②[MyASUS] in the search bar, click ③[MyASUS], click ④[Customization] on the left after the MyASUS App is opened, and then click ⑤[Exclusive Features] on the right to hit the mini screen control page.
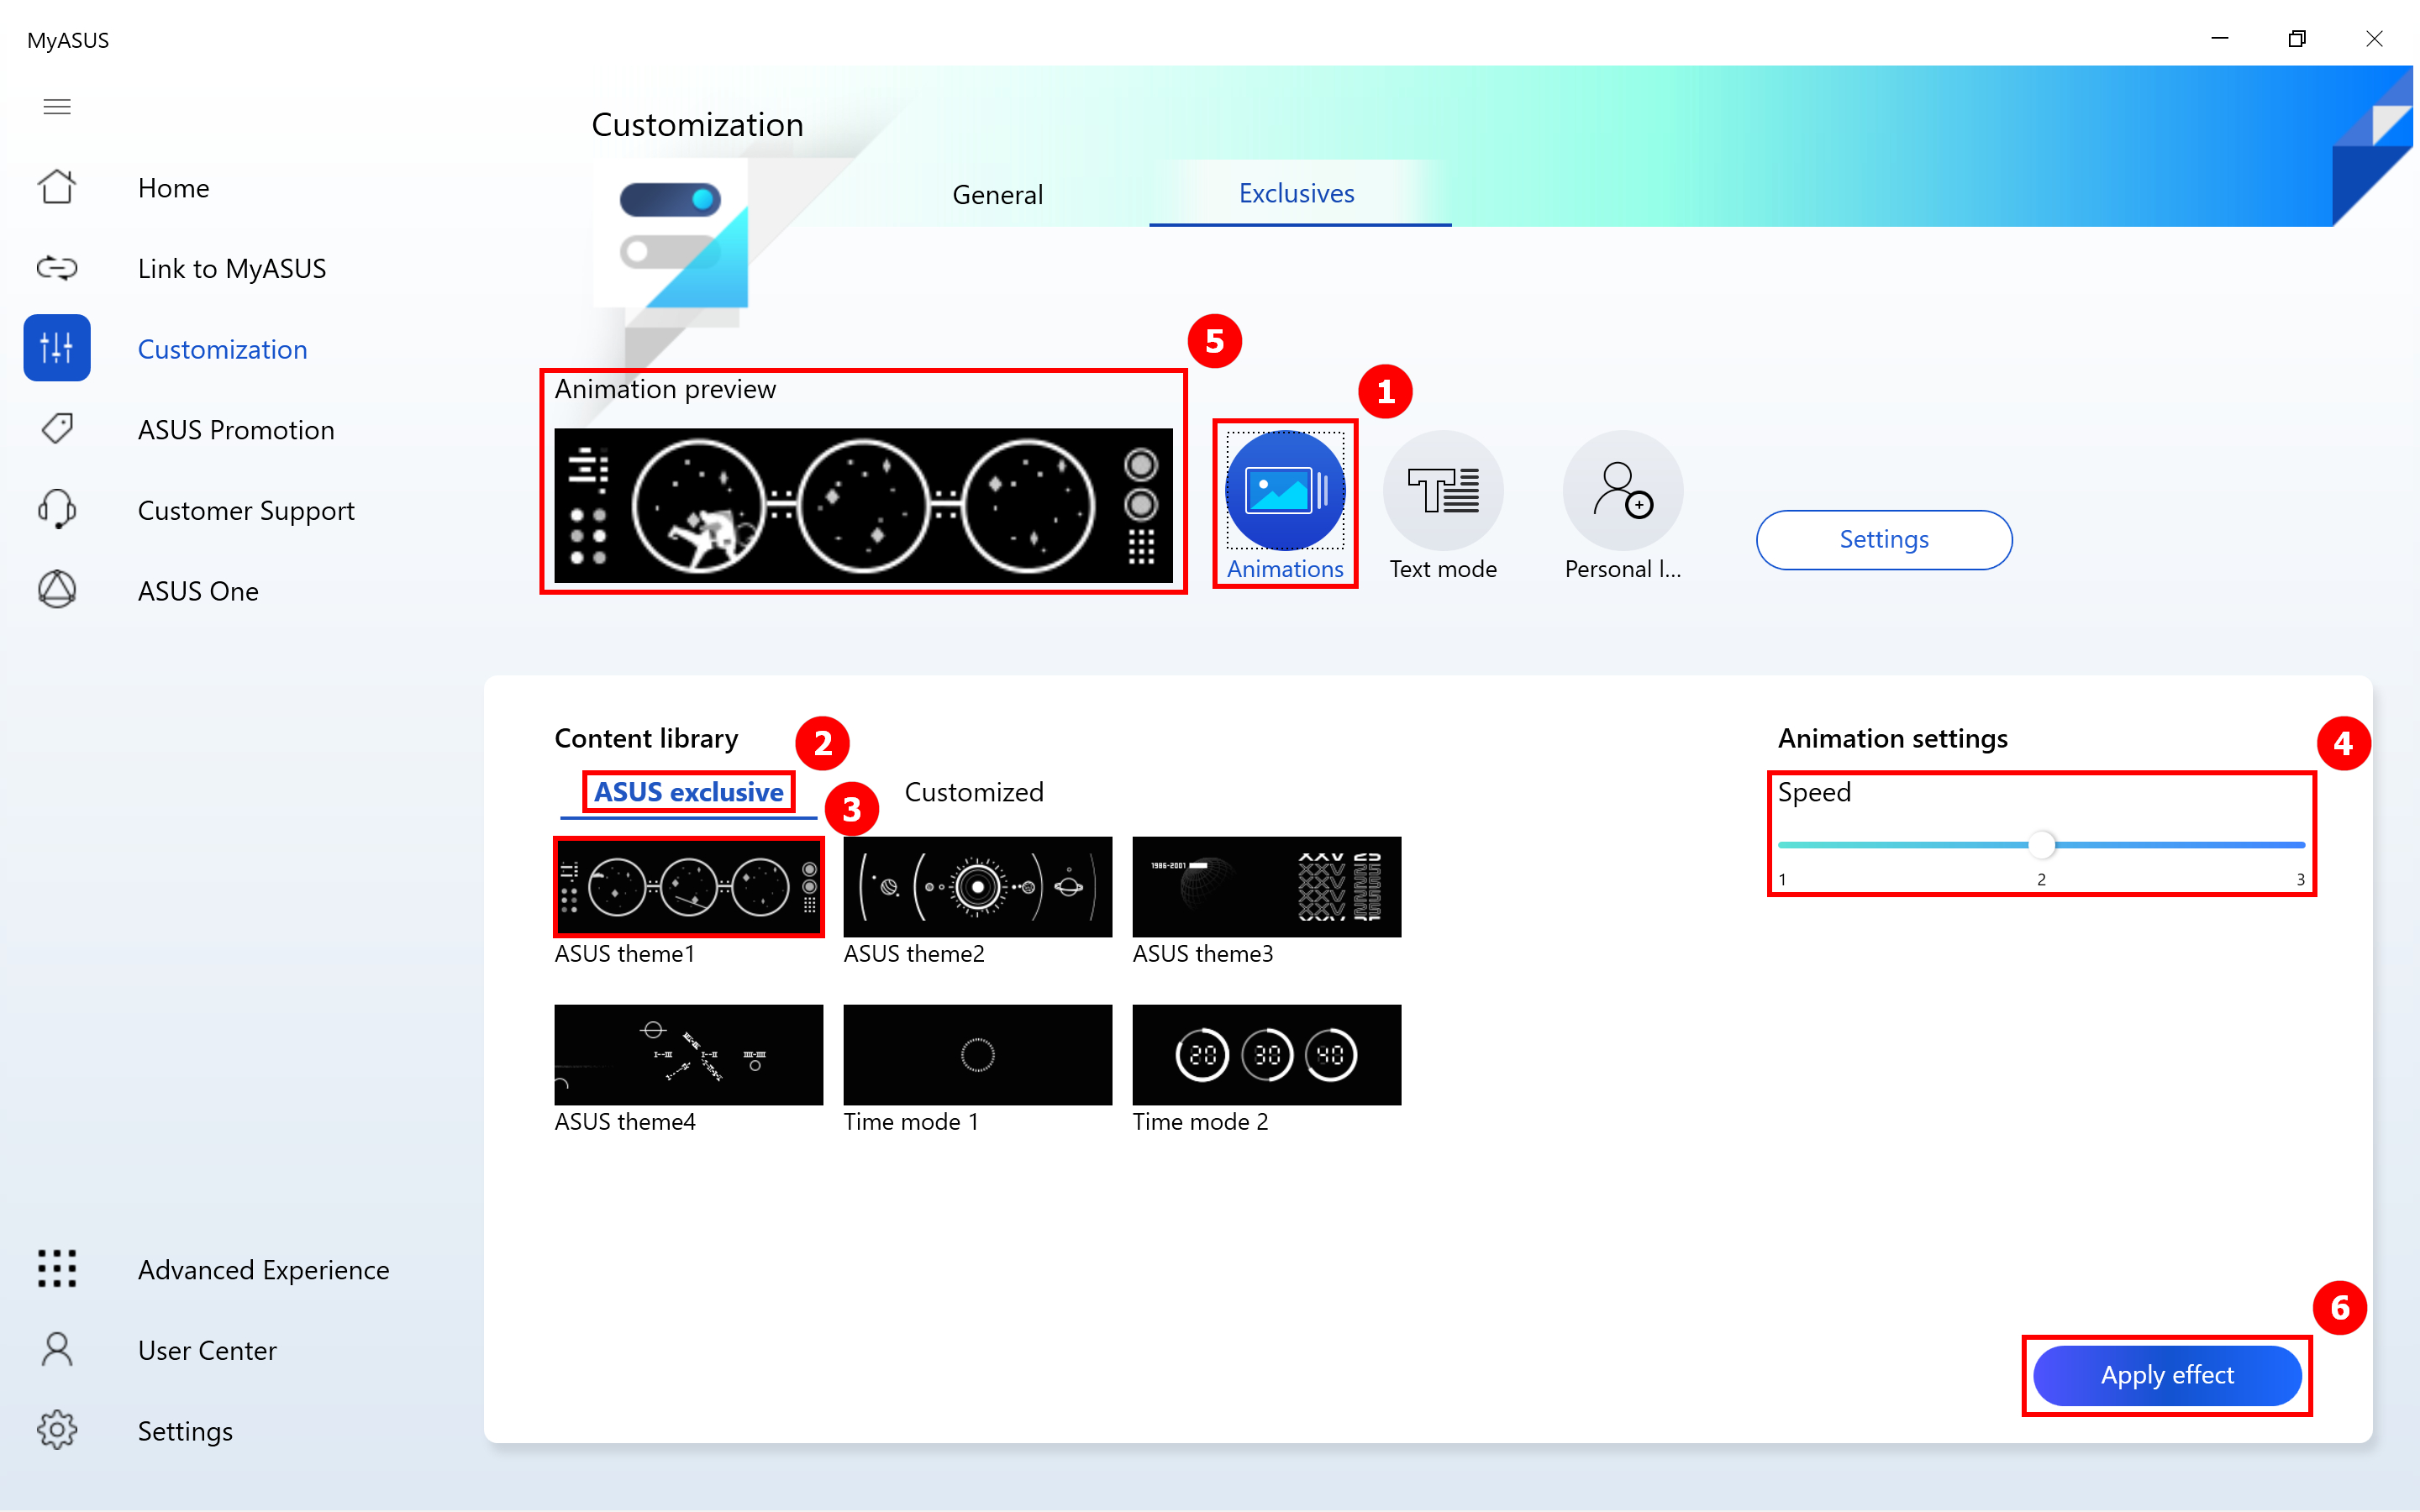
Click ①[Animations], click ②[ASUS exclusive], select the ③[ASUS Theme] you like, adjust the ④[Animation Speed] on the right side, you can view the animation display effect in the ⑤[Animation Preview] page. If you are satisfied with the animation, click ⑥[Apply effect] and the animation will be displayed on the OLED screen.
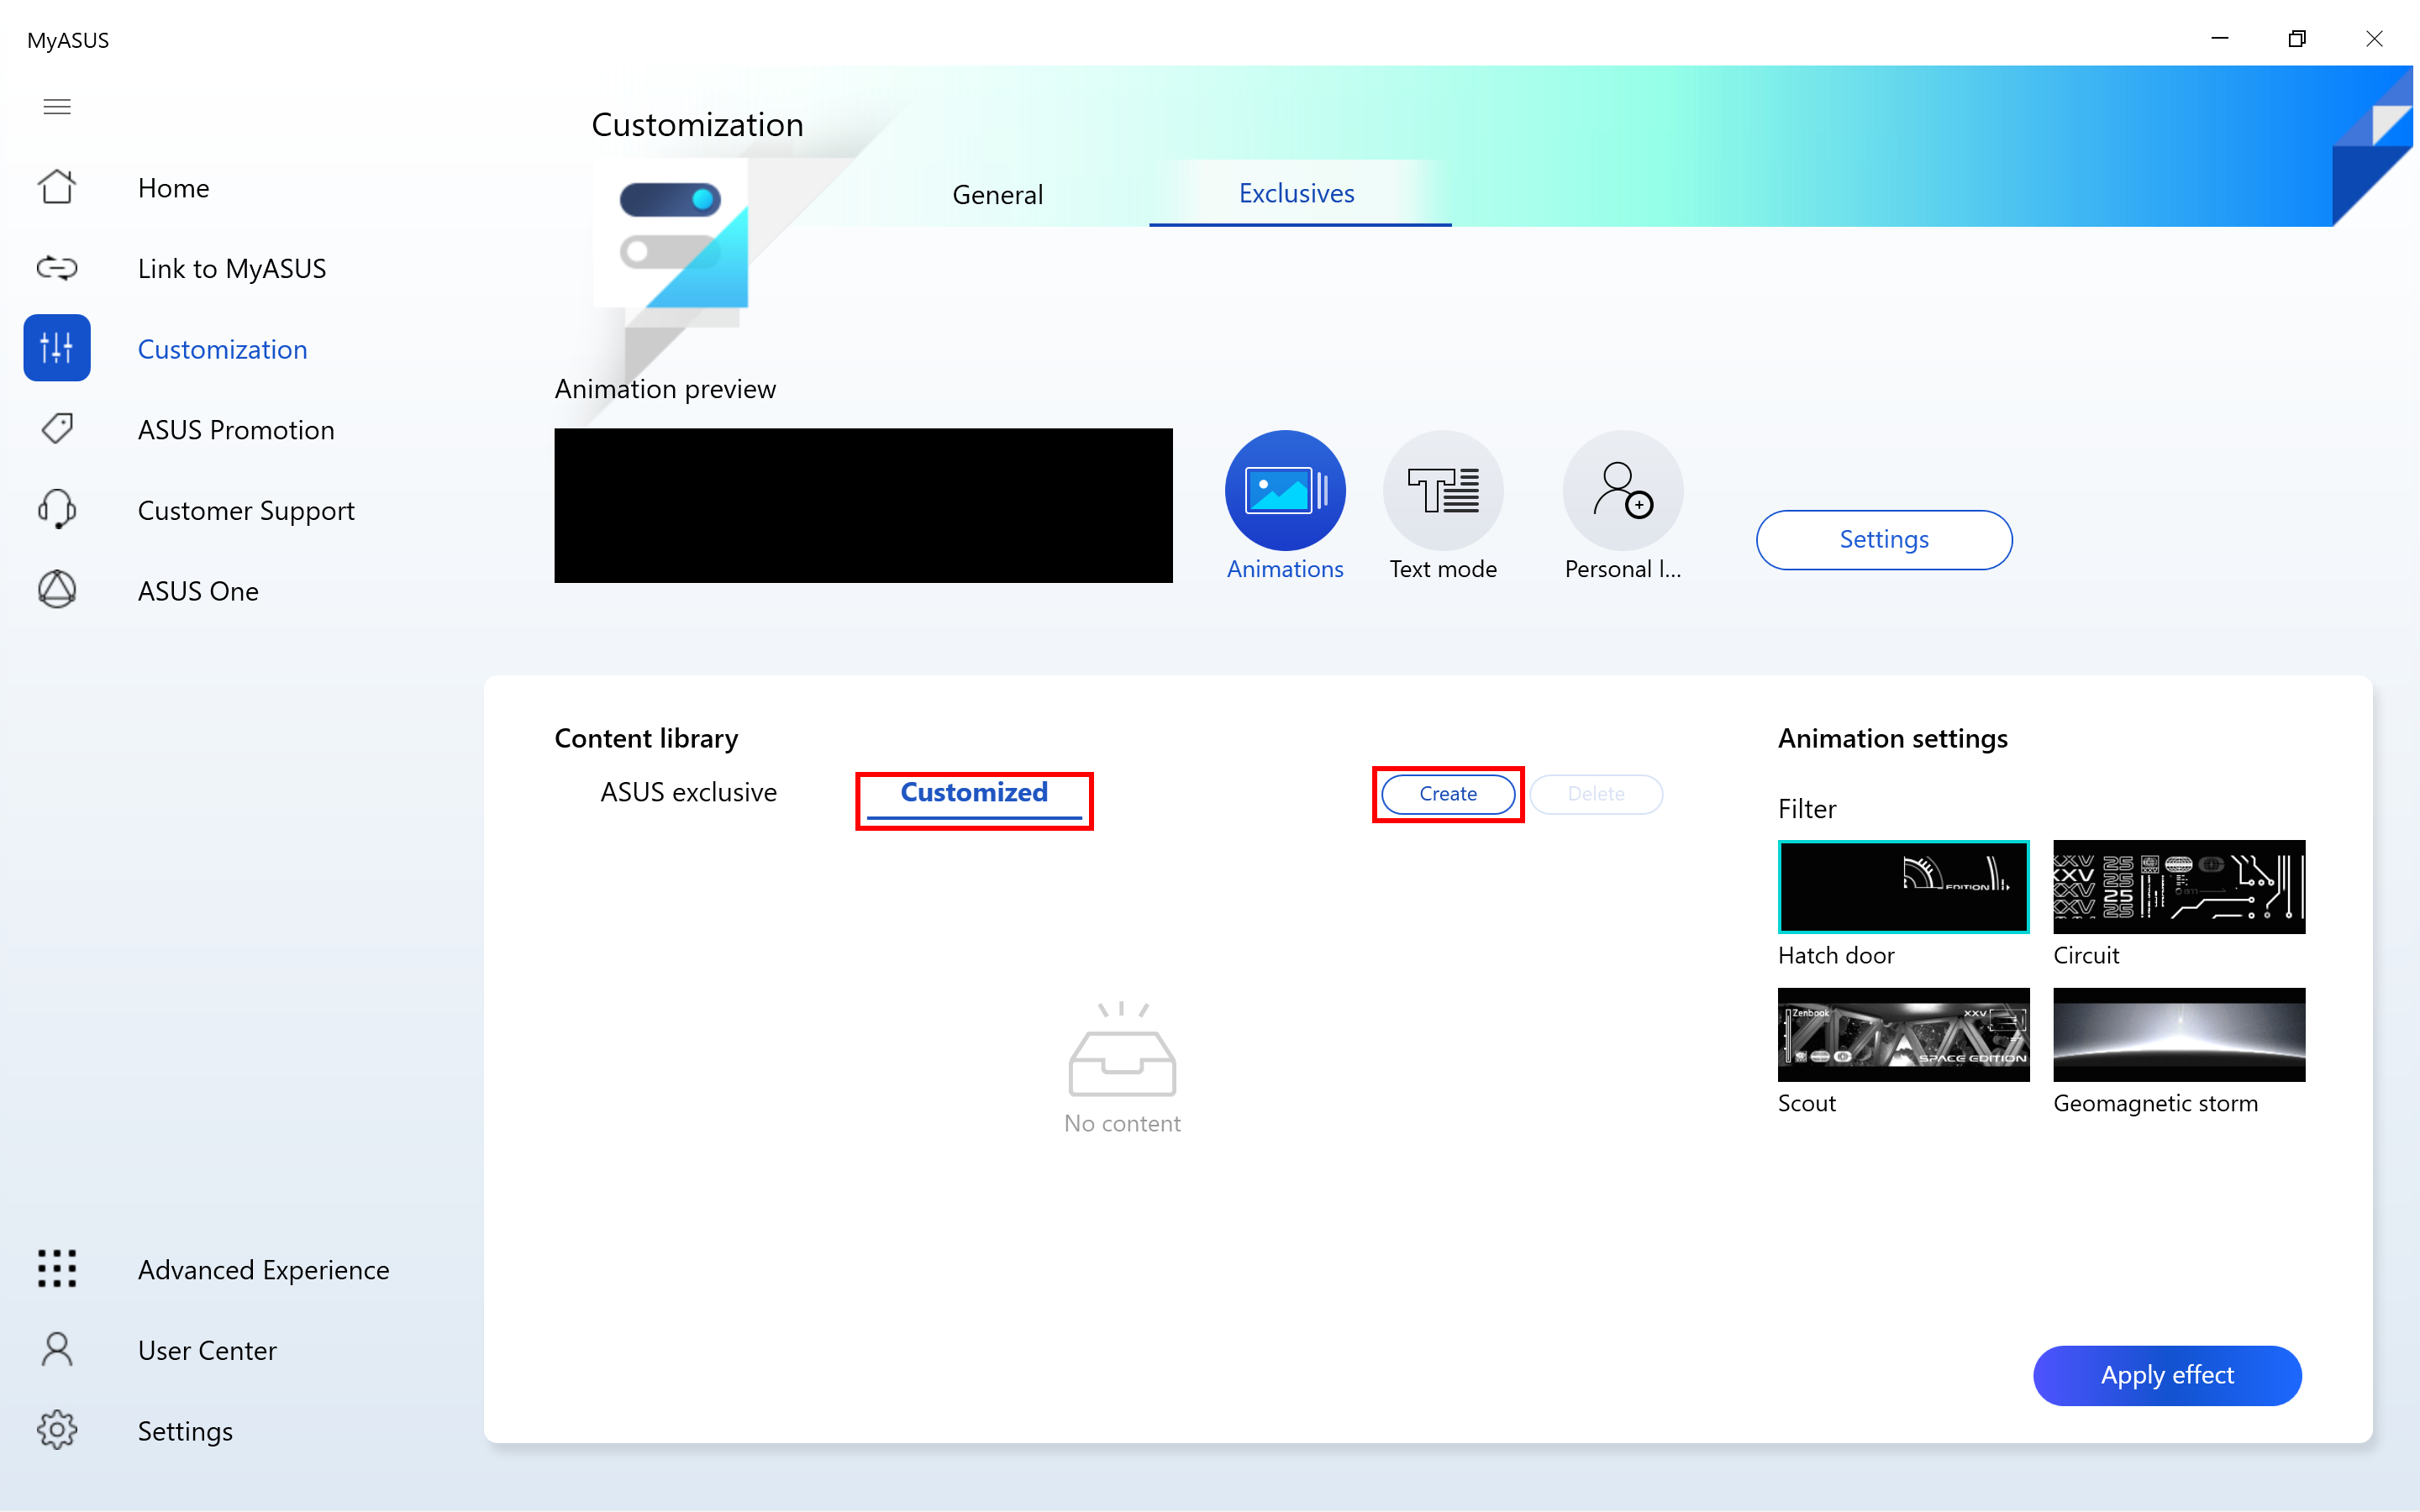
If you want to use the image you prepared to display on the OLED screen, you need to click ①[Customized] and click ②[Create] on this page.
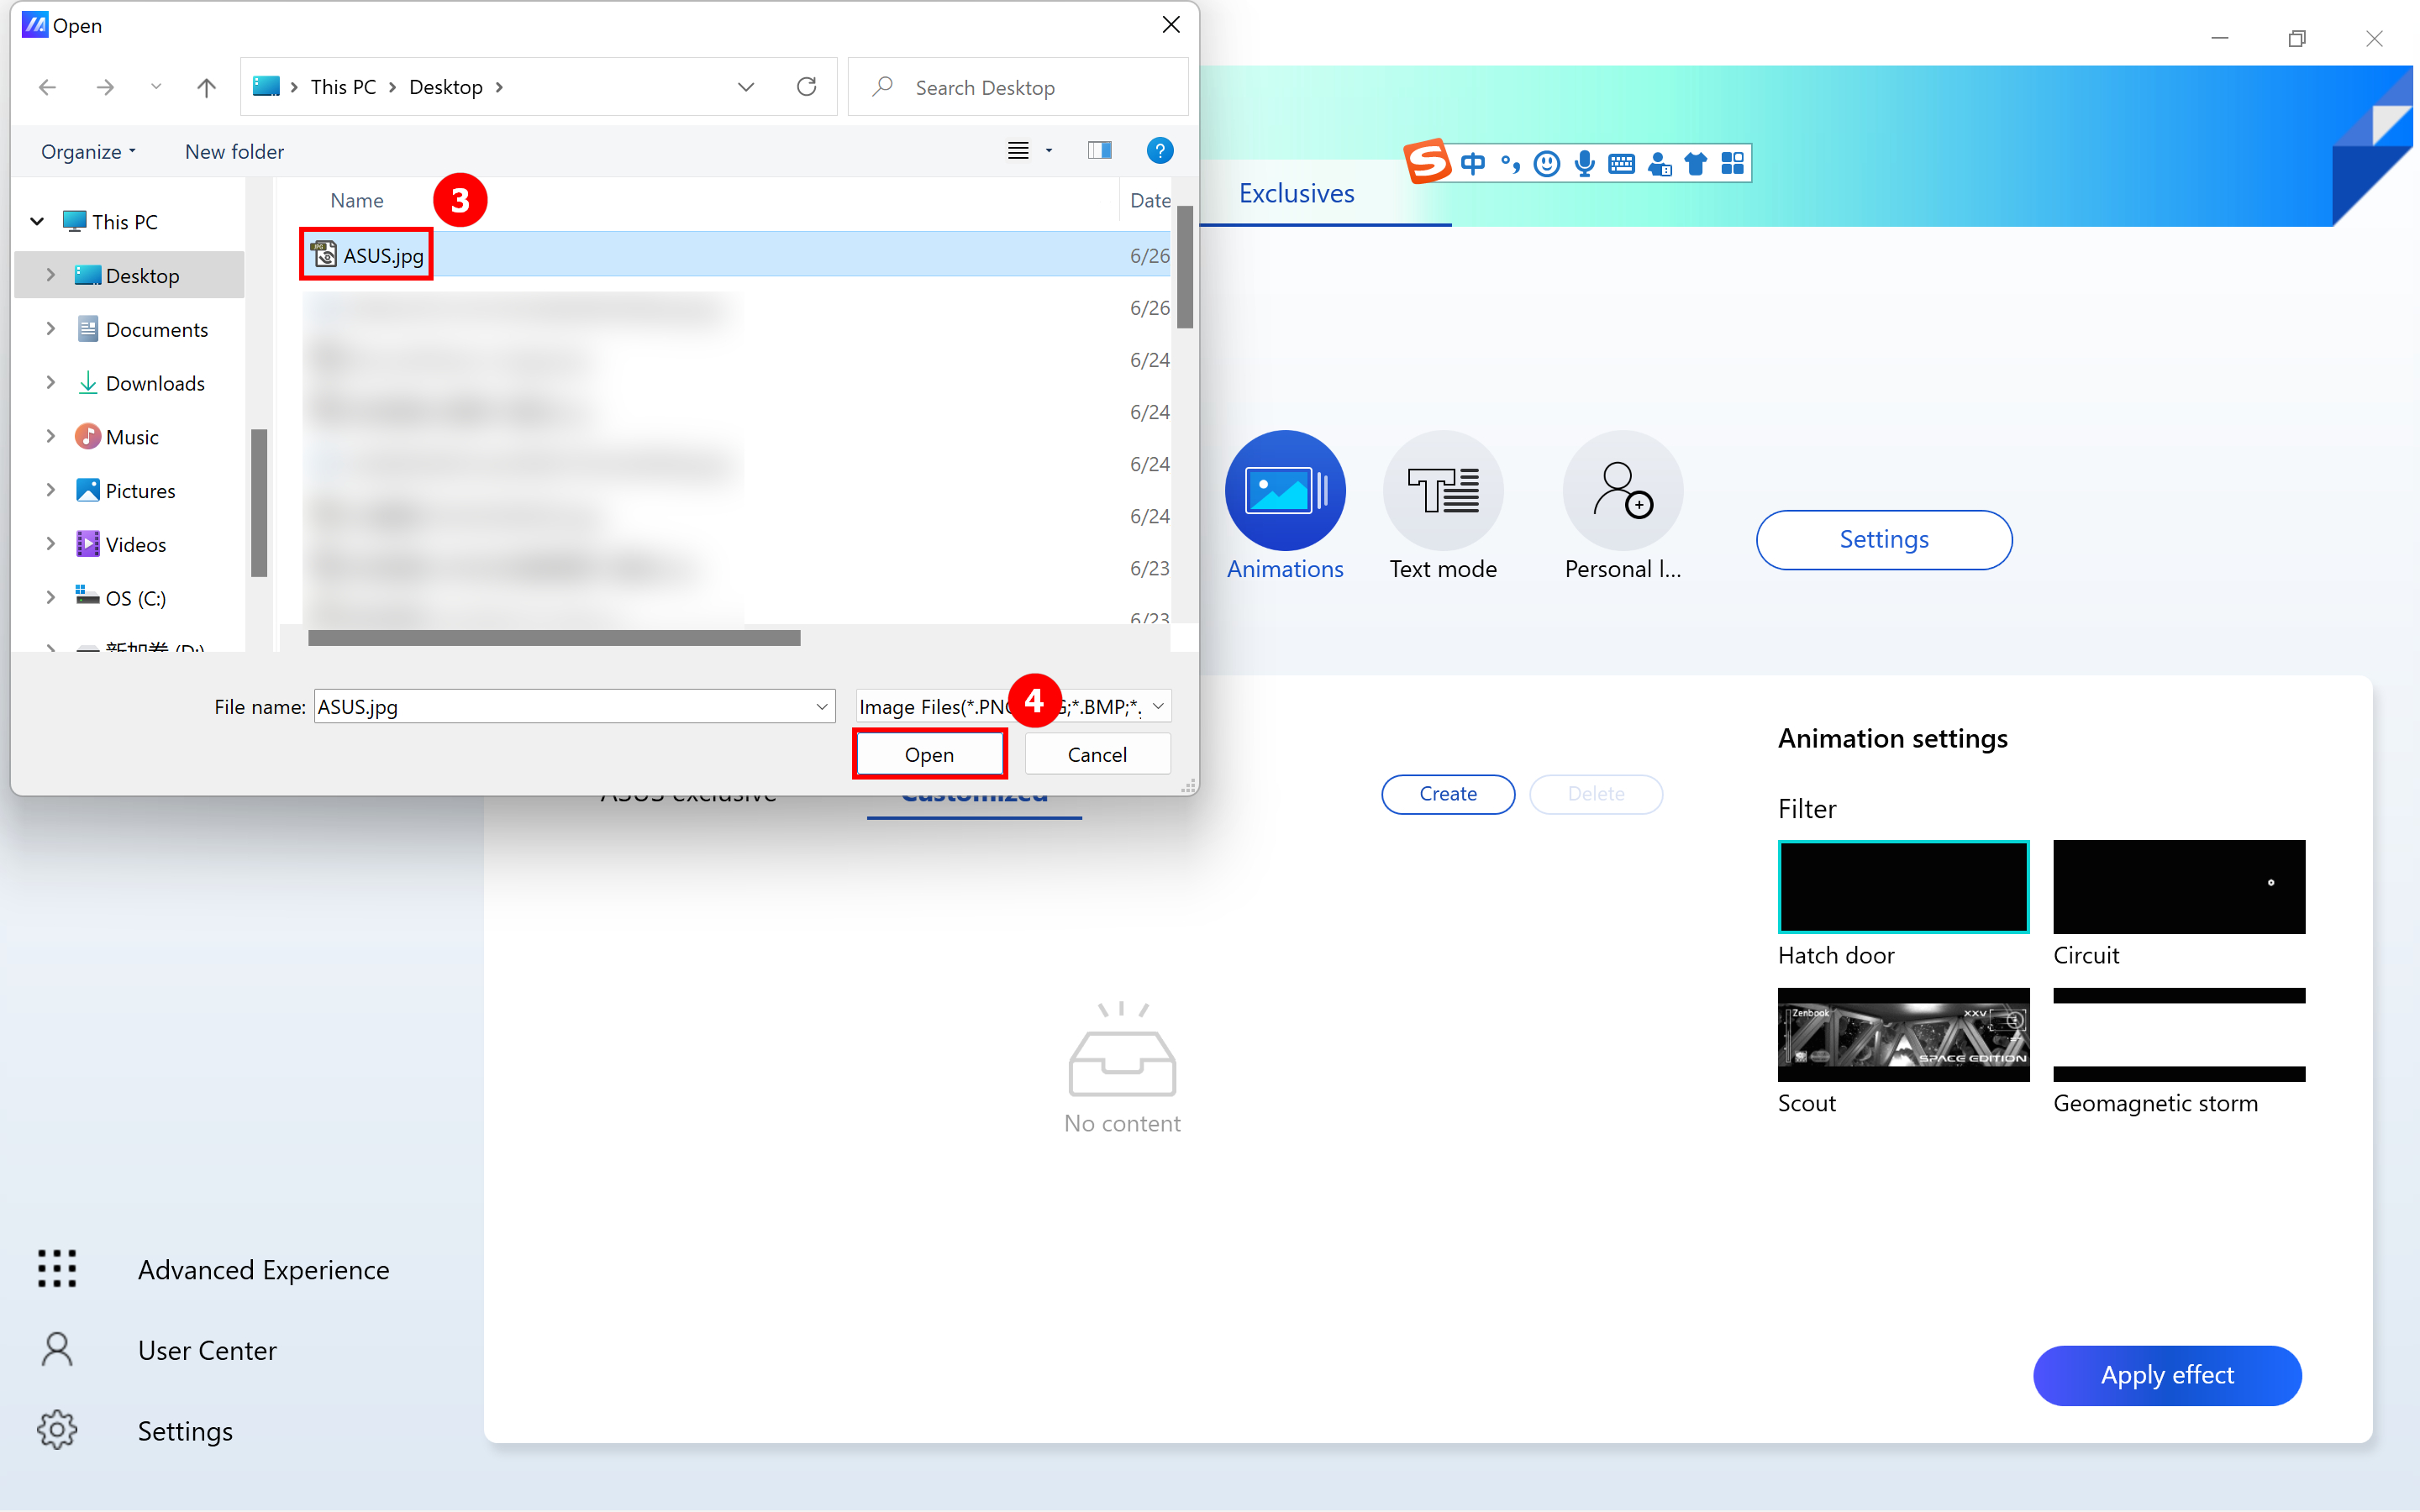
A new window will pop up, click ③[Prepared Image] and then click ④[Open].
Please note: The pixel size of the prepared image cannot be greater than 256*64.
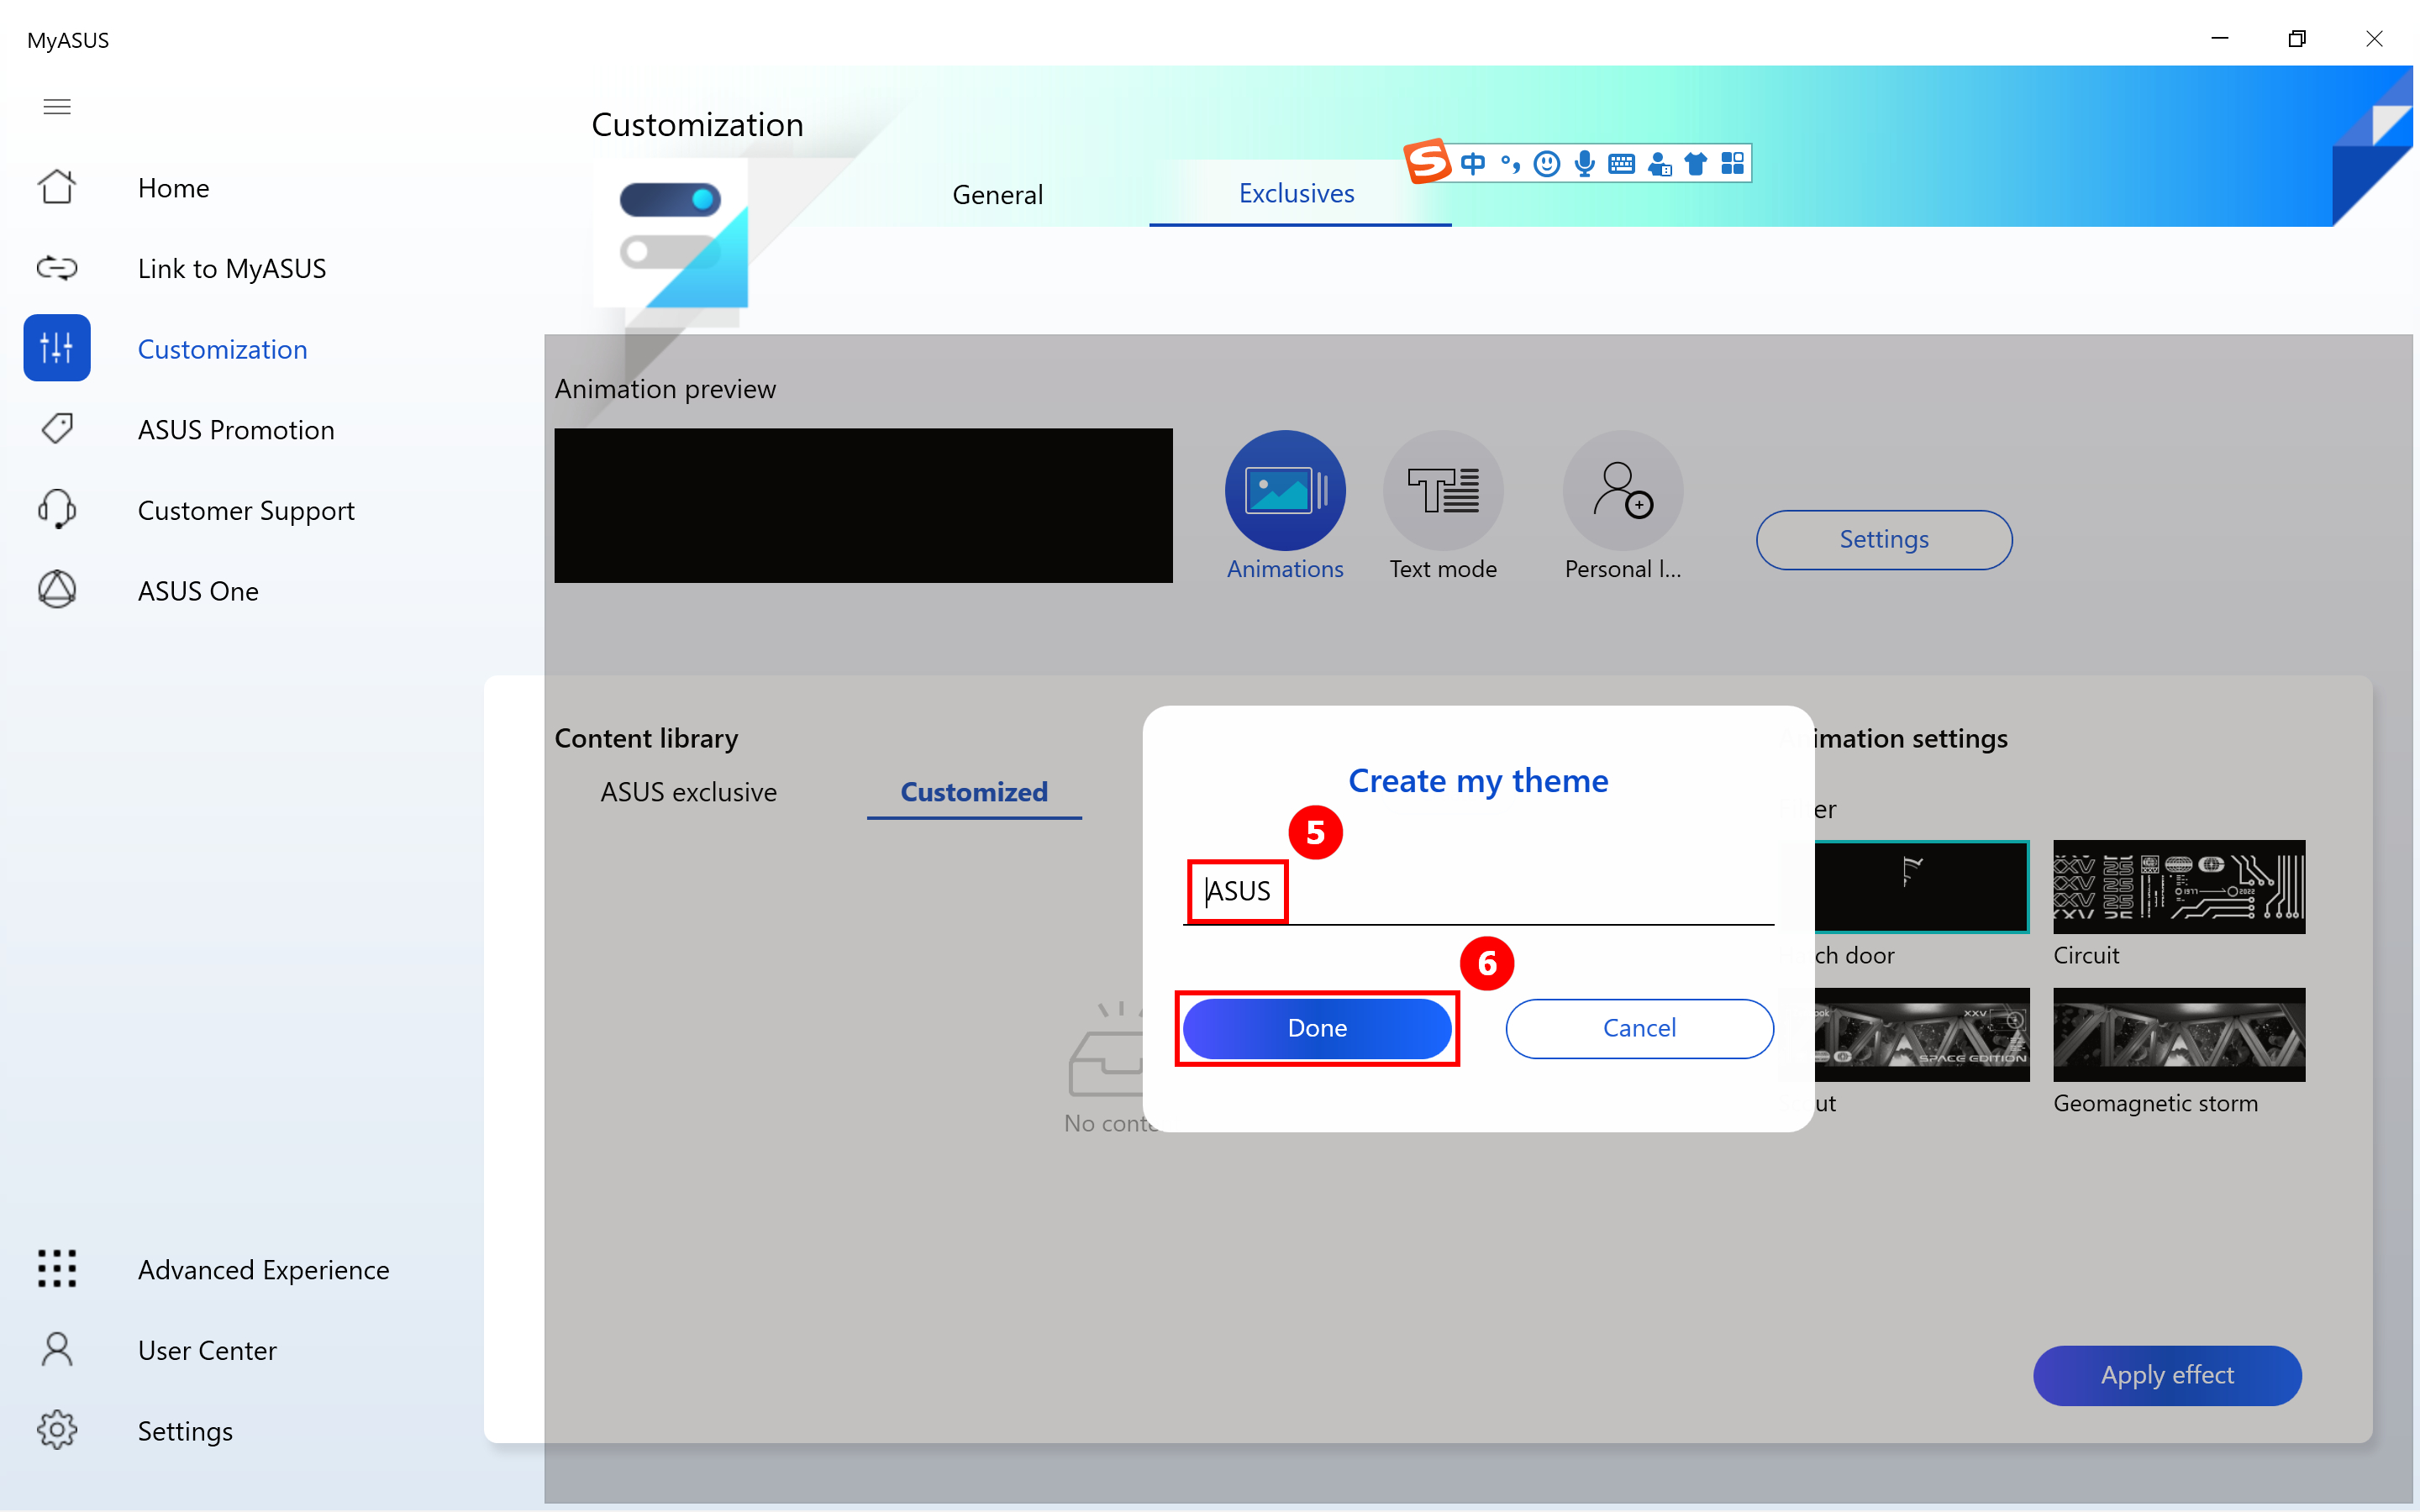
Then name the ⑤[theme you] just created and tap ⑥[Done].
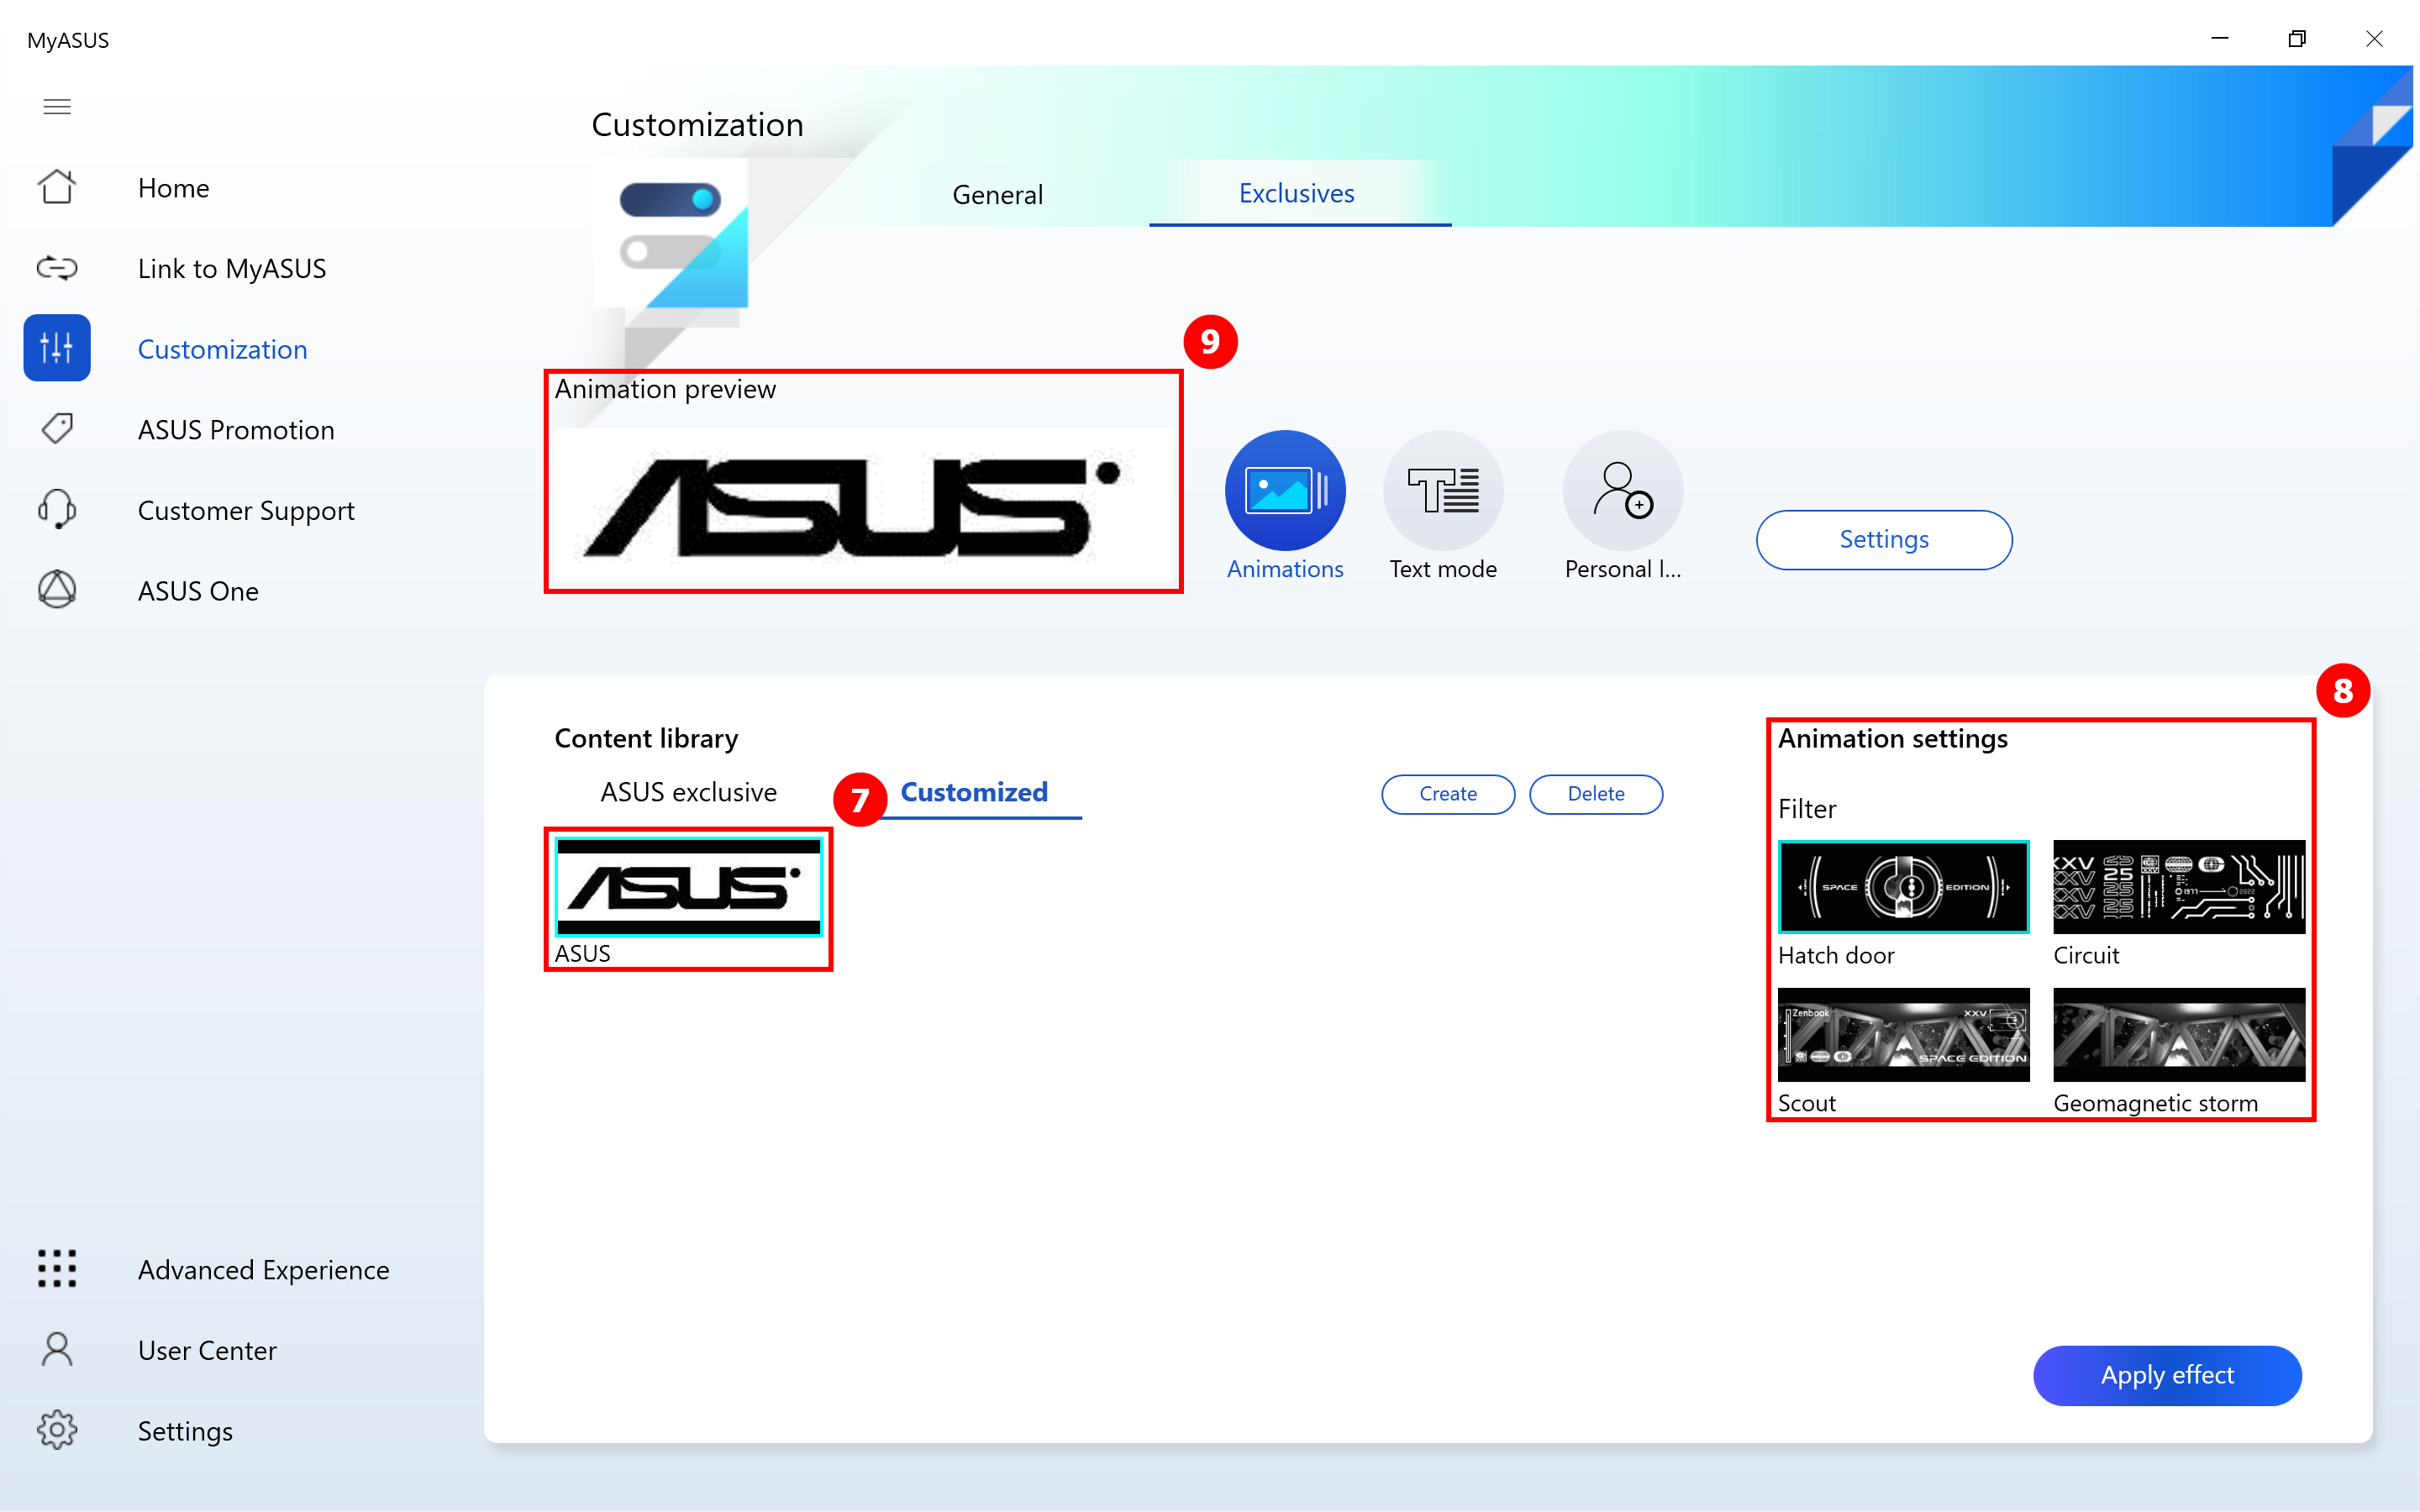
The new theme you just created ⑦[Picture] has been displayed in the customized, adjust in the right ⑧[Animation Settings], view the animation display effect in the ⑨[Animation preview] page, and then click ⑩[Apply], the theme will be displayed on the OLED screen.
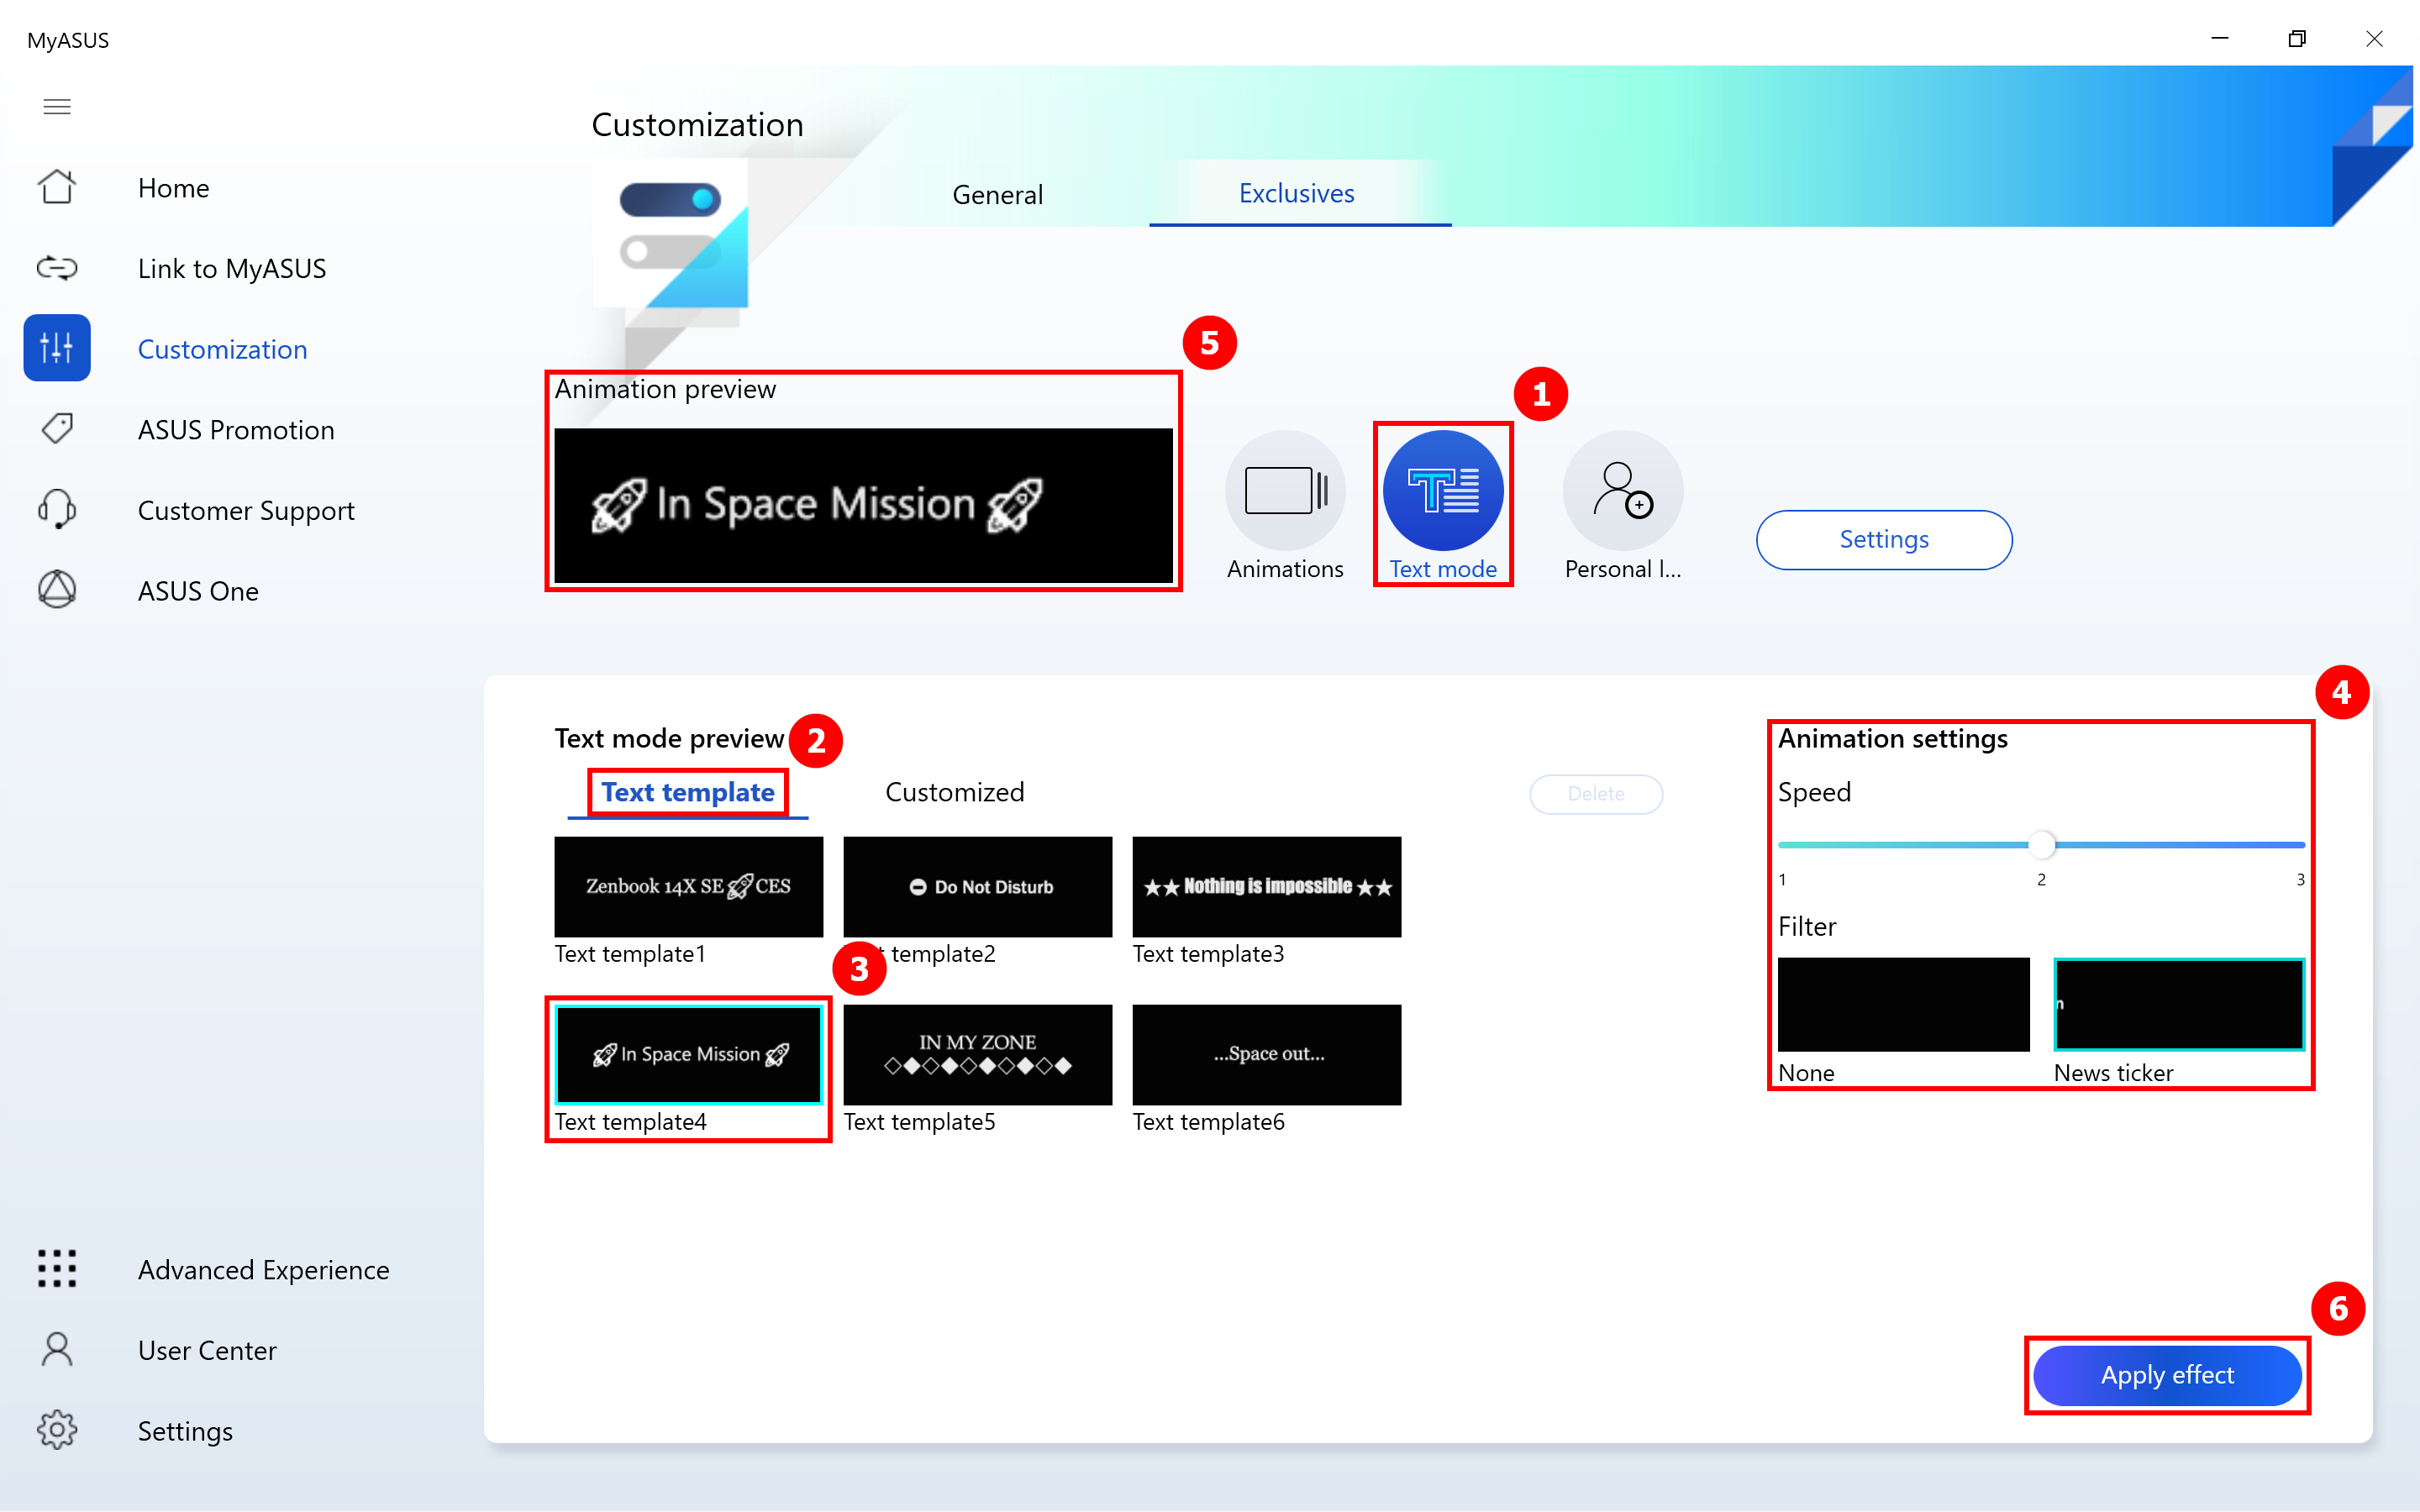
Click ①[Text Mode], click ②[Text Content], click ③[Text template 4], then adjust ④[Animation Speed], then you can view the animation display effect in the ⑤[Animation preview] page, and then click ⑥[Apply], and the preset text will be displayed on the OLED screen.
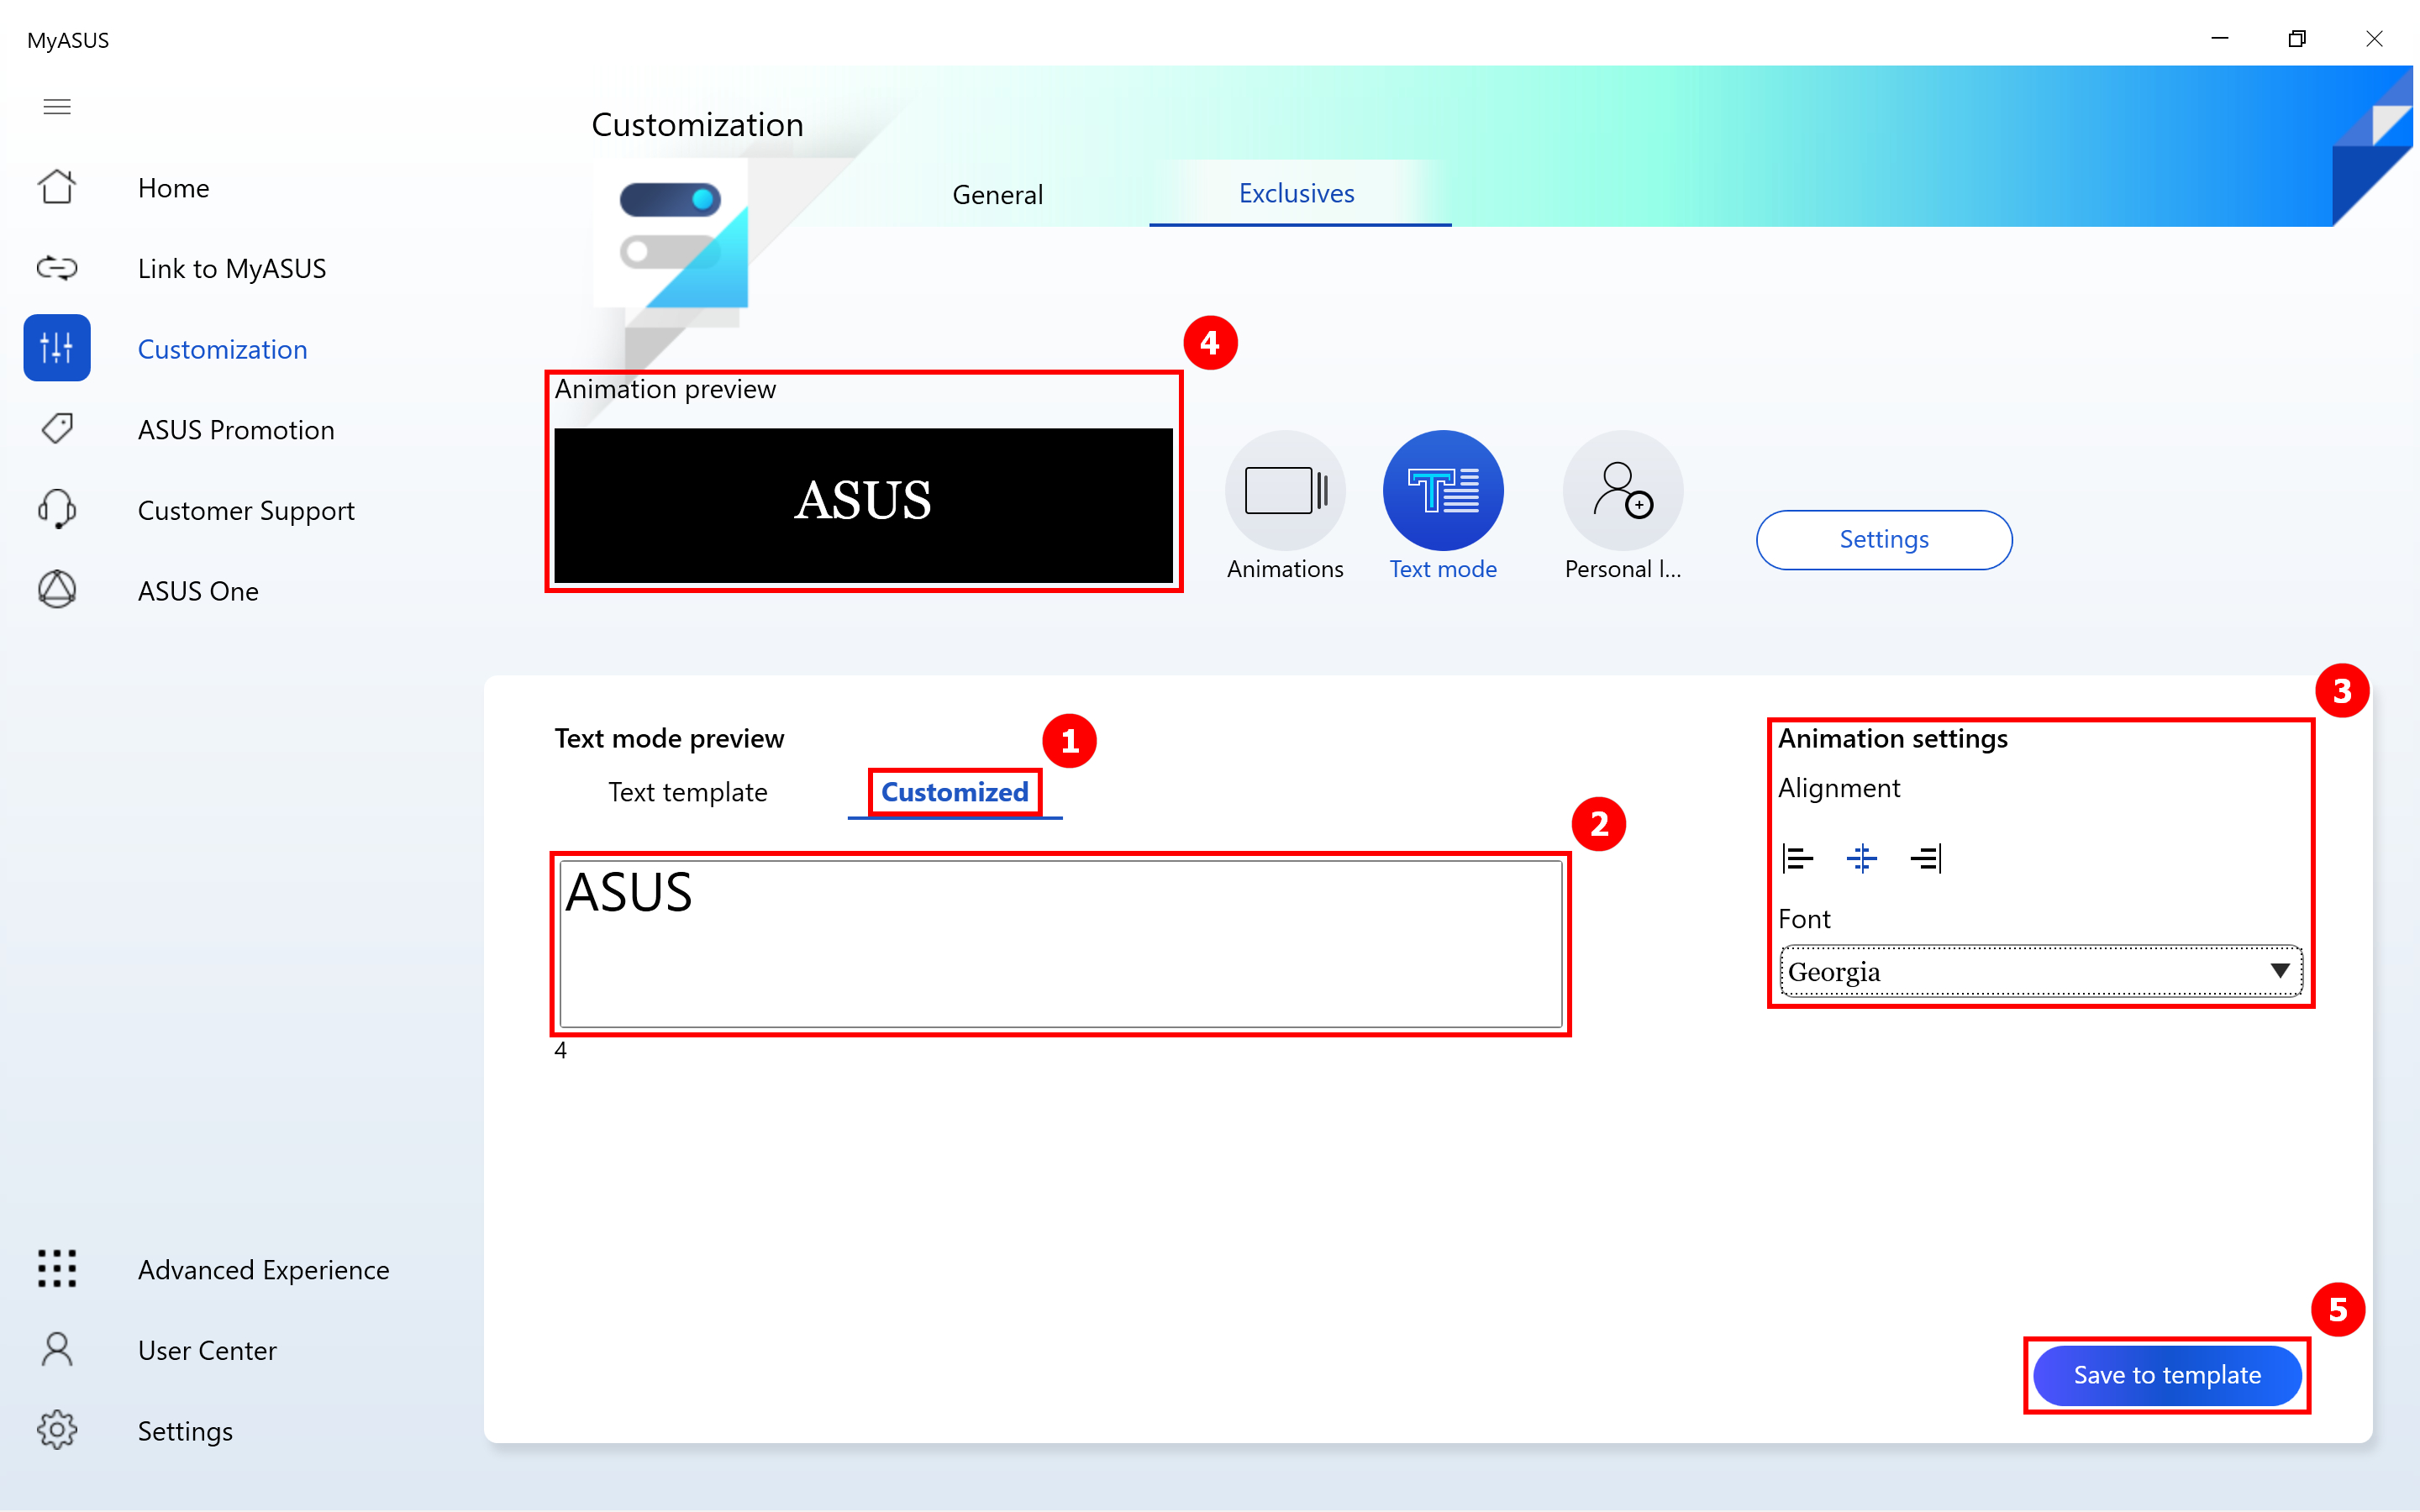
Click ①[Costomized], enter ②[ASUS], then adjust ③[Alignment settings], then you can view the animation display effect in the ④[Animation Preview] page, and then click ⑤[Save to template], and the preset text will be displayed on the OLED screen.
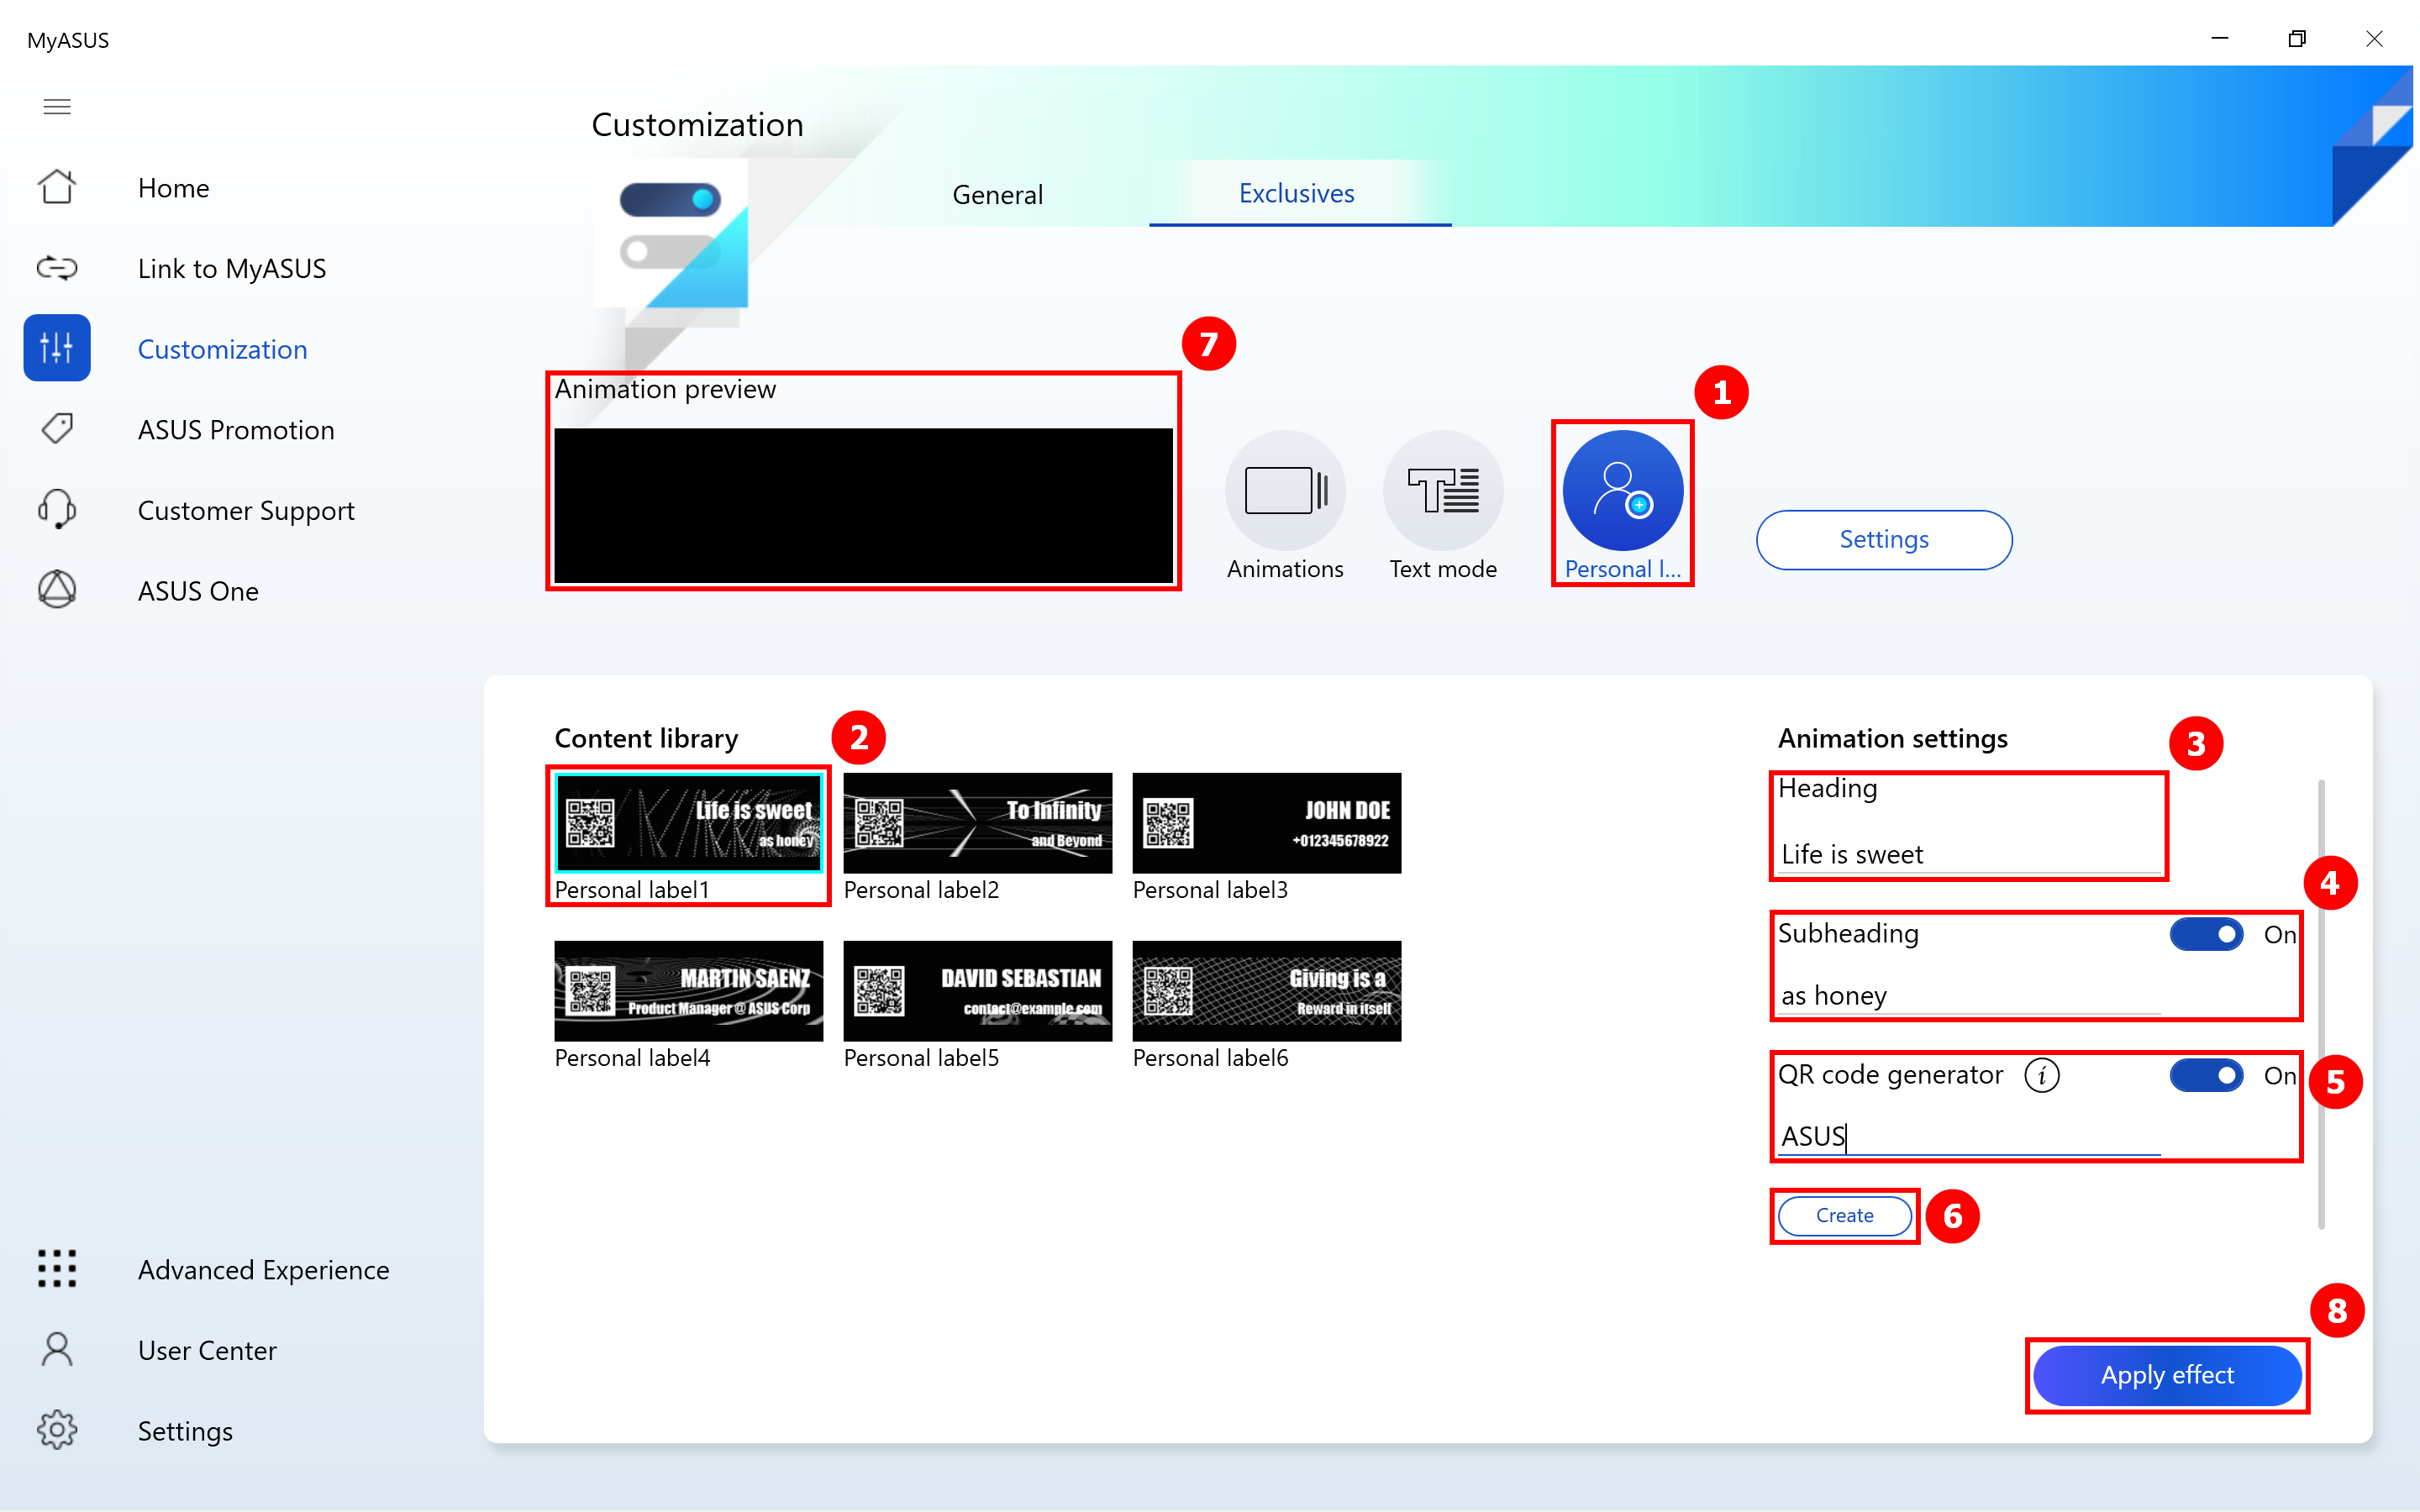
Click ①[Personal Label], Click ②[Personal Label1] in the following Content library, and then edit ③[Heading] and edit ④[Subheading] in the Animation settings, you can click the blue icon to turn off the Subheading function.
Then edit the text you want to display in ⑤[QR Code generator], and then click ⑥[Create] to generate a QR code for that text, and others can scan the QR code to get the information you generated. You can also click the blue icon to close the display QR code.
Then view the animation display effect in the ⑦[Animation Preview] page, then click ⑧[Apply effect] (8), and the preset theme will be displayed on the OLED screen.
Click ①[Settings], Click ②[Settings] to control the OLED screen on or off, Click ③[Event trigger animation] to turn on or off the OLED screen boot animation function.

