[Wireless Router] How to manage smart home devices with Home Assistant® ?
This article will show you how to easily install Home Assistant®on NAS and configure port forwarding on router.
What is Home Assistant®?
Home Assistant® is a powerful open-source software for home automation and is designed to be the center control system for smart home devices.
And also, Home Assistant® can operate in many systems, such as Raspberry Pi®, Windows®, Linux.
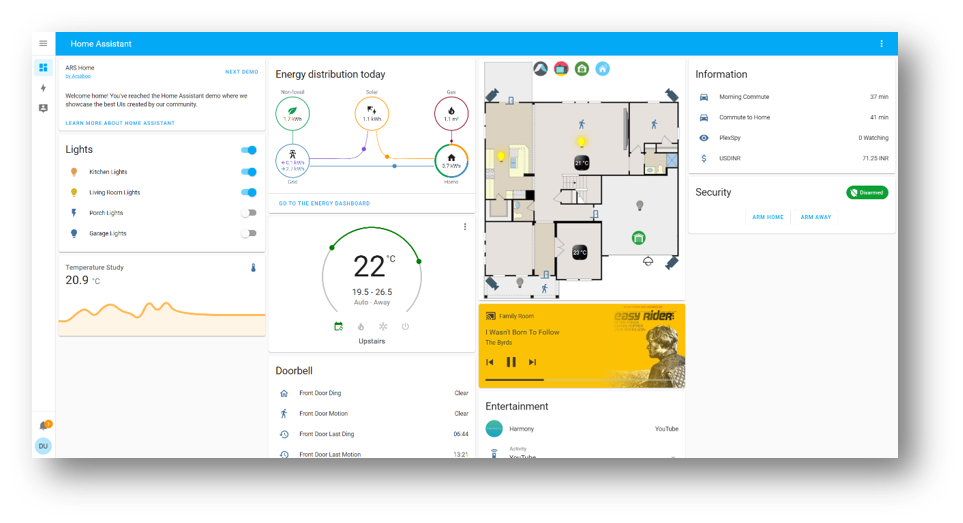
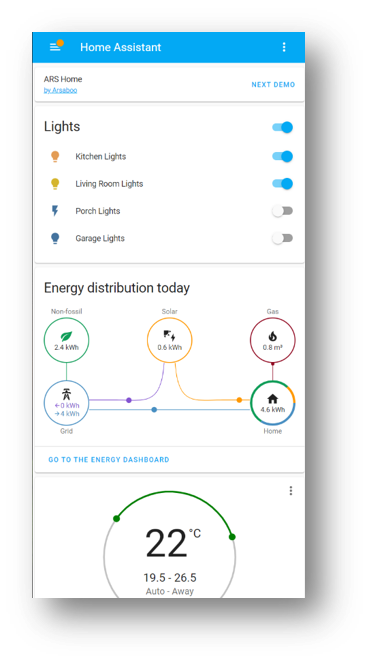
It support both web and app interface. The below two screenshots are the example.
ASUSTOR AS66 series' App Central supports Home Assistant®, so we take AS6602T as an example to build the system.
Please refer to Home Assistant – ASUSTOR NAS to find the supported NAS.
Step 1. Select the NAS and its application center that supports Home Assistant®
Step 2. Find the NAS'IP address
You can use the NAS tool or router’s network map to find the IP address.
*NAS tool (As you can see the NAS IP address in this picture is 192.168.50.146.)
Go to NAS App: Select [Settings] -> [Network] -> [Network Interface] and then select either the [LAN 1], [LAN 2] or [LAN n] depending on your connection.

*Router's network map
Log in to ASUS Router Setting page.

Note: Please refer to [Wireless Router] How to enter the router's GUI to learn more.
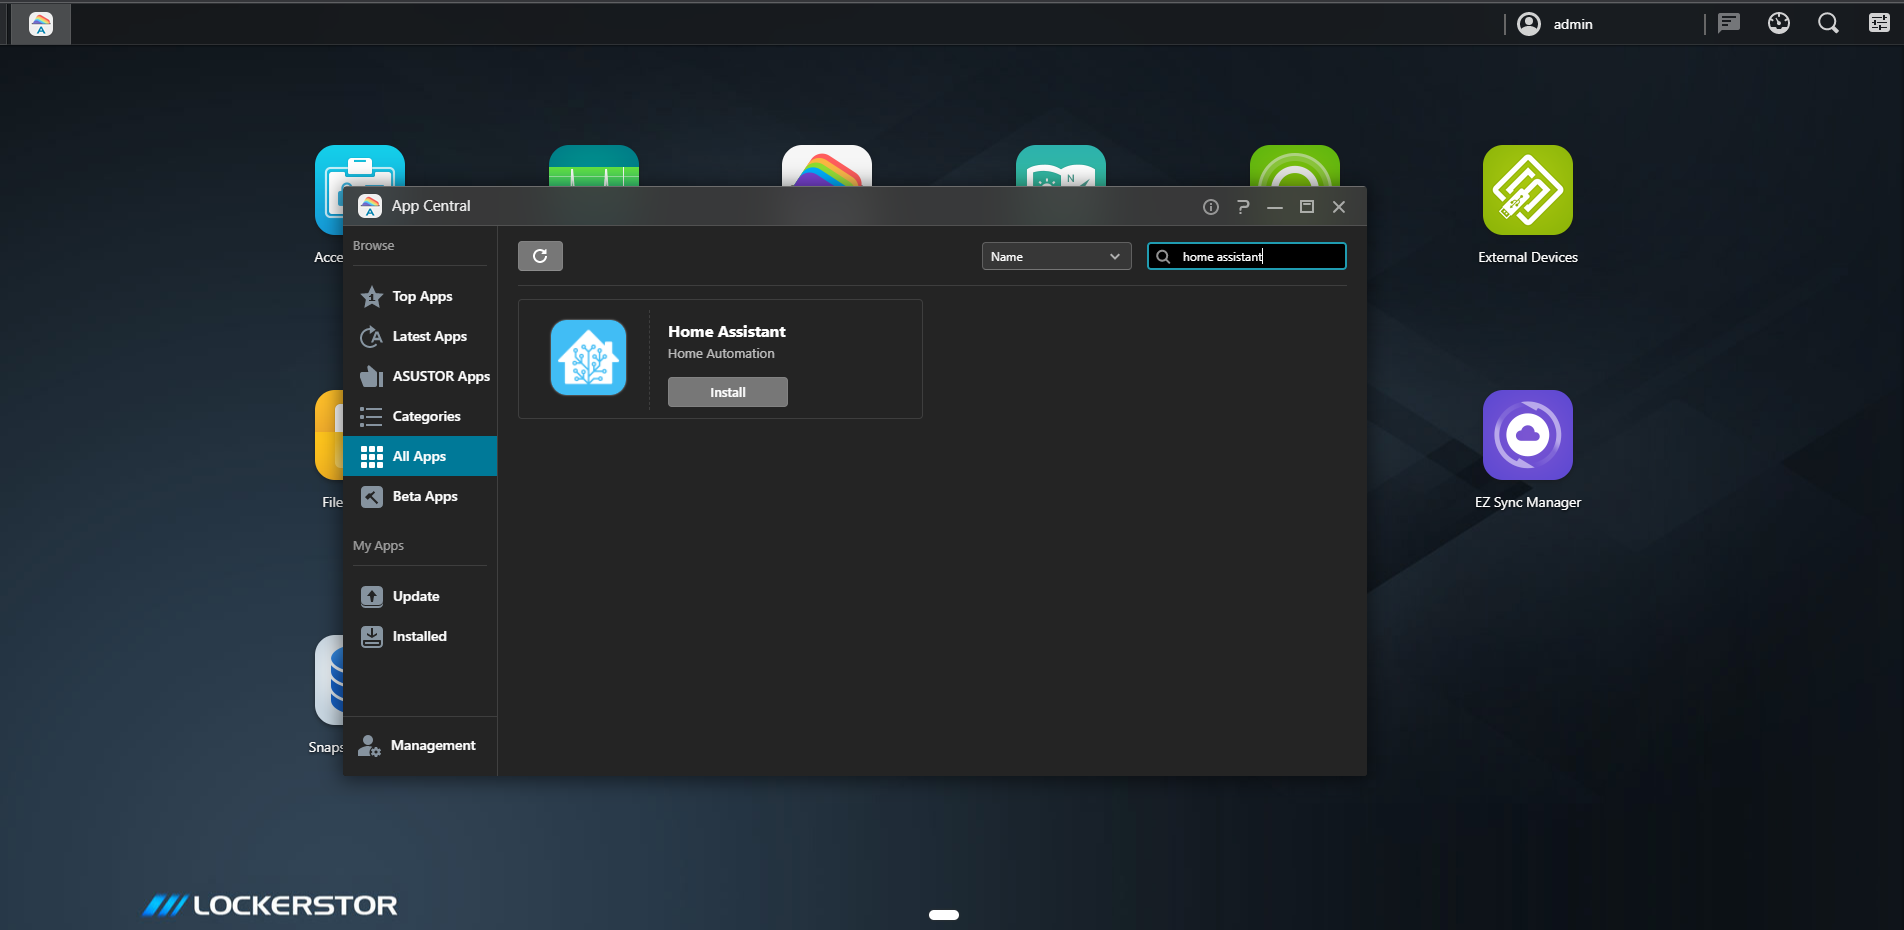
Step 3. Install Home Assistant in ASUSTOR App Central
3-1 Log in to ADM using an administrator account.
3-2 Click [App Central].
3-3 Search "Home Assistant".
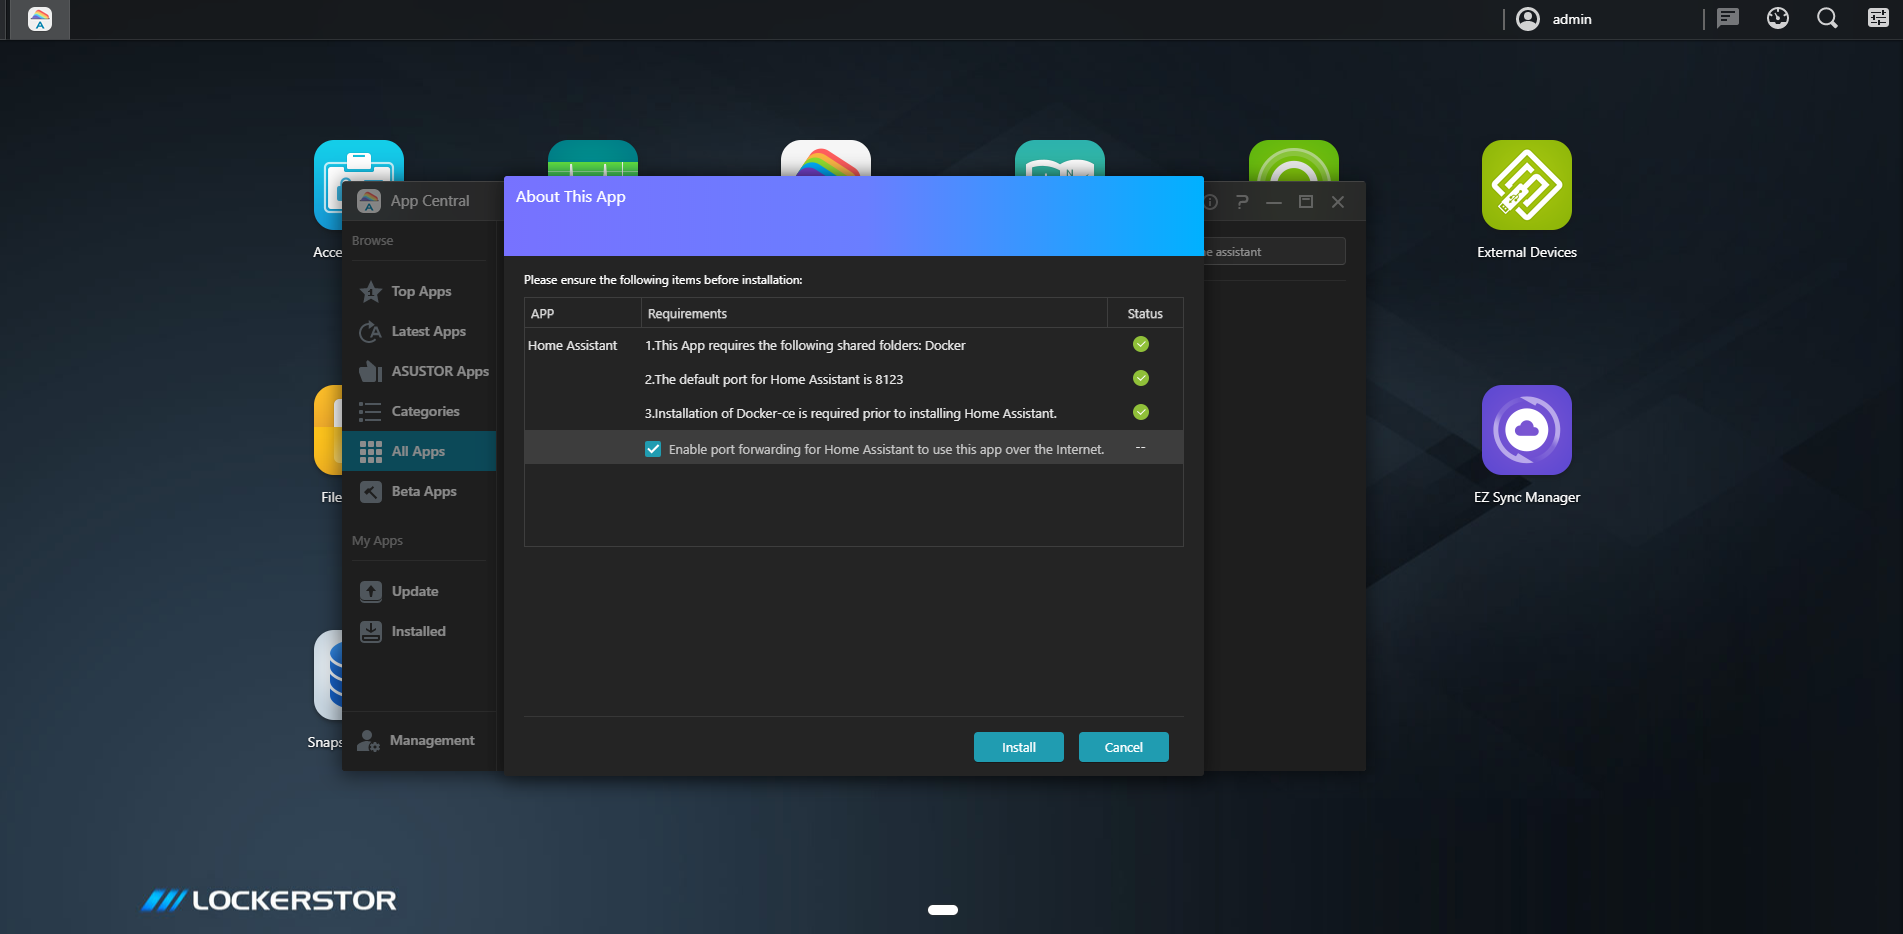
3-4 Click [Install] button to install Home Assistant App.
3-5 Click [Enable port forwarding…], if you want to use Home Assistant outside of home.
Step 4. Setup the username and password for Home Assistant on NAS.
Remember to use the long and more complex password to make the system more secure.
Use passwords with more than 8 characters mixed with capitalized letters, numbers, and special characters to increase the security level of your devices.
Note : Do not use passwords with consecutive numbers or letters, such as 12345678, abcdefgh, or qwertyuiop.

Step 5. If you want to control the Home Assistant® out of home and your router has a public IP.
You can go to the router setting page(WebGUI) > WAN > DDNS to assign router’s DDNS . In this example, we use HomeAssistant-test as router DDNS name.
If you only use Home Assistant in home, skip Step 5 and Step 6.
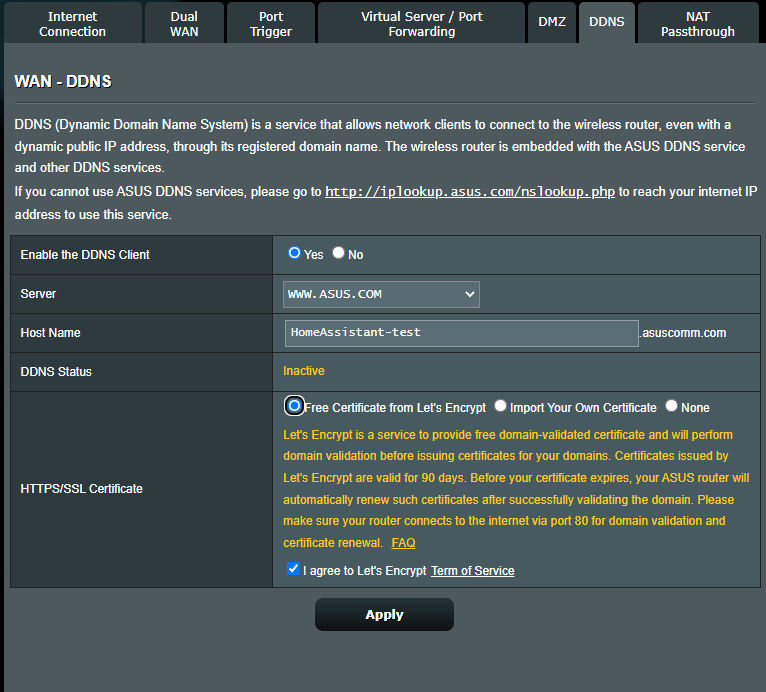
Note: Please refer to [Wireless Router] DDNS introduction and set up to learn more.
Step 6. Setup port forwarding on Router
Go to the router setting page(WebGUI) > WAN > Virtual Server/ Port Forwarding and add a port forwarding rule for Home Assistant.
*192.168.50.146 is NAS IP.
*8123 is the port used by Home Assistant.
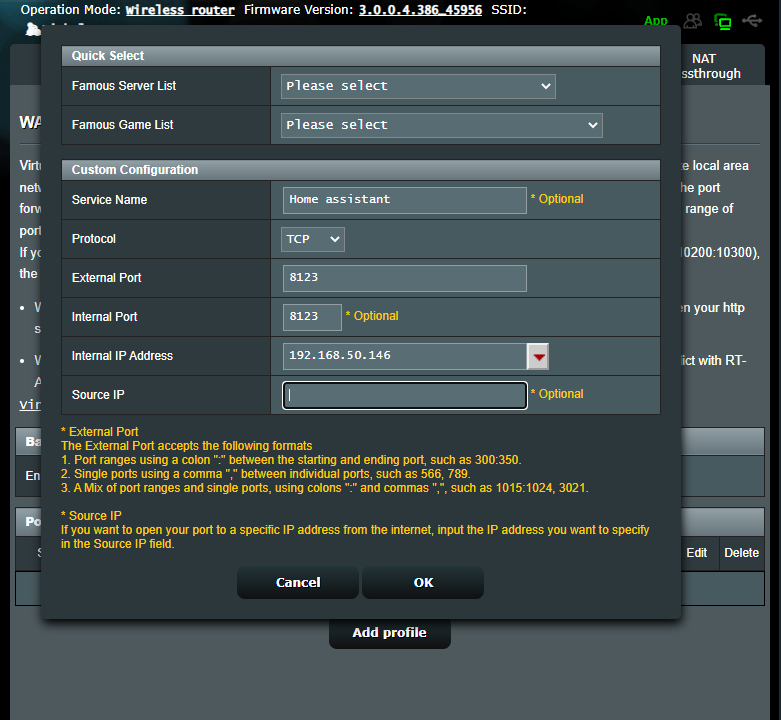
Note: Please refer to [Wireless Router] How to set up Virtual Server/Port Forwarding Rules on ASUS Router? to learn more.
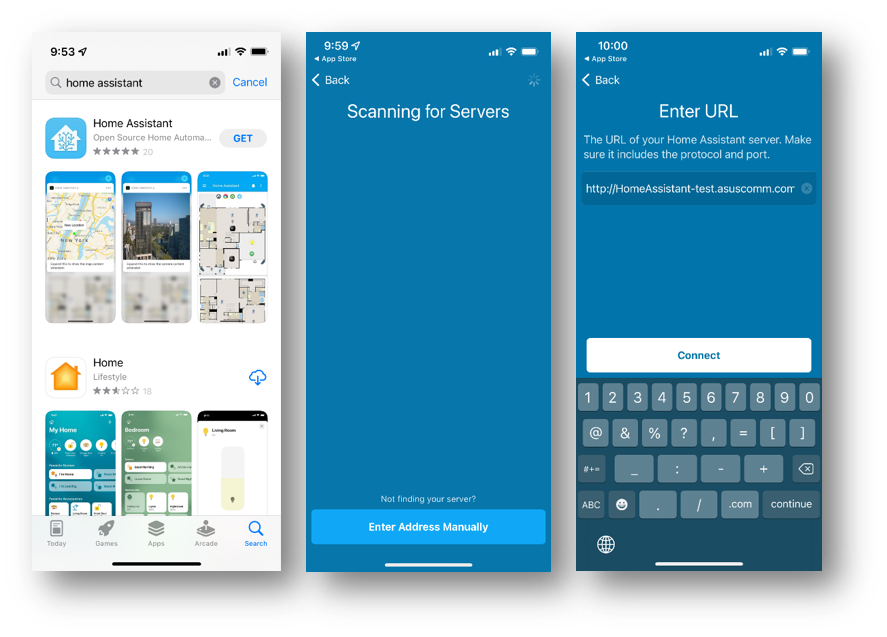
Step 6. Install the App on your Smart Phone.
Search "home assistant" in app store or google play. After launched the app, it will scan the server in local network. If you want to use the app out of home, click "Enter Address Manually".
Key in the https://<YOUR DDNS NAME>:8123 in the URL field.
For example. We assign the HomeAssistant-test as ASUS DDNS name and the URL is https://HomeAssistant-test.asuscomm.com
Enjoy it.
There are many information on the Home Assistant® interface. For more information, please refer to https://www.home-assistant.io/
How to get the (Utility / Firmware)?
You can download the latest drivers, software, firmware and user manuals in the ASUS Download Center.
If you need more information about the ASUS Download Center, please refer this link.