


[Notebook] StoryCube - Introduction
StoryCube - One-Stop Smart File Management Hub
Create your personal story by capturing content from your imaging devices such as phones and cameras. Quickly import and organize everything in StoryCube.
StoryCube is an intelligent digital asset management app designed to provide you with a seamless and efficient file organizing experience. Easily collect photos, videos, and audio from various devices and cloud platforms, and organize and categorize them according to your preferences. Al helps you effortlessly identify different people or scenes automatically.
For more information about StoryCube, please visit: StoryCube - One-Stop AI Media Hub | ProArt | ASUS Global
1. StoryCube supports media formats
13. How to Update and Uninstall StoryCube
1. StoryCube supports media formats
Currently StoryCube supports Media formats:
Image -> jpg, jpeg, heic
Video -> mp4, mov
Audio -> mp3
※ If you do not have the HEVC decoder installed, StoryCube cannot edit HEVC format Media due to copyright issues.
StoryCube only supports ASUS products and can be downloaded using this link.
The system recommends Windows 11 paired with Intel Core™ Ultra 7, Qualcomm Snapdragon® X Elite, or AMD Ryzen™ AI 9 HX 370 or higher for the best experience.
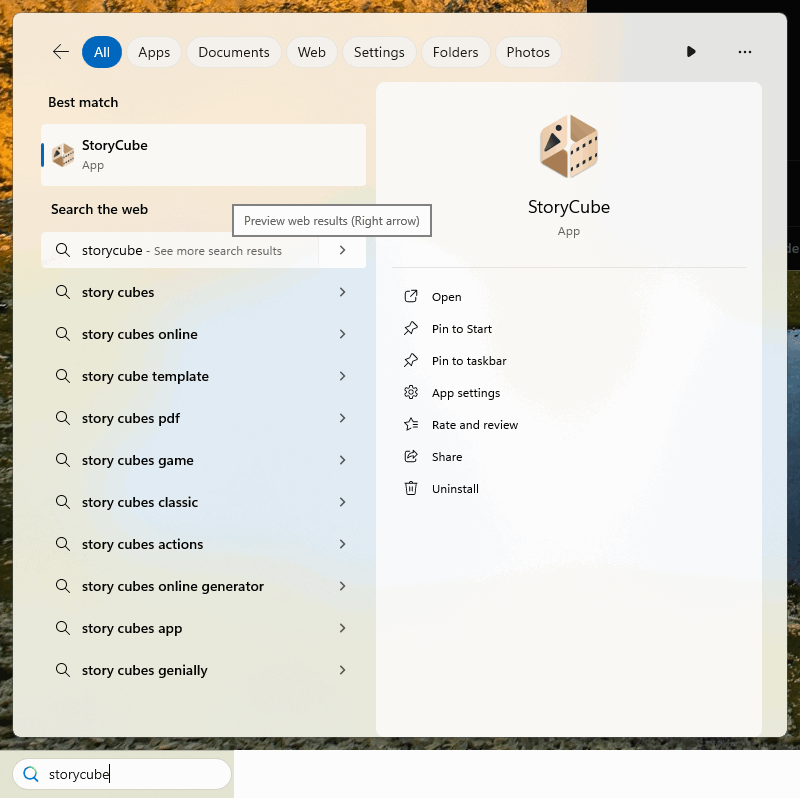
(1) Search for [StoryCube] in the search bar, and click [StoryCube], StoryCube will open.
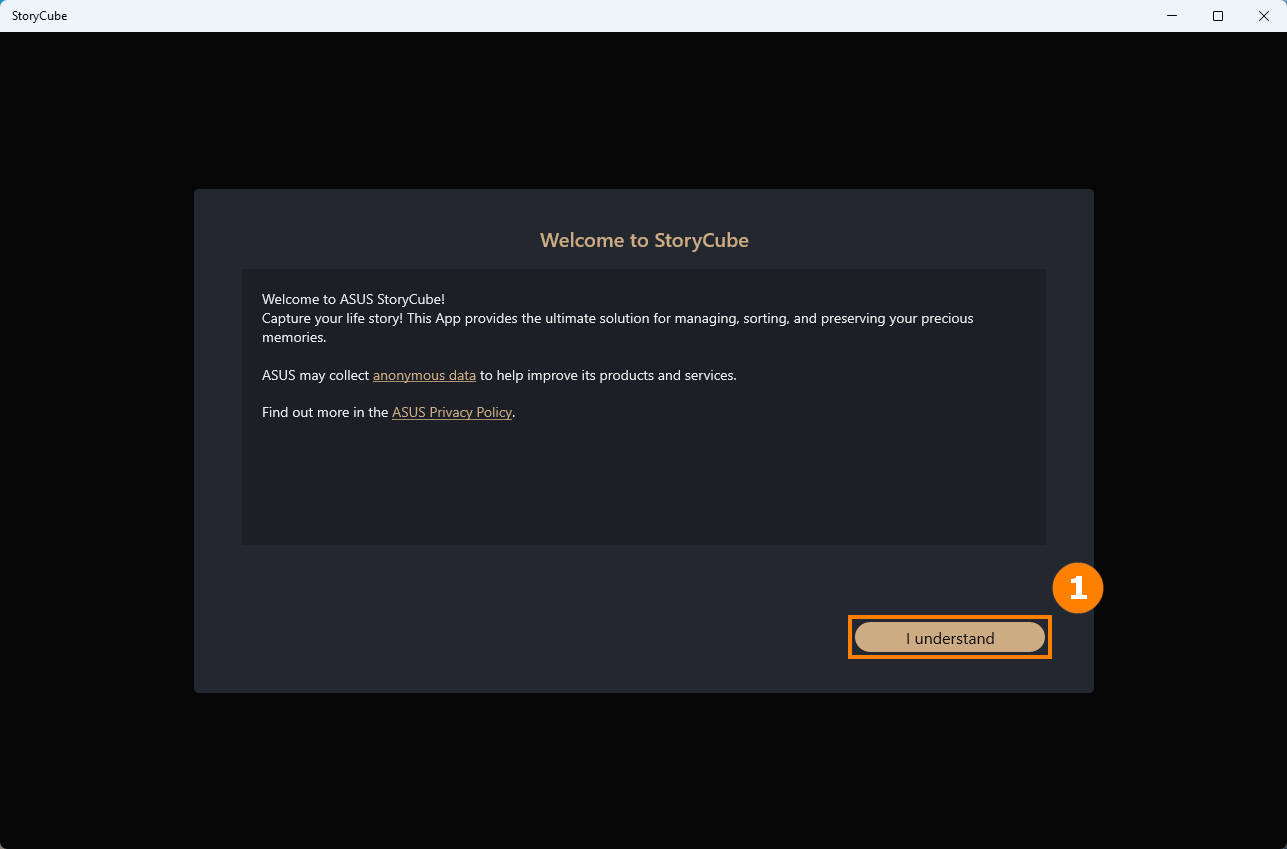
(2) When you enter StoryCube for the first time, you will see "Welcome to StoryCube", please click ①[I understand].
(3) The Feature Guide will introduce you to the features in StoryCube in an animated way, click ②[Next] to watch the introduction of the remaining features, or you can click ③[Skip] to skip it.

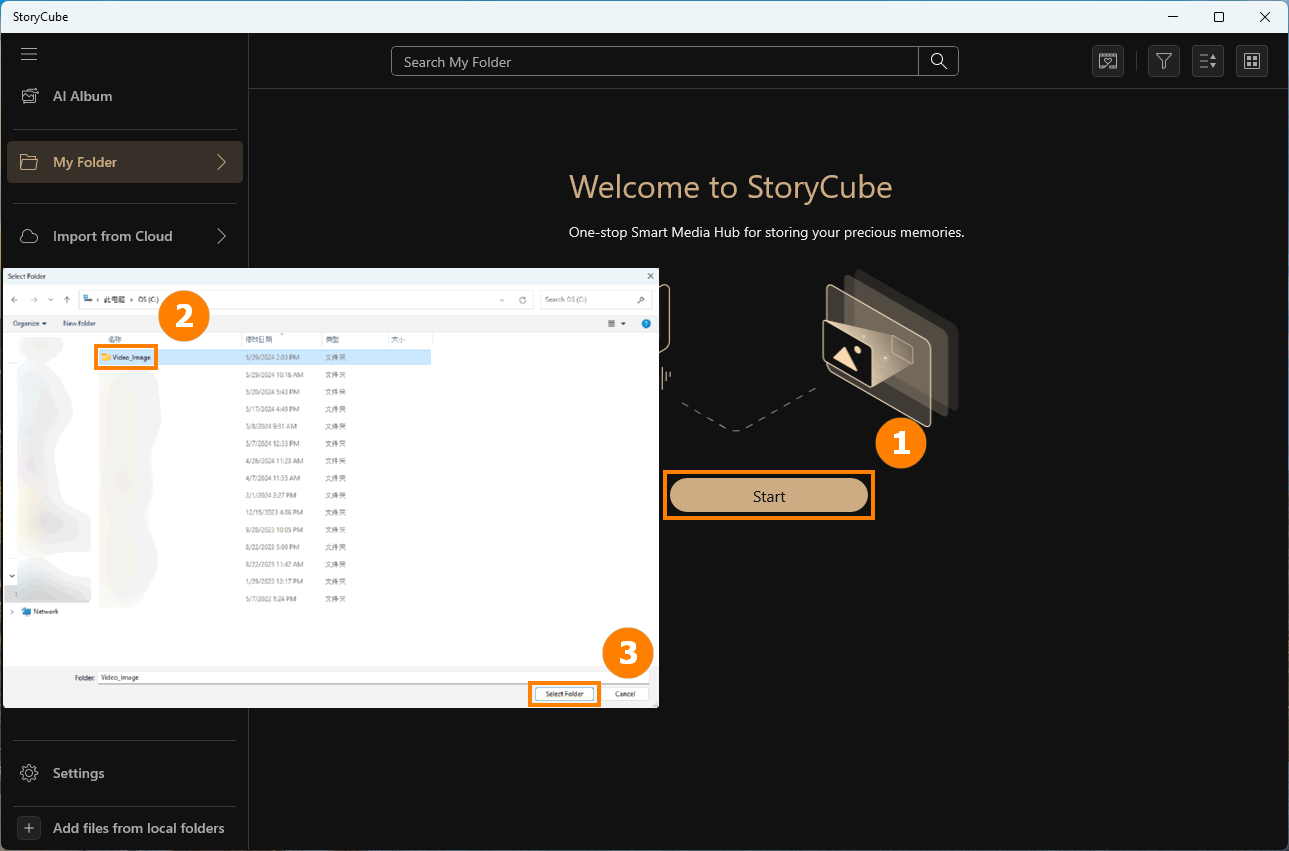
(1) If you are using StoryCube for the first time, import your media, click ①[Start], select the ②[Folder] you want to import, and click ③[Select Folder].
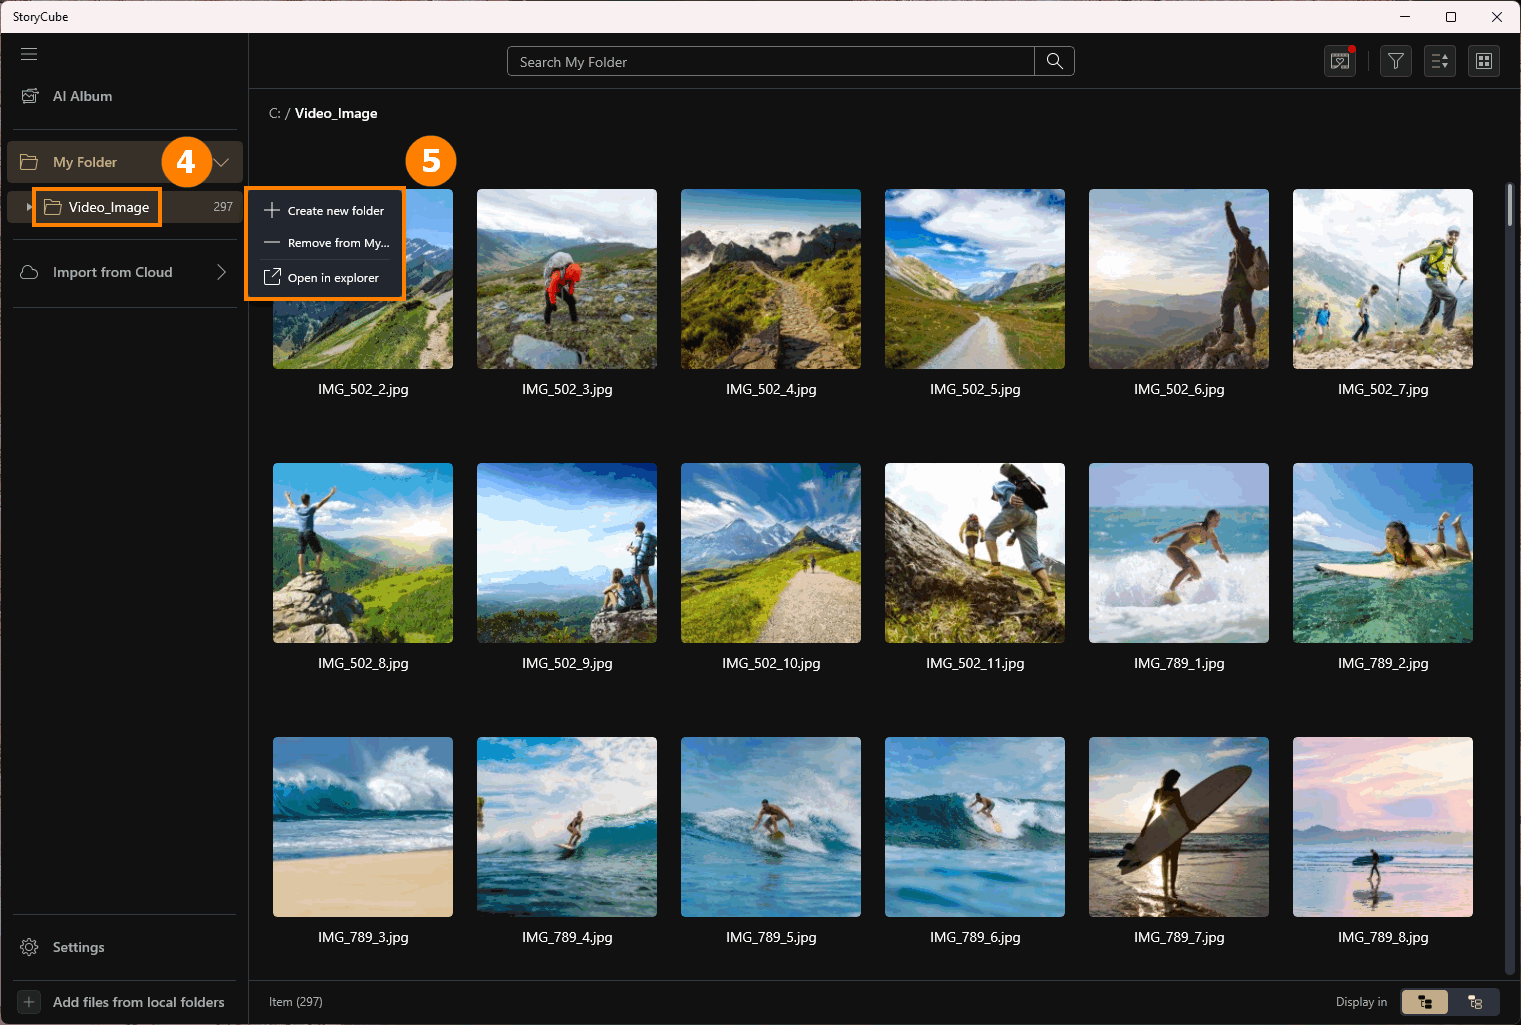
(2) The folder has been imported, and when you right-click ④[Folder], ⑤[Menu] will pop up.
Create new folder - A new folder will continue to be created under the existing folder. When you copy or transfer media, you can move the media to created folder to facilitate your media management.
Remove from my folder - Maybe you added the wrong folder, you can remove it from StoryCube and the folder and the archives in it won't have any effect.
Open in explorer - Open the folder where the Media are located.
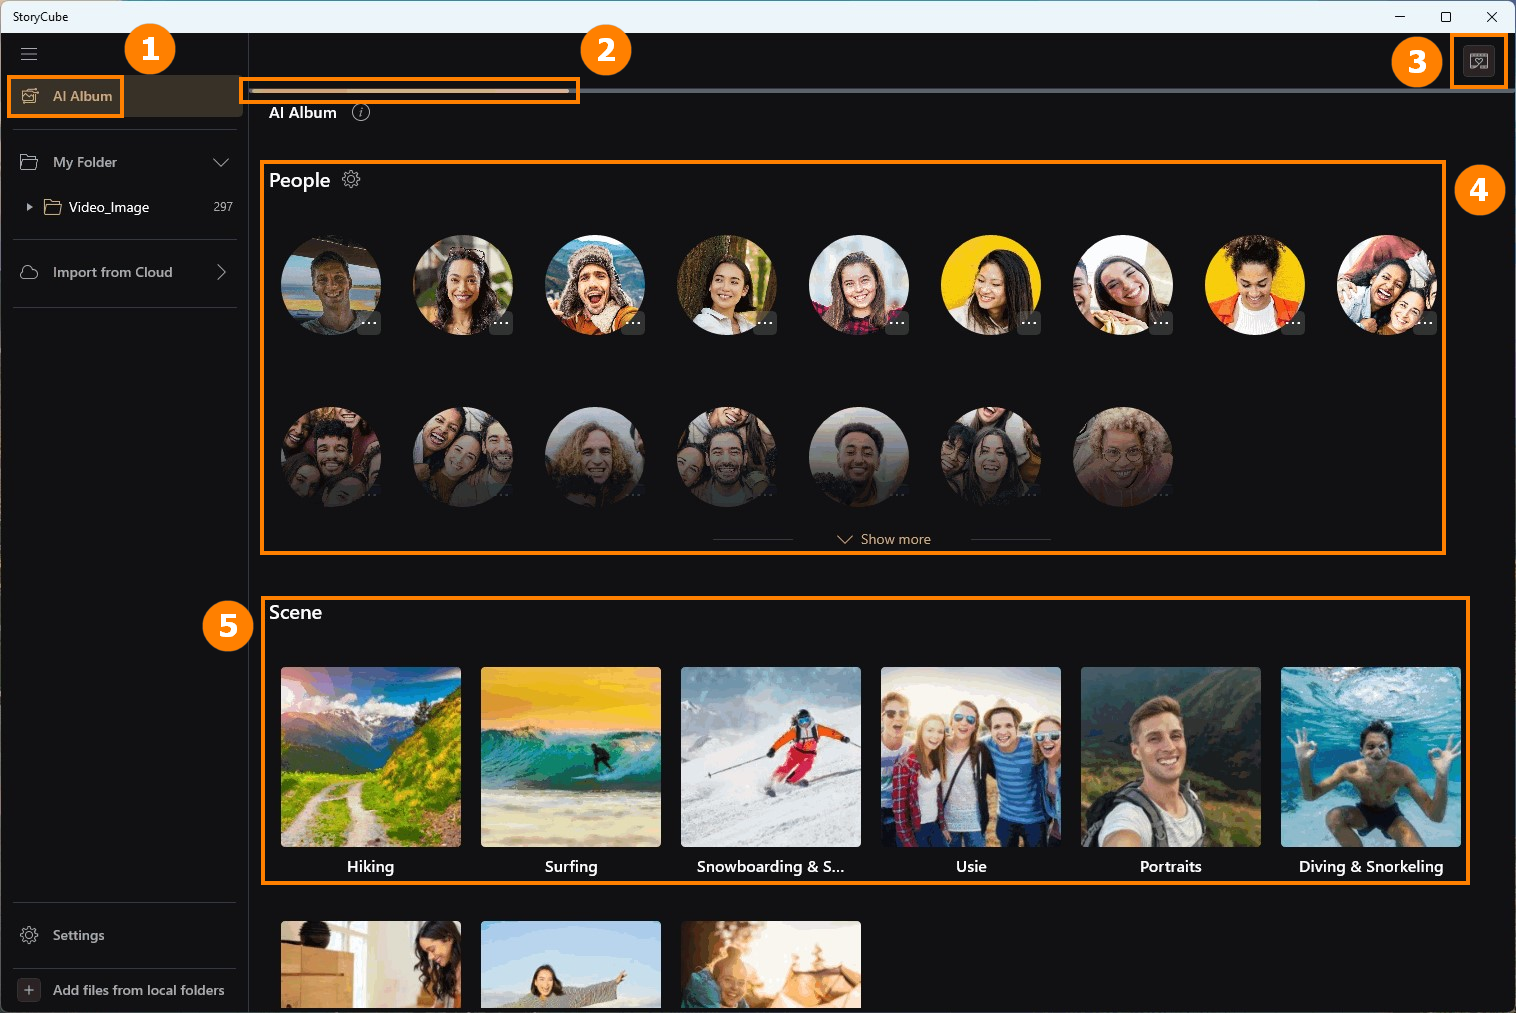
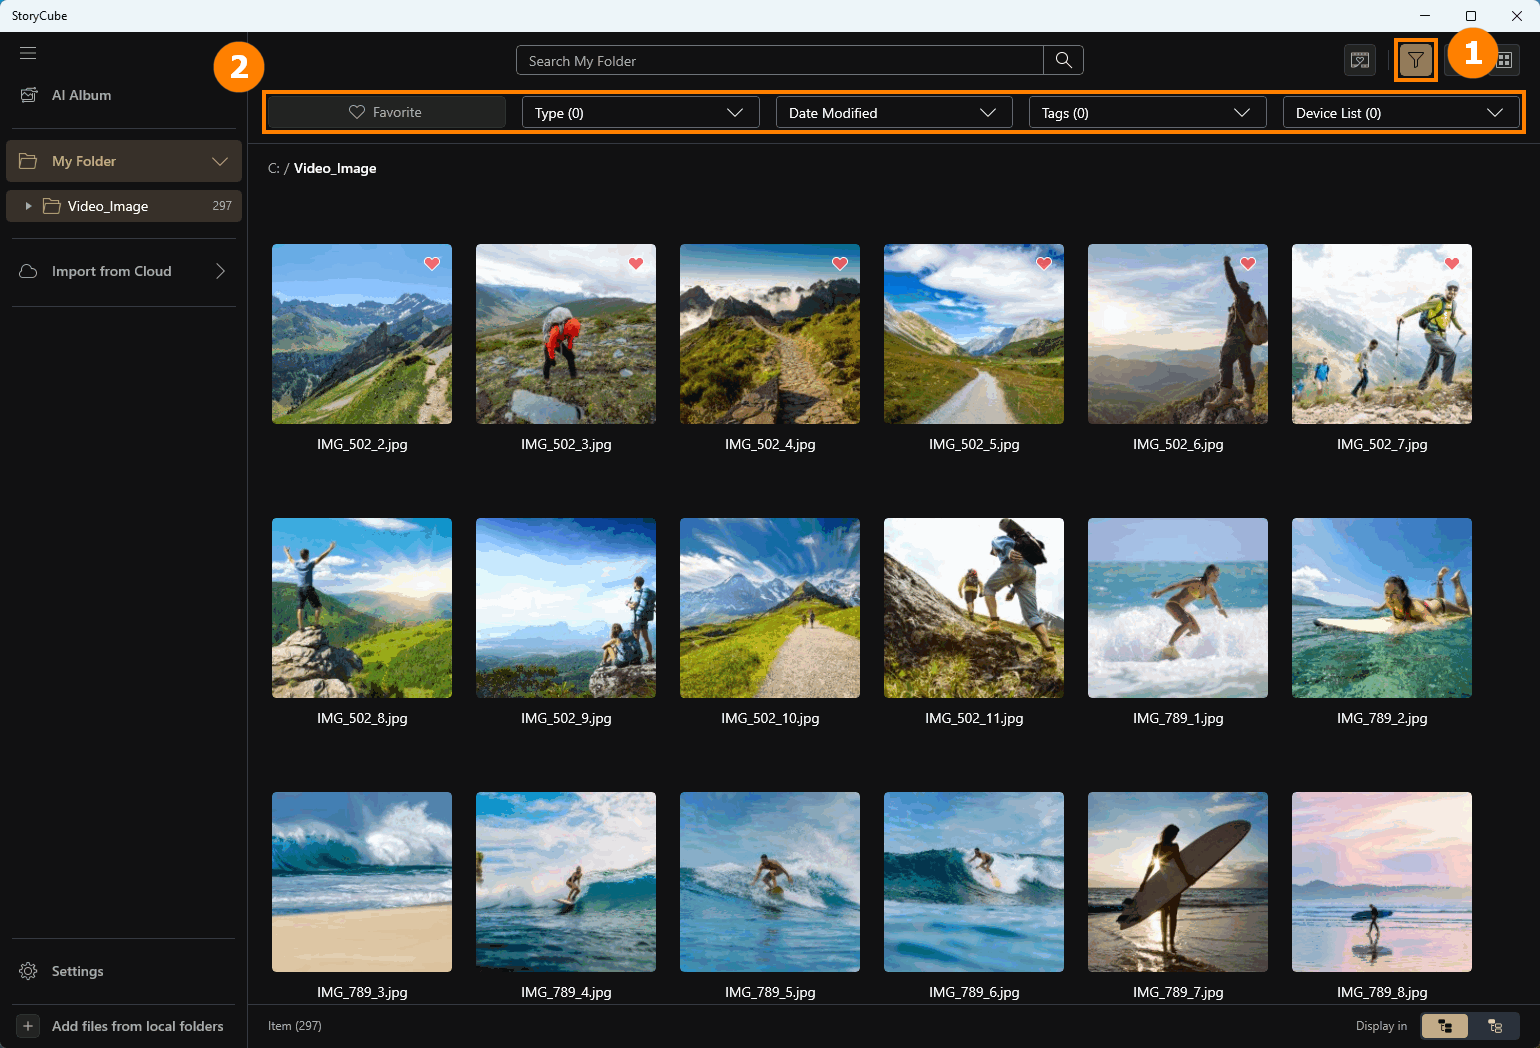
The following content will introduce StoryCube's interface and features.
①AI Album - Leverage AI to recognize Scene and People and automatically generate videos. Includes : People, Scene and Memories functions.
②Media Folder - Show local or cloud Media folders.
③Search - Search for media in the current folder.
④Memories - The StoryCube will automatically generate a highlight video based on the media you imported.
④Filter - Click to open filter functions, such as Favorite, Edit, etc.
④Sort - Sort by time.
④View - Choose the display method: Grid, TimeLine, Map.
⑤Tools - After selecting one or more Media, you can use the above tools to perform operations on Media.
⑥Media - You can left-click any Media to select it, and then click the box in the upper left corner of another Media to continue selecting it. You can also double-click any Media with the left mouse button to enlarge the Media.
⑦Add files from local folders - Continue to add Media to StoryCube from other folders.
⑧Item - Displays the number of Media in the current Folder.
⑨Display in - Select whether to display the media in the subfolder.

AI Album will use local artificial intelligence to analyze and filter the media you import, saving you the time of manual filtering. It currently supports recognizing over a dozen common outdoor activity scenarios such as skiing, surfing, camping, and more.
Click ①[AI Album], ②[Processing] will vary depending on the computer processor speed and the number of Media. AI Album has three important functions, namely ③[Memories], ④[People], and ⑤[Scene].
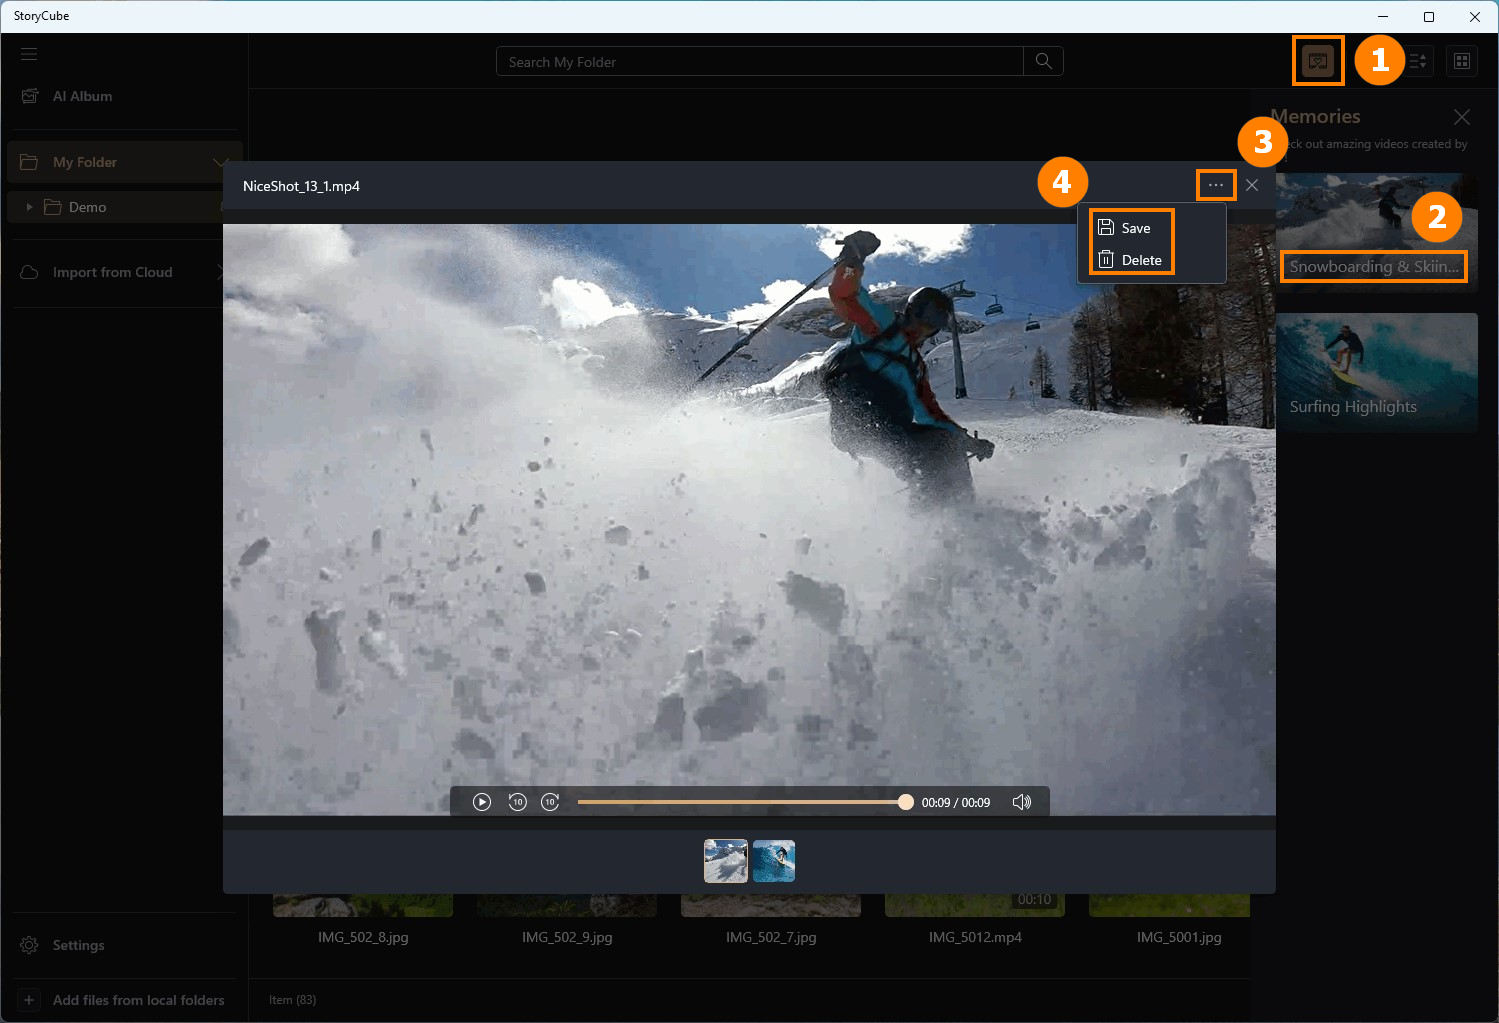
Click ①[Memories], double-click with the left mouse button ②[Generated Media] to view, click ③[Options], and select ④[Save & Delete].
Even if you import the same Media each time, Memories may generate different videos. If you feel that the currently generated video meets your needs, please save it.
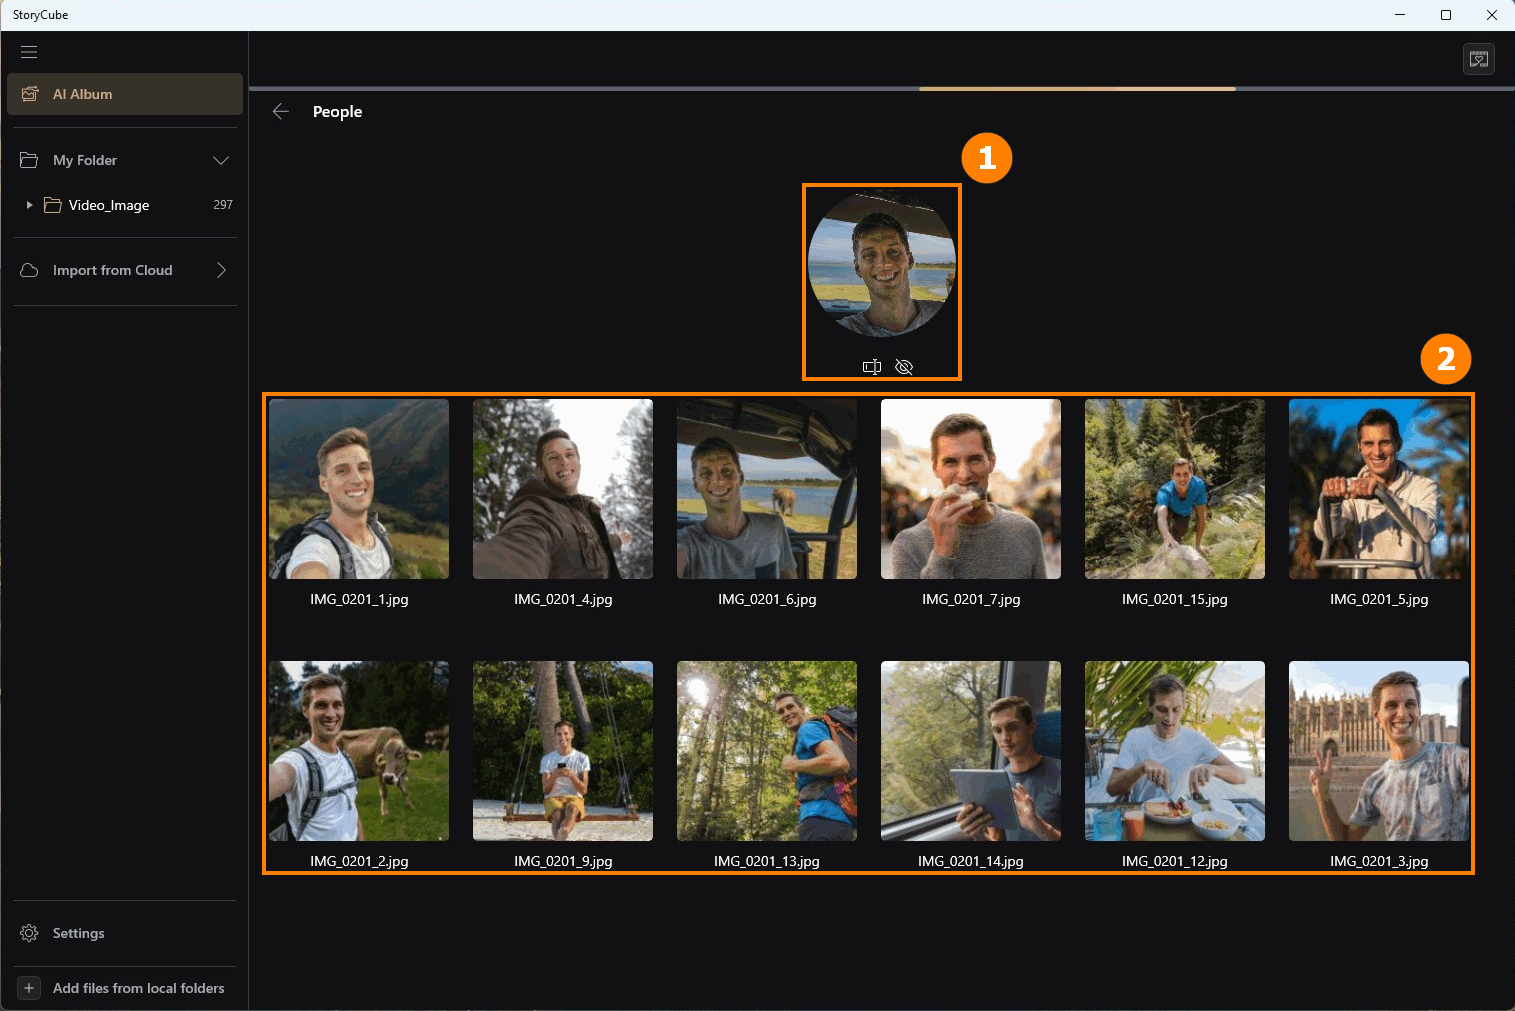
Click [People] to view all the media about this person in ①[Photo post] and ②[Media]. There are two options under ①[Photo post], namely [Rename] and [Hide]. If you click [Hide] by mistake, you can go to settings to unhide it.
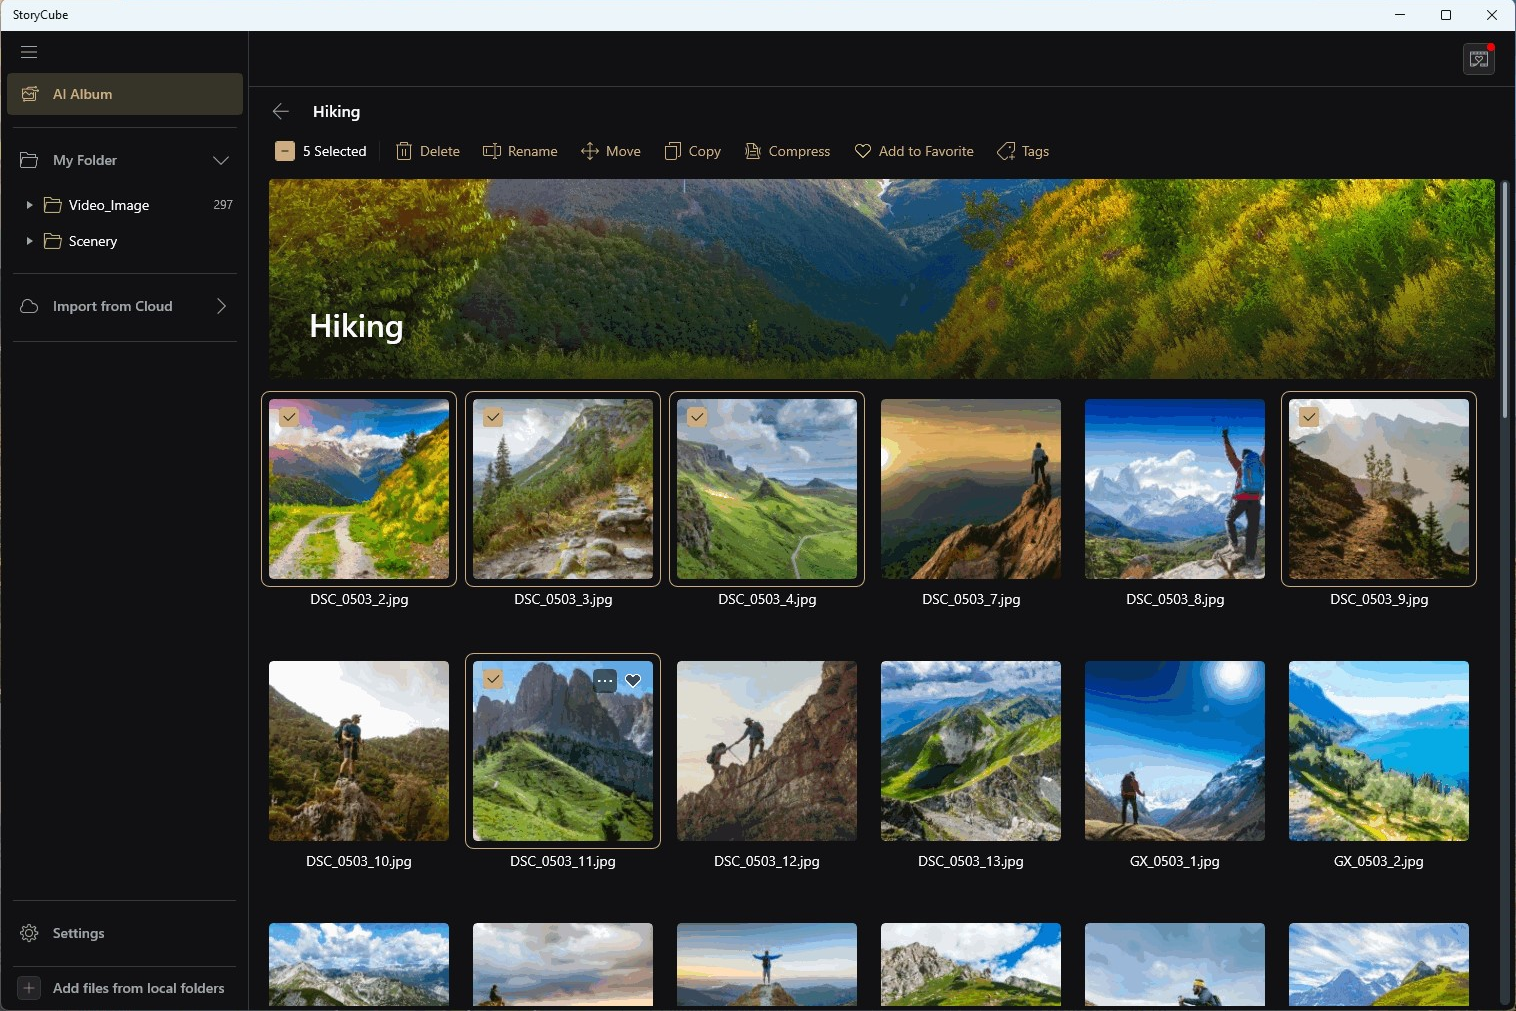
Click [Scene] to view all Scene-related Media.
StoryCube not only provides AI AIbum filtering methods, but also provides three advanced filtering methods: ②[Grid, Timeline, Map] View.
The system default filter is Grid. Click ①[View] to open ②[Options].

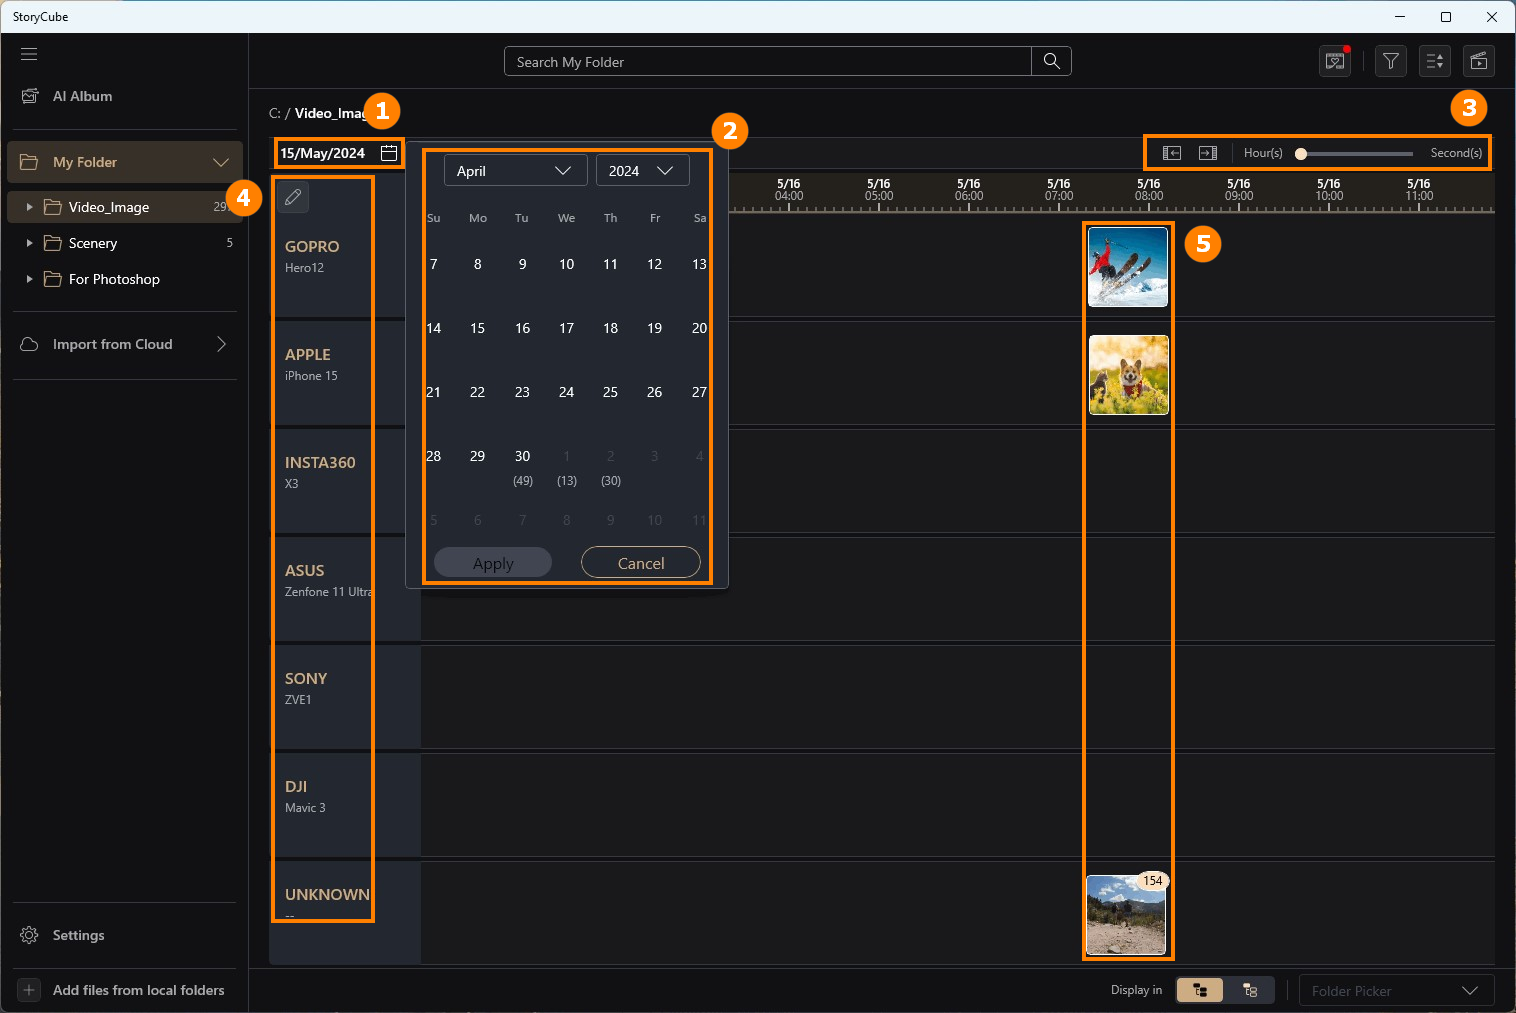
Click [Timeline], click ①[Calendar], select the specific ②[time] you want, you can lengthen or shorten the timeline by adjusting ③[Hour - Second], and the ④[Device] you took will also be displayed on the left, ⑤[Media] will be displayed on the timeline.
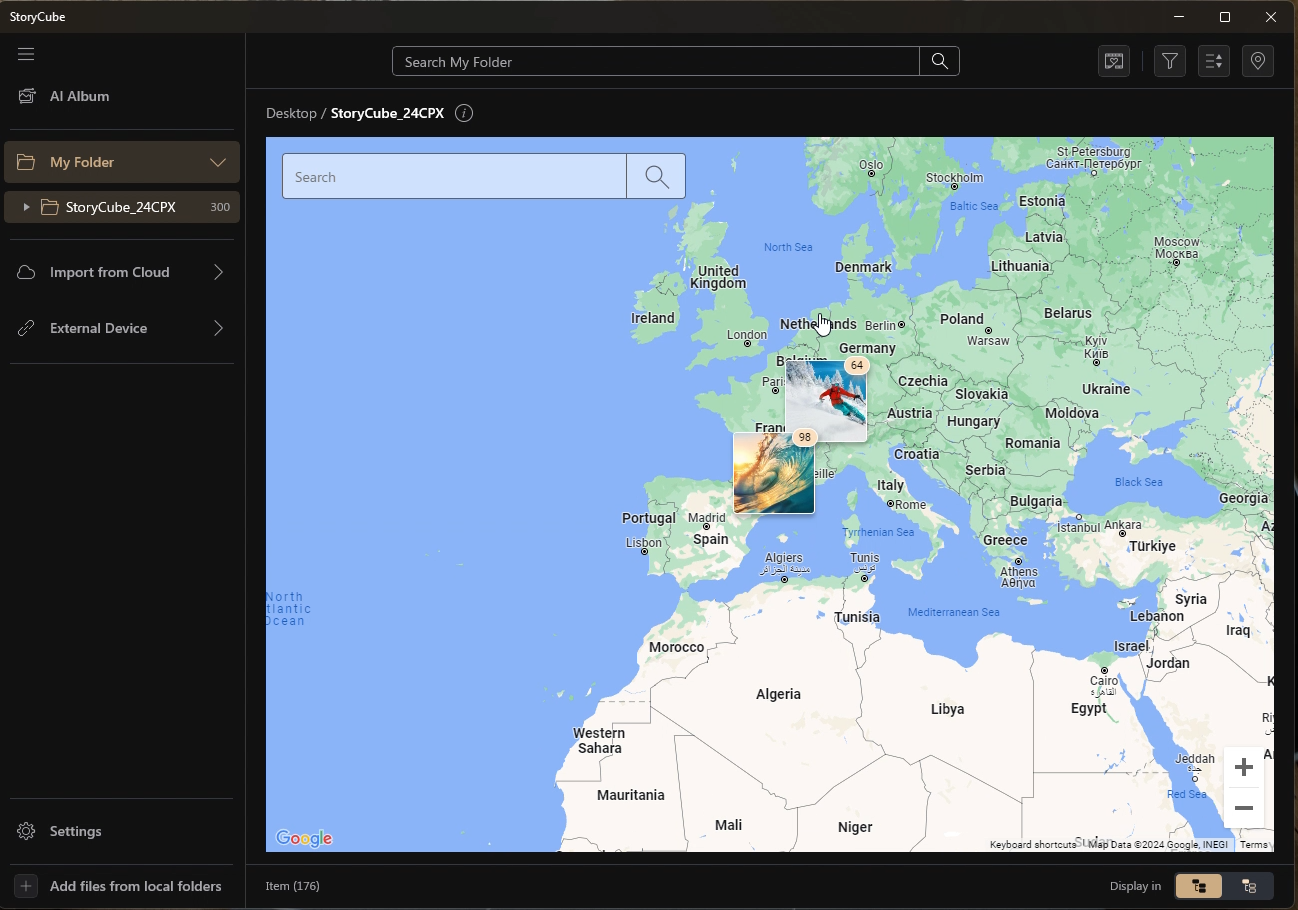
By clicking [Map], you can see where the Media of the current Folder was taken.
※ Map View requires an Internet connection.
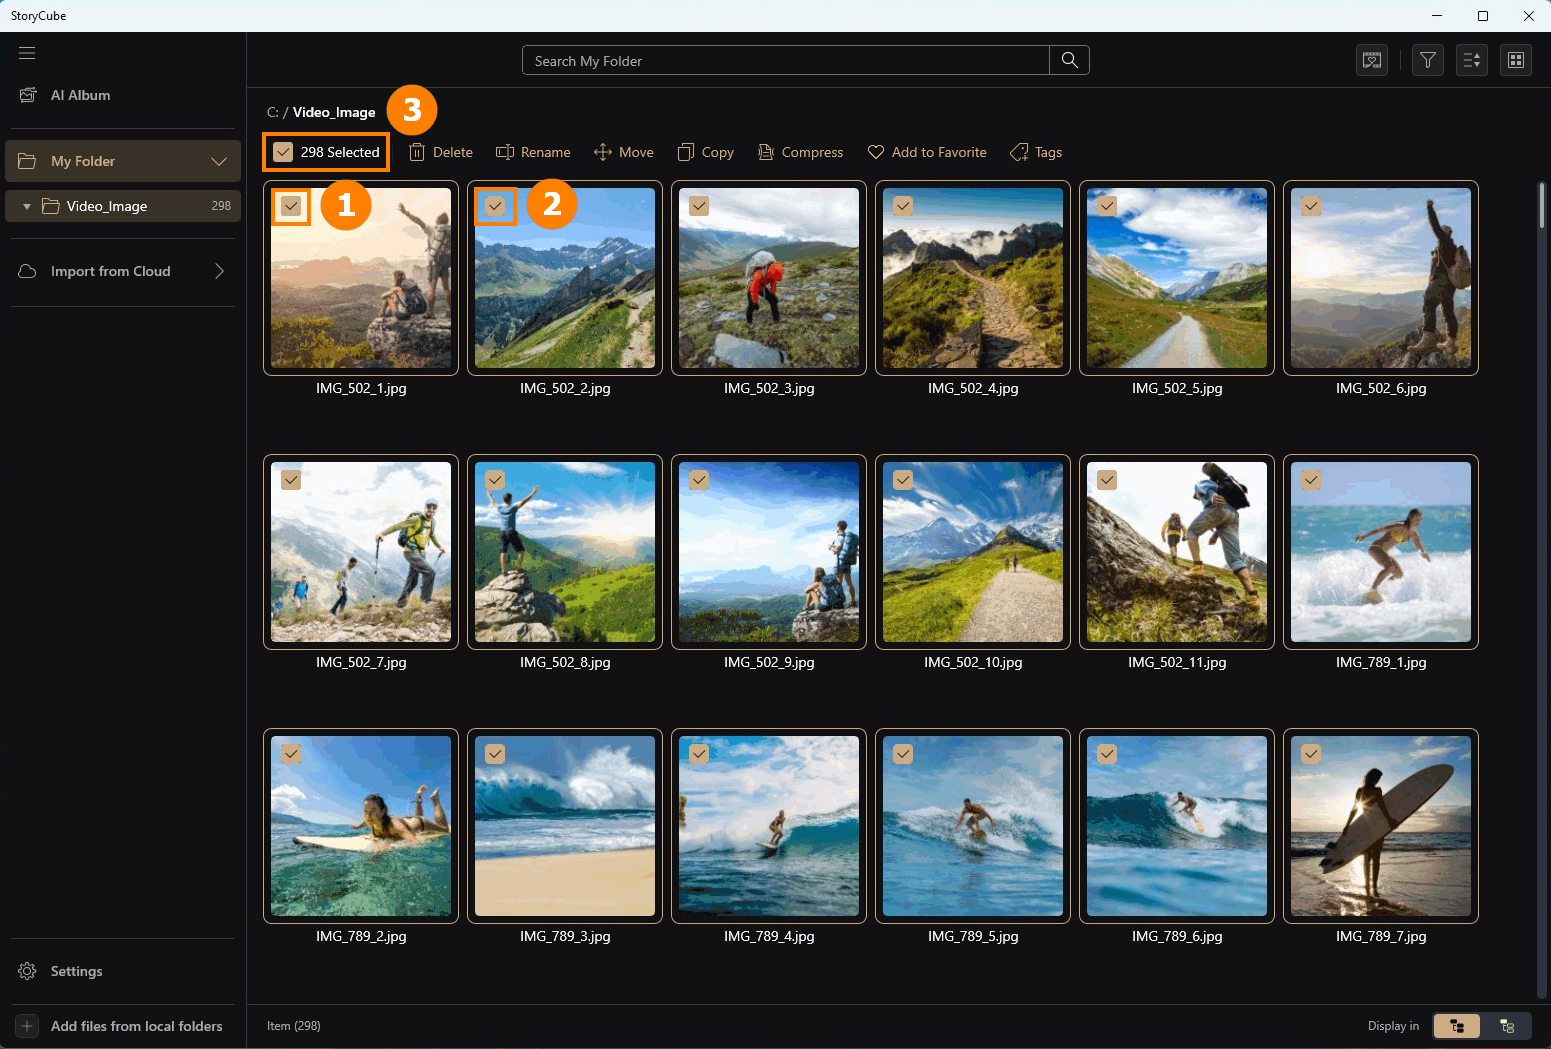
StoryCube supports batch move, copy, and compress media functions.
Click any ①[Media], you can also continue to manually check ②[Media], or click ③[select all].
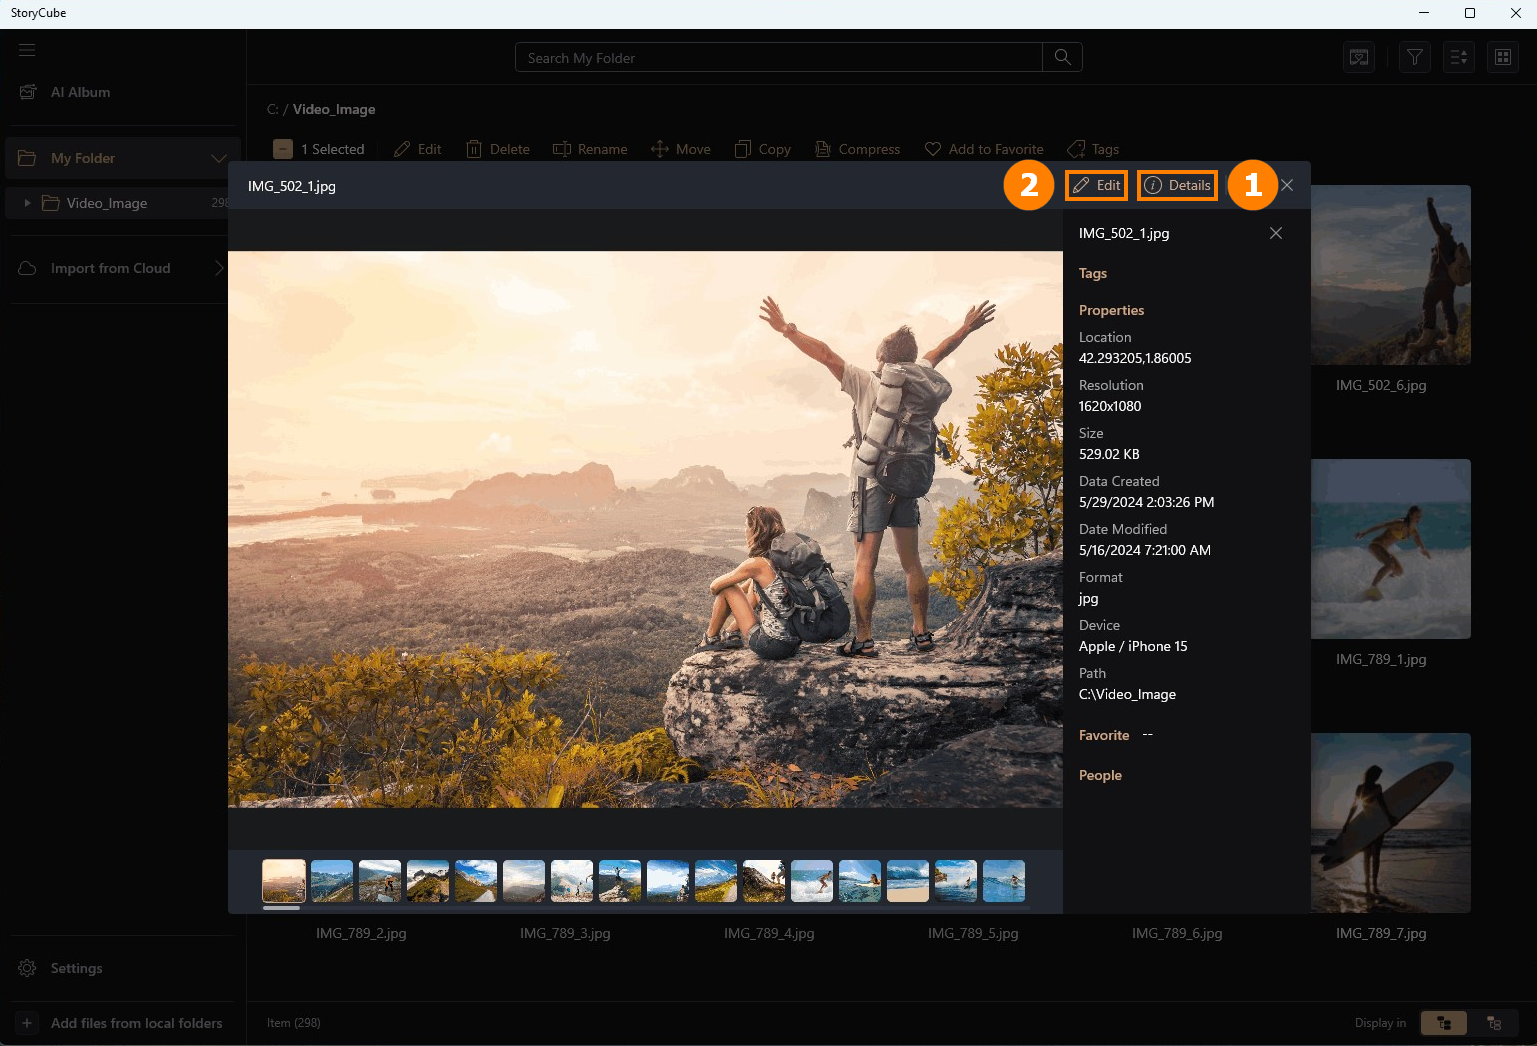
Double-click the media with the left mouse button to view the media. You can click ①[Details] to view the detailed information of the media. Click ②[Edit] to edit this Media.
StoryCube supports the editing functions of Media. The following uses picture editing as an example.
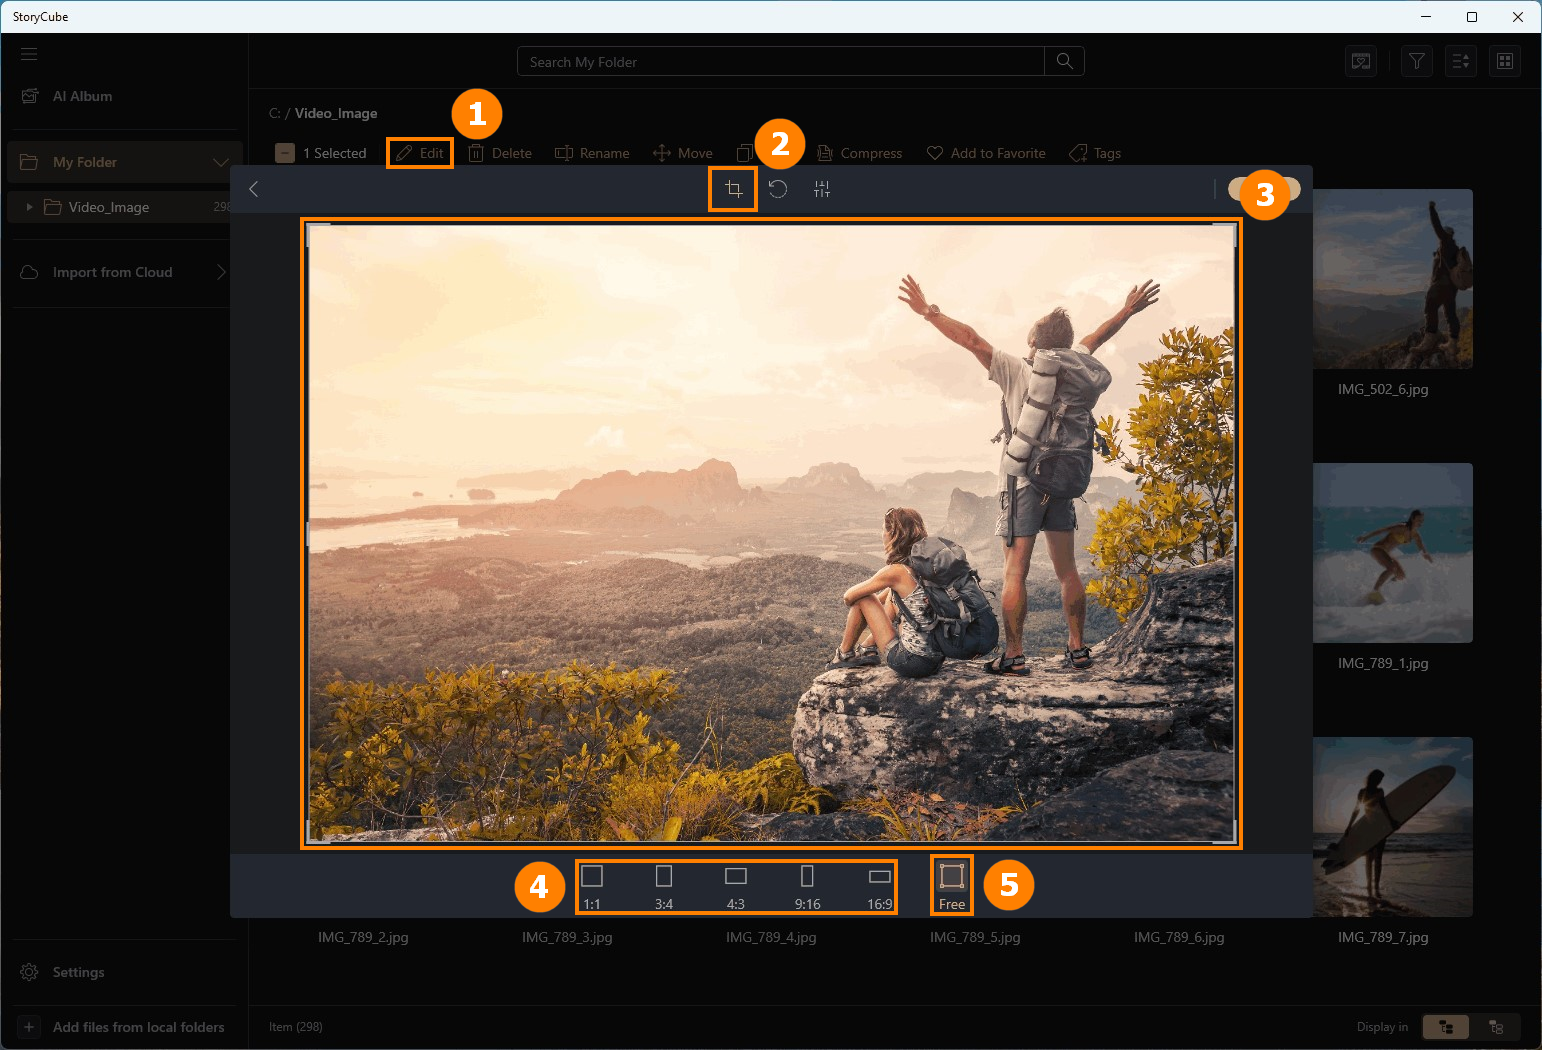
(1) Cropping
Click ①[Edit], click ②[Crop], you can manually ③[Crop] the image, or you can choose the system default ④[Style]. If you are not satisfied with the modification, you can click ⑤[Free] to restore to the original style.
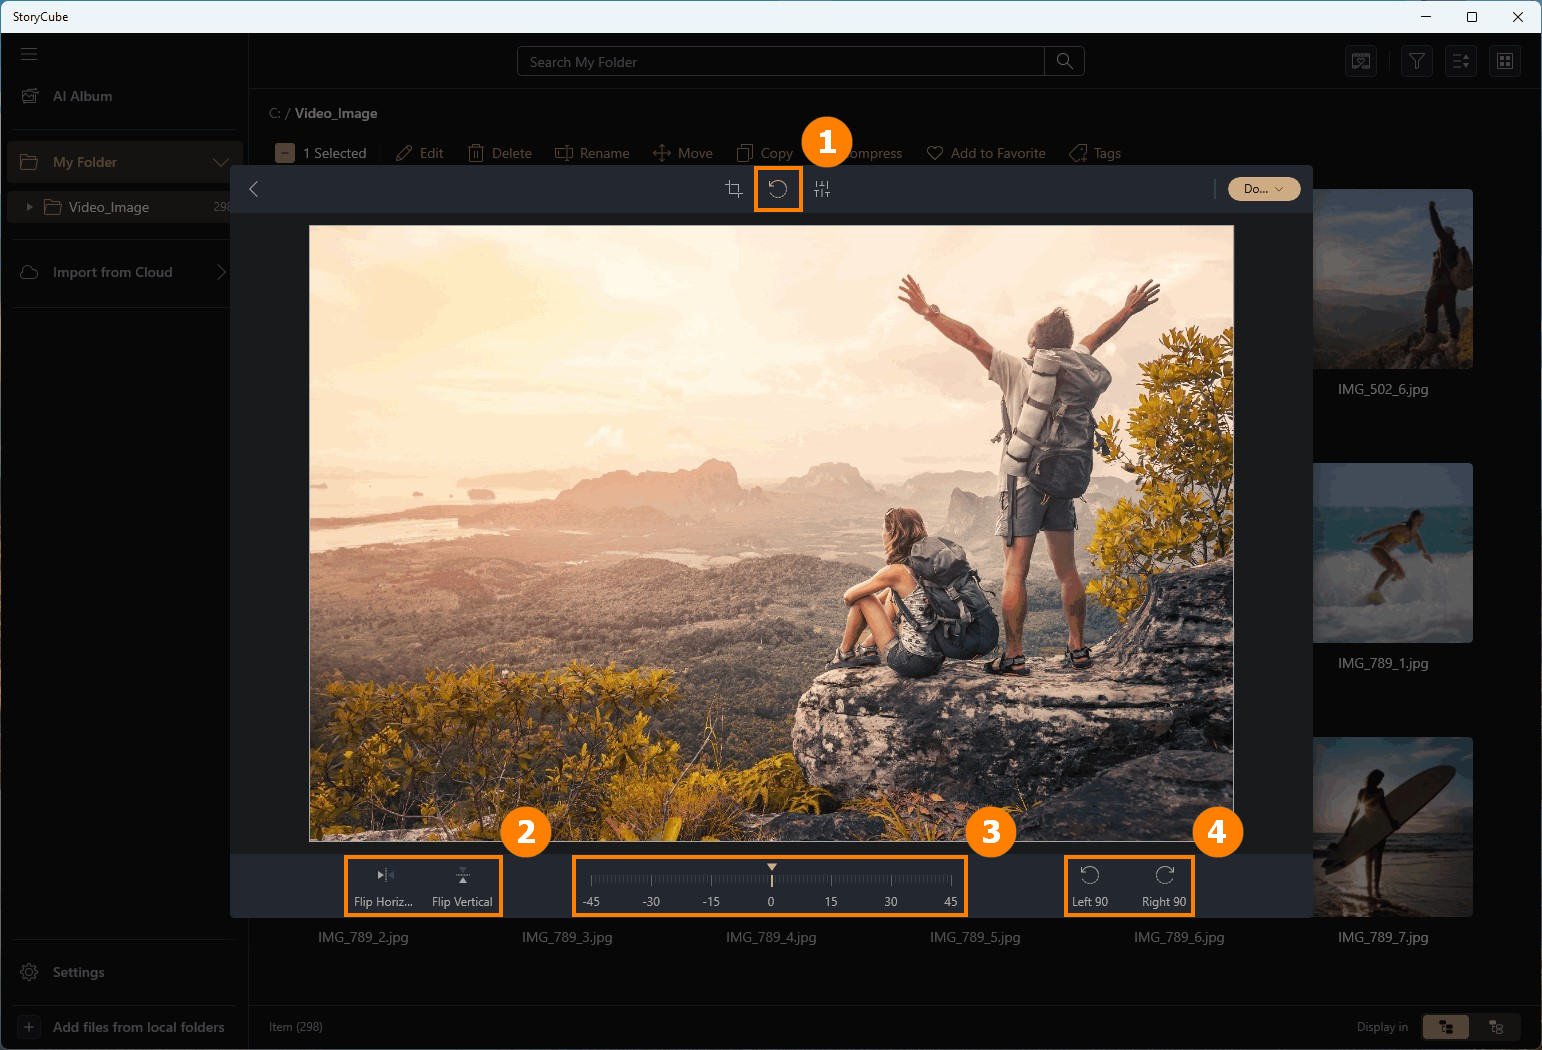
(2) Rotation
Click ①[Rotation], you can select ②[Flip Horizontal & Flip Vertical], or manually adjust ③[Angle], or select ④[Left 90 & Right 90].
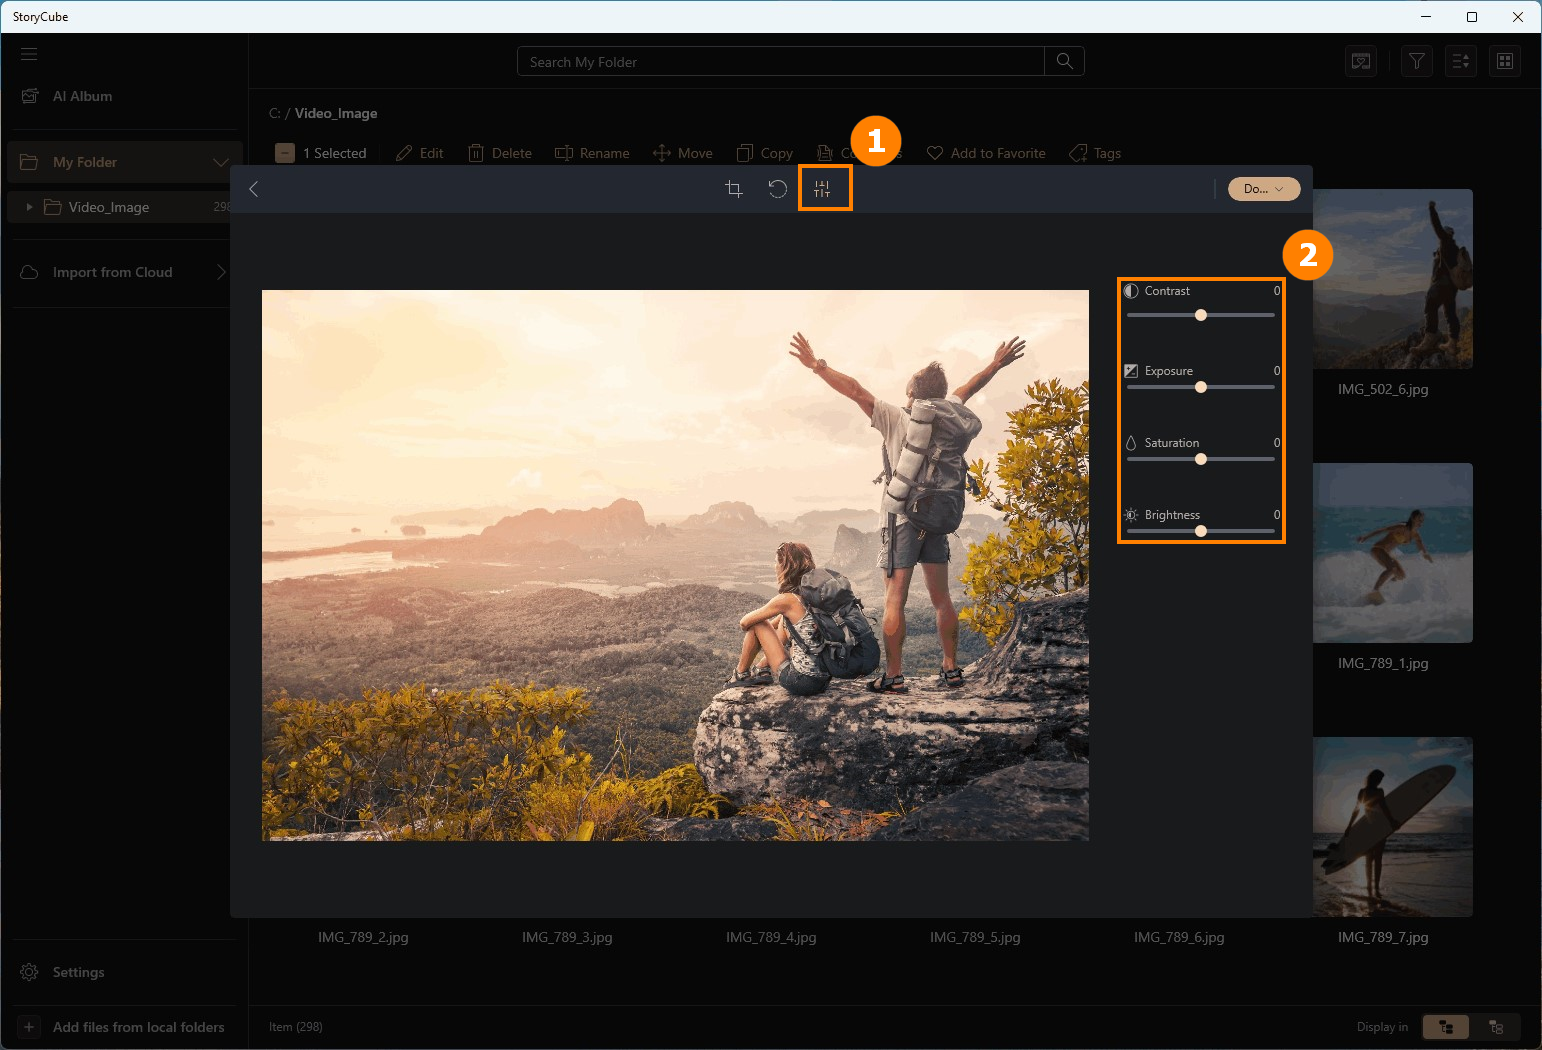
(3) Brightness
Click ①[Brightness], and adjust the Brightness parameter of the image in ②[Brightness].
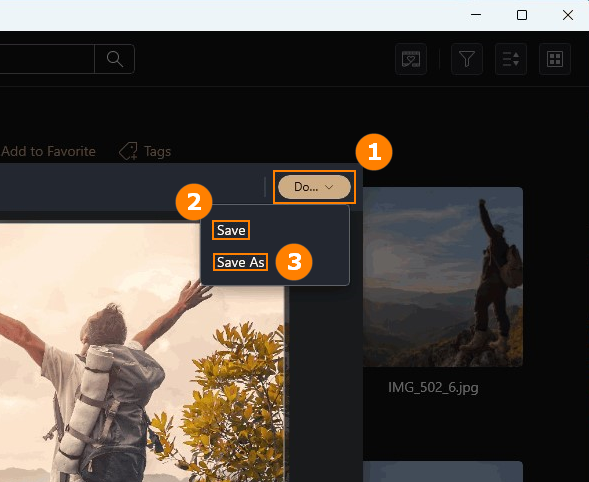
(4) Save
After completing editing, move the cursor to ①[Done] and select ②[Save] or ③[Save As] to save the image.
※ Clicking ②[Save] will overwrite the original file. Please use ③[Save As] to save the edited picture.
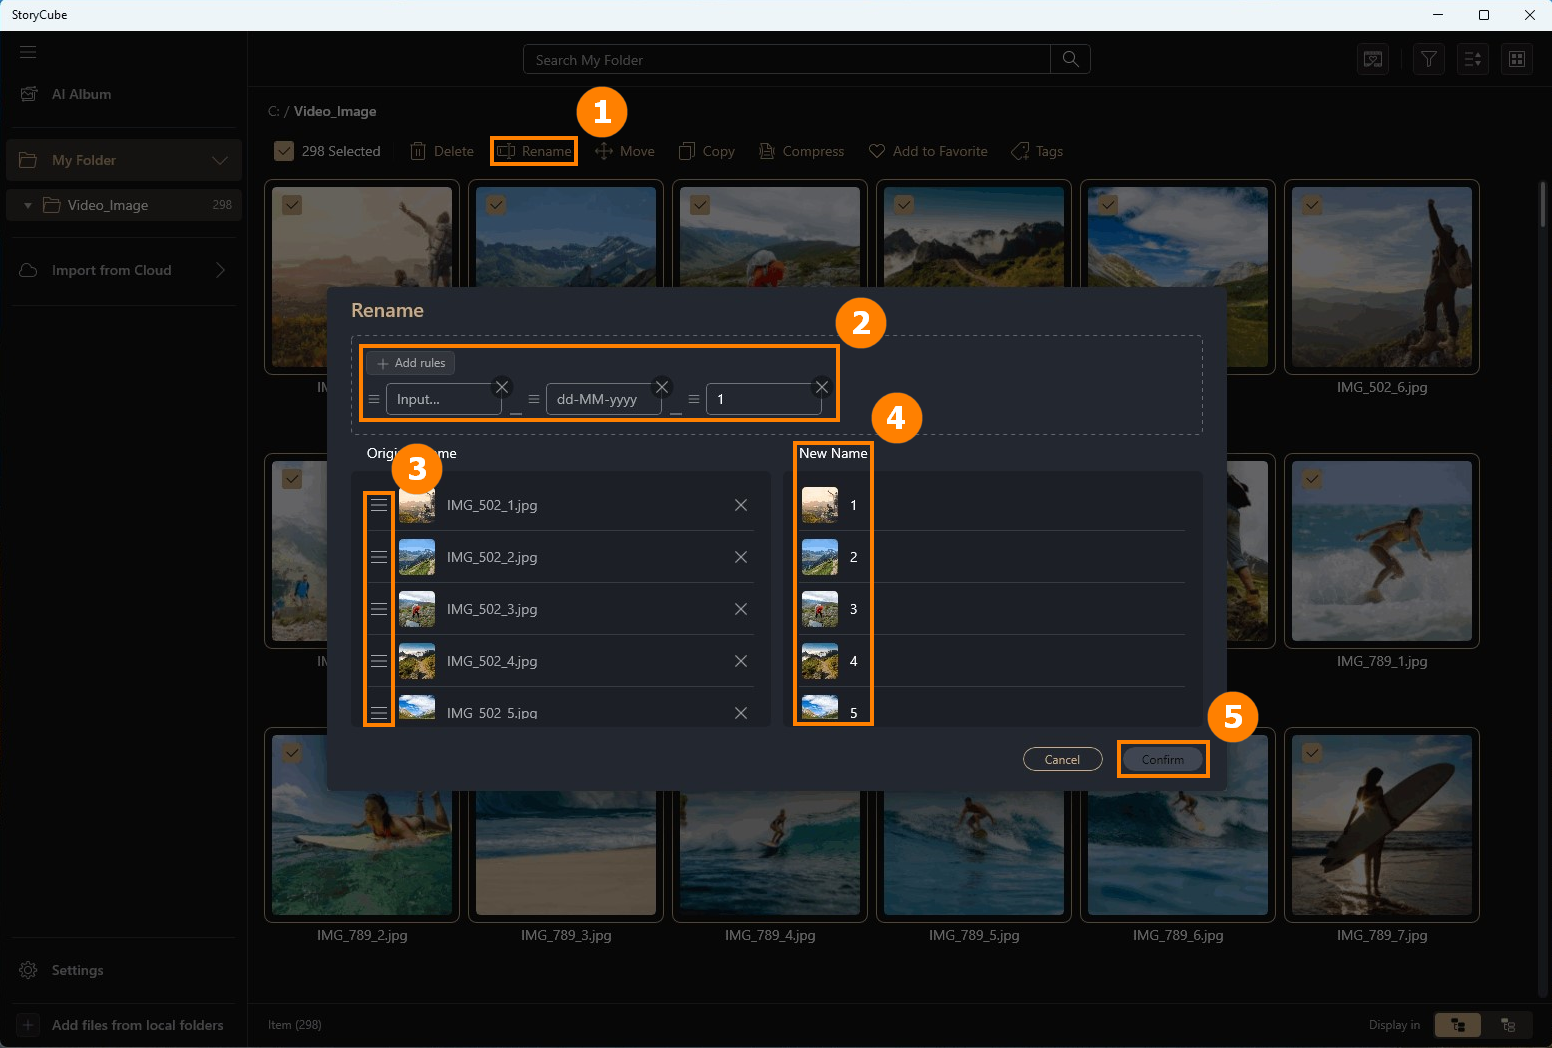
After selecting the Media you need, click ①[Rename] and select the new naming ②[Rules]. You can manually move ③[Media to be named] to adjust its order. You can preview ④[New Name] on the right, and then Click ⑤[Confirm].
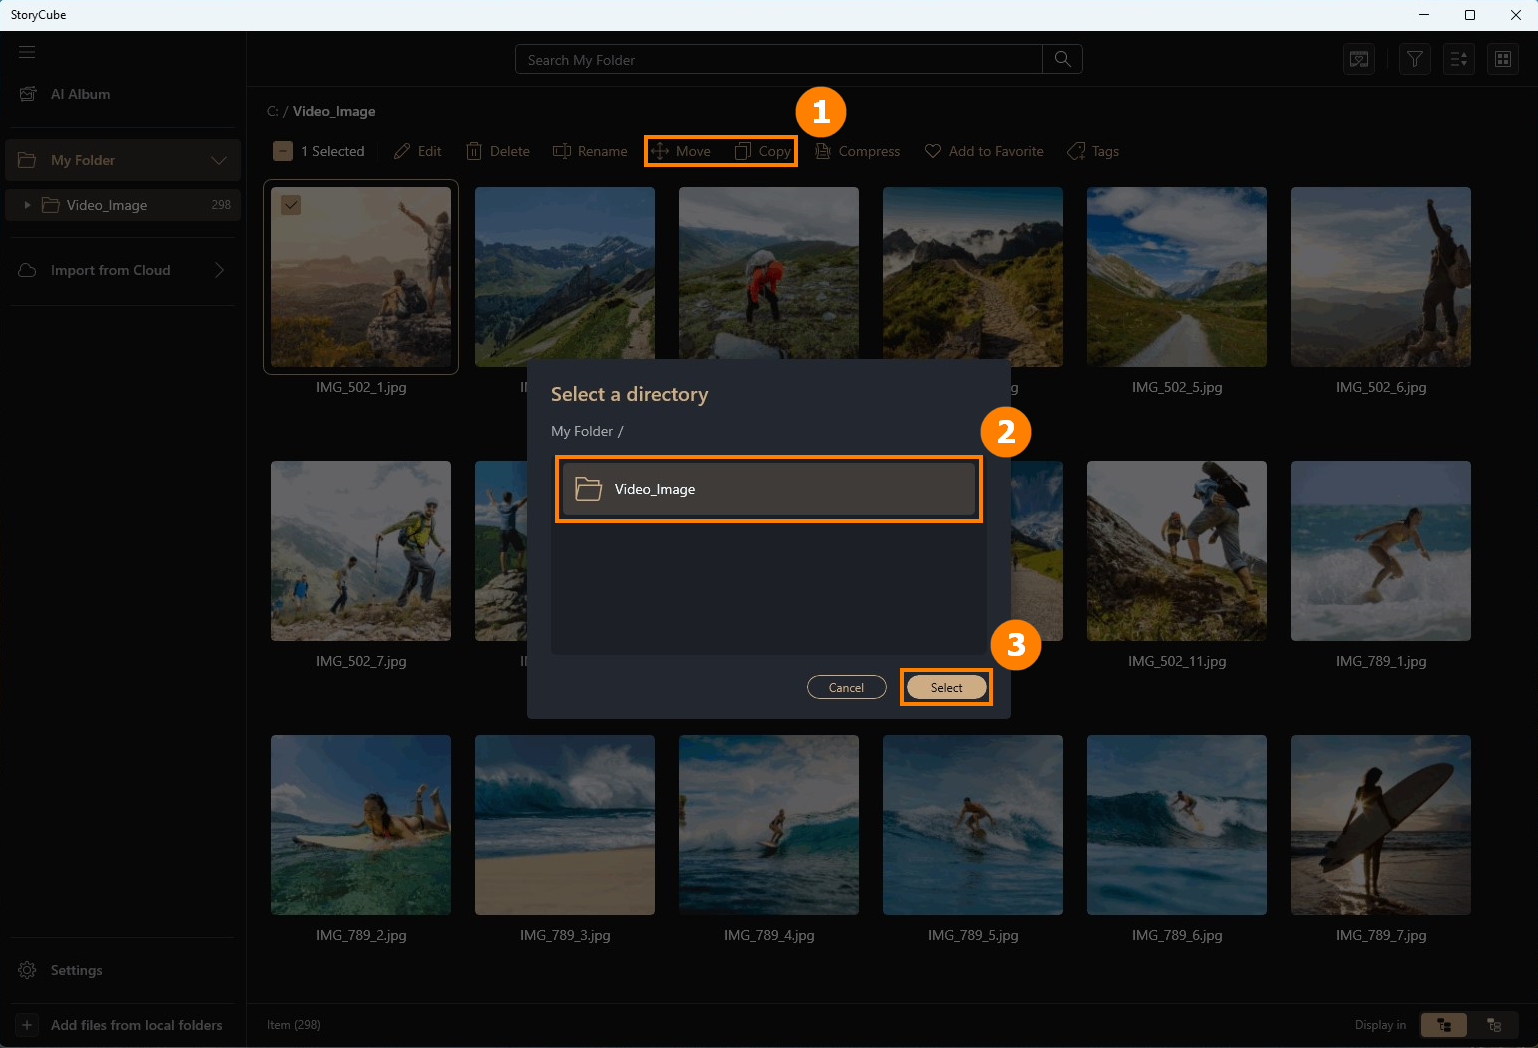
Click ①[Move & Copy], click ②[Folder], click ③[select] to complete the operation.
※ The Move operation will move the original file, and the Copy operation will not move the original file but only a copy of the original file.
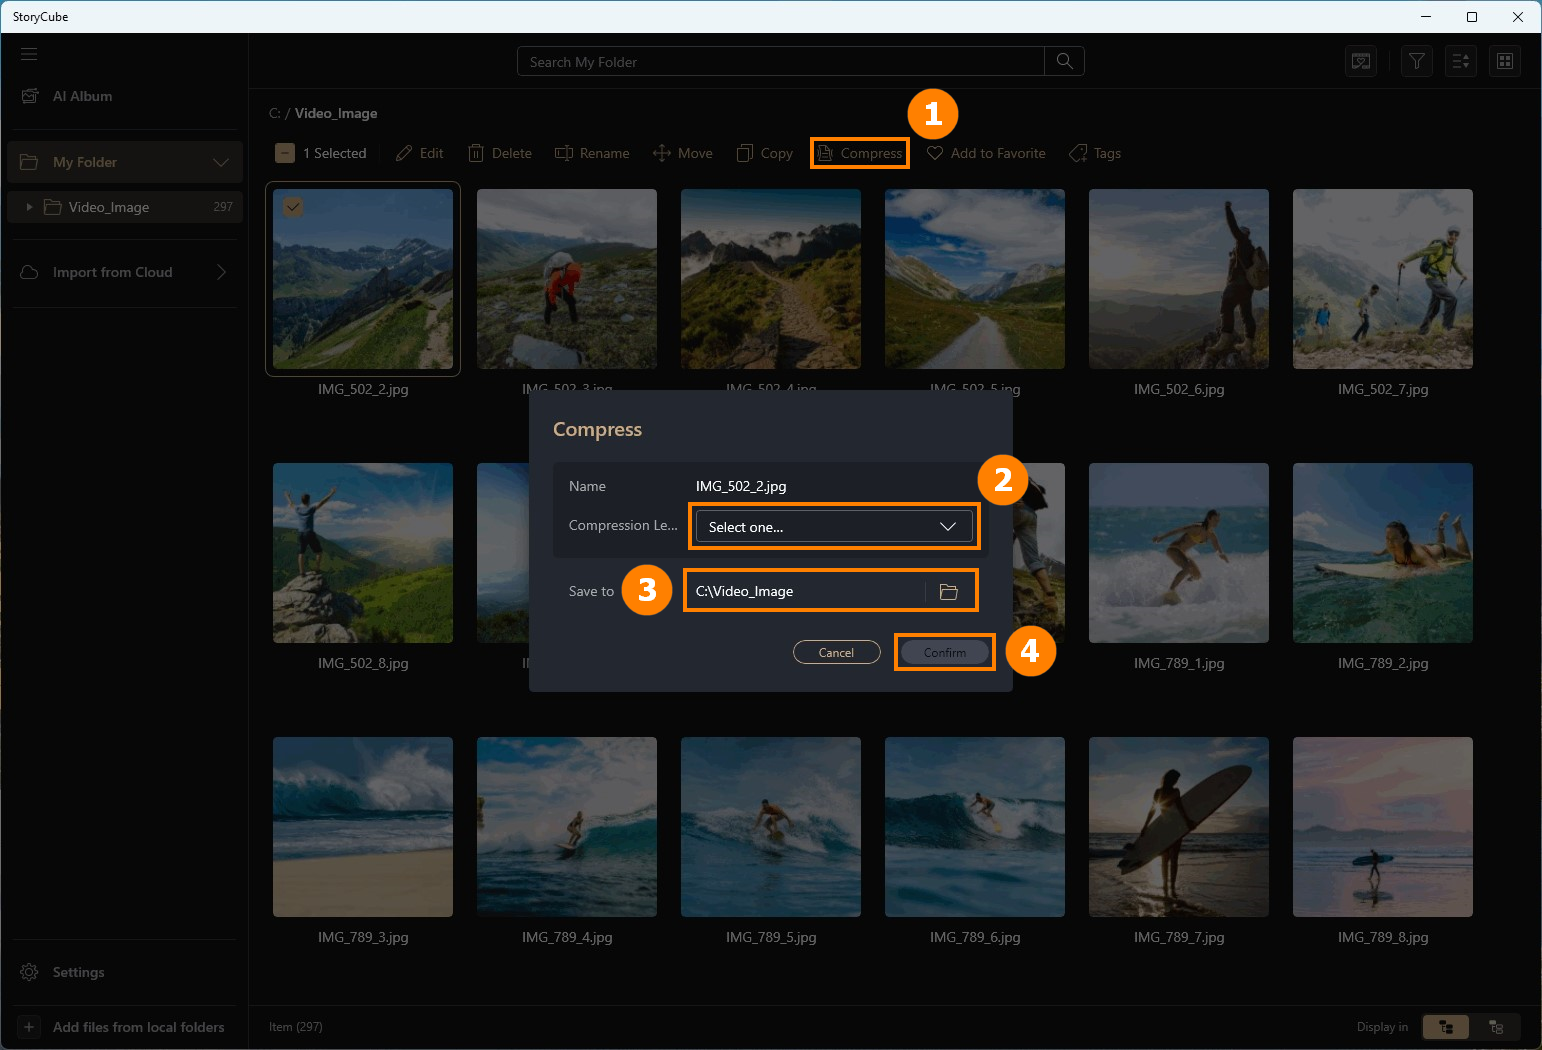
Click ①[Compress], select ②[Compression Quality], select ③[Folder to be saved], and click ④[Confirm] to complete the operation.
※ Please do not save it in the current Folder, otherwise the original file will be overwritten by the new file.
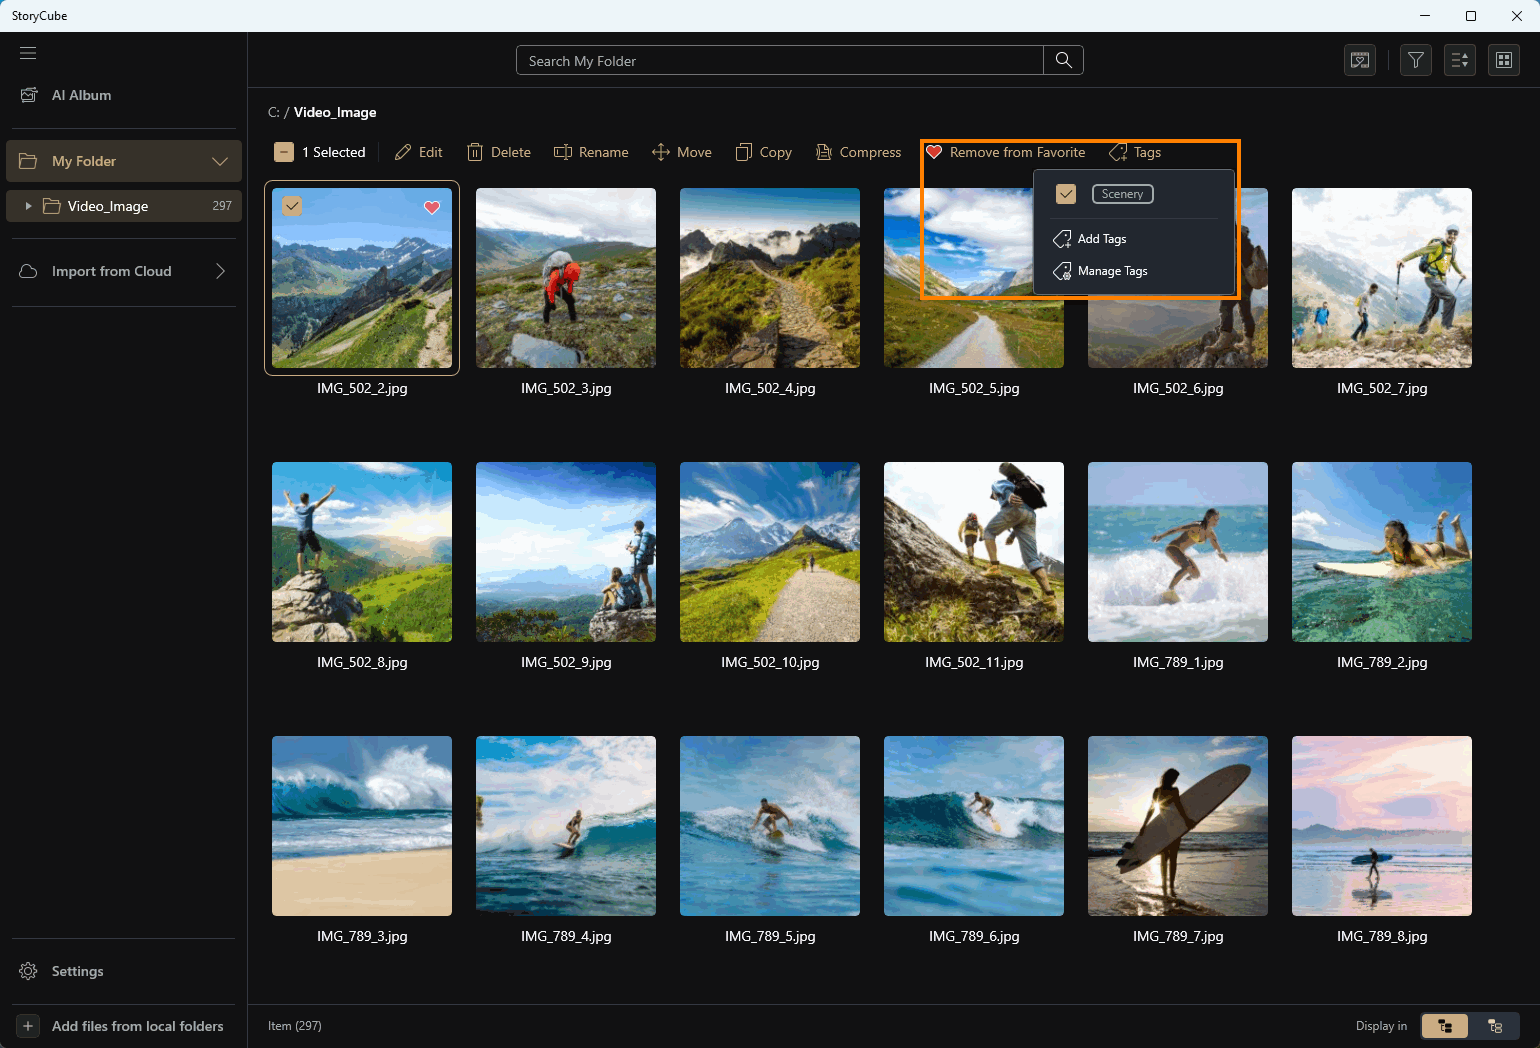
After selecting the media you want to tag, you can click Favorite & Tags to tag the media. The marked media will be specially displayed when you search or filter.
Click ①[Filter] to open filter functions, such as ②[Favorite, Edit, etc].
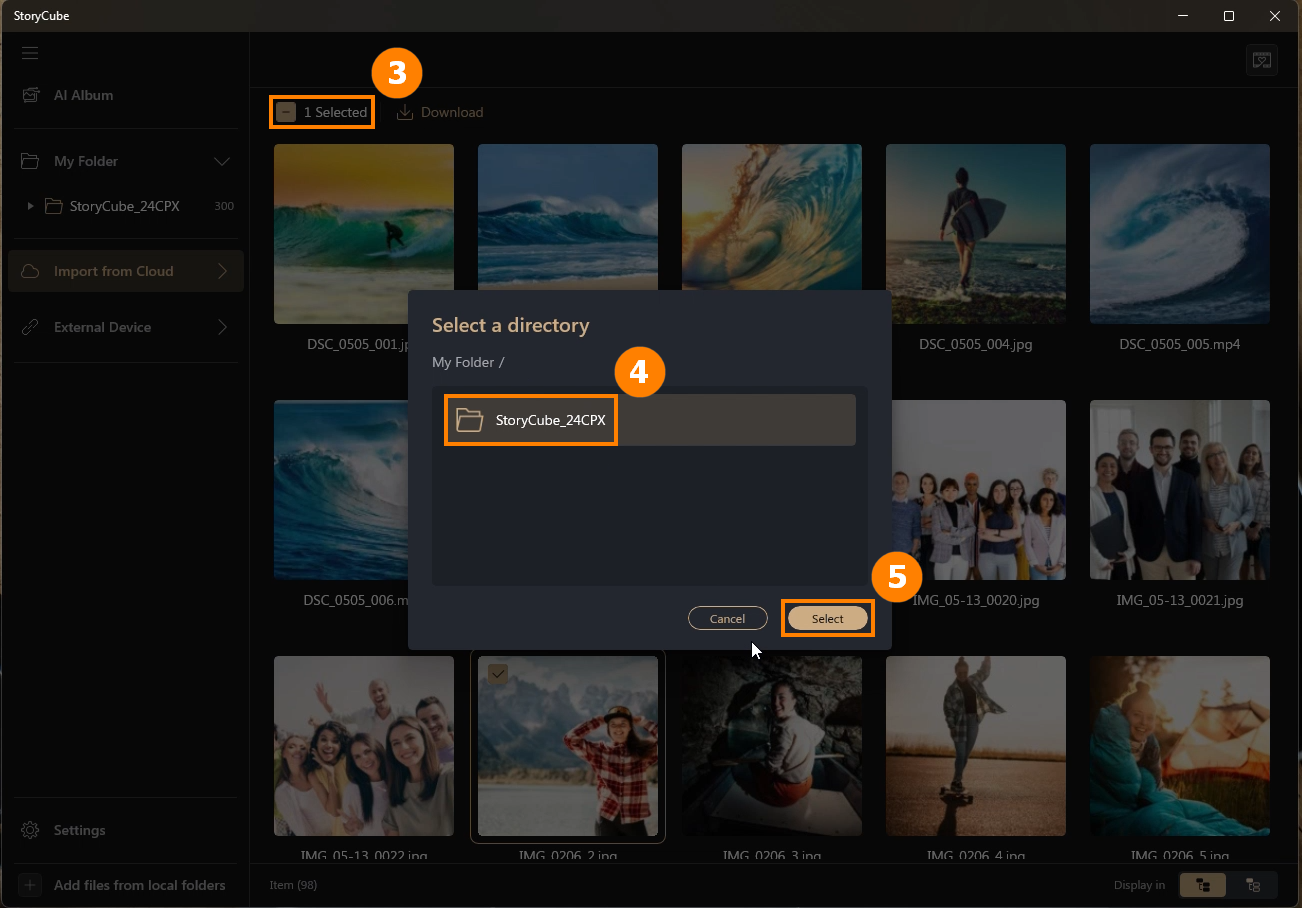
StoryCube supports the function of importing media from the cloud.
(1) Click ①[Import from Cloud], click [Cloud Drive], and click ②[Login].

(2) Select the ③[Media] to be imported, click ④[Folder], and click ⑤[select] to download the cloud media to your Folder.
When you insert an SD card, USB flash drive, or removable hard drive, StoryCube will automatically detect it.
Click ①[External Device], select the ②[Media] you want to import, select ③[Folder], and click ④[Select] to import the Media of the External Device into the Folder of your choice.

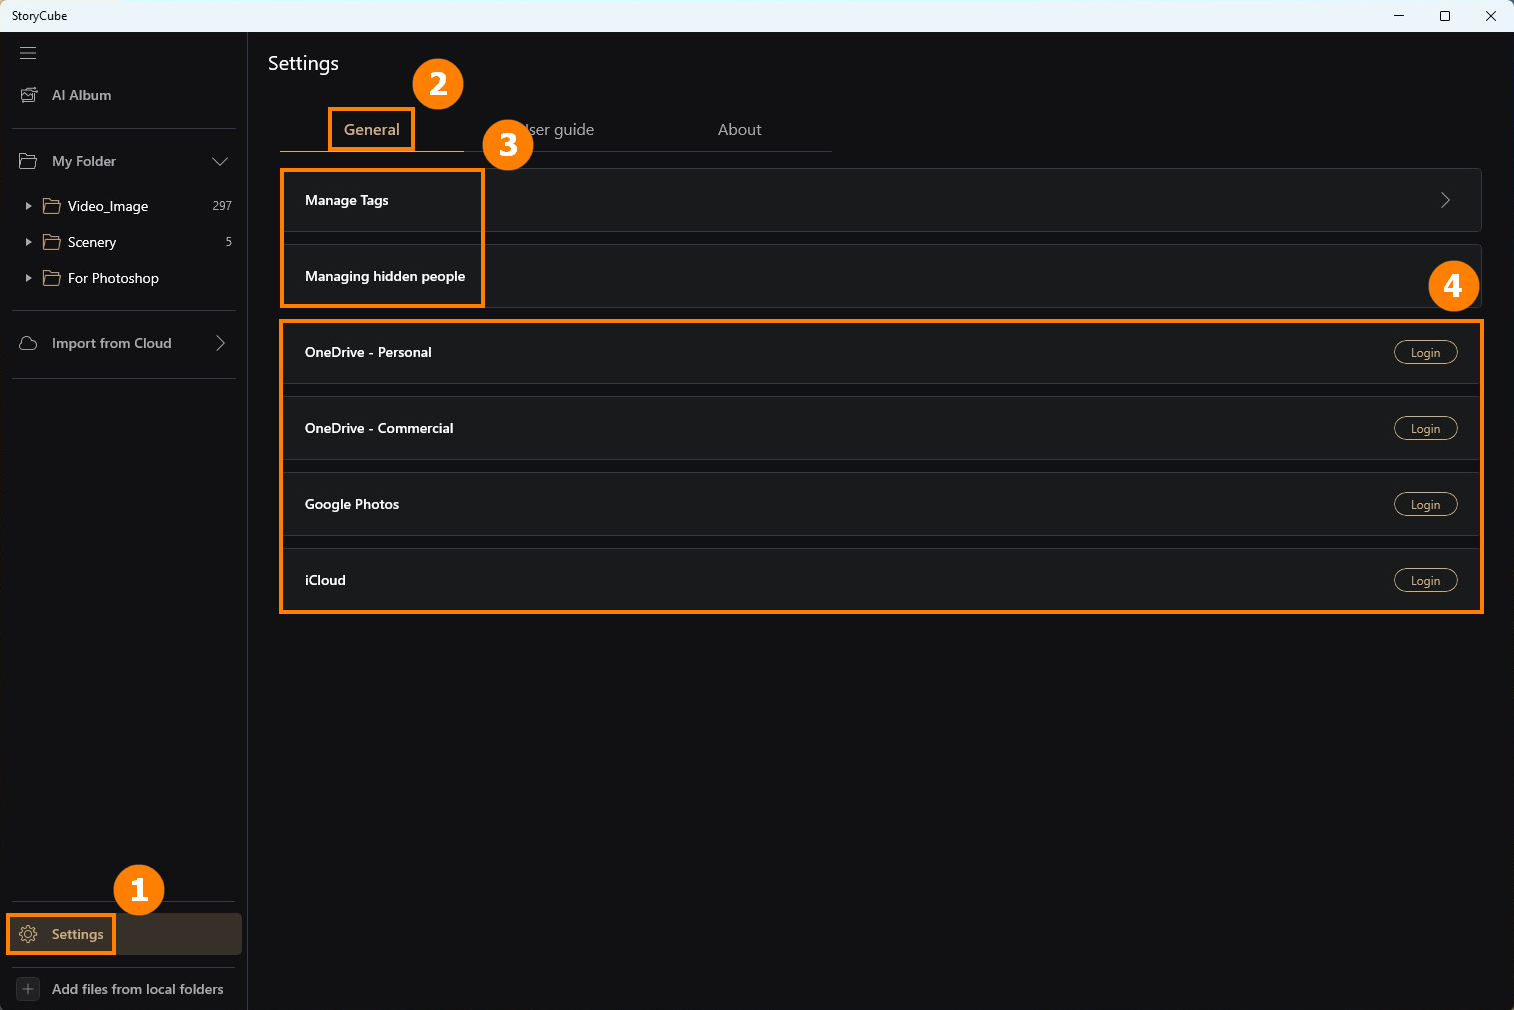
(1) Click ①[Setting], click ②[General], in ③[Manage Tags & Hidden People], unhide People, and in ④[Cloud Drive] you can log in or manage logged-in accounts.
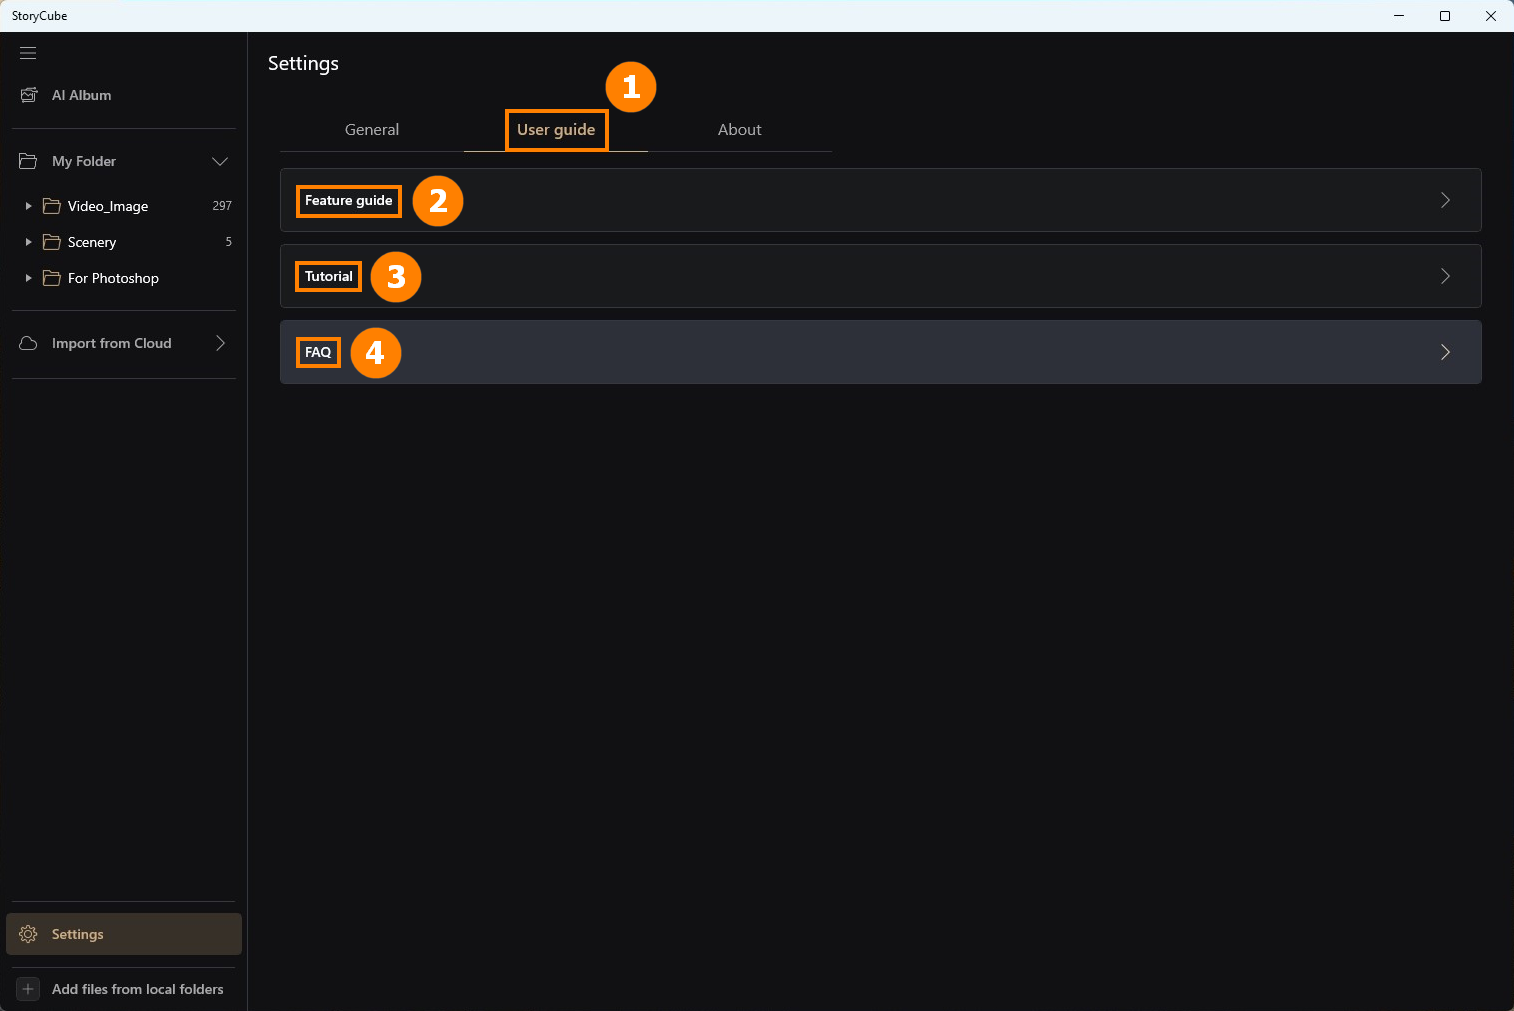
(2) Click ①[User guide], click ②[Feature guide] to read the introduction of StoryCube's built-in functions, click ③[Tutorial] to open the StoryCube tutorial in the browser, and click ④[FAQ] to open this article in the browser.
(3) Click ①[About] to view the current ②[Version].

13. How to Update and Uninstall StoryCube
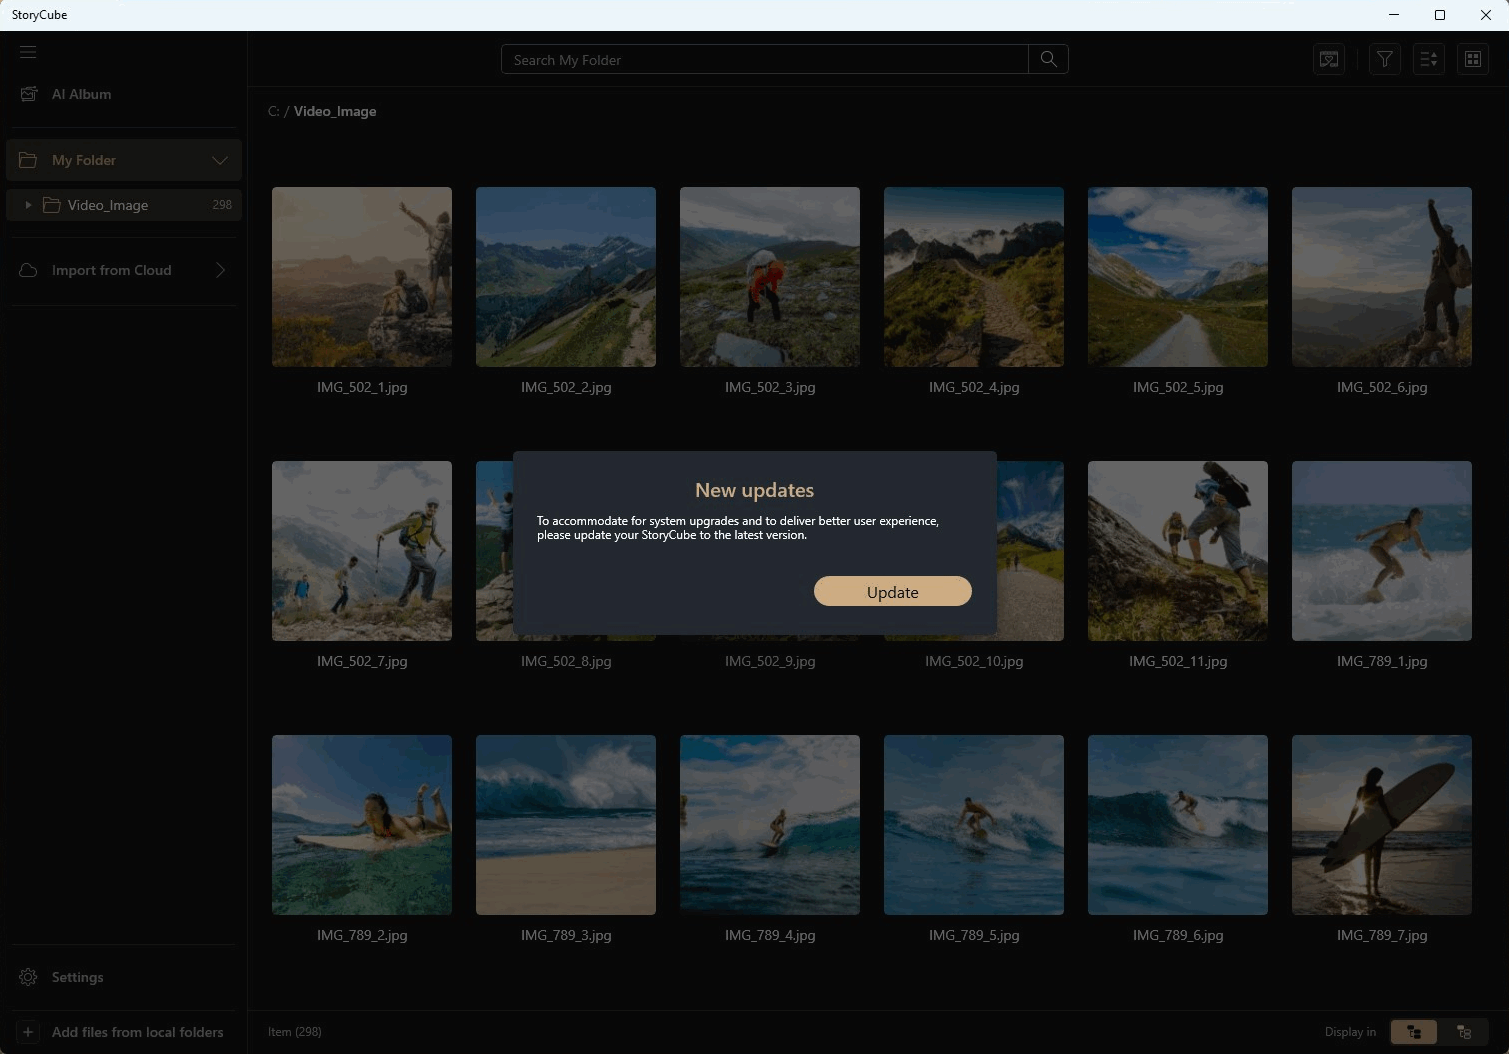
(1) When you are connected to the Internet and there is an update in StoryCube, StoryCube will automatically prompt you to update, please click [Update] and wait patiently for the update to complete.
(2) Uninstall StoryCube: If you want to remove this application, click: [Windows 11/10] How to uninstall Apps, Windows installed updates, Drivers | Official Support | ASUS Global
