[ExpertWiFi] How to use the QIS (Quick Internet Setup) to set up ExpertWiFi router? (Web GUI)
Before starting the setup, please make sure to confirm your external network connection method (e.g., PPPoE, etc.). If you are not sure about your network connection method, please contact your Internet Service Provider (ISP).
This article describes how to set up ASUS ExpertWiFi router to connect to the internet using a browser (Web GUI).
The device is wireless connect to the ExpertWiFi router, please refer here.
The device is wired connect to the ExpertWiFi router, please refer here.
If you want to set up the ExpertWiFi router through ASUS ExpertWiFi App, please refer to [ExpertWiFi] How to set up ASUS ExpertWiFi router via ASUS ExpertWiFi App? (QIS, Quick Internet Setup).
Before entering ExpertWiFi Web GUI, please set up ExpertWiFi router first.
Note: Different models have different specifications, please refer to ASUS Download Center to download the product user manual to check the specifications.
- Connect the RJ45 cable provided by your Internet Service Provider (ISP) from the modem to the WAN port of ExpertWiFi router.
- Insert your ExpertWiFi router’s AC adapter to the DC-IN port and plug it to a power outlet.

- After connecting to the power supply, remember to press the Power switch to turn on the ExpertWiFi router.
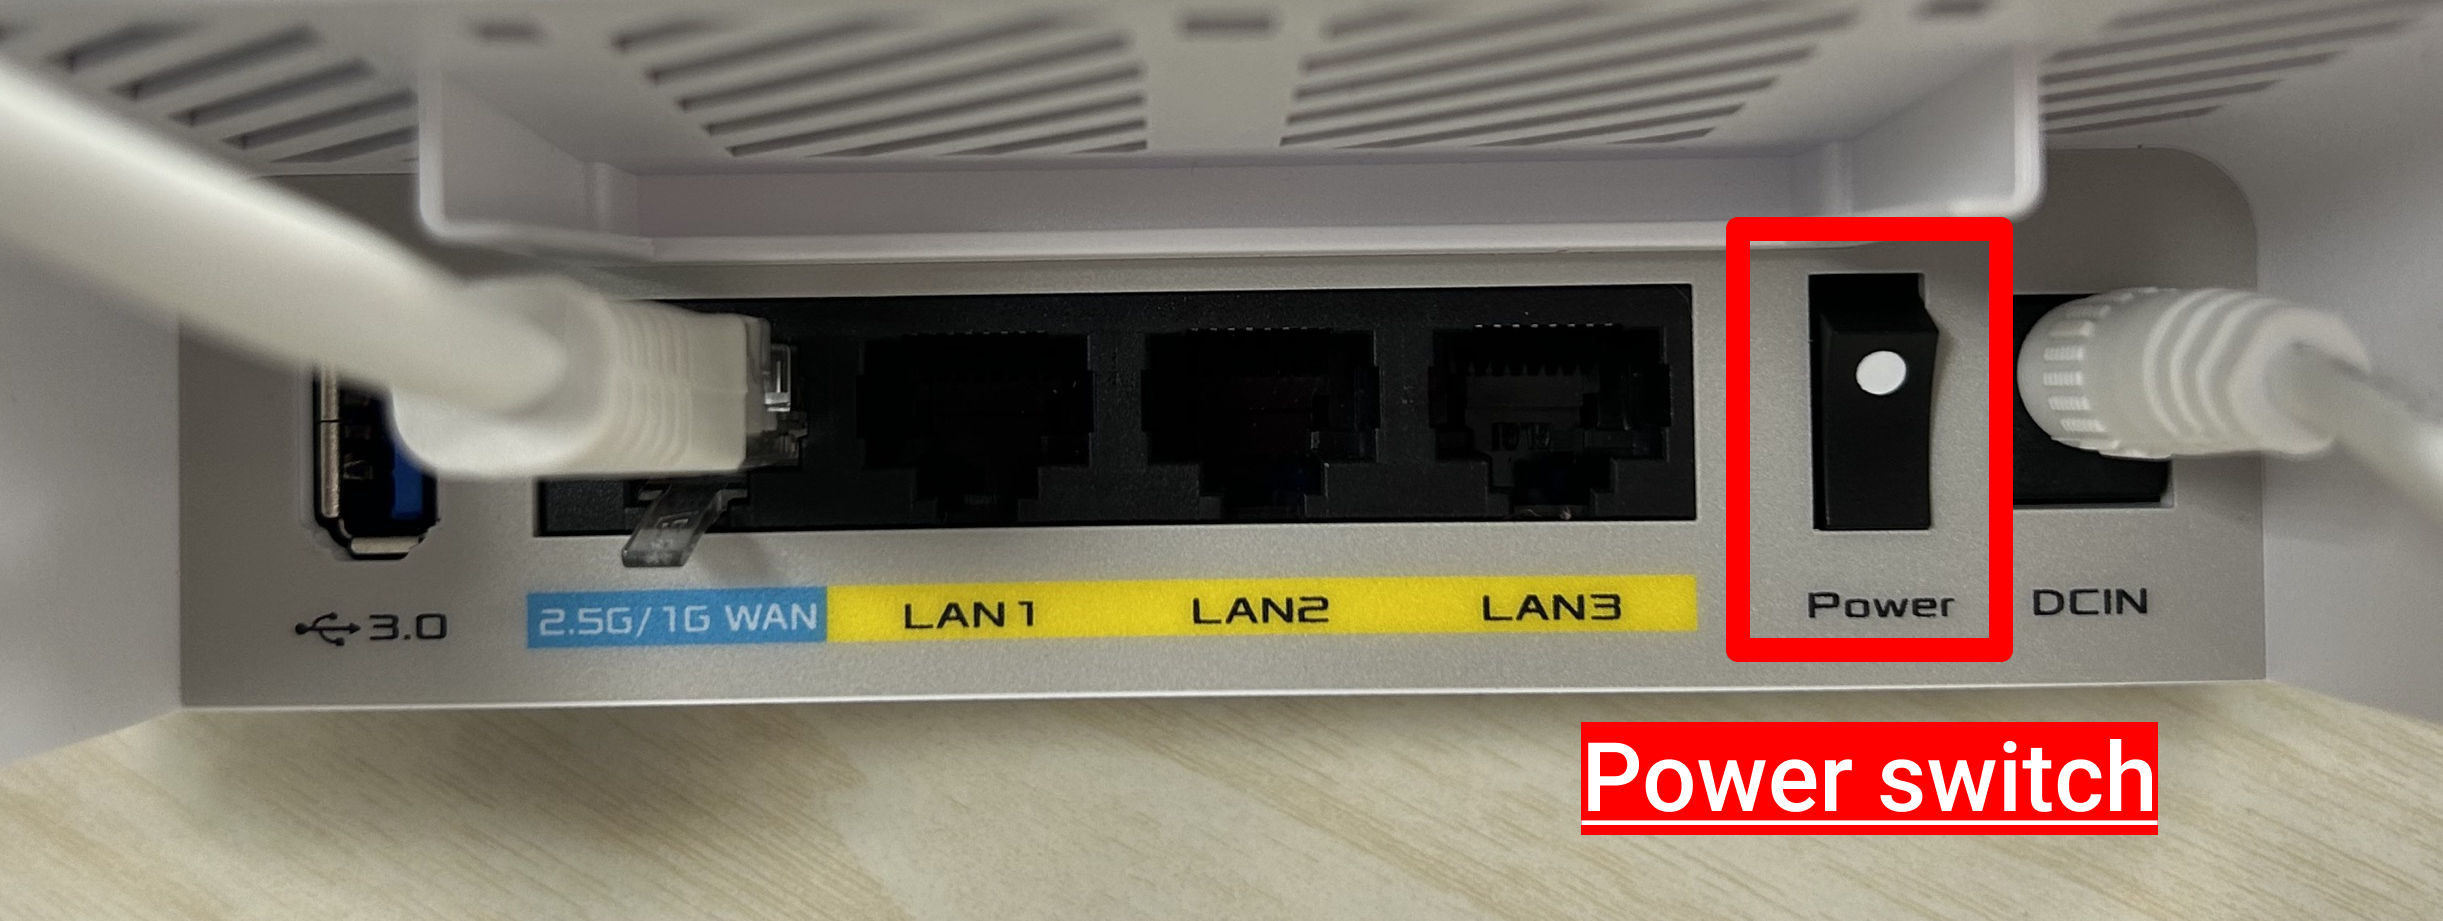
- Make sure the power LED indicator on the front of the ExpertWiFi router is on. (Please check the user manual to confirm the LED light instructions for the ExpertWiFi router.)

- Connect to ExpertWiFi router's default network name (SSID): ASUS_XX_model
Default network name (SSID) shown on the product label on the bottom of the ExpertWiFi router.
Note: The location of labels for different models will vary.

After finishing the above steps, jump directly to ExpertWiFi setting page (Web GUI).
Before entering ExpertWiFi Web GUI, please set up ExpertWiFi router first.
- Connect the RJ45 cable provided by your Internet Service Provider (ISP) from the modem to the to WAN port of ExpertWiFi router.
- Connect LAN port and computer with another network RJ45 cable.
- Insert your wireless router’s AC adapter to the DC-IN port and plug it to a power outlet.

- After connecting to the power supply, remember to press the Power switch to turn on the ExpertWiFi router.

- Make sure the power LED indicator on the front of the ExpertWiFi router is on. (Please check the user manual to confirm the LED light instructions for the ExpertWiFi router.)

Before entering ExpertWiFi Web GUI, please set up ExpertWiFi router first. For how to set up, please refer to here.
Step 1. Connect your computer to the ExpertWiFi router via wired or WiFi connection and enter your ExpertWiFi router LAN IP or ExpertWiFi router URL http://expertwifi.net to the WEB GUI.

Step 2. When you login to the Web GUI for the first time, you will be directed to the Quick Internet Setup (QIS) page automatically.
Click [Create A New Network].
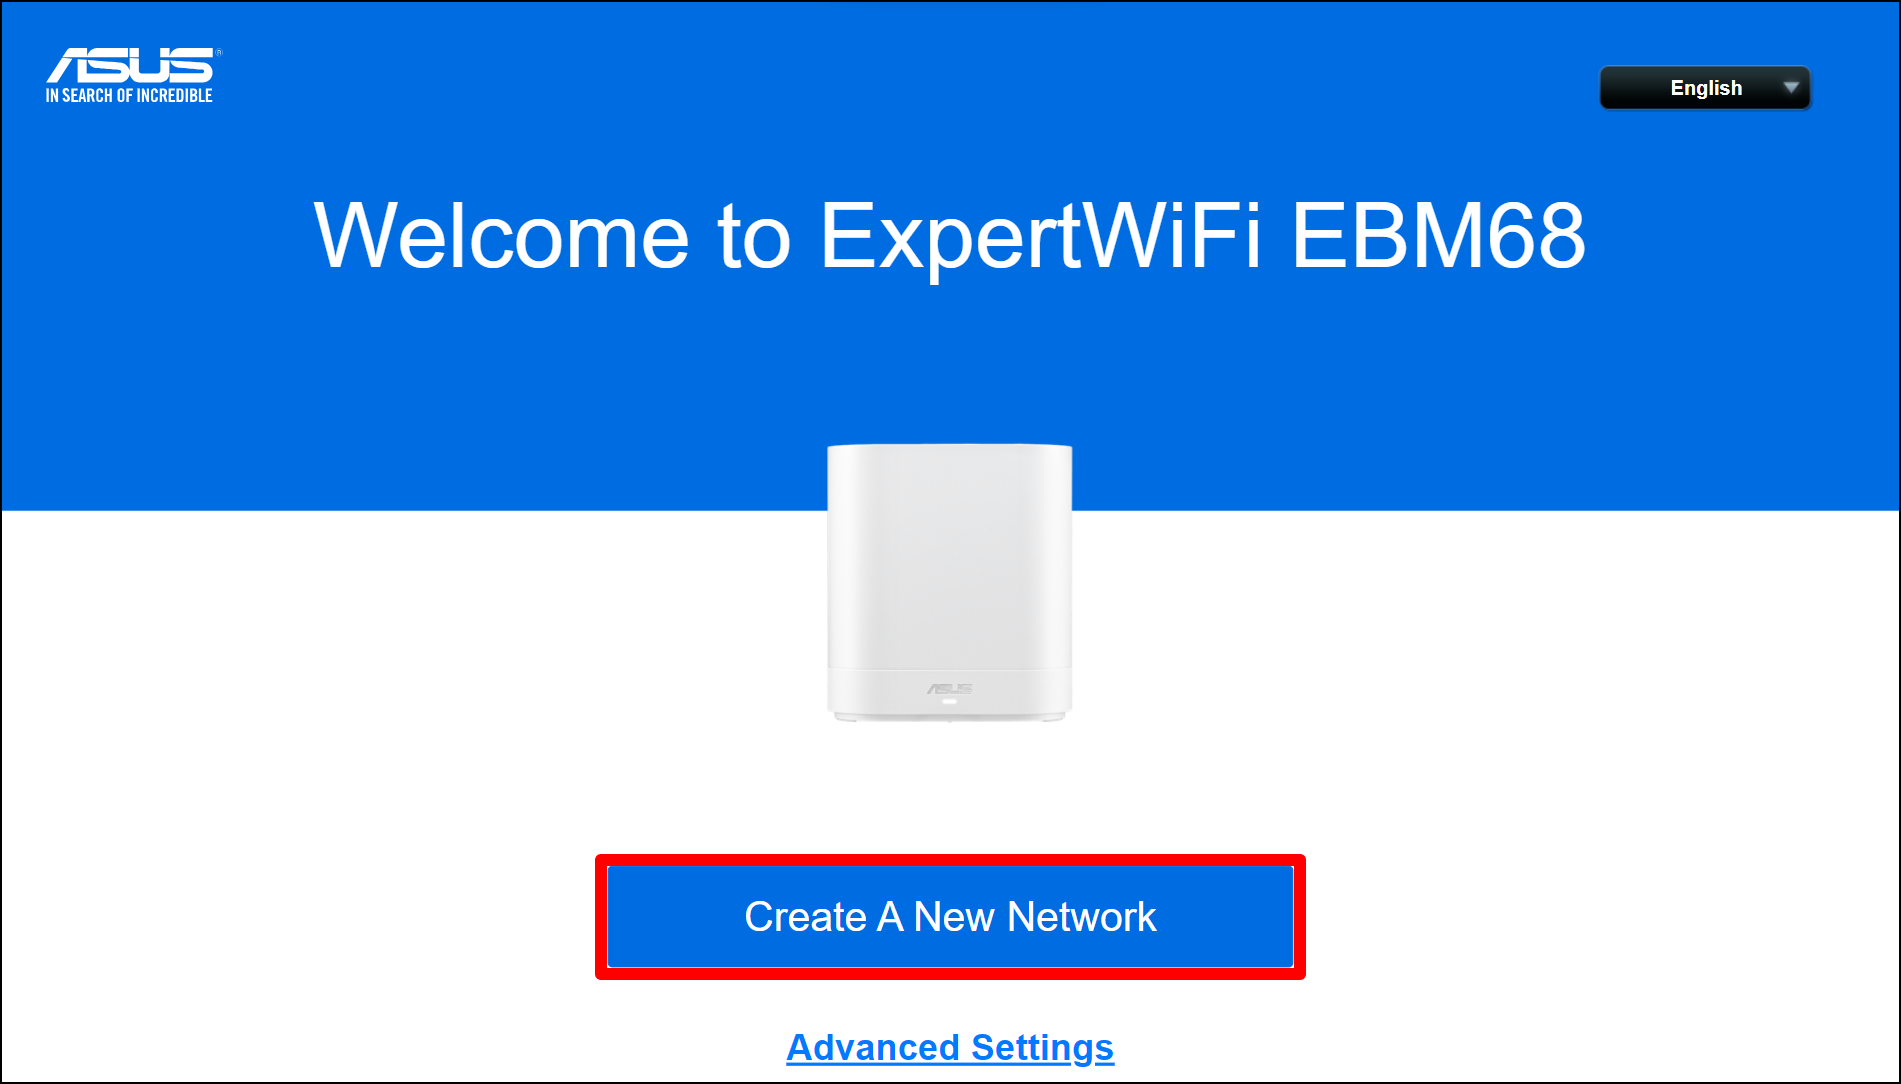
Step 3. Set up the login username and password for your ExpertWiFi router and click [Next].
Note: Login username and password are required every time when you access to ExpertWiFi router configuration page. If you forget the login username and password, you may need to reset the ExpertWiFi router to default setting and setup from scratch to reset the login username and password.

Step 4. The Internet connection type will be automatically detected. You can also choose [Manual Setting] to skip the auto detection.
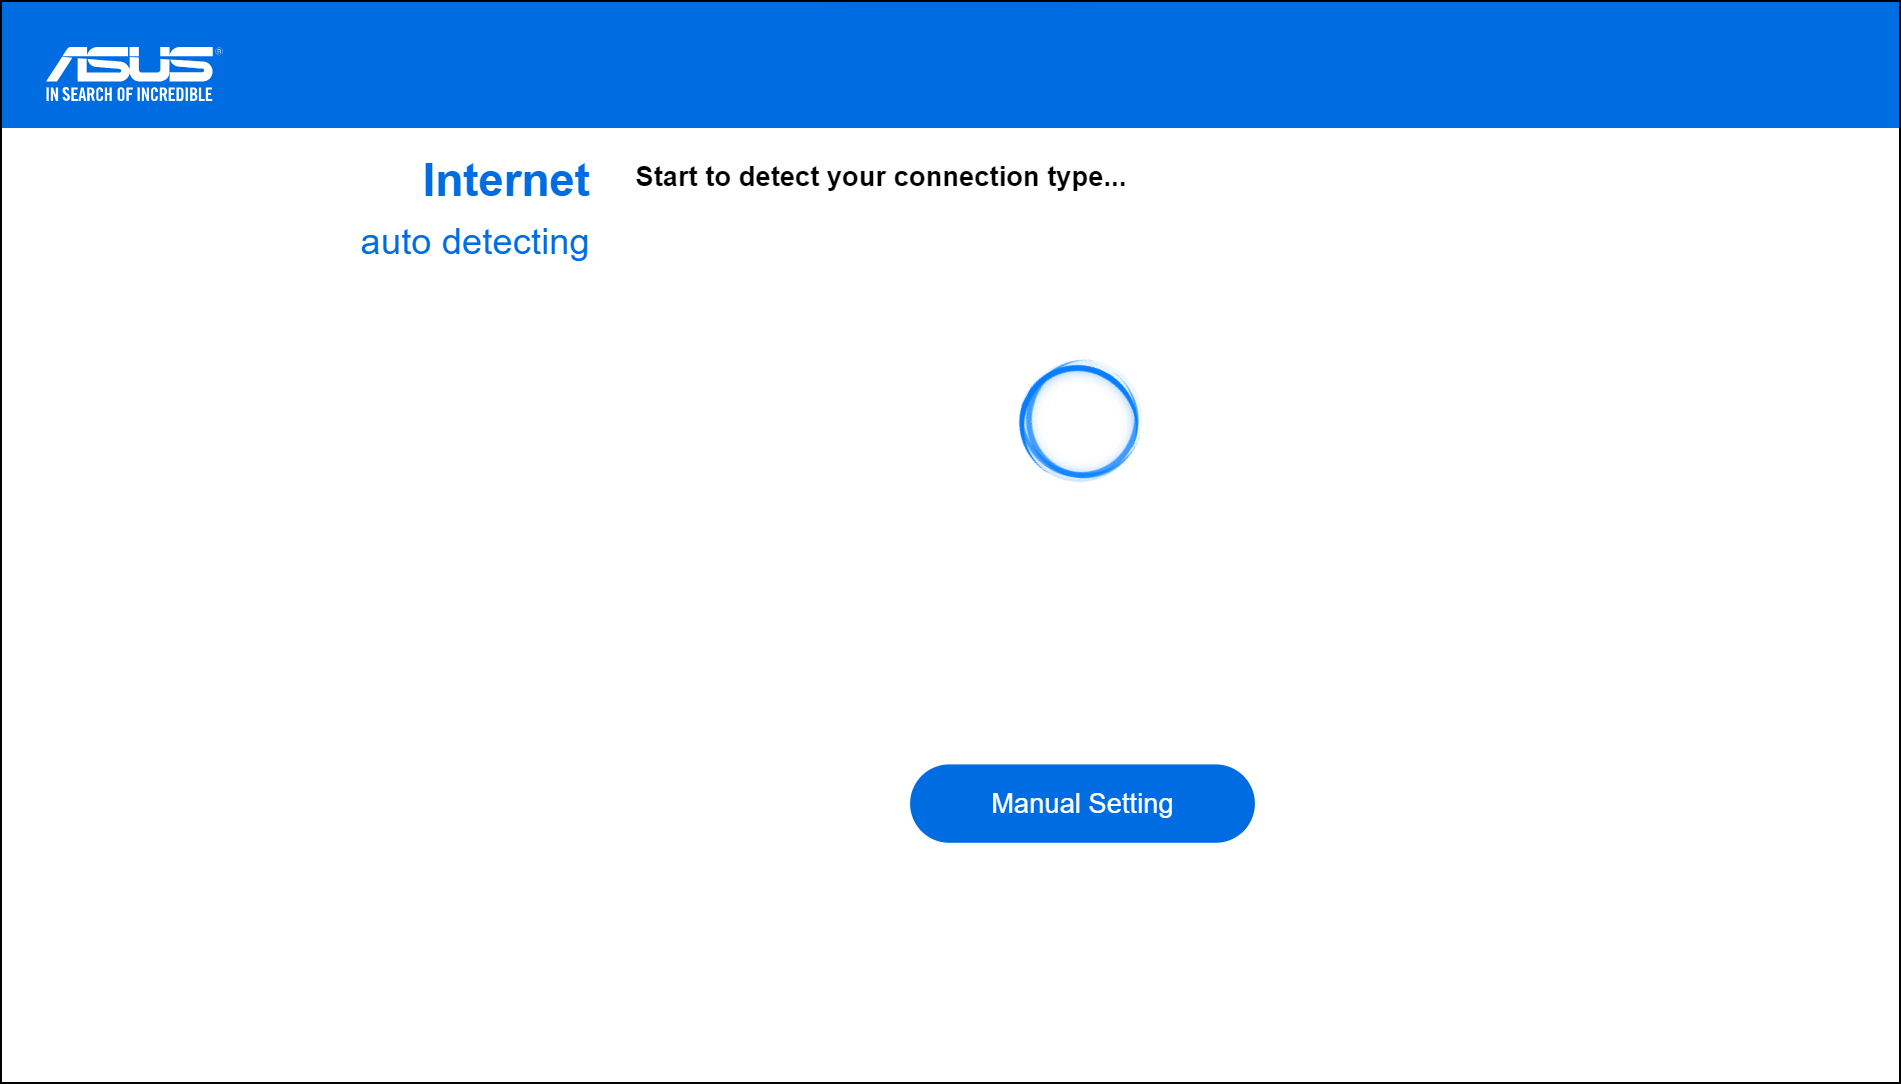
Step 5. Follow the automatic detection results as the following:
There are three types of connections.
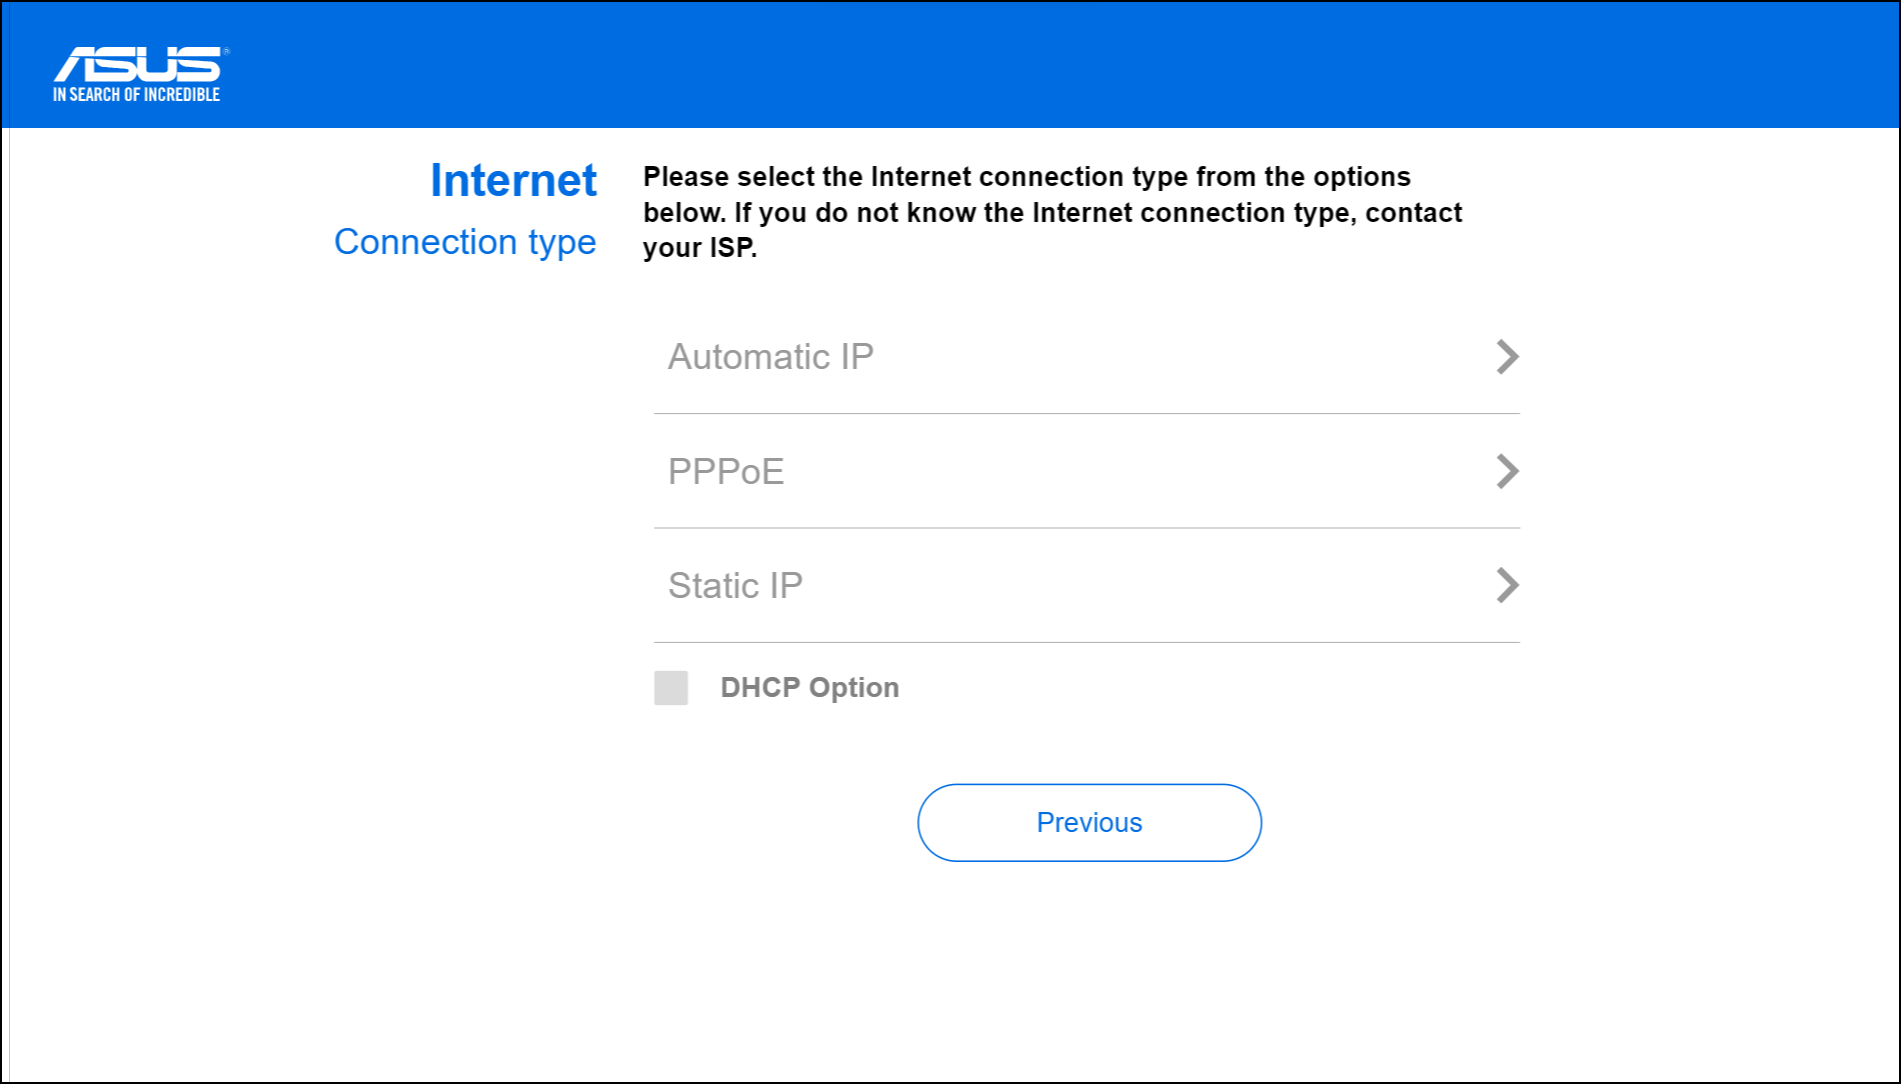
(1) Automatic IP(DHCP): No information required to fill in here, jump directly to Step 6.
(2) PPPoE: Enter the PPPoE Username and Password provided by your Internet Service Provider (ISP).
For example: (Varies from every country / region)
Country: Taiwan
WAN connection type: PPPoE
User Name: 12345678@hinet.net
Note: You need to confirm the above related information with your Internet Service Provider (ISP).
And then go to Step 6.
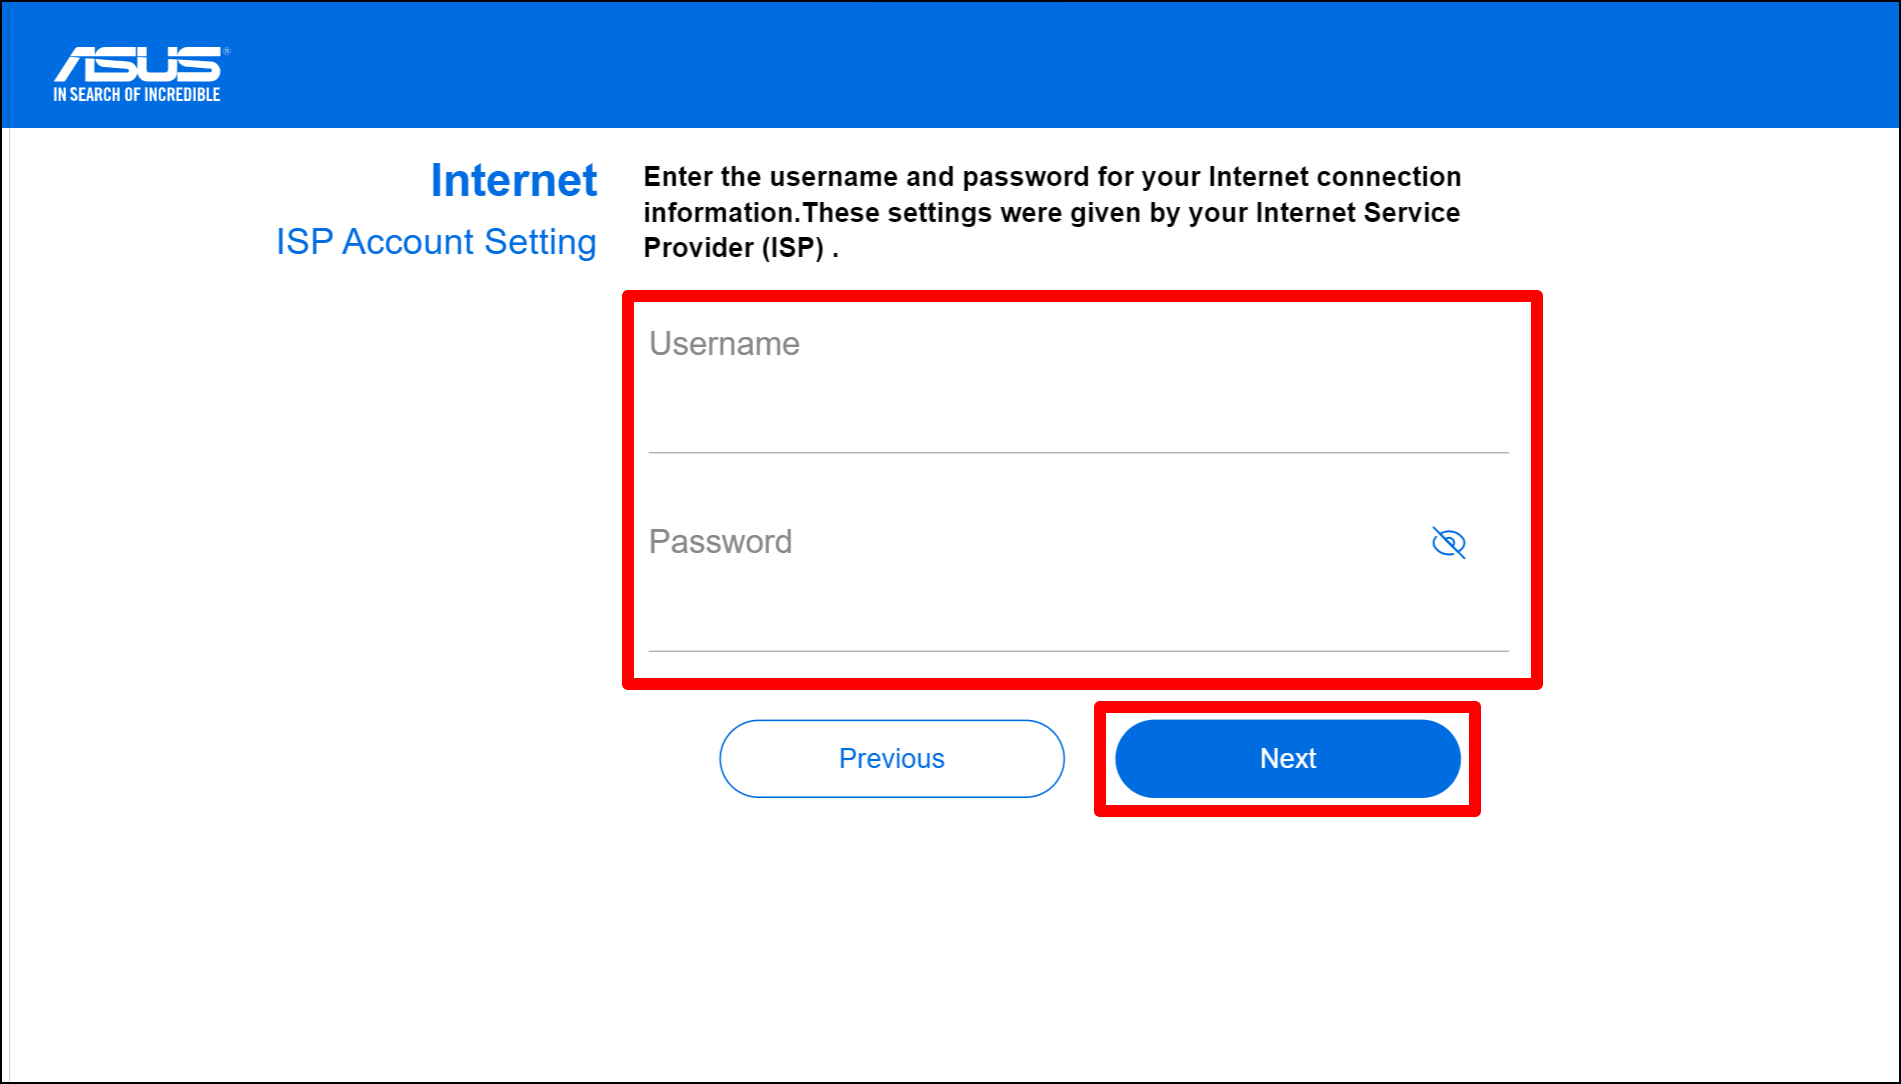
(3) Static IP: Please enter the following information.
- IP Address
- Subnet Mask
- Default Gateway
- DNS Server
Note: Please confirm with your Internet Service Provider (ISP) for the following information.
And then go to Step 6.

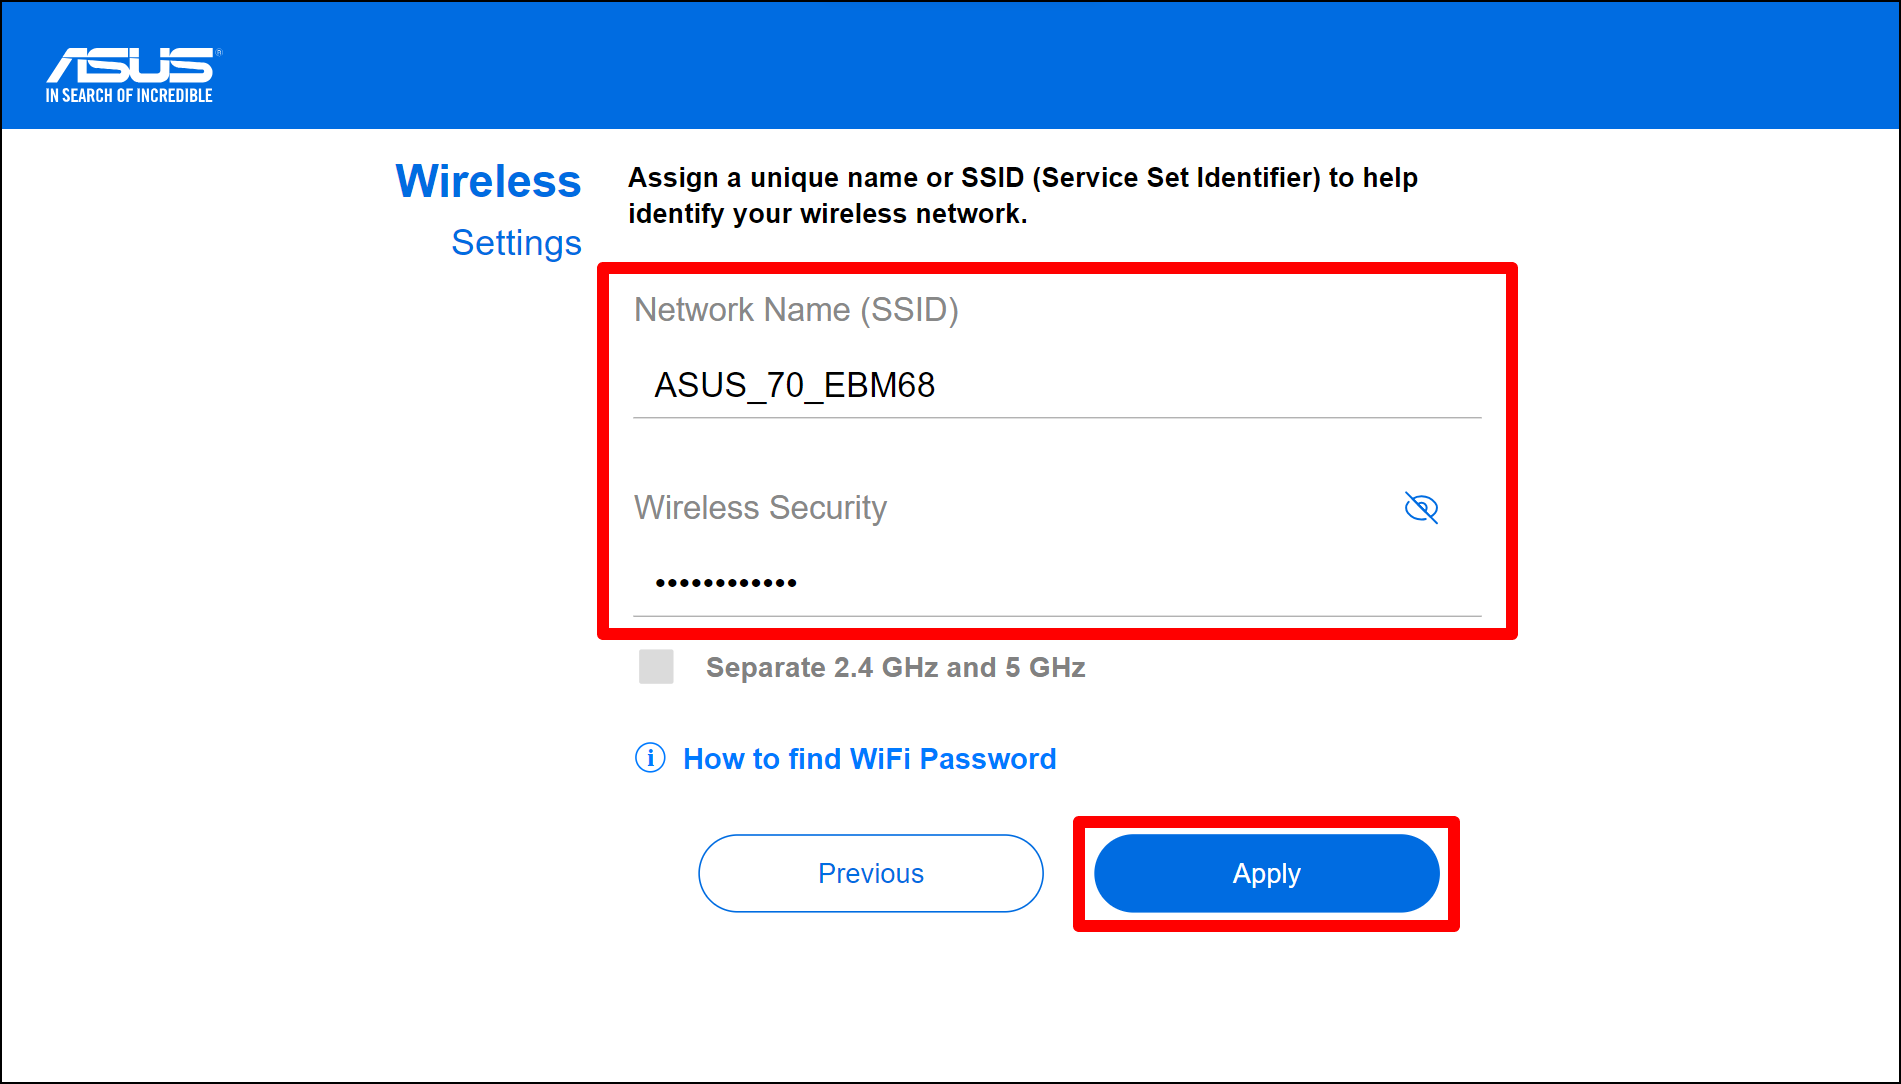
If you want to set up 2.4GHz and 5GHz separately, tick the checkbox for the setup of each band.
Note: Please enter at least 8 characters for the password and use the combination of English letters and numbers for it.
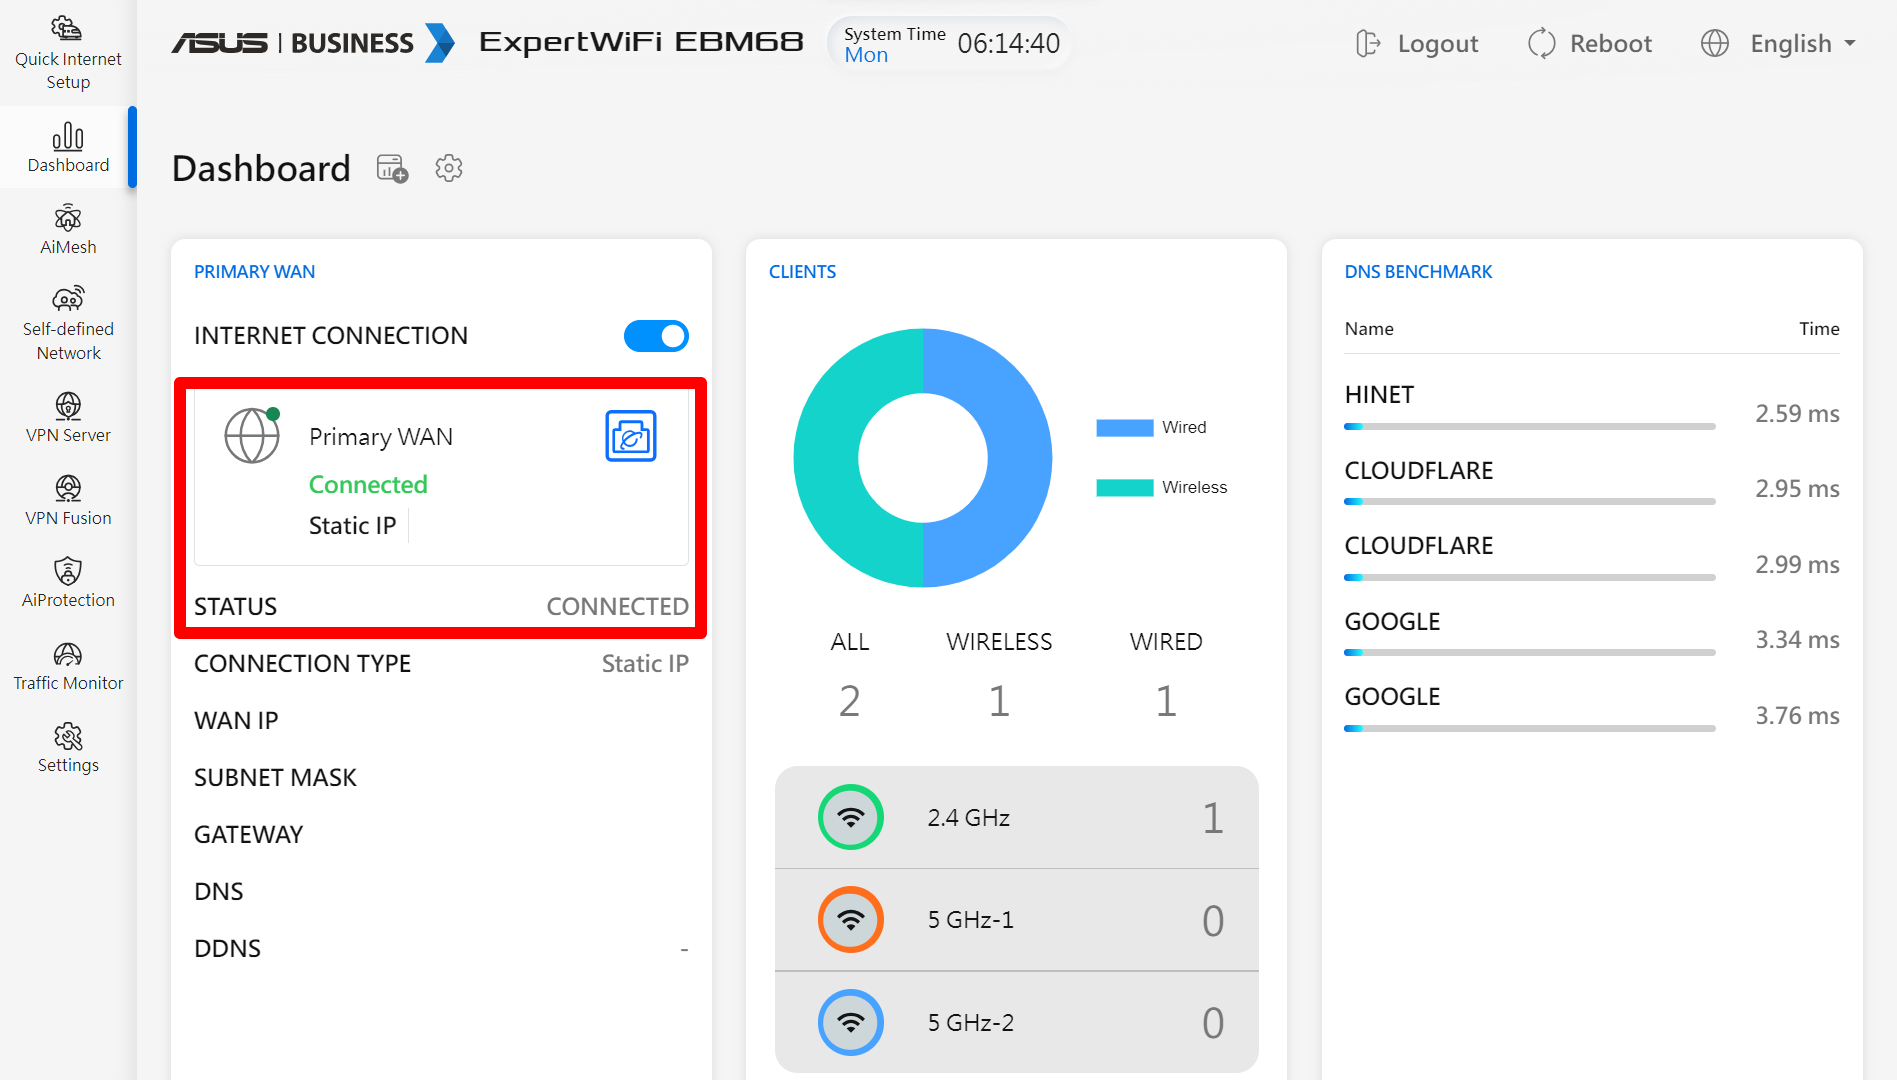
Step 7. You will be directed to ExpertWiFi router management page once you finish QIS process.
From the [Status] section, you can see your ExpertWiFi router is Connected to the Internet successfully.
FAQ
1. What should I do if I don't know the Internet connection type for the ExpertWiFi router setup? (Automatic IP, PPPoE or Static IP)
It is recommended to ask your Internet Service Provider (ISP) to confirm your Internet connection type and required information for Internet setup.
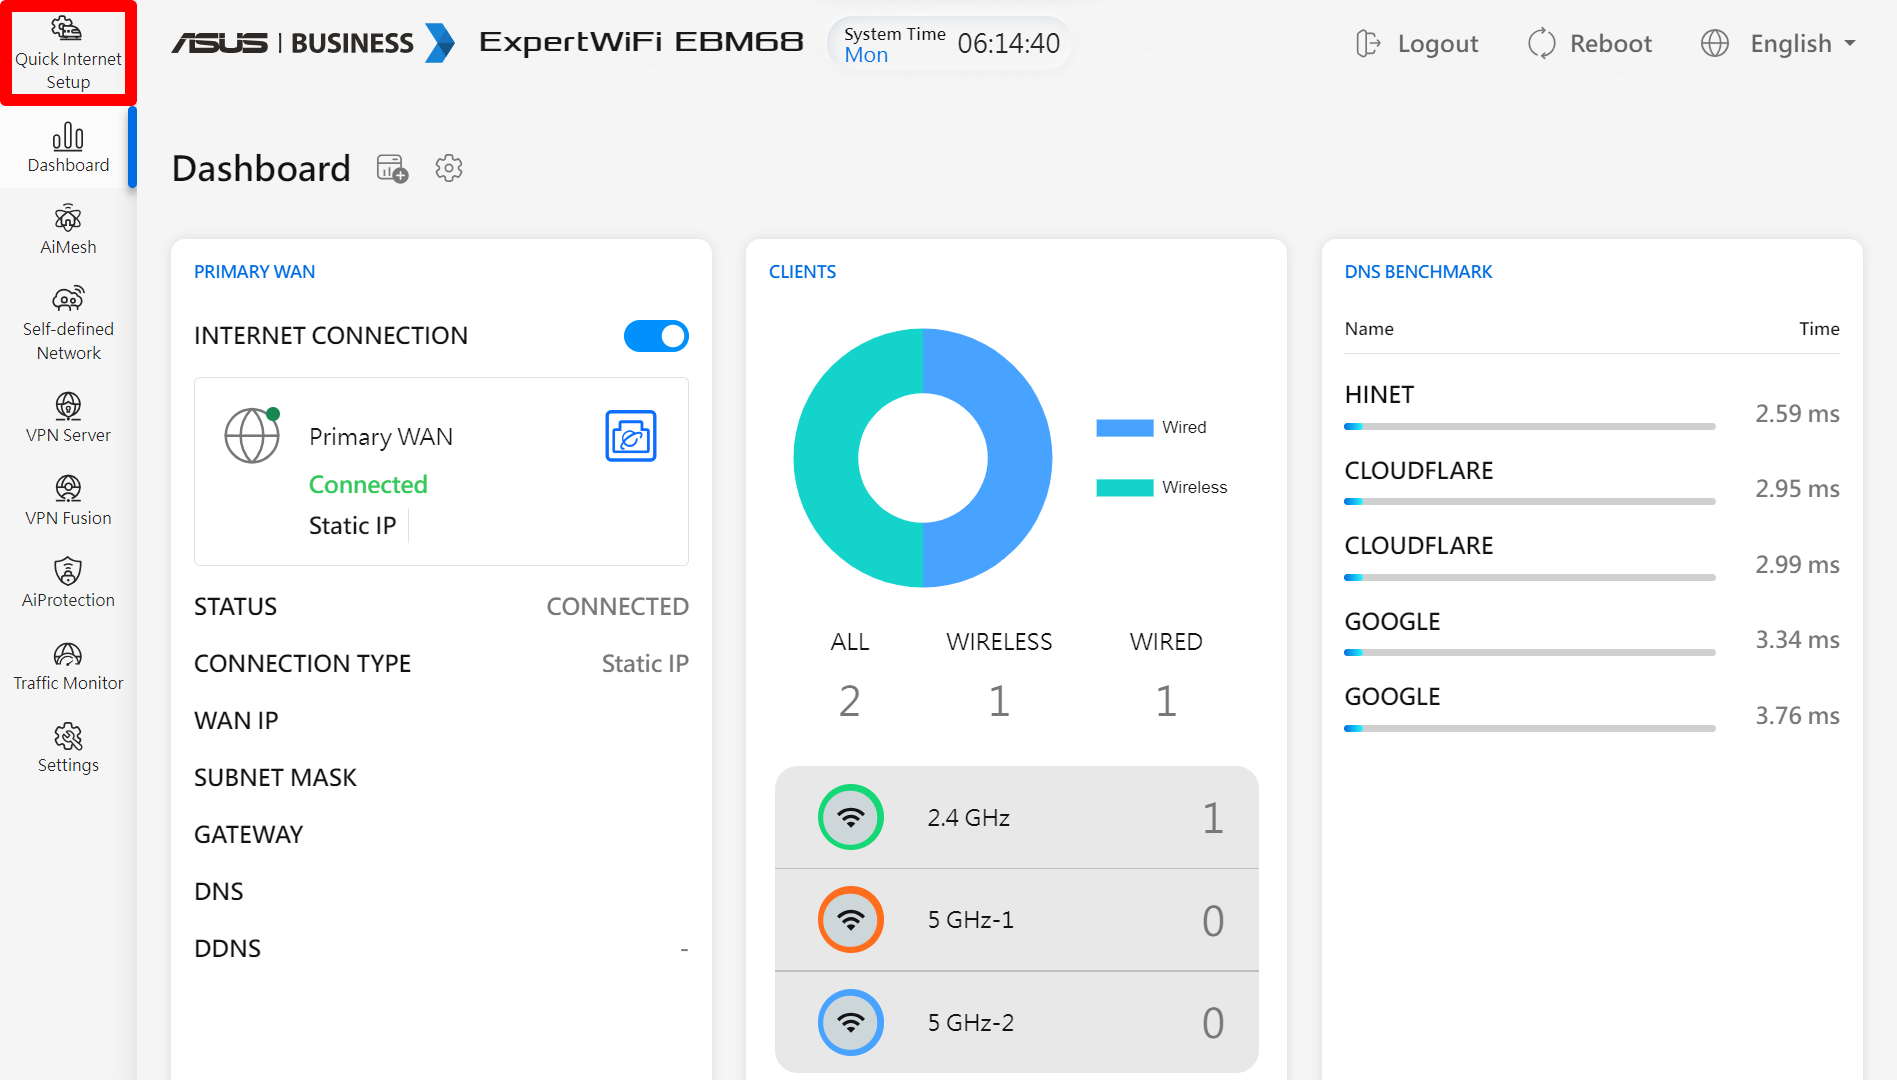
2. Where can I find the Quick Internet Setup (QIS wizard) in Asus ExpertWiFi Web GUI?
If you want to execute QIS again after you finish the QIS setup, you can find the QIS wizard from the upper left in the ExpertWiFi router Web GUI.
3. What should I do if I forget the ExpertWiFi router login name and password?
Please reset your ExpertWiFi router to default setting and set up the ExpertWiFi router again from scratch via QIS wizard. You should be able to reset the login name and password during QIS process.
4. Can I assign the same Wi-Fi SSID and password for both 2.4GHz and 5GHz?
Yes, you can assign the same Wi-Fi SSID and password for 2.4GHz and 5GHz. However, it is recommended that you set up the separate WIFI SSID and password for easy management and for devices to choose which Wi-Fi band to connect.
How to get the (Utility / Firmware)?
You can download the latest drivers, software, firmware and user manuals in the ASUS Download Center.
If you need more information about the ASUS Download Center, please refer to this link.