[Motherboard] AI Noise-Canceling Microphone - Introduction
About AI Noise-Canceling
• AI Noise-Canceling Microphone software is exclusively featured on ASUS motherboards and supports 3.5 mm, USB, or Bluetooth audio devices. Through the massive deep-learning database, the utility leverages to preserve the sound of your voice while eliminating distracting keyboard clatter, mouse clicks, and other forms of environmental noise. It only occupies a slight load on the CPU, and ensures the least impact on gaming performance.
• Multiple port connection supported :
It supports all types of audio device connected, e.g, 3.5mm audio jack, USB, or Bluetooth.
• AI Noise-Canceling Microphone: Setup Guide
2. Test AI Noise-Canceling Microphone
3. Configuration of Common Apps
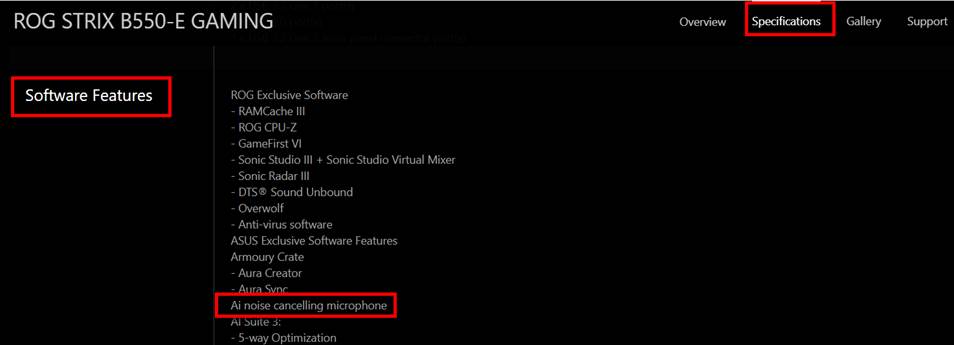
How to support AI Noise-Canceling Microphone?
You can check the product specifications on the ASUS official website.
(Ex: ROG STRIX B550-E GAMING)
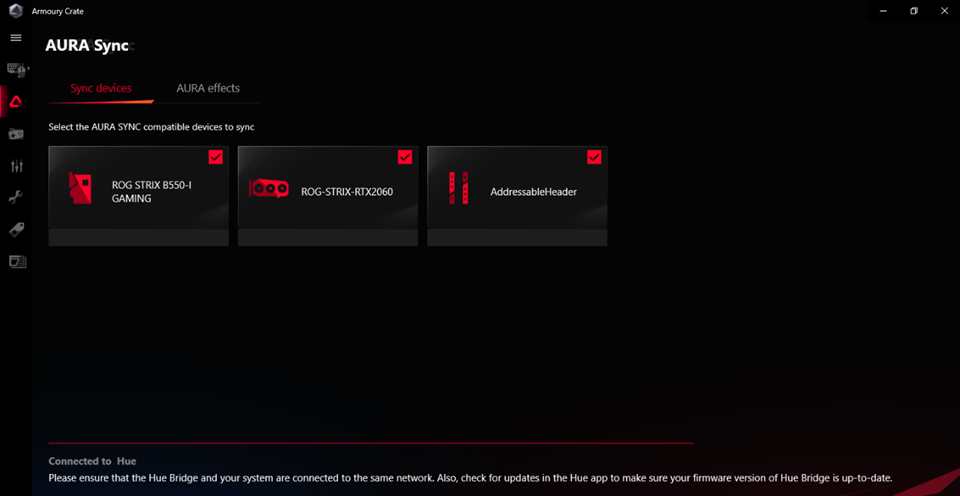
Step 1. Open and Enter Armoury Crate
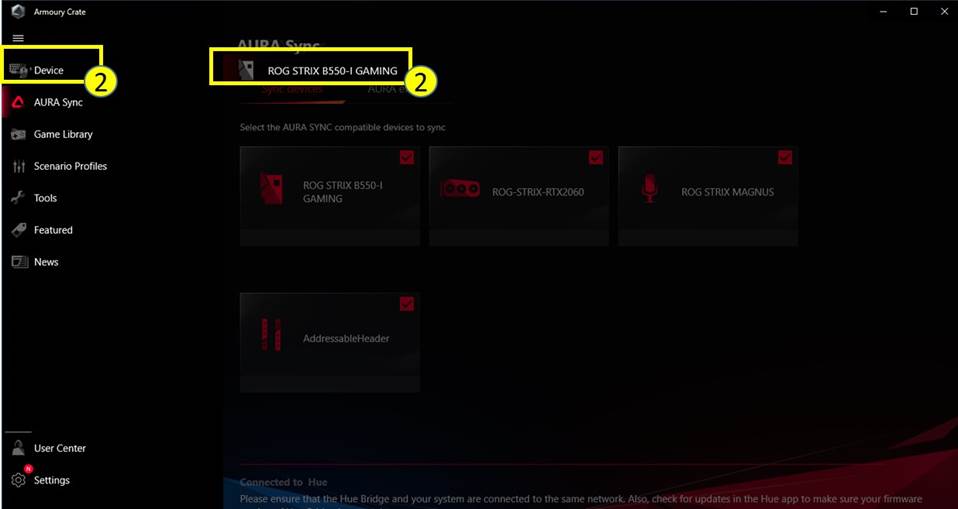
Step 2. Click “Device” and choose your motherboard.
Step 3. Click “Audio”
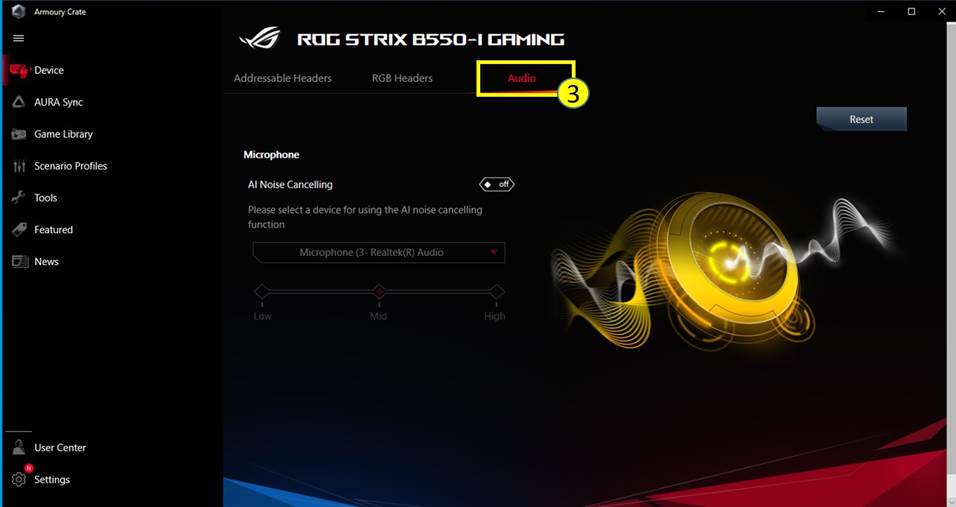
Step 4. Turn on AI Noise-Canceling after plugging in the audio device
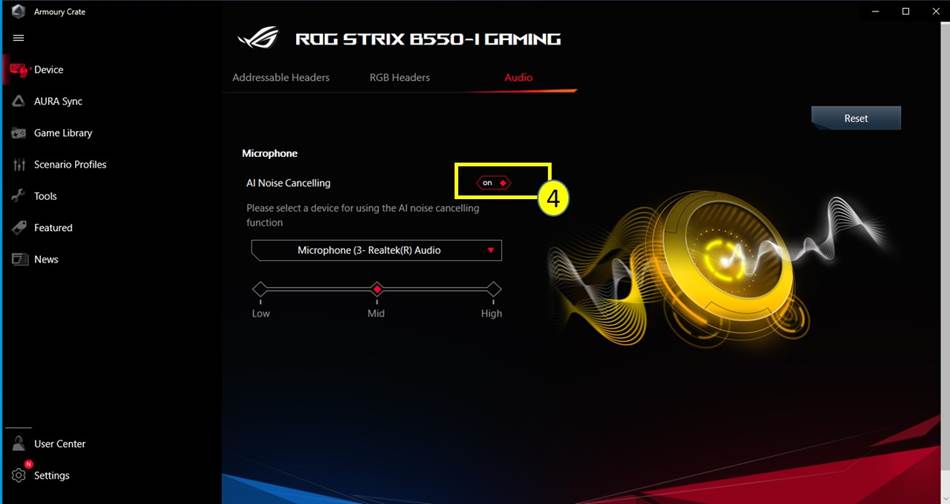
Step 5. Select the device to which you want to apply AI Noise-Canceling Microphone

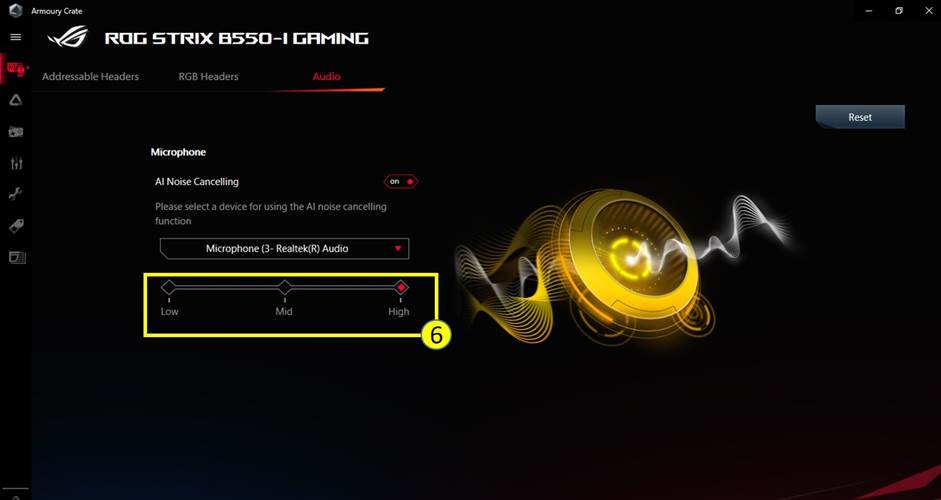
Step 6. Adjust the AI Noise-Canceling level, depending on the environment you are in.
* For the suggested Noise Type, please refer to the table below.
|
Level |
User scenario |
Noise Type |
|
Low level |
Slightly disturbed by the background noise during the call |
e.g. Keyboard typing, Mouse clicking, Fan sound, Talking sound in the office etc. |
|
Middle level |
Interference caused by background noise during the call. User needs to repeat for clear conversation |
e.g. Sound of kids playing , Chit-chatting, Background noise in a cafe |
|
High level |
Can't hear your voice during the call. The noise has seriously interfered the call. |
e.g. Construction works, House renovation, Vacuuming floor, etc. |
Step 7. Continue to set up for the communication or Live streaming apps. For more details, please refer to Common App Configuration.
Note:
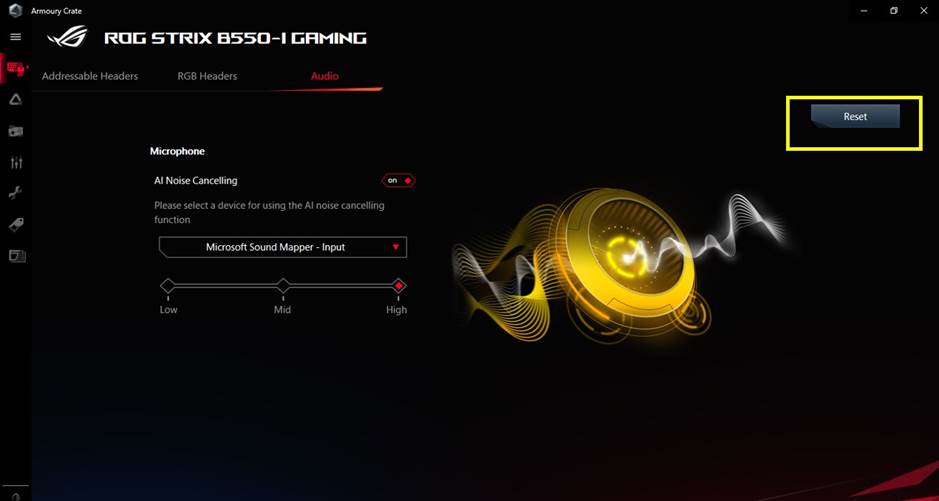
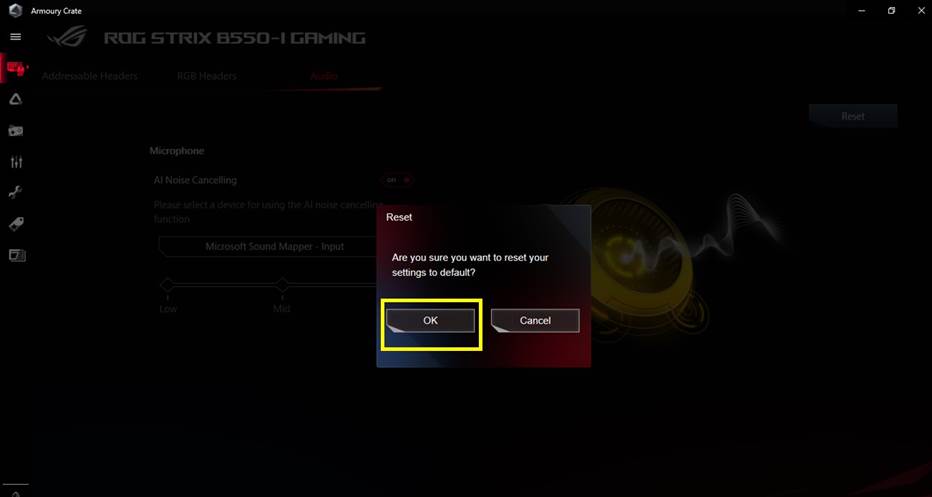
1. Click “Reset” when you re-plug and change audio device, or when your device is not detected.
2. Click “OK” to continue
2._Test AI Noise-Canceling Microphone
To test whether your background noise is removed with this function turned on, we recommend to confirm by the following steps:
1. Open the audio recording app when the AI Noise-Canceling Microphone is disabled. Take Window’s Voice Recorder as example, and record your voice with your microphone. Click on the ”Record” icon to start the recording.
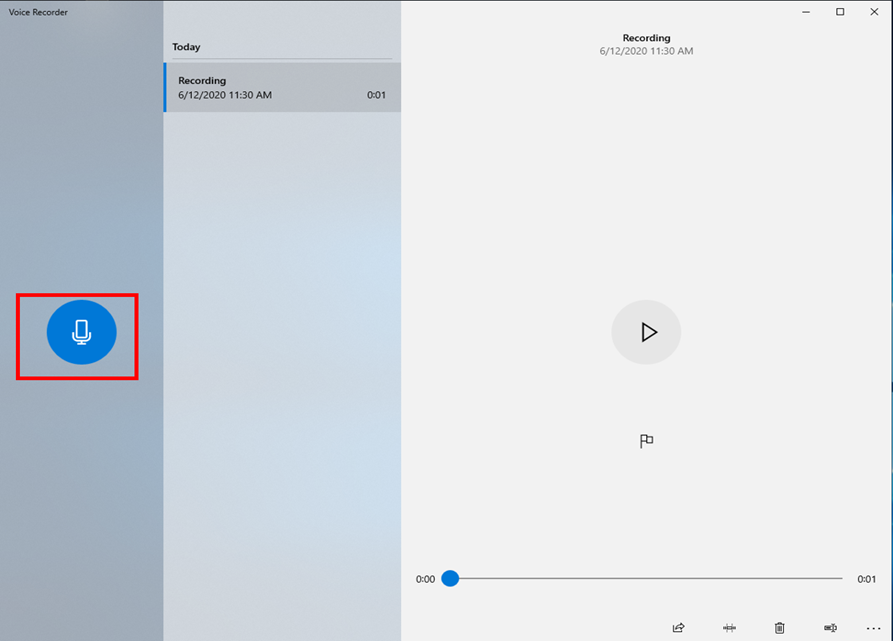
2. Setup AI Noise-Canceling Microphone in Armoury Crate (Please refer to the Instruction above).
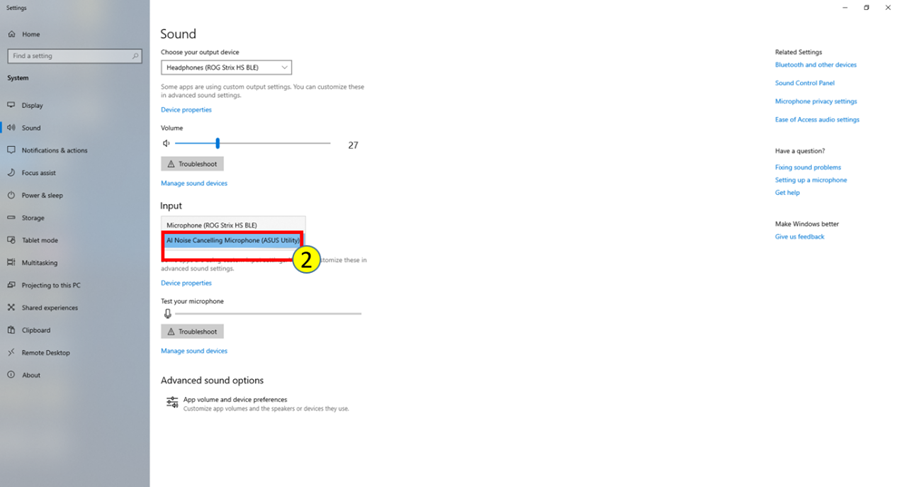
3. Setup AI Noise-Canceling Microphone (ASUS Utility) in the Sound Settings of Windows.(Please refer to Instruction below)
Step 1. Click “Open Sound Settings”
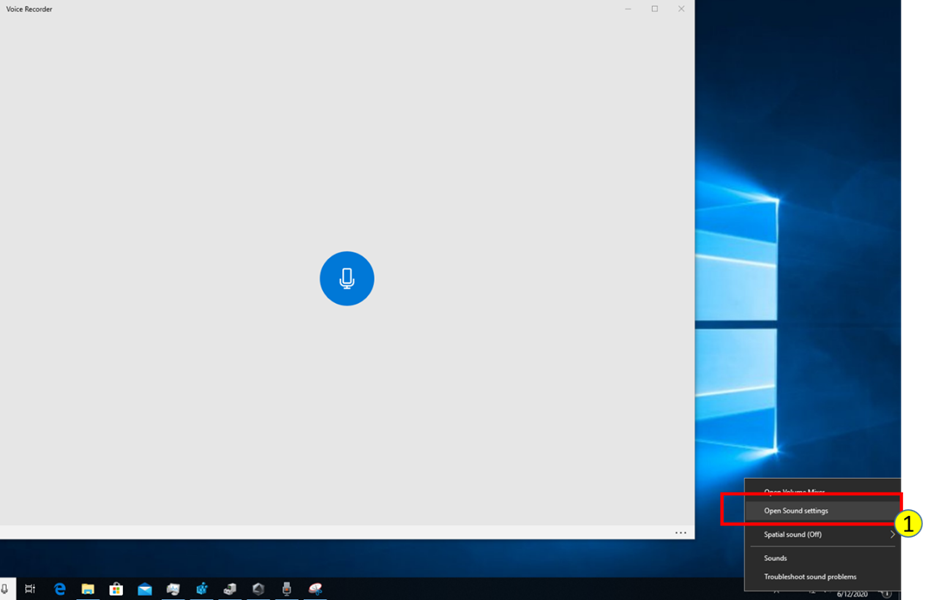
Step 2. Select “AI Noise Canceling (ASUS Utility) in Input
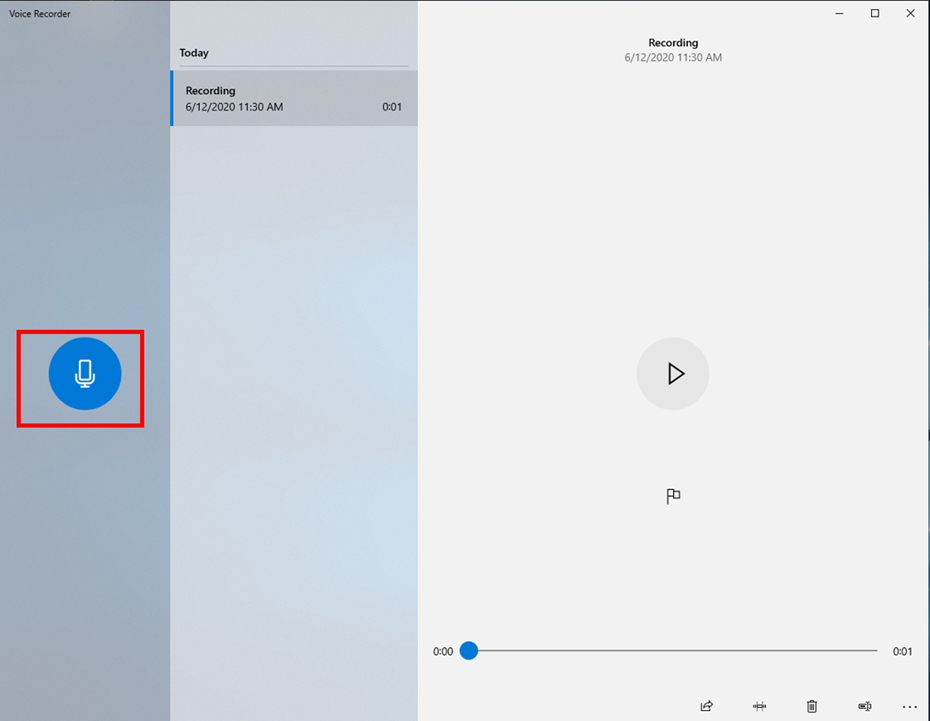
4. Open the audio recording app again and record your voice with your microphone. You can compare the difference to check whether AI Noise-Canceling Microphone is enabled.
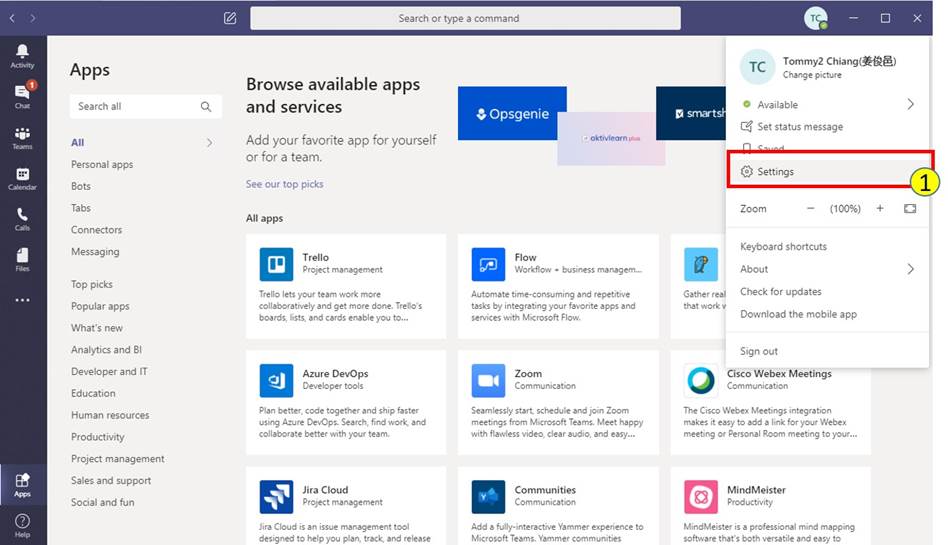
Step 1. Click “Settings”
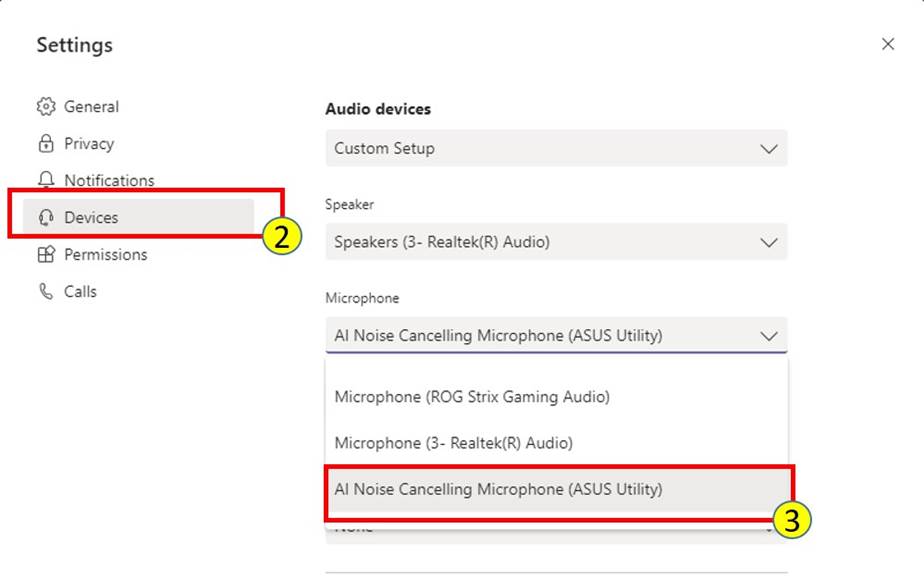
Step 2. Click “Devices”
Step 3. Select “AI Noise-Canceling Microphone (ASUS Utility)” in the Microphone list
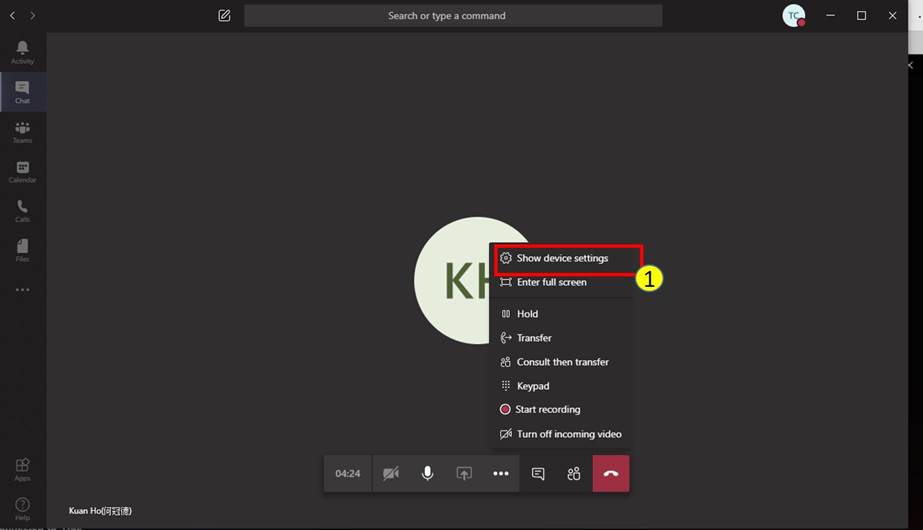
When using Teams, you can also set up during the call
Step 1. Please click “Show device settings”
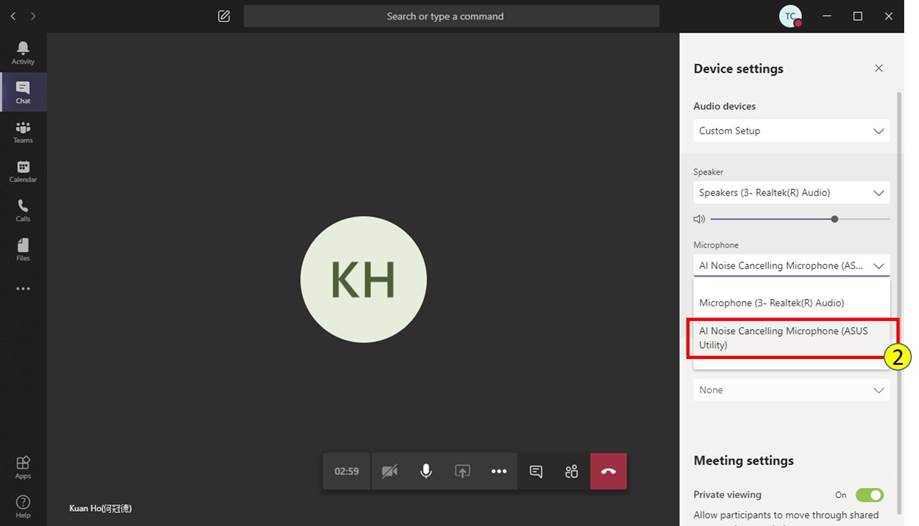
Step 2. Select “AI Noise-Canceling Microphone (ASUS Utility)” in Microphone list
Step 1. Click “Settings”
Step 2. Click “Voice & Video”
Step 3. Select “AI Noise-Canceling Microphone (ASUS Utility)” in INPUT DEVICE list
Step 4. For the best quality, make sure that you disable any noise canceling/removal effects in Discord.
Step 1. Click “Settings”
Step 2. Click “Audio”
Step 3. Select “ AI Noise-Canceling Microphone( ASUS Utility)” in the specific source of Mic/Auxiliary(1-4).
*It can only support applying AI Noise-Canceling Microphone function to one Mic/Auxiliary source.
Step 1. Click “Privacy and security” in Setting
Step 2. Click “Microphone”
Step 3. Choose “AI Noise-Canceling Microphone (ASUS Utility)”
Step 1. Click Setting
Step 2. Click “Audio”
Step 3. Choose “AI Noise-Canceling Microphone (ASUS Utility)” in the specific source of Mic/Auxiliary(1-3).
*It can only support applying AI Noise-Canceling Microphone function to one Mic/Auxiliary source.
Step 1. Click “ Settings” icon
Step 2. Choose “AI Noise-Canceling Microphone (ASUS Utility)
Step 1. Click “Settings” icon
Step 2. Choose “AI Noise-Canceling Microphone (ASUS Utility)”
Step 3. For the best quality, make sure that you disable the Noise Suppressor and Noise Gate.
Step 1. Click “Settings” icon
Step 2. Click “Audio” tab
Step 3. Choose “AI Noise-Canceling Microphone (ASUS Utility)” in Microphone
Step 1. Click "Settings"
Step 2. Click “Audio & Video”
Step 3. Choose “AI Noise-Canceling Microphone (ASUS Utility)” in Microphone