[NUC] BIOS Update and Recovery Instructions for NUCs with the Aptio® V UEFI Firmware Core
| Note | The NUCs that shipped in 2018 and earlier use the Visual BIOS core, which uses a different method of updating BIOS. For those models, see BIOS Update Instructions for NUC with Visual BIOS. |
| Note |
BIOS Update Instructions for NUC with Aptio® V UEFI Firmware Core
|
Click or the topic for details:
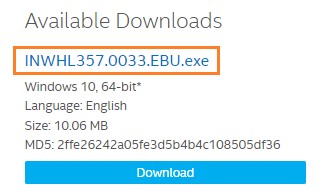
Express BIOS Update (Windows-based)
- Download and save the Express BIOS Update (.EBU.exe) file to a temporary folder. Example:
- Double-click the .EBU.exe to run the Express BIOS update.

- A command dialog appears. Press Y to restart the computer and start the update.

- Wait 2-5 minutes for the update to complete.

- When the BIOS update is complete, the computer will boot back into Windows.
F7 Update
The F7 BIOS update option allows you to update the system BIOS during the boot process and before the operating system loads.
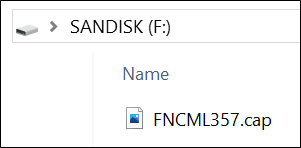
- Download and save the Recovery BIOS (.CAP) file to a USB device. Example:

- Plug the USB device into a USB port of the target computer.
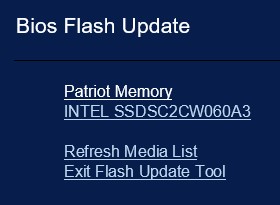
- Start the NUC. During boot, when the F7 prompt is displayed, press F7 to enter the BIOS Flash Update tool.
- Select the USB device and press Enter.
- Select the .CAP file and press Enter.

- Confirm you want to update the BIOS by pressing Enter.
- Wait 2-5 minutes for the update to complete.
- When the BIOS update is complete, the computer will boot back into Windows.
Power Button Menu Update
The Power Button Menu Update allows you to update the system BIOS during the boot process and before the operating system loads.
- Download and save the Recovery BIOS (.CAP) file to a USB device. Example:
- Plug the USB device into a USB port of the NUC when it’s turned off (not in Hibernate or Sleep mode).
- Press and hold down the power button for three seconds, then release it before the 4 second shutdown override. The Power Button Menu displays. (Options on the menu can vary, depending on the NUC model.)
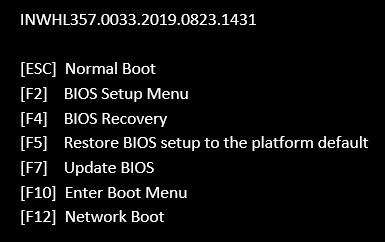
- Press F7 to start the BIOS update.
- Wait 2-5 minutes for the update to complete.
- When the BIOS update is complete, the computer will boot back into Windows.
UEFI Shell Update
The UEFI Flash BIOS update utility allows you to update the BIOS from the EFI Shell, see How to Update the NUC BIOS Using Extensible Firmware Interface (UEFI)
BIOS Recovery by Power Button Menu
- Plug an USB device into an USB port of the NUC when it’s turned off (not in Hibernate or Sleep mode), then power up the NUC.
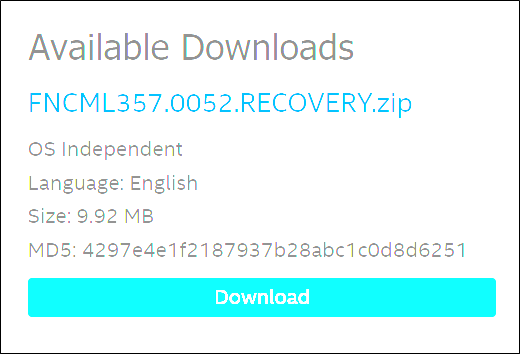
- Download and save the zip Recovery BIOS file for your NUC unit to that USB device. Example:
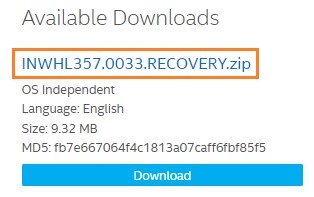
- Double-click the RECOVERY.zip to extract its files.
- Power off your NUC, keep the USB device in USB port.
- Press and hold down the power button for three seconds, then release it before the 4-second shutdown override. The Power Button Menu appears.
- Press F4 to start a BIOS Recovery.
- Wait 2-5 minutes for the update to complete.
- The computer will either turn off when the recovery process is completed or it will prompt you to turn off the computer.
- Remove the USB flash drive.
- Restart the computer.
BIOS Recovery by Security Jumper for NUC8ixINH
| Note000000 |
|
Download and save the Recovery BIOS file to a USB device. Example:
- Double-click the *.RECOVERY.zip to extract its files.
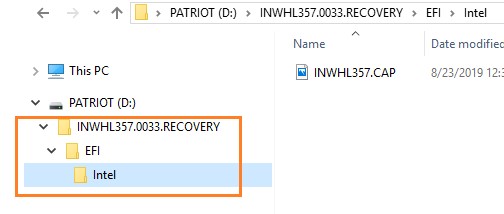
| Note |
Example: D:\INWHL357.0033.RECOVERY\EFI\INTEL\INWHL357.CAP. |
Shut down the computer and unplug the AC power adapter.
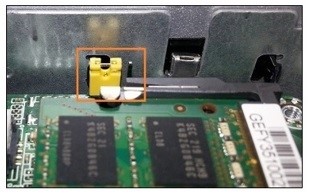
- Open the chassis and remove the BIOS security jumper. (See the Technical Product Specification for details including the location of this jumper.)
- Plug the USB device into a USB port of the target computer and turn it on.
- Wait 2-5 minutes for the recovery process to complete.
- The computer will either turn off when the recovery process is complete, or it will prompt you to turn it off.
- Remove the USB device.
- Replace the BIOS security jumper.
- Close the chassis.
- Restart the computer.
BIOS Recovery by Security Jumper for all other Aptio® V-based NUCs
| Note |
|
Download and save the Recovery BIOS file to a USB device. Example:
- Double-click the *.RECOVERY.zip to extract its files.
| Note |
|
Shut down the computer and unplug the AC power adapter.
Open the chassis and remove the BIOS security jumper. (See the Technical Product Specification for details including the location of this jumper.)
- Plug the USB device into a USB port of the target computer and turn it on.
- Wait 2-5 minutes for the recovery process to complete.
- The computer will either turn off when the recovery process is complete, or it will prompt you to turn it off.
- Remove the USB device.
- Replace the BIOS security jumper.
- Close the chassis.
- Restart the computer.