[NUC] Installing Optane™ Memory on NUC Kits
Click or the topic for details:
Supported NUCs
NUC products with Intel Optane memory pre-installed
| Product Names | Support for Optane™ Memory |
| NUC 10 Performance Mini PC - NUC10i7FNHJA NUC 10 Performance Mini PC - NUC10i5FNHF6 NUC 10 Performance Mini PC - NUC10i5FNHJA NUC 10 Performance Mini PC - NUC10i3FNHF6 NUC 10 Performance Mini PC - NUC10i3FNHFA NUC 10 Performance Mini PC - NUC10i3FNHJA NUC 8 Mainstream-G mini PC (NUC8i7INHJA) NUC 8 Mainstream-G mini PC (NUC8i5INHJA) NUC 7 Home, a Mini PC with Windows® 10 - NUC7i3BNHXF NUC 7 Enthusiast, a Mini PC with Windows® 10 - NUC7i7BNHXG NUC 7 Home, a Mini PC with Windows® 10 - NUC7i5BNHXF NUC Kit NUC7i3BNHX1 with Optane™ Memory NUC Kit NUC7i5BNHX1 with Optane™ Memory NUC Kit NUC7i7BNHX1 with Optane™ Memory | Intel Optane Memory is pre-installed BIOS version is Intel Optane Memory ready |
NUC products with Intel Optane memory supported (not pre-installed)
| Product Names | Support for Optane™ Memory |
| NUC 12 Pro X Kit - NUC12DCMv9 NUC 12 Pro X Kit - NUC12DCMv7 NUC 12 Extreme Kit - NUC12DCMi9 NUC 12 Extreme Kit - NUC12DCMi7 NUC 10 Performance kit - NUC10i7FNH NUC 10 Performance kit - NUC10i7FNHN NUC 10 Performance kit - NUC10i7FNK NUC 10 Performance kit - NUC10i7FNKN NUC 10 Performance kit - NUC10i5FNH NUC 10 Performance kit - NUC10i5FNHN NUC 10 Performance kit - NUC10i5FNK NUC 10 Performance kit - NUC10i5FNKN NUC 10 Performance kit - NUC10i3FNH NUC 10 Performance kit - NUC10i3FNHN NUC 10 Performance kit - NUC10i3FNK NUC 10 Performance kit - NUC10i3FNKN | BIOS version is Intel Optane Memory ready |
| NUC Kit NUC9VXQNX NUC Kit NUC9V7QNX NUC Kit NUC9i9QNX NUC Kit NUC9i7QNX NUC Kit NUC9i5QNX | BIOS version is Intel Optane Memory ready |
| NUC 7 Enthusiast, a Mini PC with Windows® 10 - NUC7i7BNKQ NUC 7 Home, a Mini PC with Windows® 10 - NUC7i5BNKP NUC Kit NUC7i3BNH NUC Kit NUC7i5BNH NUC Kit NUC7i7BNH | You can configure Intel Optane Memory after completing the following:
|
| NUC 8 Mainstream-G mini PC (NUC8i5INHPA) NUC 8 Mainstream-G mini PC (NUC8i7INHPA) NUC 8 Mainstream-G kit (NUC8i5INHP) NUC 8 Mainstream-G kit (NUC8i7INHP) NUC 8 Mainstream-G kit (NUC8i5INHZ) NUC 8 Pro Kit NUC8v7PNH NUC 8 Pro Kit NUC8v5PNH NUC 8 Pro Kit NUC8i3PNH NUC Kit NUC8i7BEH NUC Kit NUC8i5BEH NUC Kit NUC8i3BEH NUC Kit NUC8i3CYSM NUC Kit NUC8i3CYSN NUC Kit NUC7i7DNHE NUC Kit NUC7i5DNHE NUC Kit NUC7i3DNHE NUC 7 Business, a Mini PC with Windows® 10 Pro - NUC7i3DNHNC | BIOS version is Intel Optane Memory ready |
You need:
- One of the supported NUC models from the table above
- Intel Optane Memory (M.2 format)
- 2.5-inch (6.35cm) SSD or HDD SATA drive
- Windows® 10, 64-bit* operating system
- Optane™ technology software
| Note | If the Rapid Storage Technology (RST) is installed, you must remove it before you install Intel Optane Memory. |
Install the operating system
- Install Windows® 10, 64-bit* on the 2.5-inch SATA drive.
- Don't install the operating system on the Intel Optane Memory.
- Install the current device drivers for your NUC from Download Center:
- Chipset Device Software
- Management Engine Consumer driver
- HD Graphics driver
- Bluetooth Technology-based driver
- Wireless Technology-based driver
- Gigabit Ethernet Controllers driver
- Realtek* High Definition Audio driver
- Realtek Card Reader driver
- ITE Tech* Consumer Infrared driver
- Thunderbolt™ Bus driver (for NUC7i5BNH, NUC7i5BNHX1, NUC7i7BNH, NUC7i7BNHX1 only)
Configure Optane™ Memory
- Download and install the Optane™ Memory software.
- Restart the NUC after the installation is complete.
- When Windows* restarts, a dialog box to complete the setup displays. Select Yes to continue.

- Select Enable.

- Select Yes on the warning screen.

- When the process is finished, select Restart.

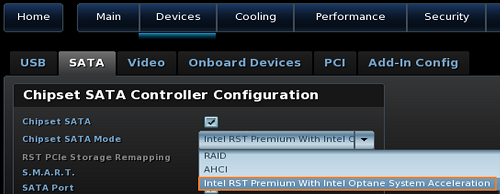
| Note | When the NUC reboots, the BIOS automatically changes to support Intel Optane Memory*. * NUC 8 Mainstream-G NUC8ixINH has a different BIOS settings layout. To set up SATA Mode Selection, please go Advanced -> Storage tab. |
View setup information and statistics in the Intel Optane Memory application. To do this, open the software in either of the two ways shown below:
| The Windows Start menu | 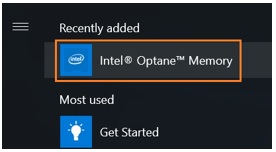 |
| Right-click the Intel Optane Memory icon on the Windows Taskbar and select Open Optane™ memory application. | 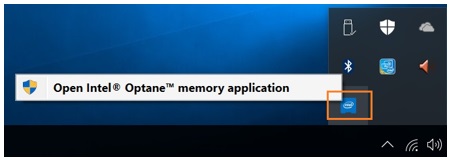 |
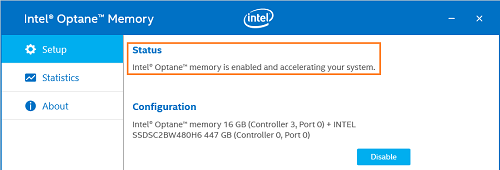
View a demo of installing the Intel Optane Memory
See how to install the Intel Optane Memory module.
Removing Intel Optane Memory
To remove Intel Optane Memory, first disable it.
| Note | If Intel Optane Memory is not disabled before removing, it may result in data loss and cause the NUC not to boot. |
To disable Intel Optane Memory:
- Open the Intel Optane Memory application and select Disable.
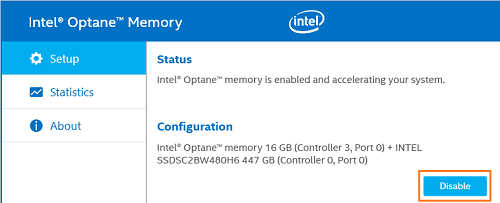
- Restart the Intel NUC to ensure Intel Optane Memory is disabled.

- Shut down the NUC.
- Follow the Changing an M.2 SSD or Intel Optane Memory Module instructions within the User Guide.
Troubleshooting
| What are you seeing? | Why are you seeing it? | How to fix it |
| Error when starting your NUC: Warning! System detected a request to change SATA mode from Intel Optane to AHCI. This may result in lost or damaged data. Are you sure you want to proceed? (N) No or (Y) Yes. | The Chipset SATA Mode option in BIOS was changed to AHCI. This happens if you used the F9 key in BIOS Setup to set BIOS to default values. | Press the N key when you see this error. The BIOS change is discarded and your NUC continues to boot into Windows normally. |
| Error when trying to install the Intel Optane Memory software: Unsupported System Drive 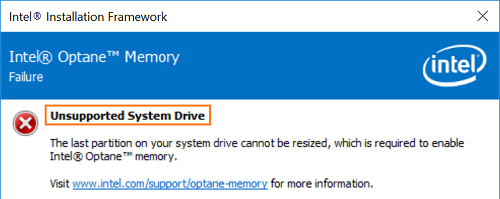 | When you install Windows® 10 version 1607 for the first time with your NUC connected to LAN, Windows asks if you want to update to version 1703.  | Fix this issue by following the directions in this article. Another option is to not update to version 1703. Instead, use the normal Windows Update procedure. |


