


[NUC] Windows* Setup for NUC or Compute Stick
The first time you start the NUC or Compute Stick, Windows* guides you through several setup steps. This document provides step-by-step instructions for the most common Setup options.
Choose your operating system version to begin.
Click or the topic for details:
Windows* 8.1
Select your Region and Language, then click Next. If your preferred language is not listed, select English. You can add your preferred language after setup is complete. 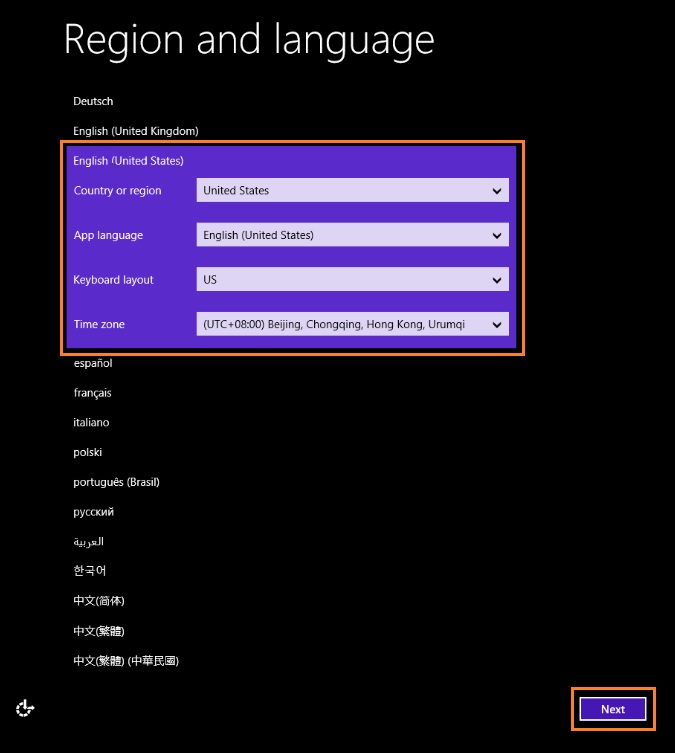
Click I accept when you see the Windows license terms. 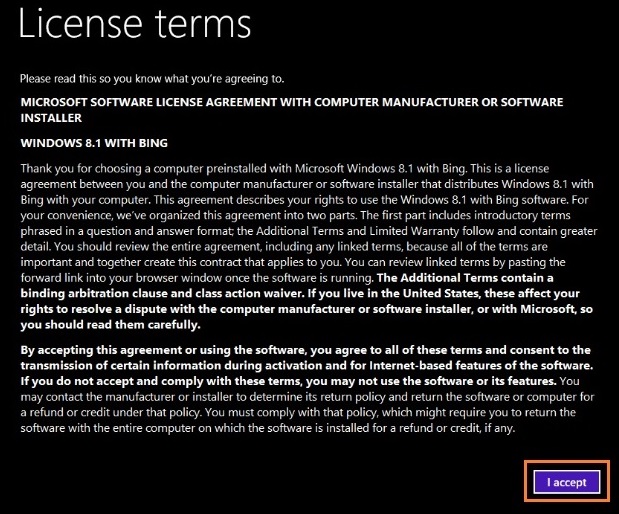
Select a color of your choice on the Personalize screen and enter a PC name. Then click Next. 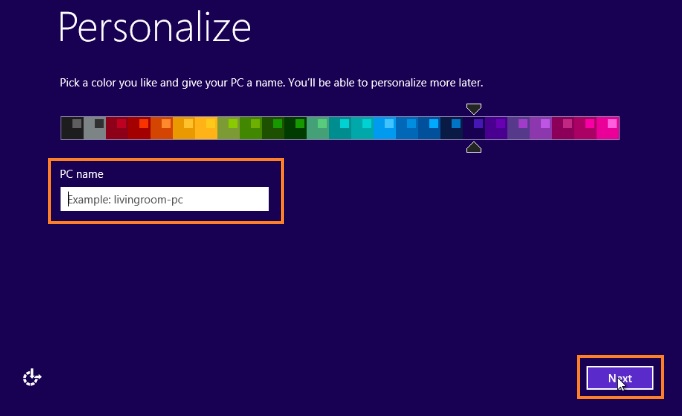
Optional: Select a network. If you choose to connect now, you are asked for your User ID and password or other network credentials. 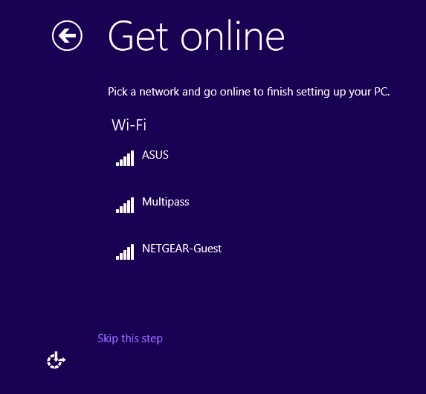
Select Use express settings. 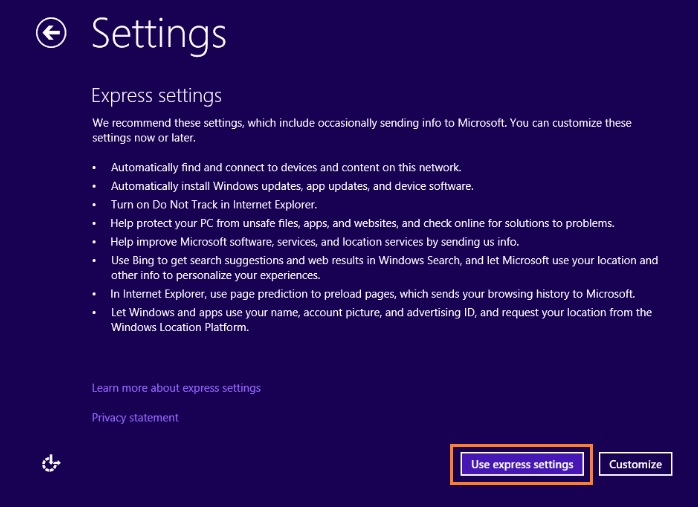
If you already have a Microsoft account, enter your user email address or phone number and password, then click Next. If you do not have an account yet, select Create a new account and follow the prompts to set one up. 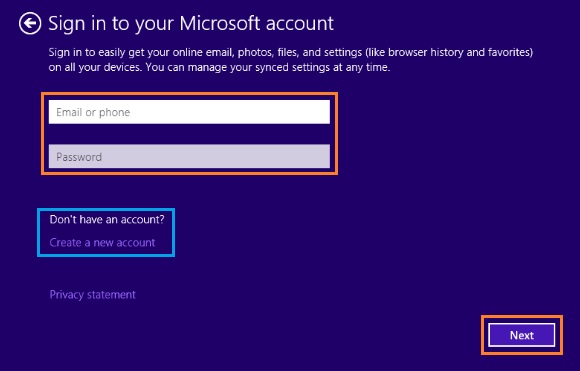
Click I can't do this right now. Then, click Next on the security setup page. 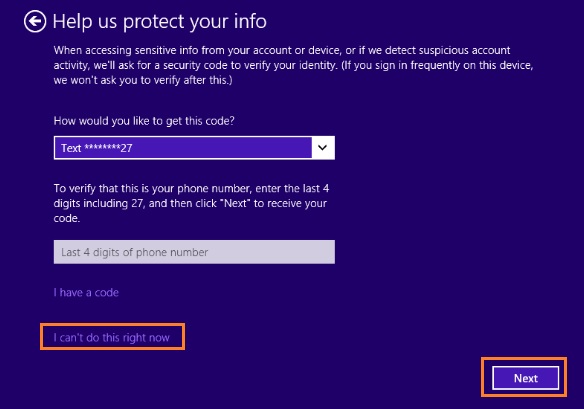
Click Next on the OneDrive setup page. 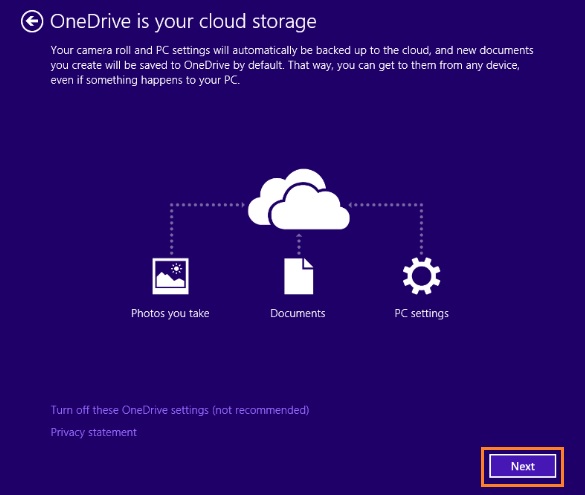
Windows Setup completes in a few minutes.
Windows® 10
Select your preferred app language, then click Next. If your preferred language is not listed, select English. You can add your preferred language after setup is complete. 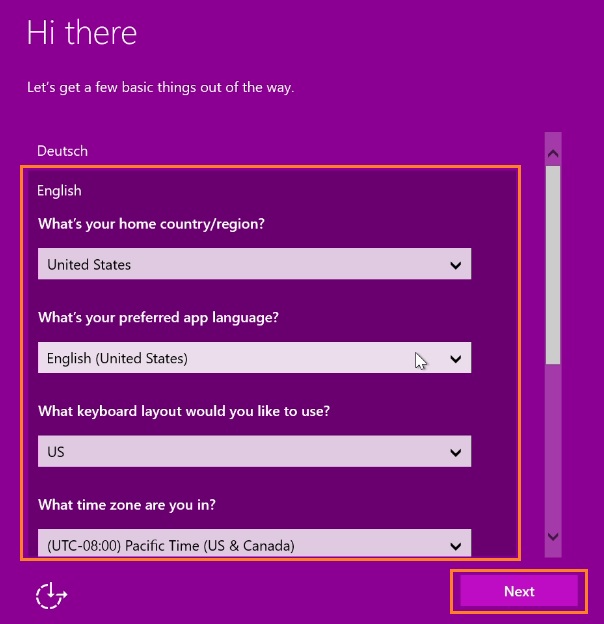
Click Accept to accept the Windows license terms. 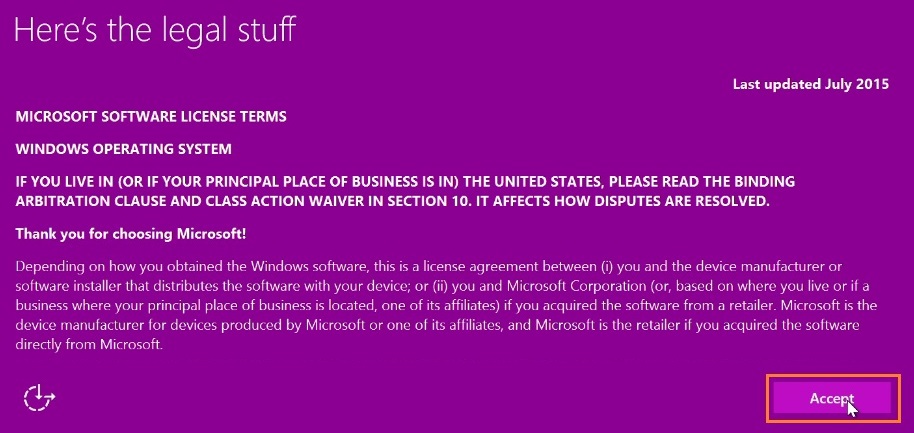
Optional: Select a network. If you choose to connect now, you are asked for your User ID and password or other network credentials. 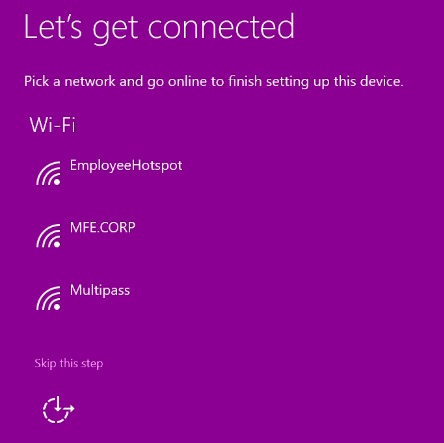
Select Use Express settings. 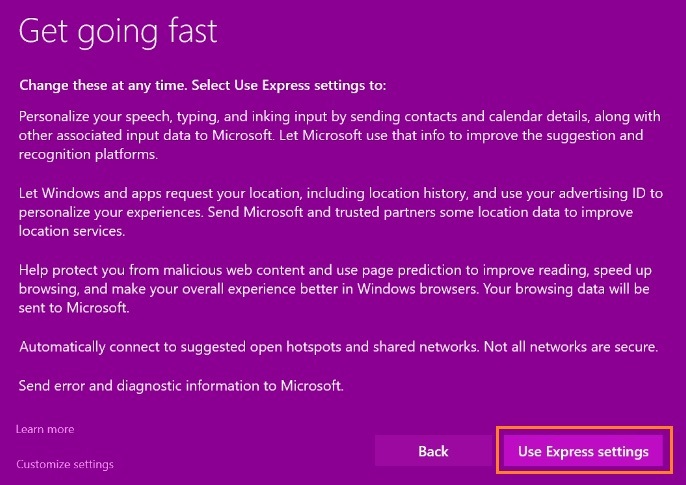
If you already have a Microsoft account, enter your user email address or phone number and password, then click Sign in. If you do not have an account, select Create one and follow the prompts to set one up. 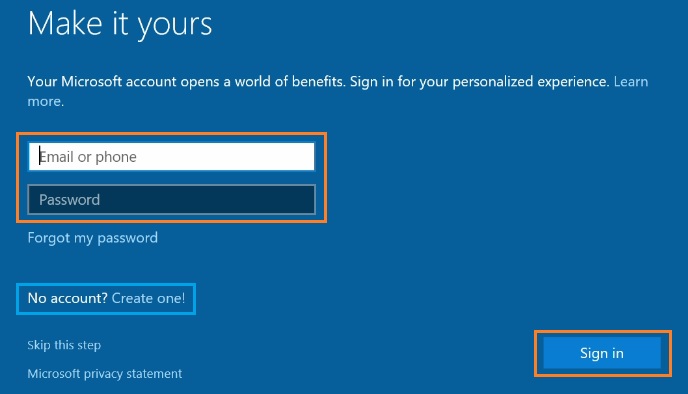
Create an account name for the PC, then click Next. 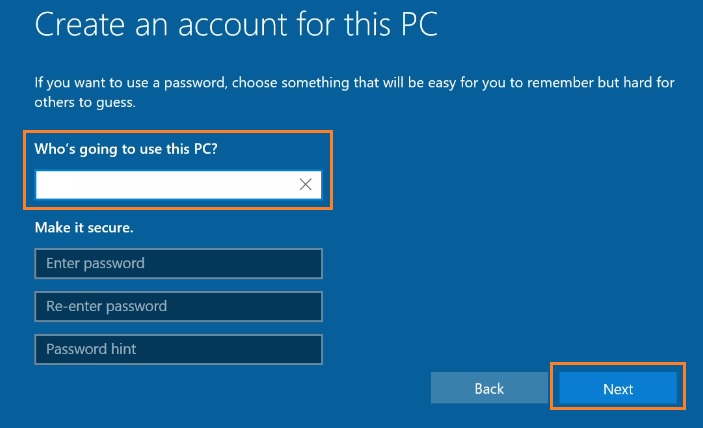
Windows Setup completes in a few minutes.
Windows* 11
| Note | Compute Stick does not support Windows 11* |
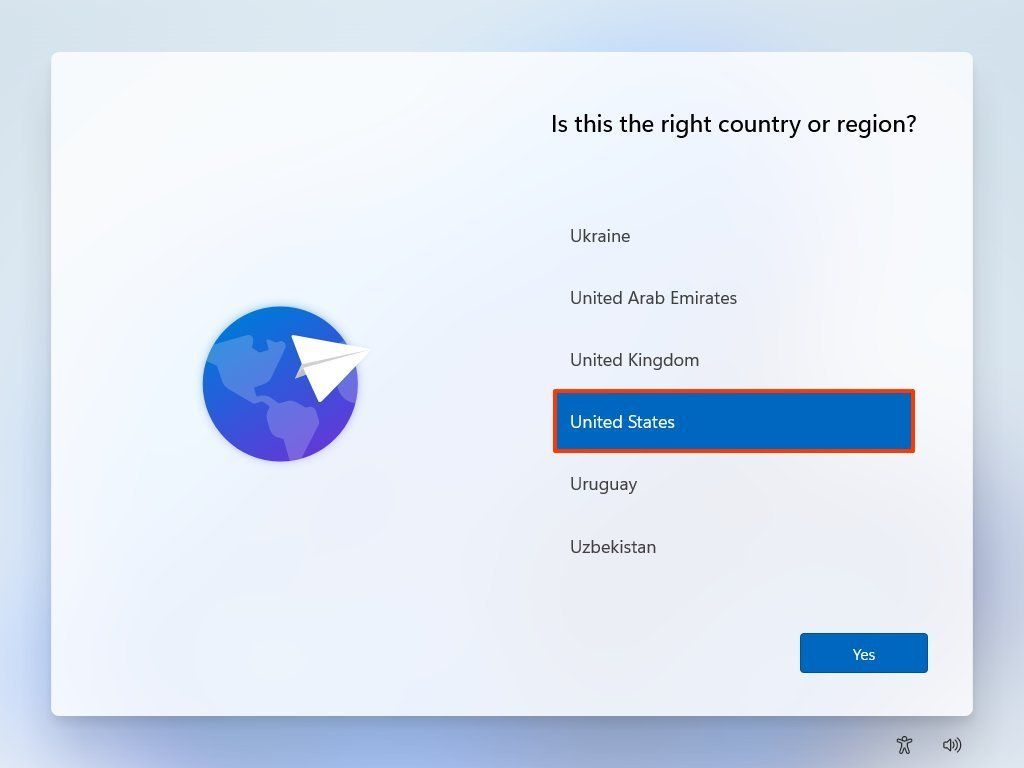
- Select your Region, then click Yes.
- Select your keyboard layout
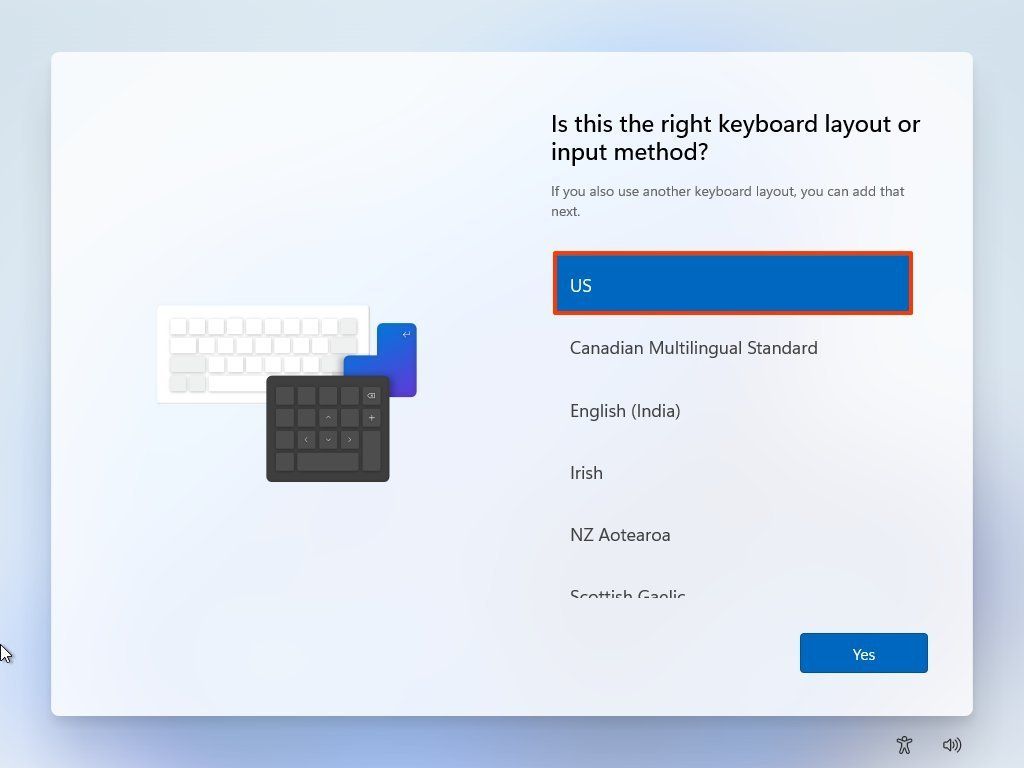
- Click the Yes button.
- Decide whether you want a second keyboard layout in Windows 11 or not. Click the Skip button (as necessary).
- Select the wireless network. If the device is connected using a wired connection, it'll connect to the network automatically. If you are using a wireless connection, you must connect to the network. Otherwise, you won't be able to continue with the setup.
- Click the Connect button.
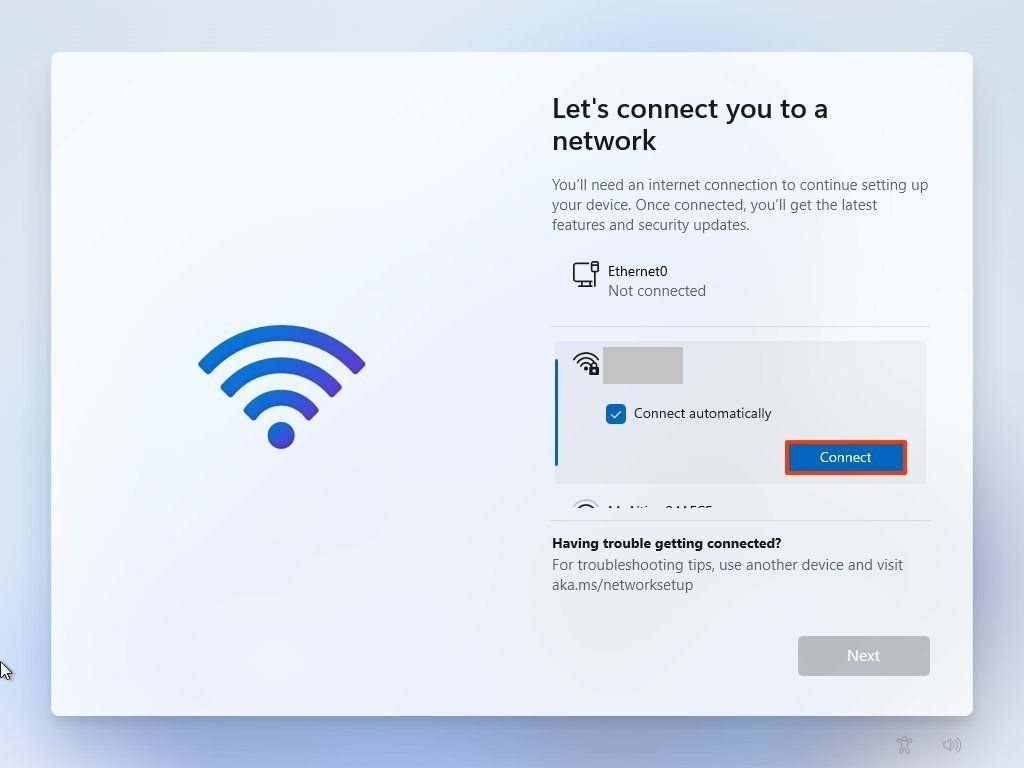
- Confirm the Wi-Fi password.
- Click the Next button.
- Click the Next button again.
- Confirm a name for the computer – for example, Office-PC. Although you can skip this option, it's recommended to set a device name to make it easier to identify it in the network and on the devices section of your Microsoft account.
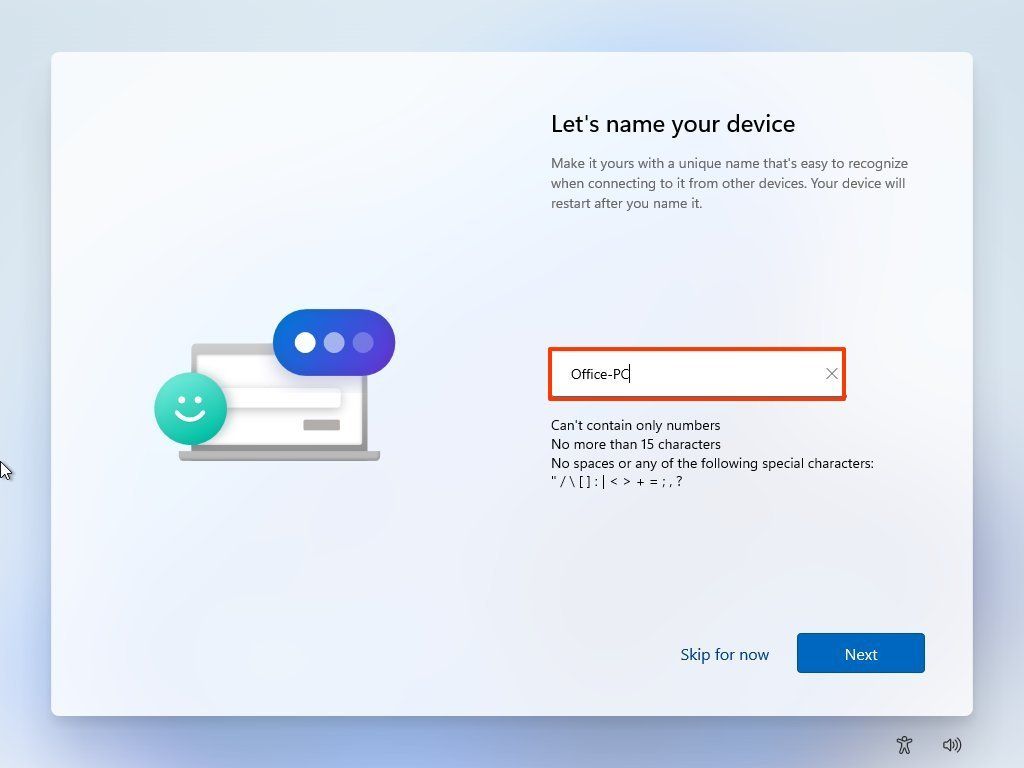
- Click the Next button.
- Select how would you like to set up this Windows 11 device? Set up for personal use or set up for work or school?
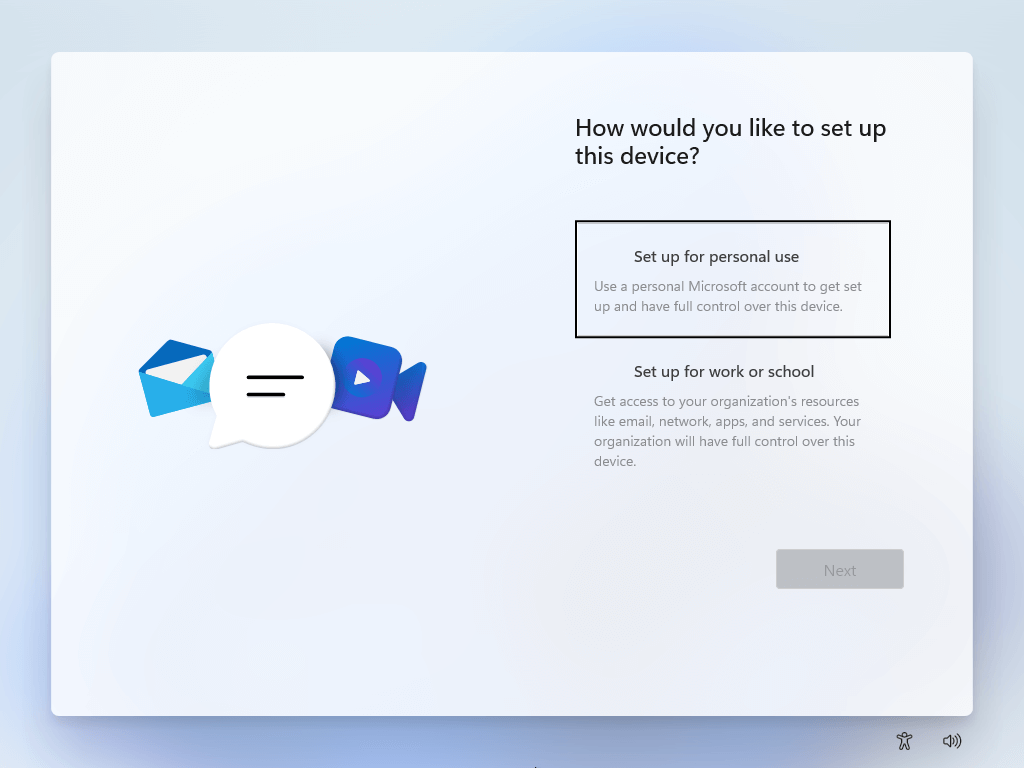
- Click the Next button.
- Sign in to your Microsoft account to continue and Confirm the password.
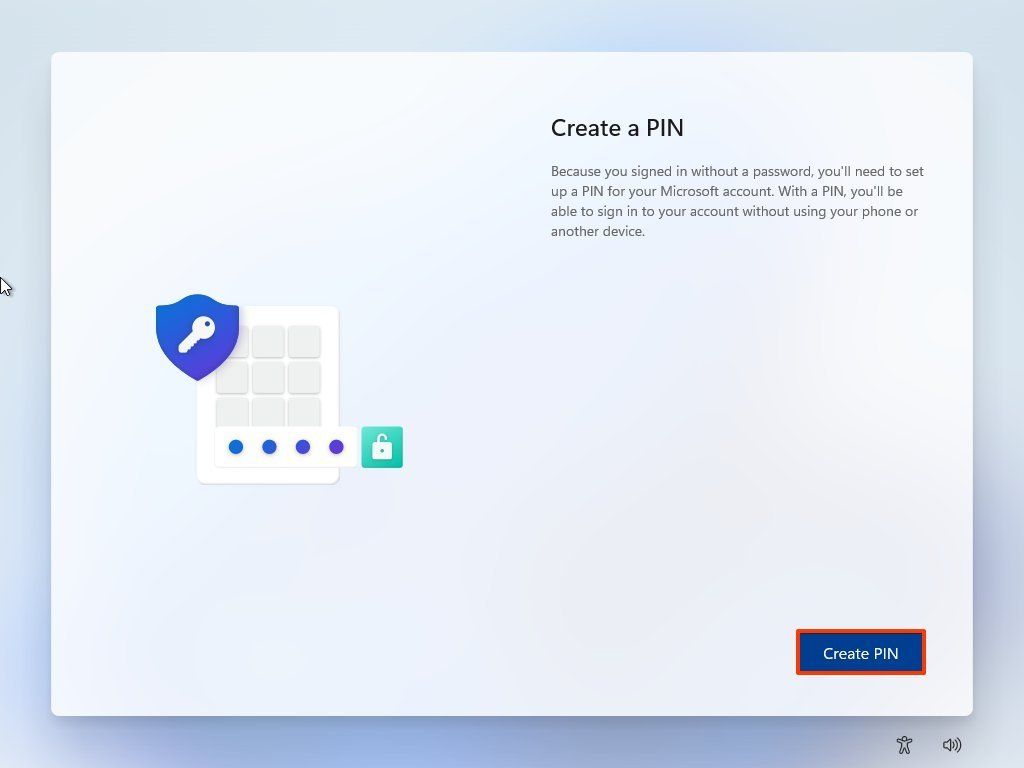
- Click the Create PIN button and follow the prompts to create a PIN.
- Select the Set up as new device (recommended) option unless you want to restore the setting from another device.
- Click the Next button.
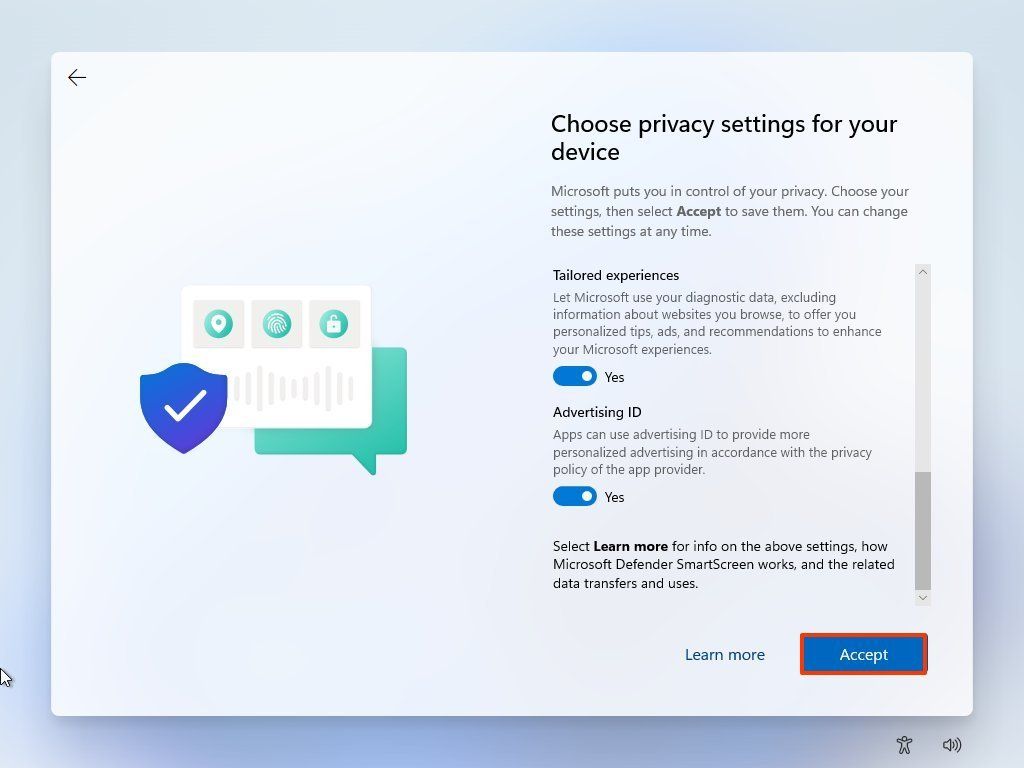
- Choose your privacy settings and scroll down to review all the settings.
- Click the Accept button.
- (Optional) Choose how to plan to use the device to receive personalized ads, tips, and recommendations.
- Click the Accept button.
- (Optional) Click the Only save files to this PC option. Or click the Next button if you want to upload and keep your files from the Desktop, Pictures, and Documents folders synchronized with OneDrive and your other devices.
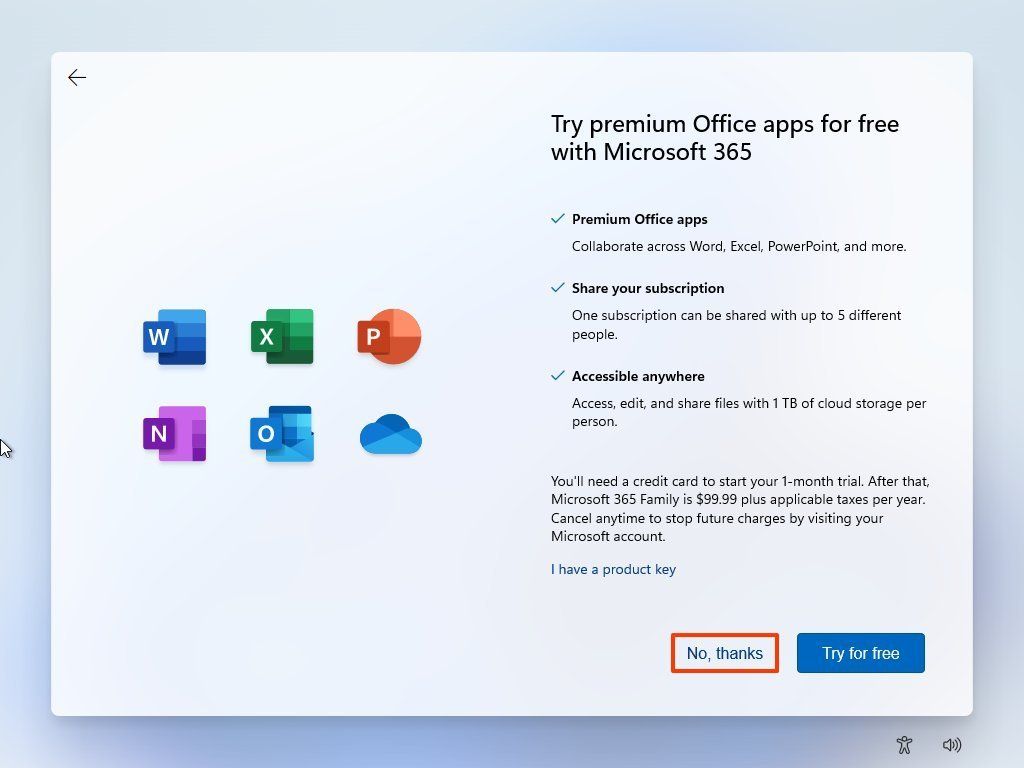
- Click the No, thanks option since you can install Office at a later time if you have a Microsoft 365 subscription
- Windows Setup completes in a few minutes.
