[Notebook] How to enable Wake on LAN (WOL) feature
The Wake on LAN feature lets you wake the system up from sleep or hibernate mode through the network. This article describes how to enable the Wake on LAN feature for ASUS laptop.
Note: The Wake on LAN feature is available depending on the computer model.
To enable the Wake on LAN feature, you need to adjust the relevant settings of Windows OS and BIOS configuration first. Please follow the steps below:
Step 1: Turn off fast startup
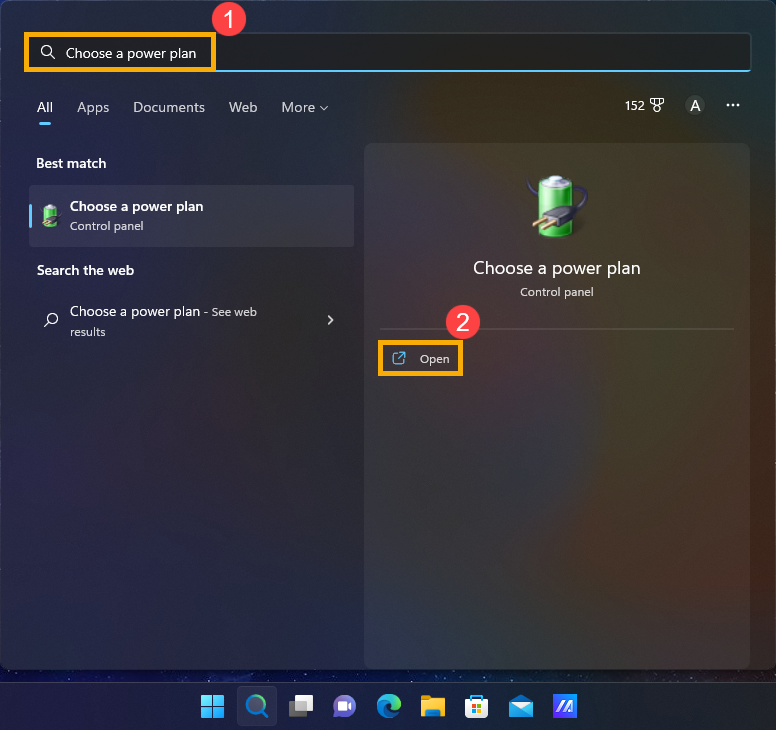
- Type and search [Choose a power plan] in the Windows search bar①, then click [Open]②.
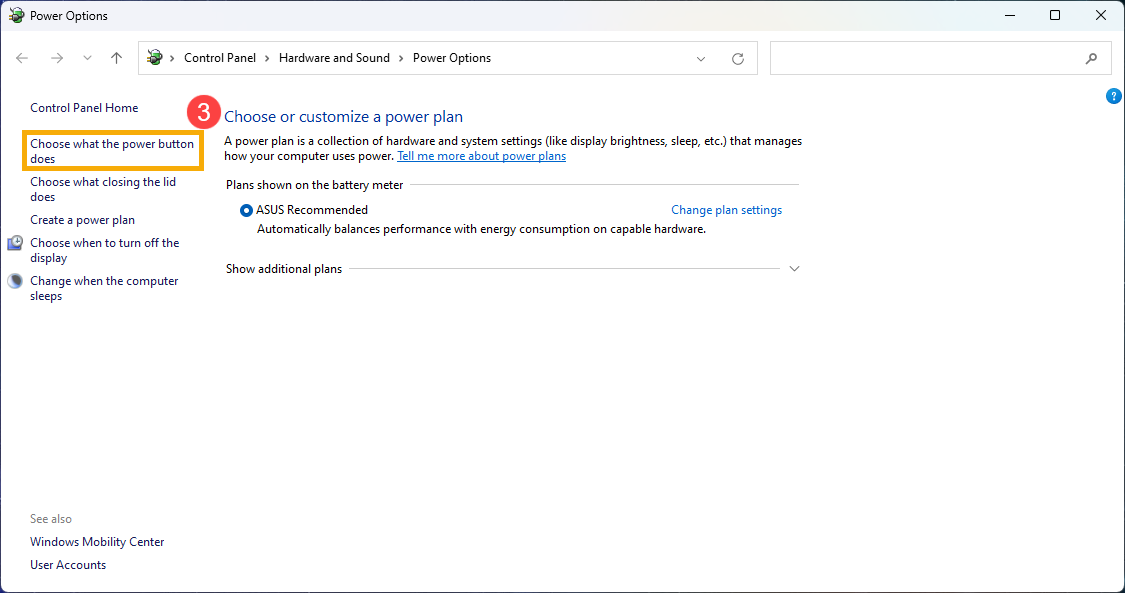
- Select [Choose what the power button does]③.
- Click [Change settings that are currently unavailable]④.
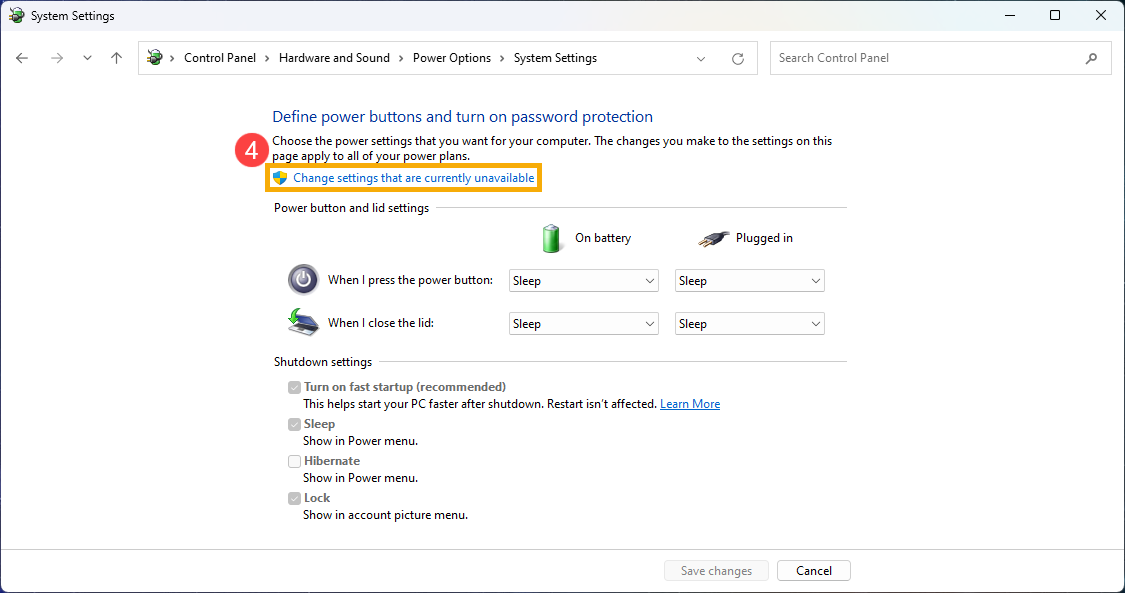
- Unselect the checkbox in front of [Turn on fast startup]⑤, then select [Save changes]⑥.

Step 2: Allow this device to wake the computer from Ethernet Controller Setting
- Right-click the [Start]
 icon on the taskbar①, then select [Device Manager]②.
- Check the arrow next to [Network adapters]③, then right-click [Your Ethernet Controller]④ to select [Properties]⑤.
Note: The Ethernet device name may be different based on different models.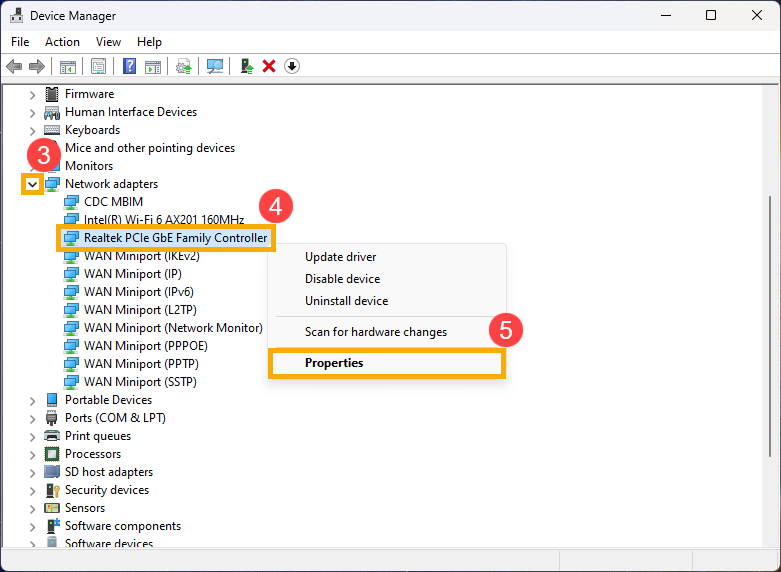
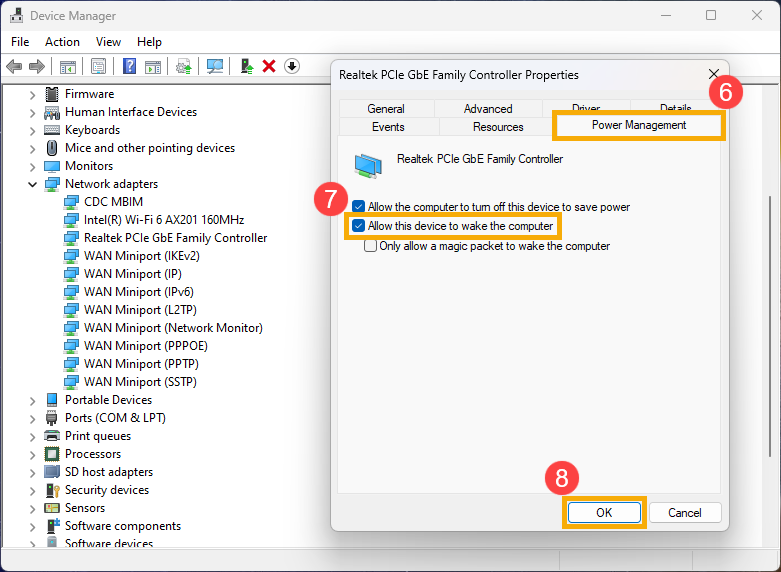
- Select the [Power Management] tab⑥, check the box to [Allow this device to wake the computer]⑦, and then select [OK]⑧.
Step 3: Enable the Wake on LAN feature in BIOS configuration
- While the computer isn’t powered on yet, press and hold the [F2] key
 of the keyboard, and then press the [Power button] (Do not release [F2] key until the BIOS configuration display.). Here you can learn more about How to enter BIOS configuration.
- Upon entering the BIOS setup screen, you will encounter two types of interfaces: UEFI interface and MyASUS in UEFI. Please refer to the following steps based on the BIOS screen of your device:
How to Enable Wake-on-Lan in the UEFI mode
In the UEFI interface, you can navigate and confirm using the Arrow Keys and Enter key on the keyboard, Touchpad, or Mouse.
Note: The BIOS update screen below may vary slightly depending on the model.
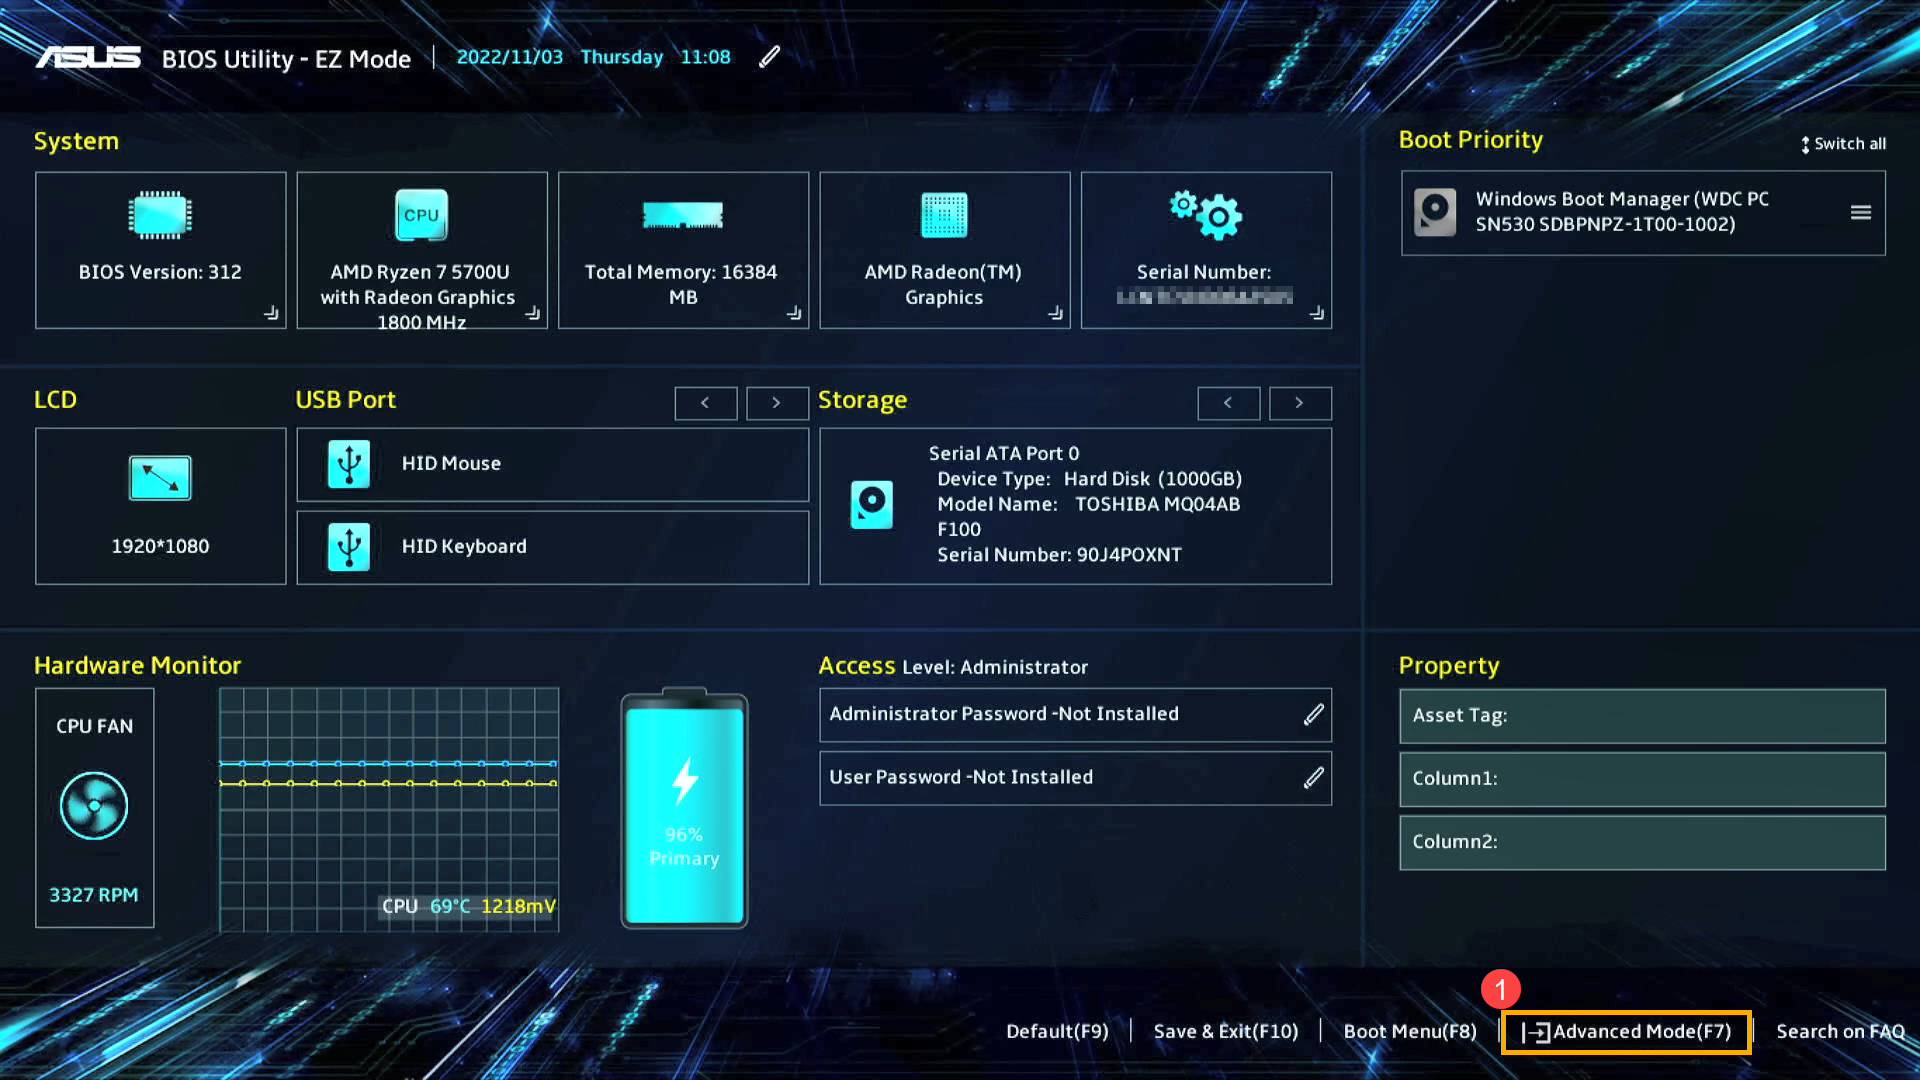
- After entering the BIOS Utility, go to the Advanced Mode by pressing Hotkey[F7] or use cursor to click①.
- After entering the Advanced Mode, select [Advanced] screen②, and then select [Network Stack Configuration]③.
Note: If this option is not present in your BIOS settings, it indicates that your computer does not support the Wake-on-LAN feature.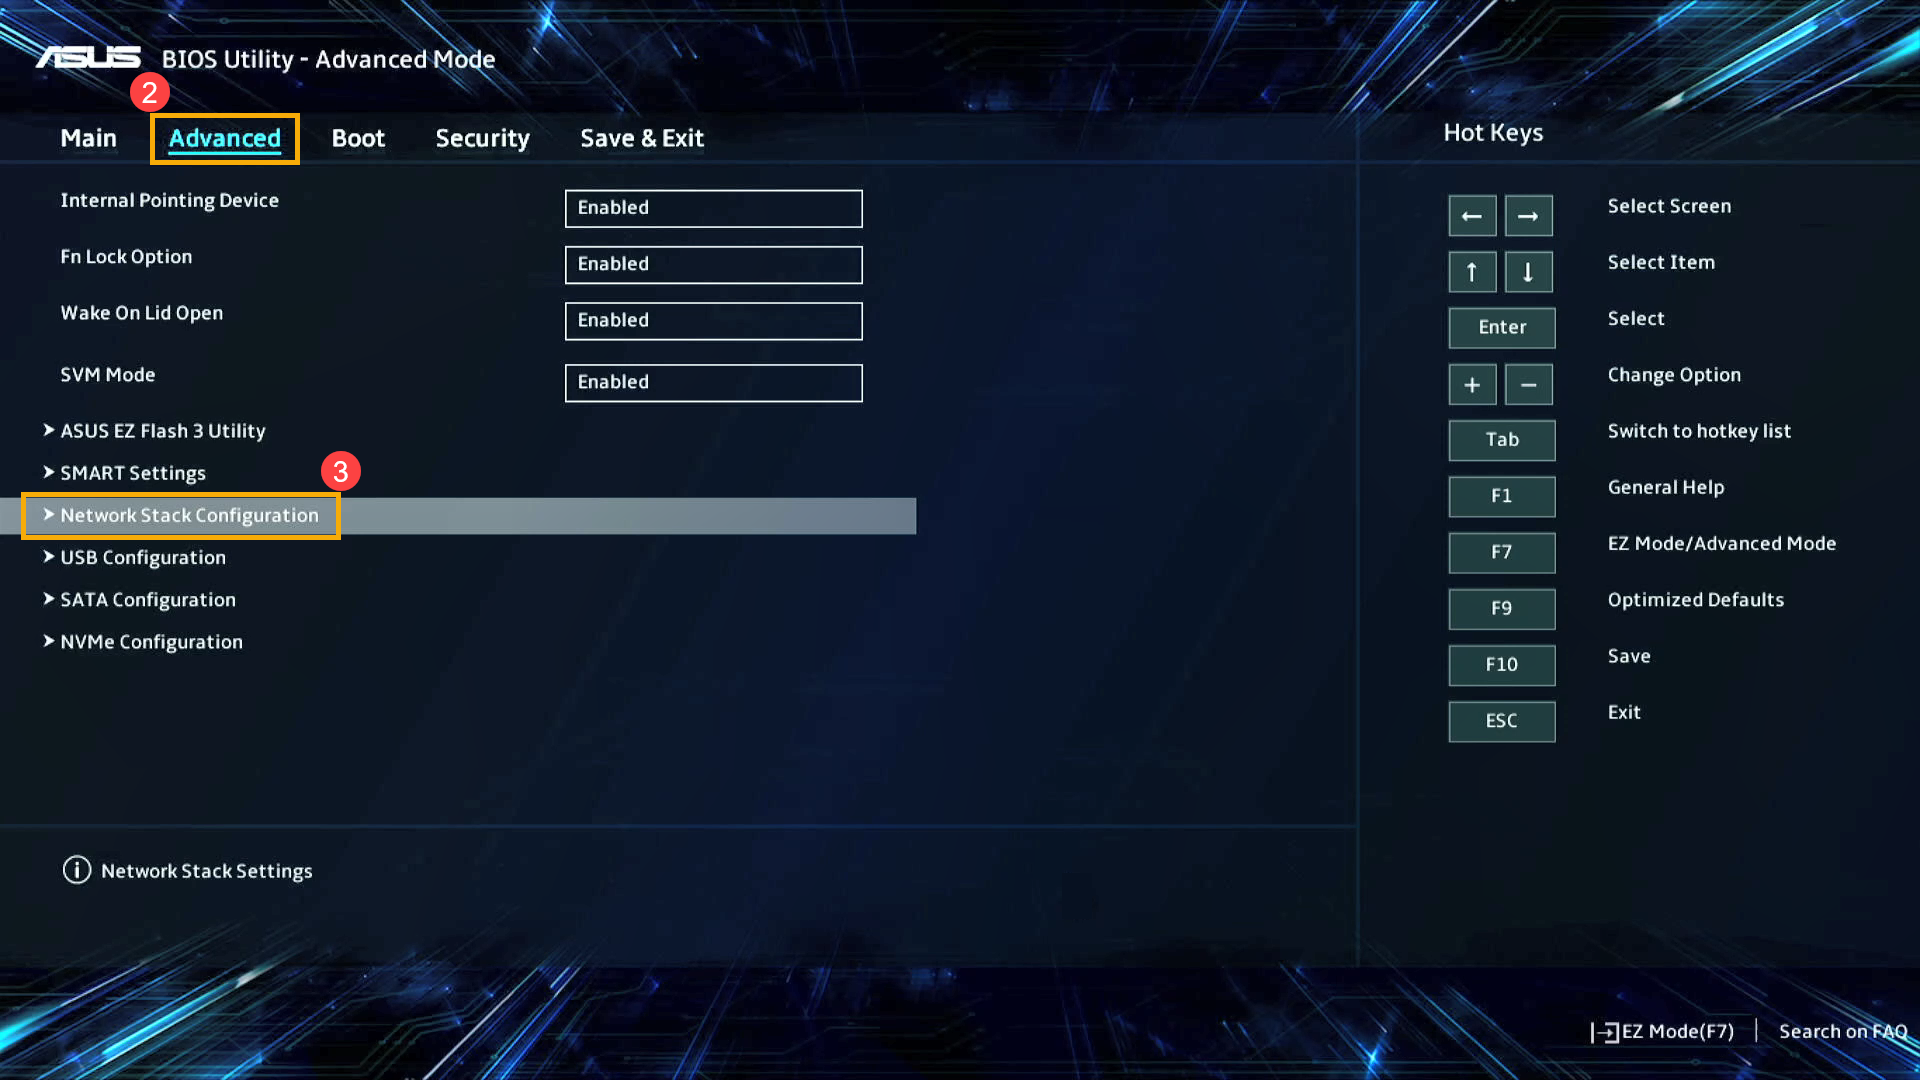
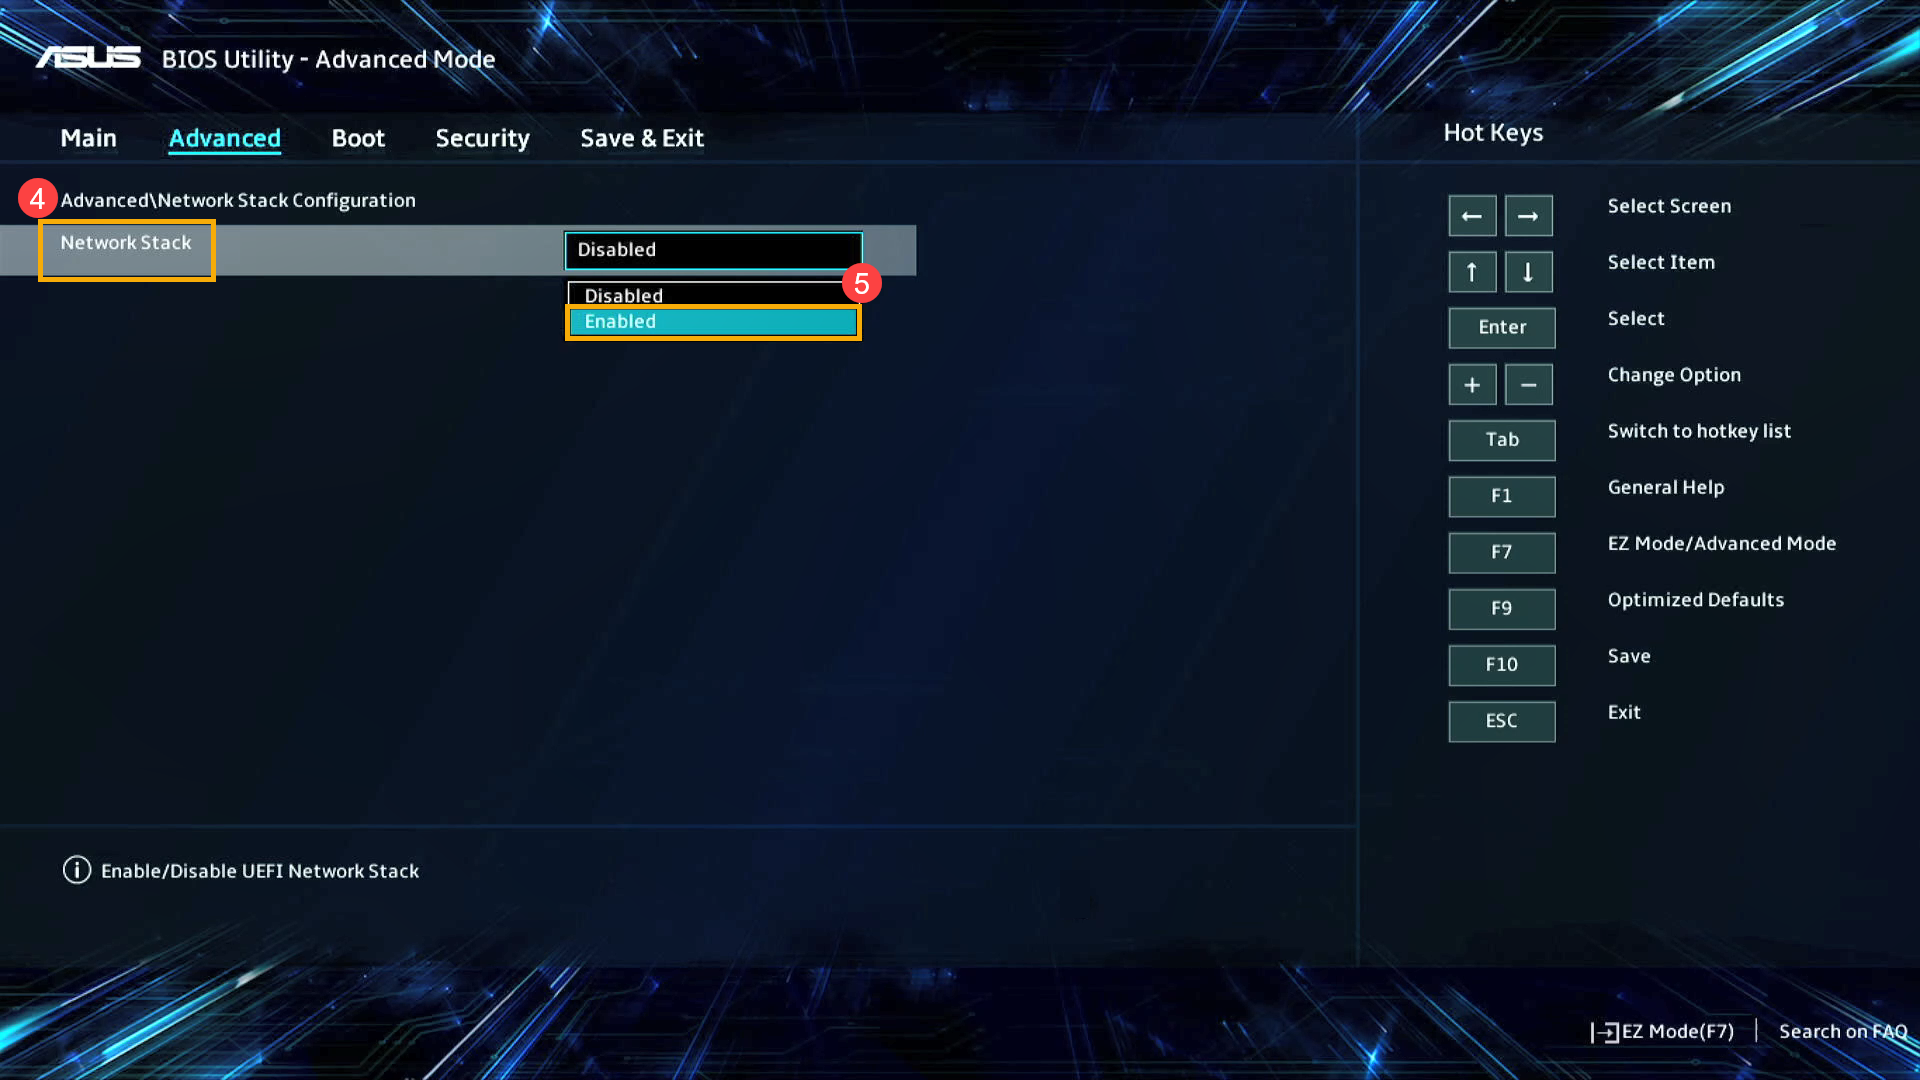
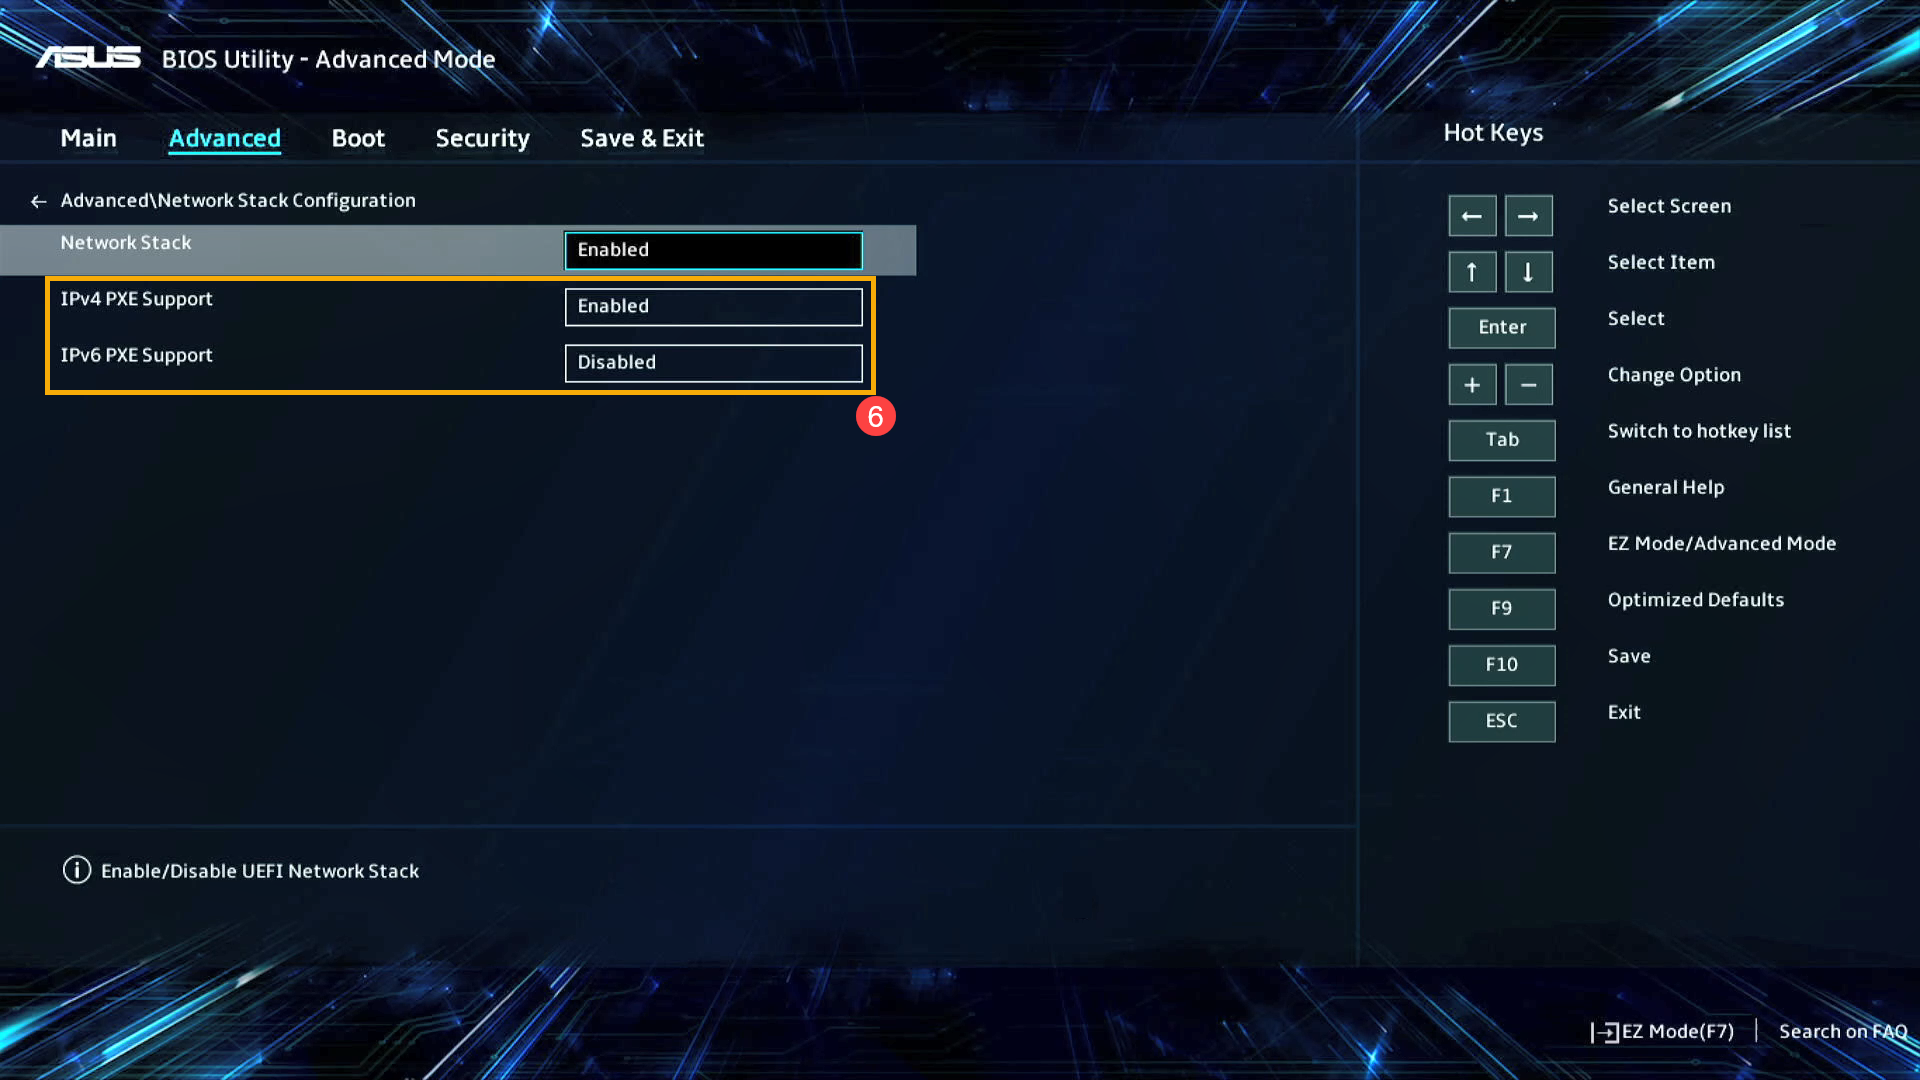
- After entering the Network Stack Configuration, select [Network Stack]④ and set [Enabled]⑤.
- Enable/Disable IPv4 PXE or IPv6 PXE depending on your requirement⑥.
- Save the settings and exit. Press Hotkey[F10] and select [Ok]⑦, the device will restart and the settings will take effect.
You can also go to the 「Save & Exit」 page and choose the 「Save Changes and Exit」 option to save your settings and exit.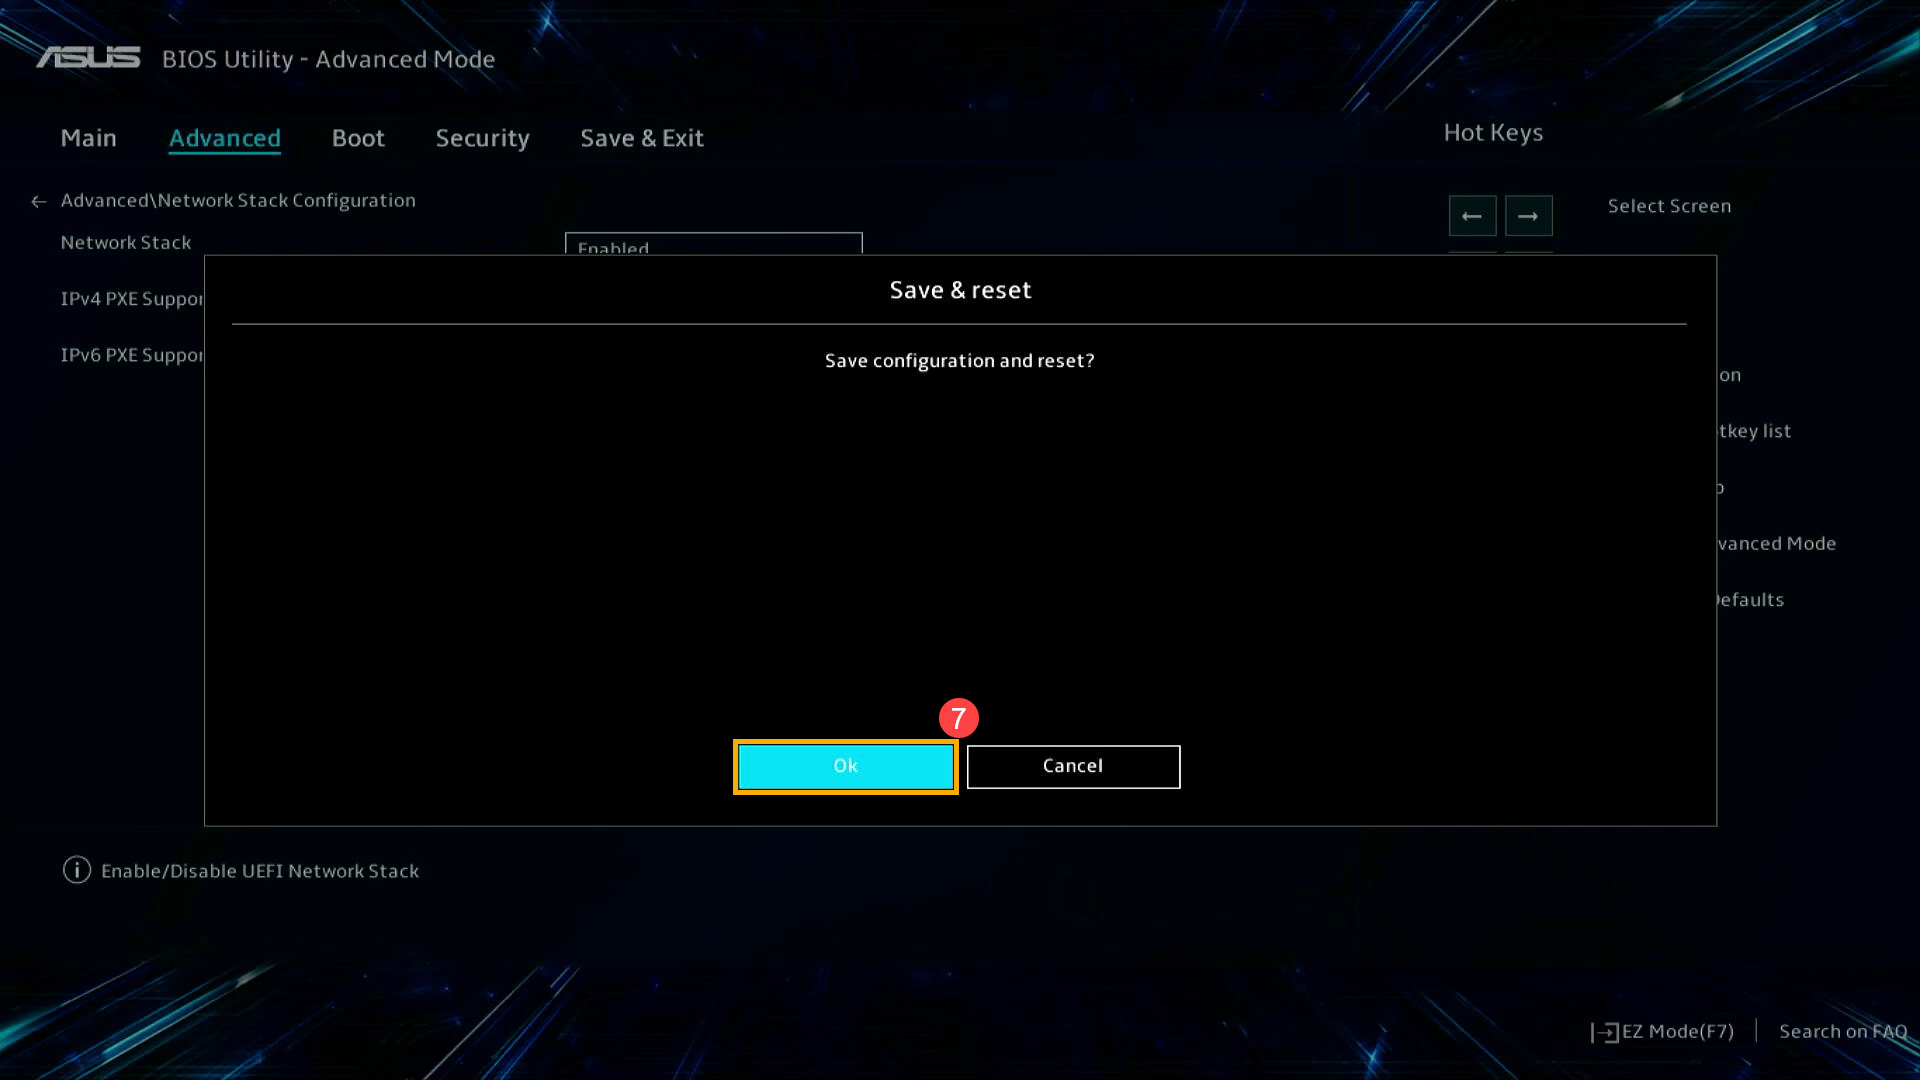
- Upon restarting the computer and entering Windows, you will be able to utilize the Wake-on-LAN feature.
How to Enable Wake-on-Lan in the MyASUS in UEFI mode
In the MyASUS in UEFI interface, you can navigate and confirm using the Arrow Keys and Enter key on the keyboard, Touchpad, or Mouse.
Note: The BIOS update screen below may vary slightly depending on the model.
- After entering the BIOS Utility, go to the Advanced Settings by pressing Hotkey[F7] or use cursor to click①.

- After entering the Advanced Settings, select [Advanced] screen②, and then select [Network Stack Configuration]③.
Note: If this option is not present in your BIOS settings, it indicates that your computer does not support the Wake-on-LAN feature.
- After entering the Network Stack Configuration, select [Network Boot]④ and set [Enabled]⑤.

- Enable/Disable IPv4 PXE or IPv6 PXE depending on your requirement⑥.

- Save the settings and exit. Press Hotkey[F10] and select [Confirm]⑦, the device will restart and the settings will take effect.
You can also go to the 「Save & Exit」 page and choose the 「Save Changes and Exit」 option to save your settings and exit.
- Upon restarting the computer and entering Windows, you will be able to utilize the Wake-on-LAN feature.