ASUS Business Manager V3.0 - Introduction
ASUS Business Manager V3.0 provides exclusive features, such as productivity and security tools for your ASUS Commercial PC.
Designed for small businesses which lack adequate IT management, it simplifies the processes of management and maintenance , and allows you to focus more on your business.
ASUS Business Manager V3.0 can help the administrator control access to data, websites, and system settings; completely delete file; create an encrypted virtual partition in your local drive where you can save your important data; customize BIOS booting logo.
1 ASUS Business Manager V3.0 Update Introduction
2 Minimum Hardware and Software Requirements
- 5.1 Secure Guard
- 5.2 Secure Storage
- 5.3 System Backtrack
- 5.4 File Shredder
- 5.5 My Logo
- 5.6 Settings
1. ASUS Business Manager V3.0 Update Introduction
Ø Remove the functions of Security Flash and System Information
Ø Add the functions of Settings and My Logo
Ø Optimize pages and icons
2. Minimum Hardware and Software Requirements
- ASUS Commercial Model (NB/DT/AIO)
- Windows 10 version 1809 (RS5) 64 bit or later.
- Notice: This app requires specific support of hardware, software and BIOS. If your computer is not pre-installed with ASUS Business Manager V3.0, it indicates that your computer can't support this app.
- To avoid system data loss and system instability, please don't download and install the app by yourself on the network.
- Only for the user of pre-installing this application : In case of accidental uninstallation, please follow「3. Update the Latest Version」 below to reinstall.
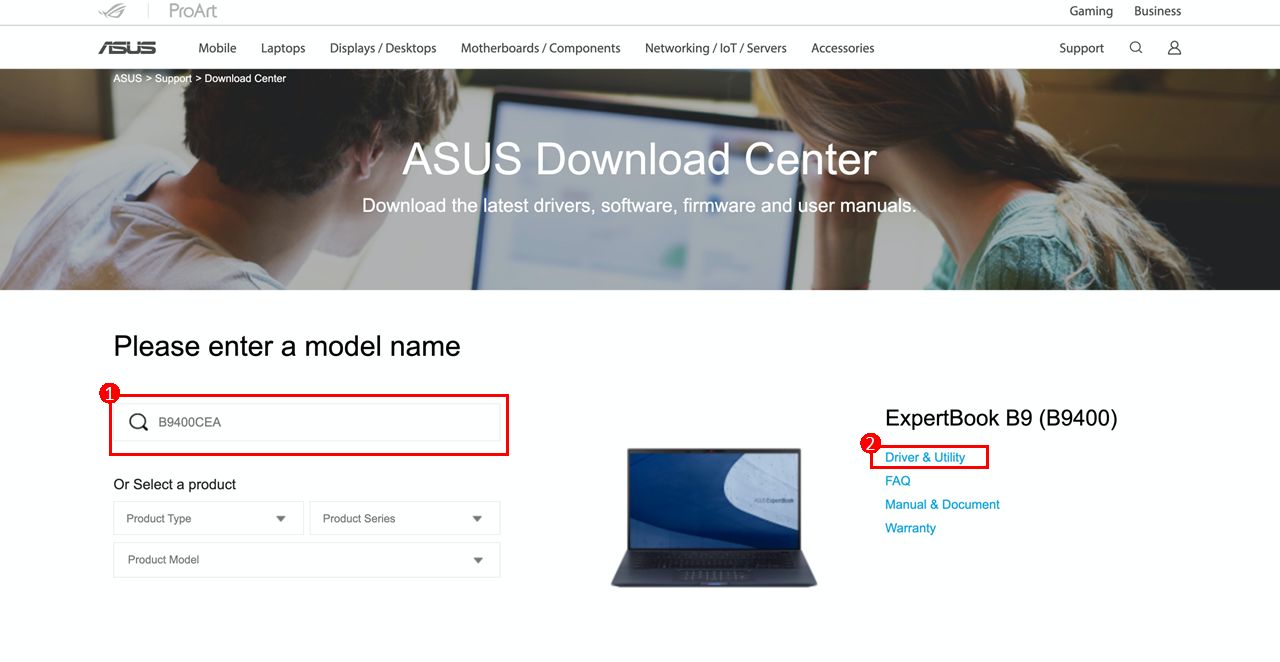
You can update ASUS Business Manager V3.0 via model support page.
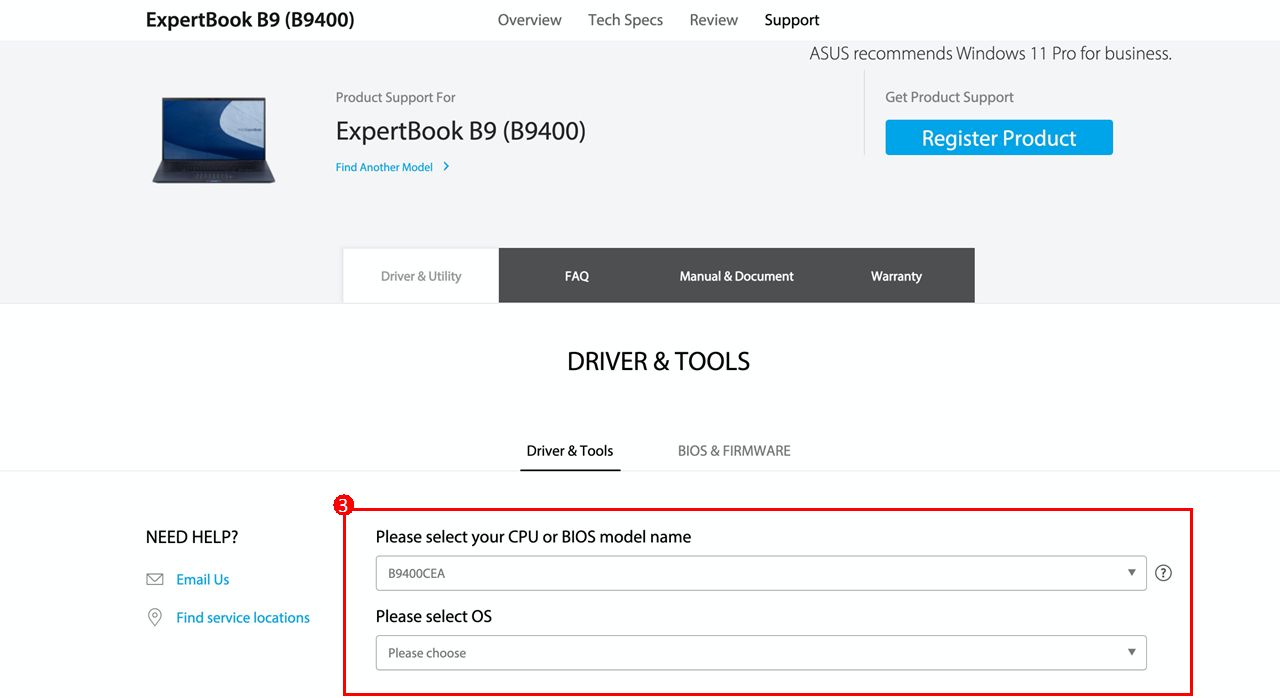
Visit ASUS Download Center and type your model name in ①[Search Box],click ②[Driver & Utility], select your ③[CPU or BIOS, and OS]. Find ④[Software and Utility] and select the newest version of ASUS Business Manager. Click ⑤[DOWNLOAD] and install to upgrade.

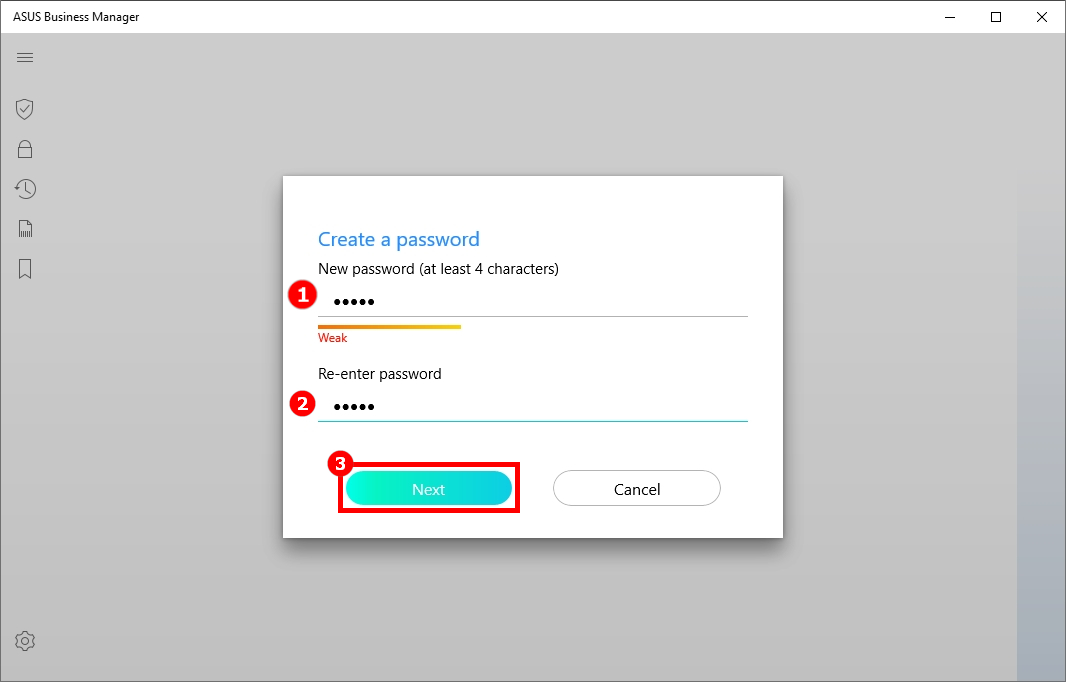
You will be asked to create a startup password to protect your settings and private data from leaking out when you run this App for the first time.
Create a startup password in ①[New password ] , confirm ②[Re-enter password] , click ③[Next] , enter the home page.
Notice: Be sure to save the startup password you created. If you lose it, you won't have access to the data and settings of ASUS Business Manager V3.0 , the password can't be retrieved.
You can only reset the system in order to reset the startup password. For how to reset the system, please refer to :
[Windows 11/10] How to reset the PC and remove all of my personal files, apps and settings
[Windows 11/10] How to reset the PC and keep my personal files

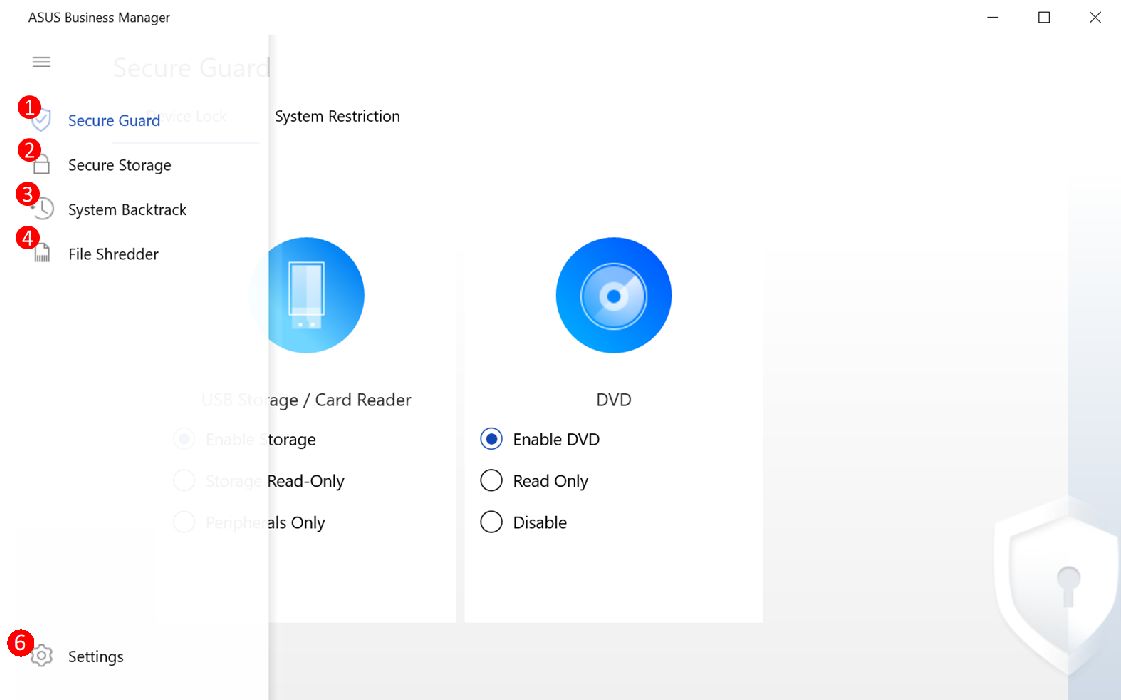
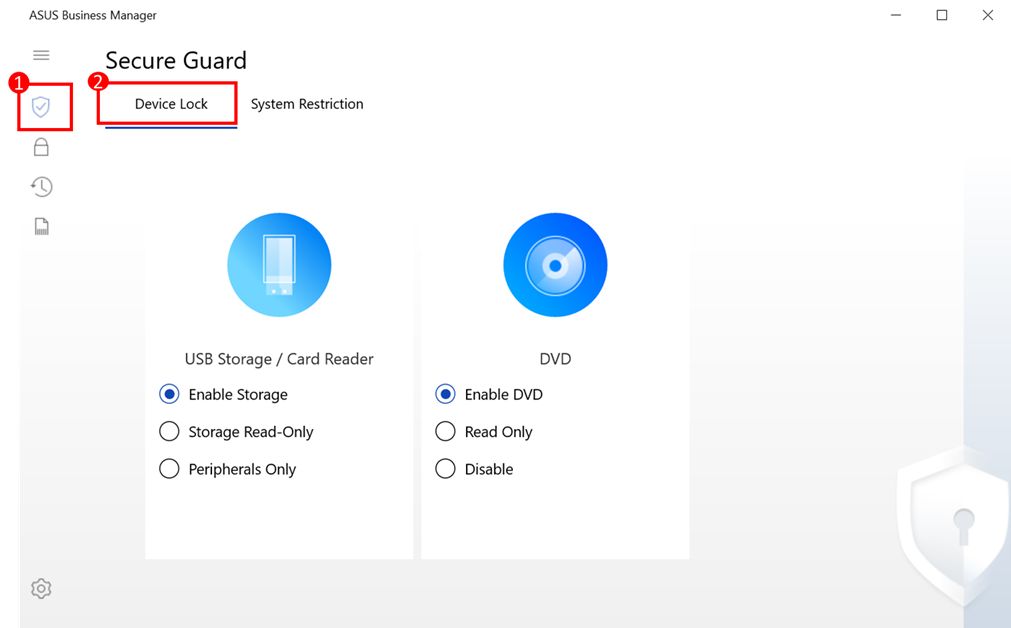
(1) Open ASUS Business Manager V3.0, click ①[Secure Guard] , there are two options for administrator. ②[Device Lock] ③[System Restriction]
- [Device Lock] Restrict users from copying data from USB storage / Card Reader and ODD.
- [System Restriction] Restrict users from damaging the computer by editing the registery or modifying system time and helps lock the system.
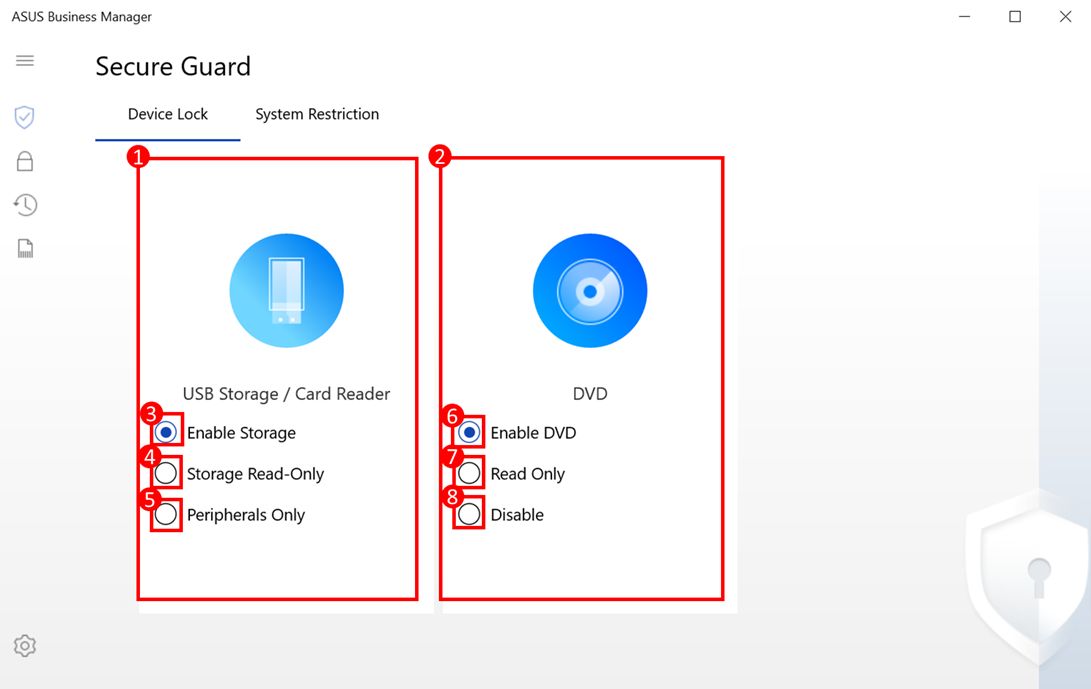
(2) Secure Guard – Device Lock
- Device Lock can lock two devices :①[USB Storage Device / Card Reader] ②[DVD]
- ③~⑧ mean the status of the two devices.
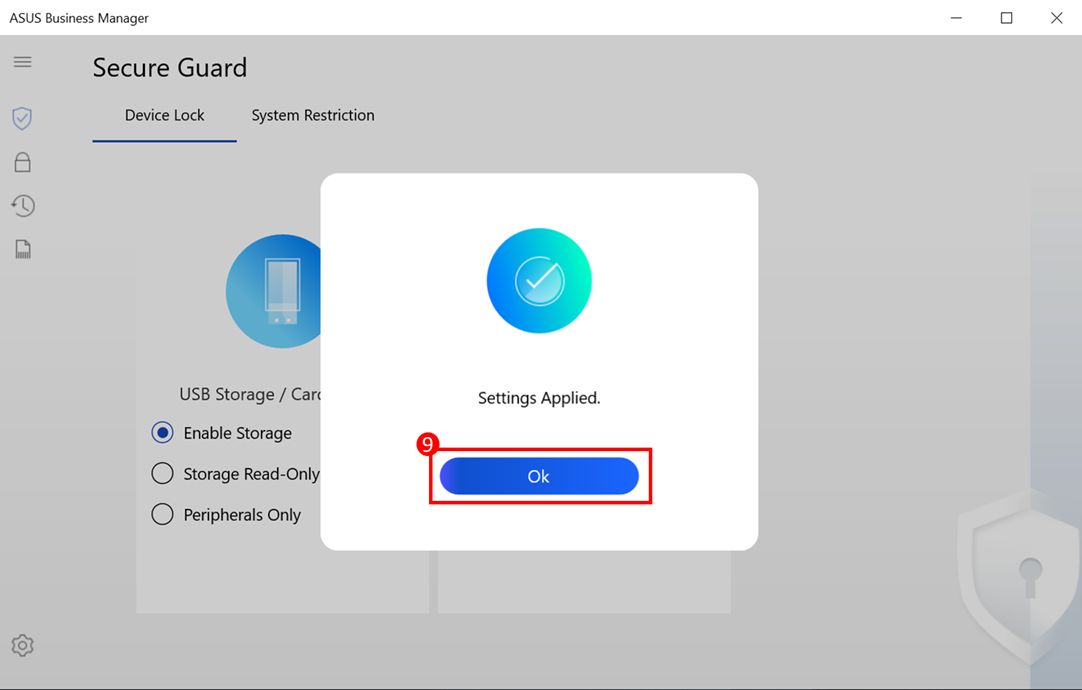
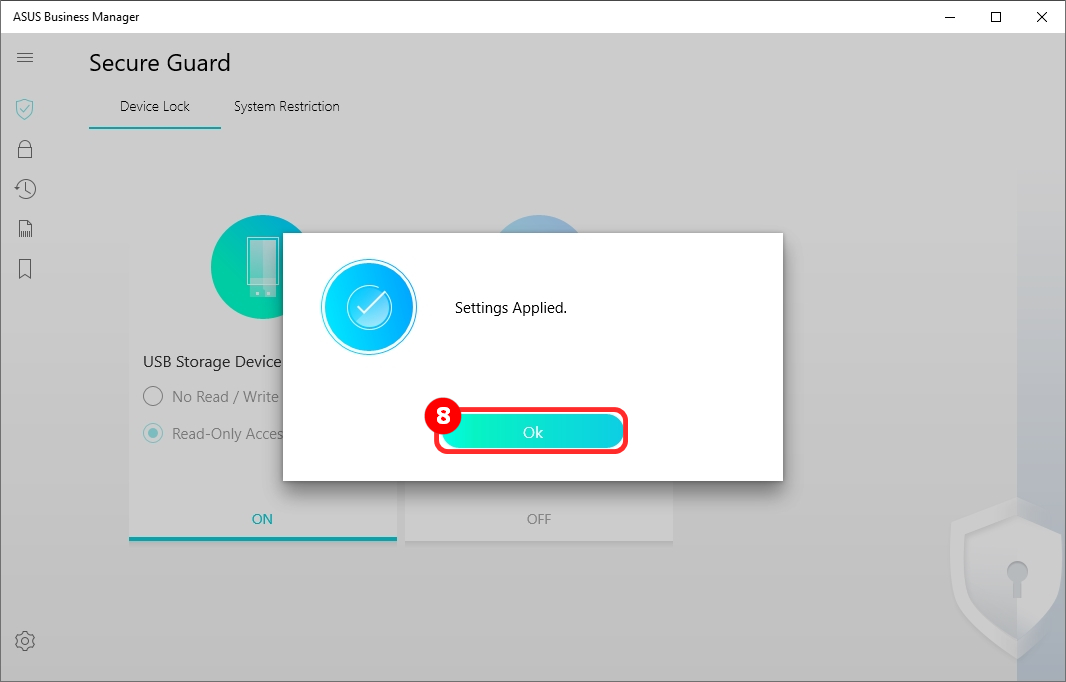
- After changing the settings, click ⑨[Ok] in the dialog box to apply.
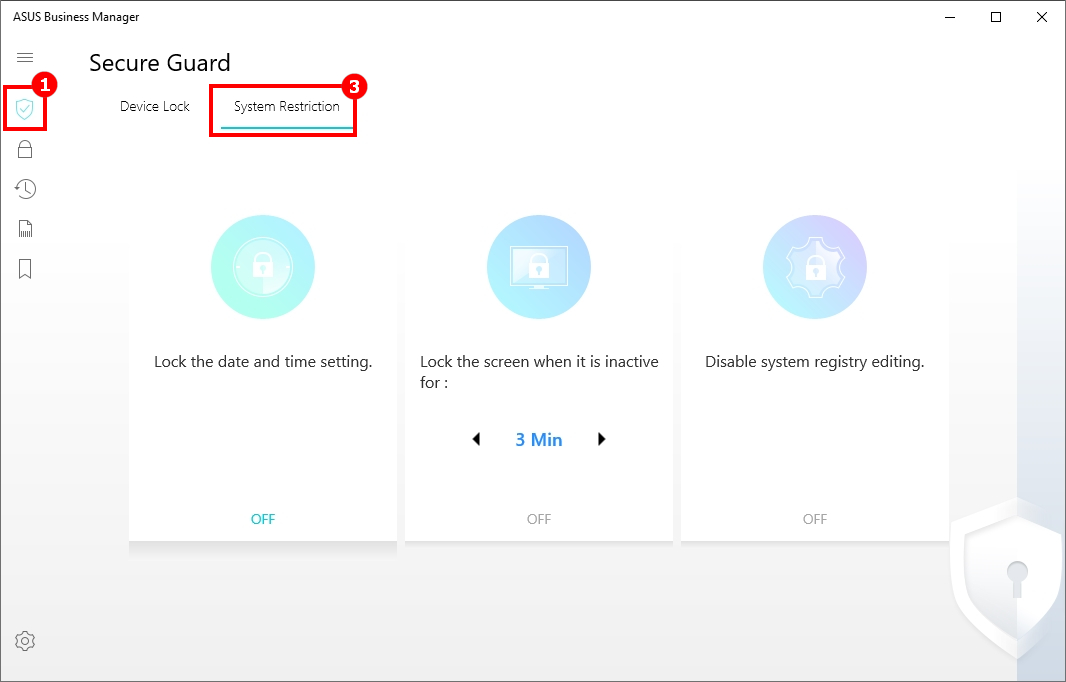
(3) Secure Guard - System Restriction
- Click ①[Secure Guard] , choose ②[System Restriction] , there are three functions :
③[Lock the date and time setting] Restrict users from modifying the system time
④[Lock the screen] Help users lock the system when they leave computer, the wait time can be adjusted by ⑥ .
⑤[Disable system registry editing] Restrict users from damaging the computer by editing the registry.
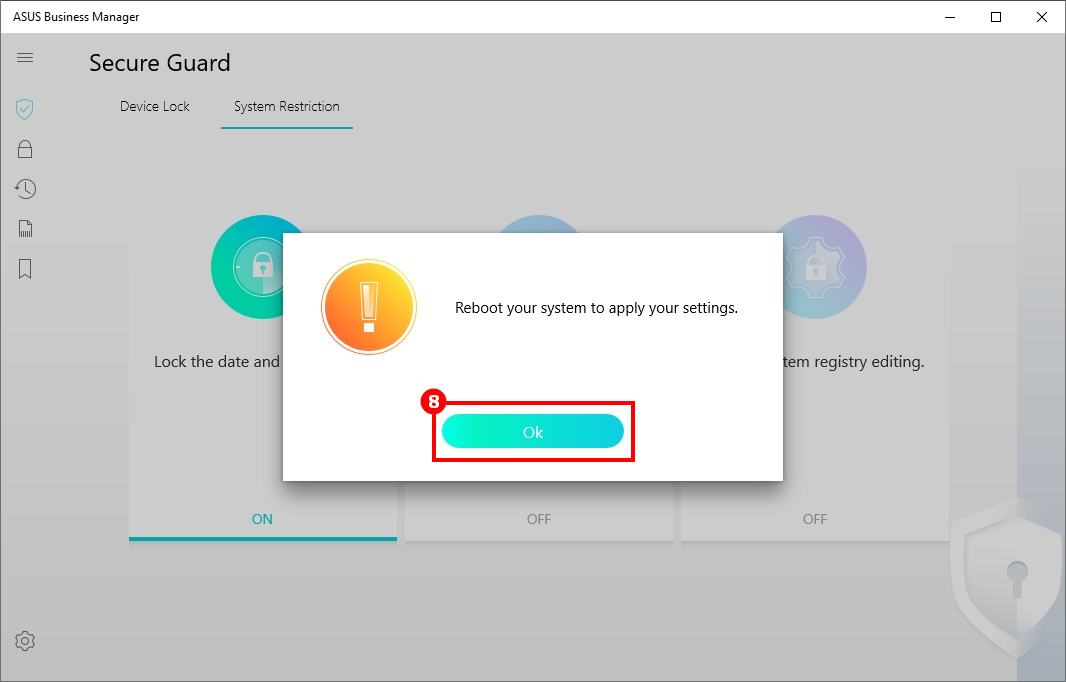
- ⑦[OFF] means that the functions of ③④⑤ are closed ; click ⑦[OFF] , click ⑧[Reboot your system to apply your settings; Ok] and restart system to take effect , or click ⑧[Settings Applied; Ok] to take effect.
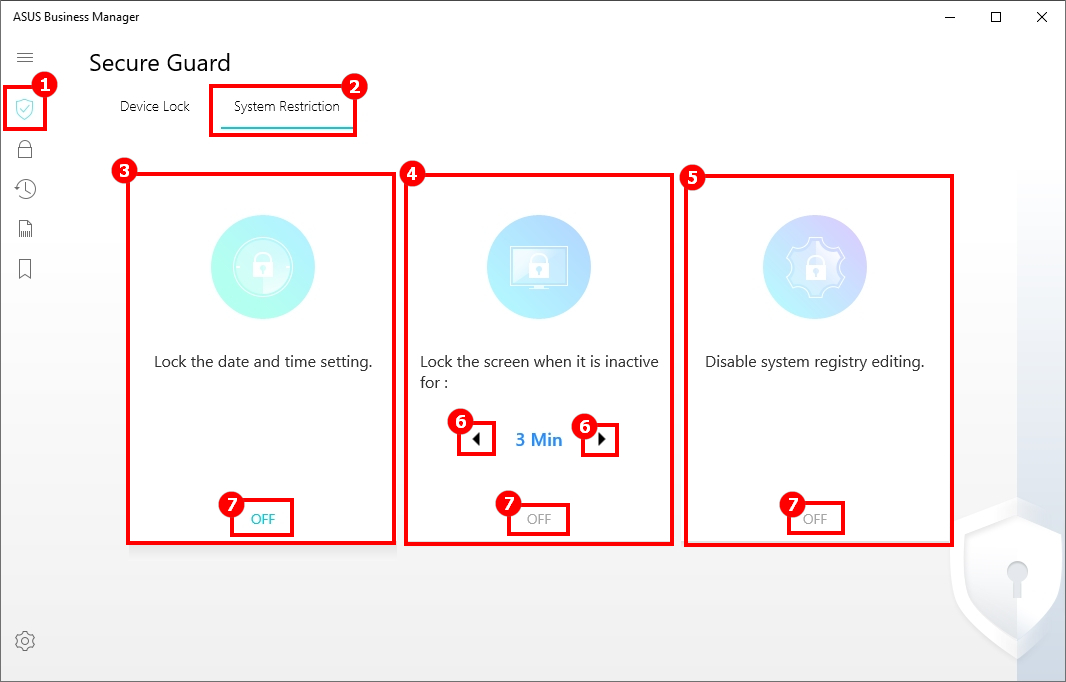
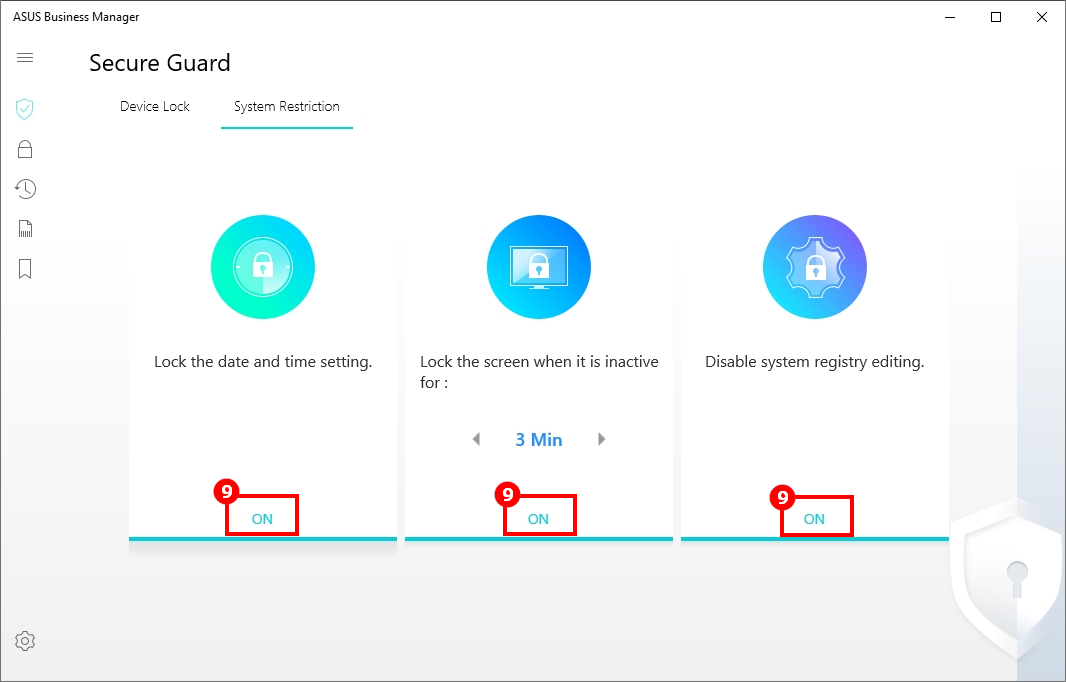
⑨[ON] means that the functions of ③④⑤ are open.
Secure Storage can help you create an encrypted virtual partition in your local drive where you can save your important data.
(1) Create Secure Drive
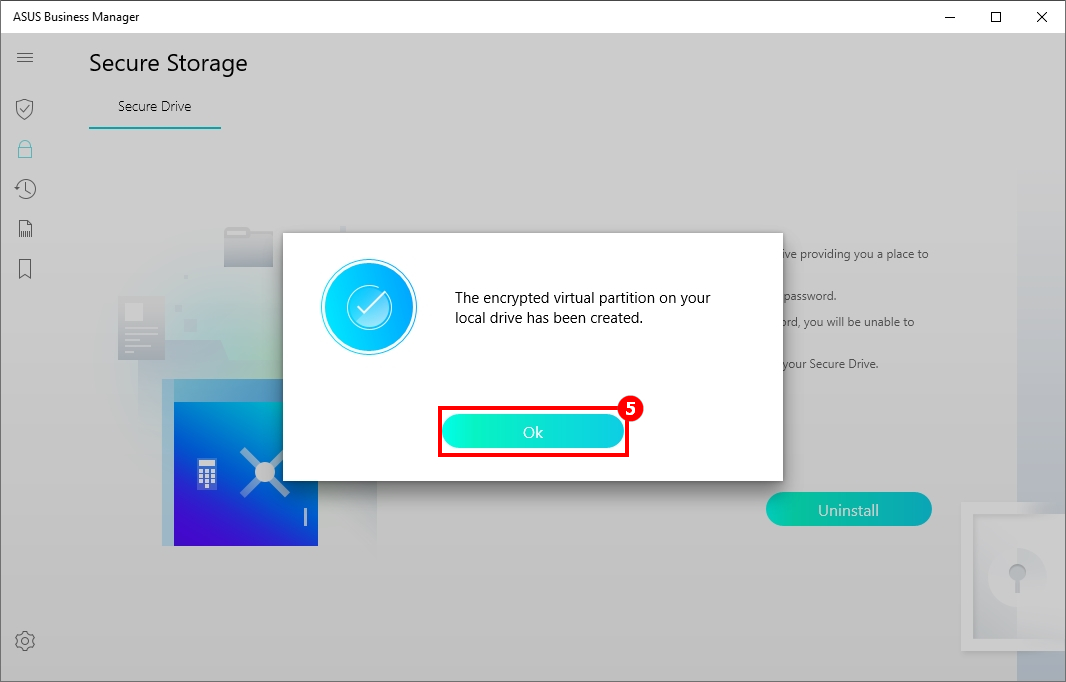
Click ①[Secure Storage] , choose ②[Secure Drive] , select the storage device you want to encrypt,as ③[OS(C:)] ,click ④[create] , and click ⑤[OK] to create it.

(1) Activate Secure Drive
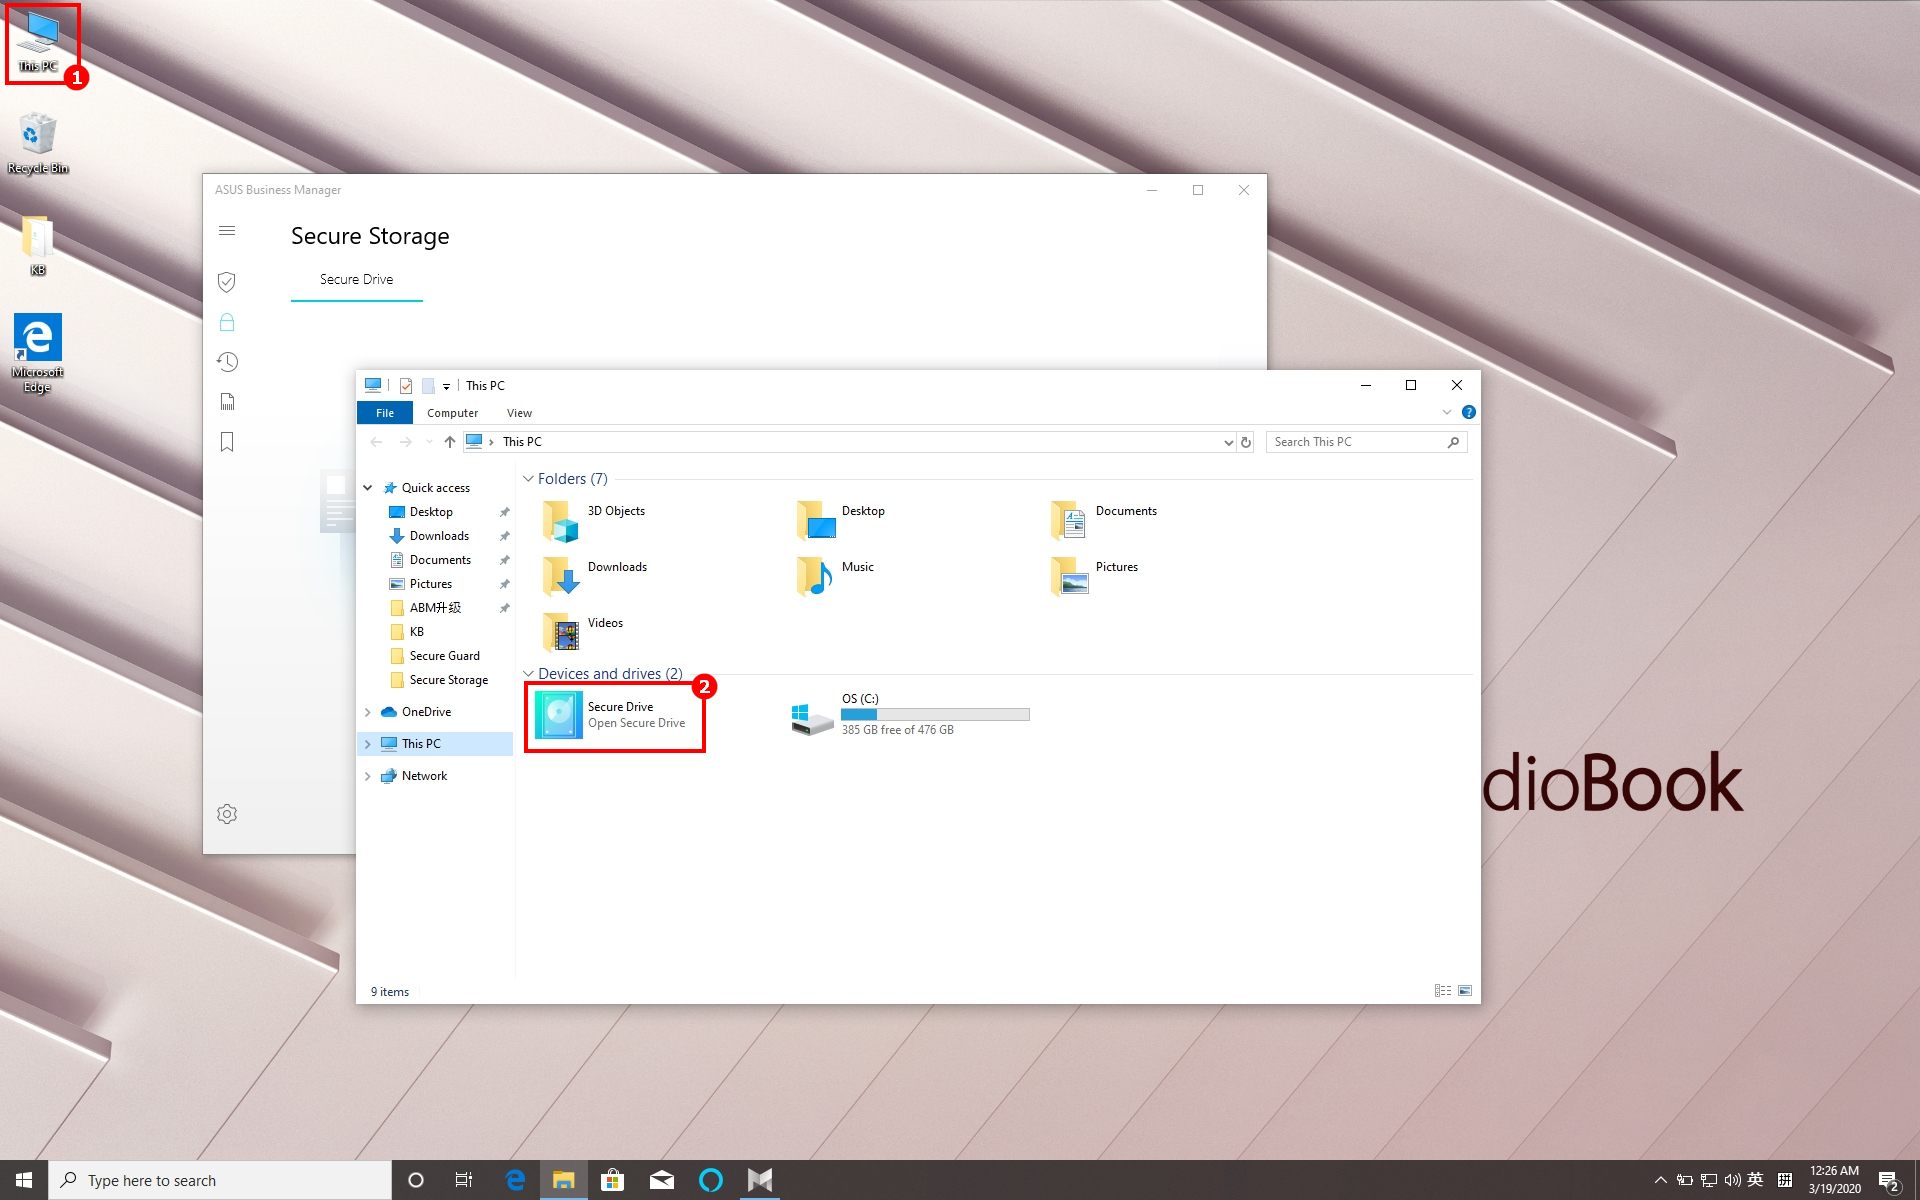
- Open ①[This PC] , there is a new icon ②[Secure Drive] ,open it.
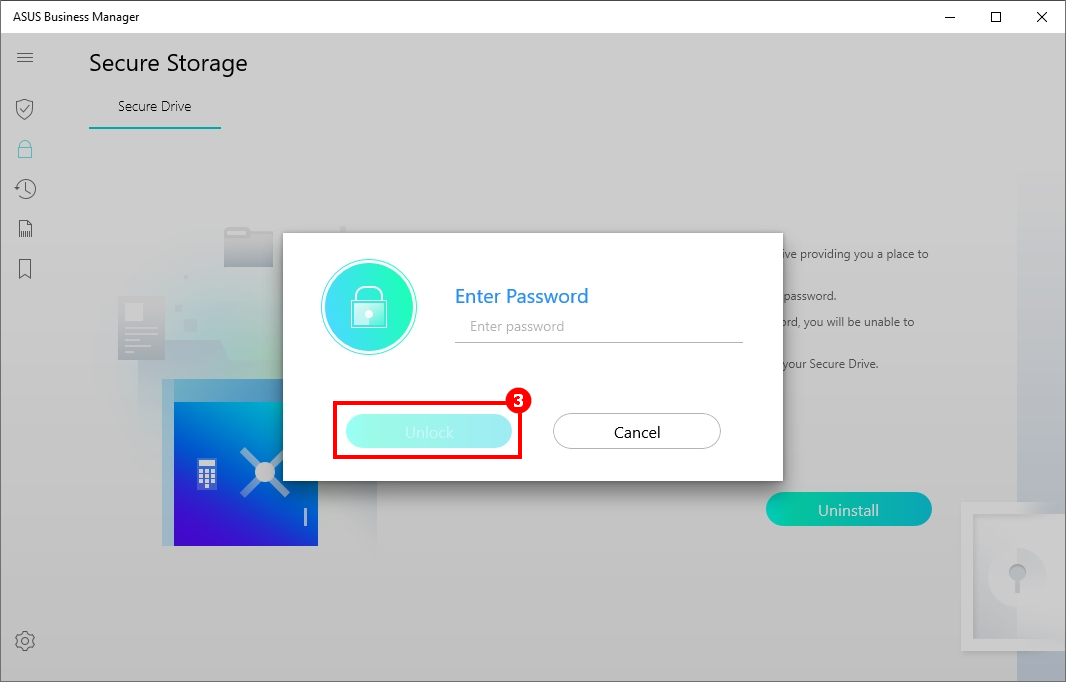
- Input the startup password and click ③[Unlock]
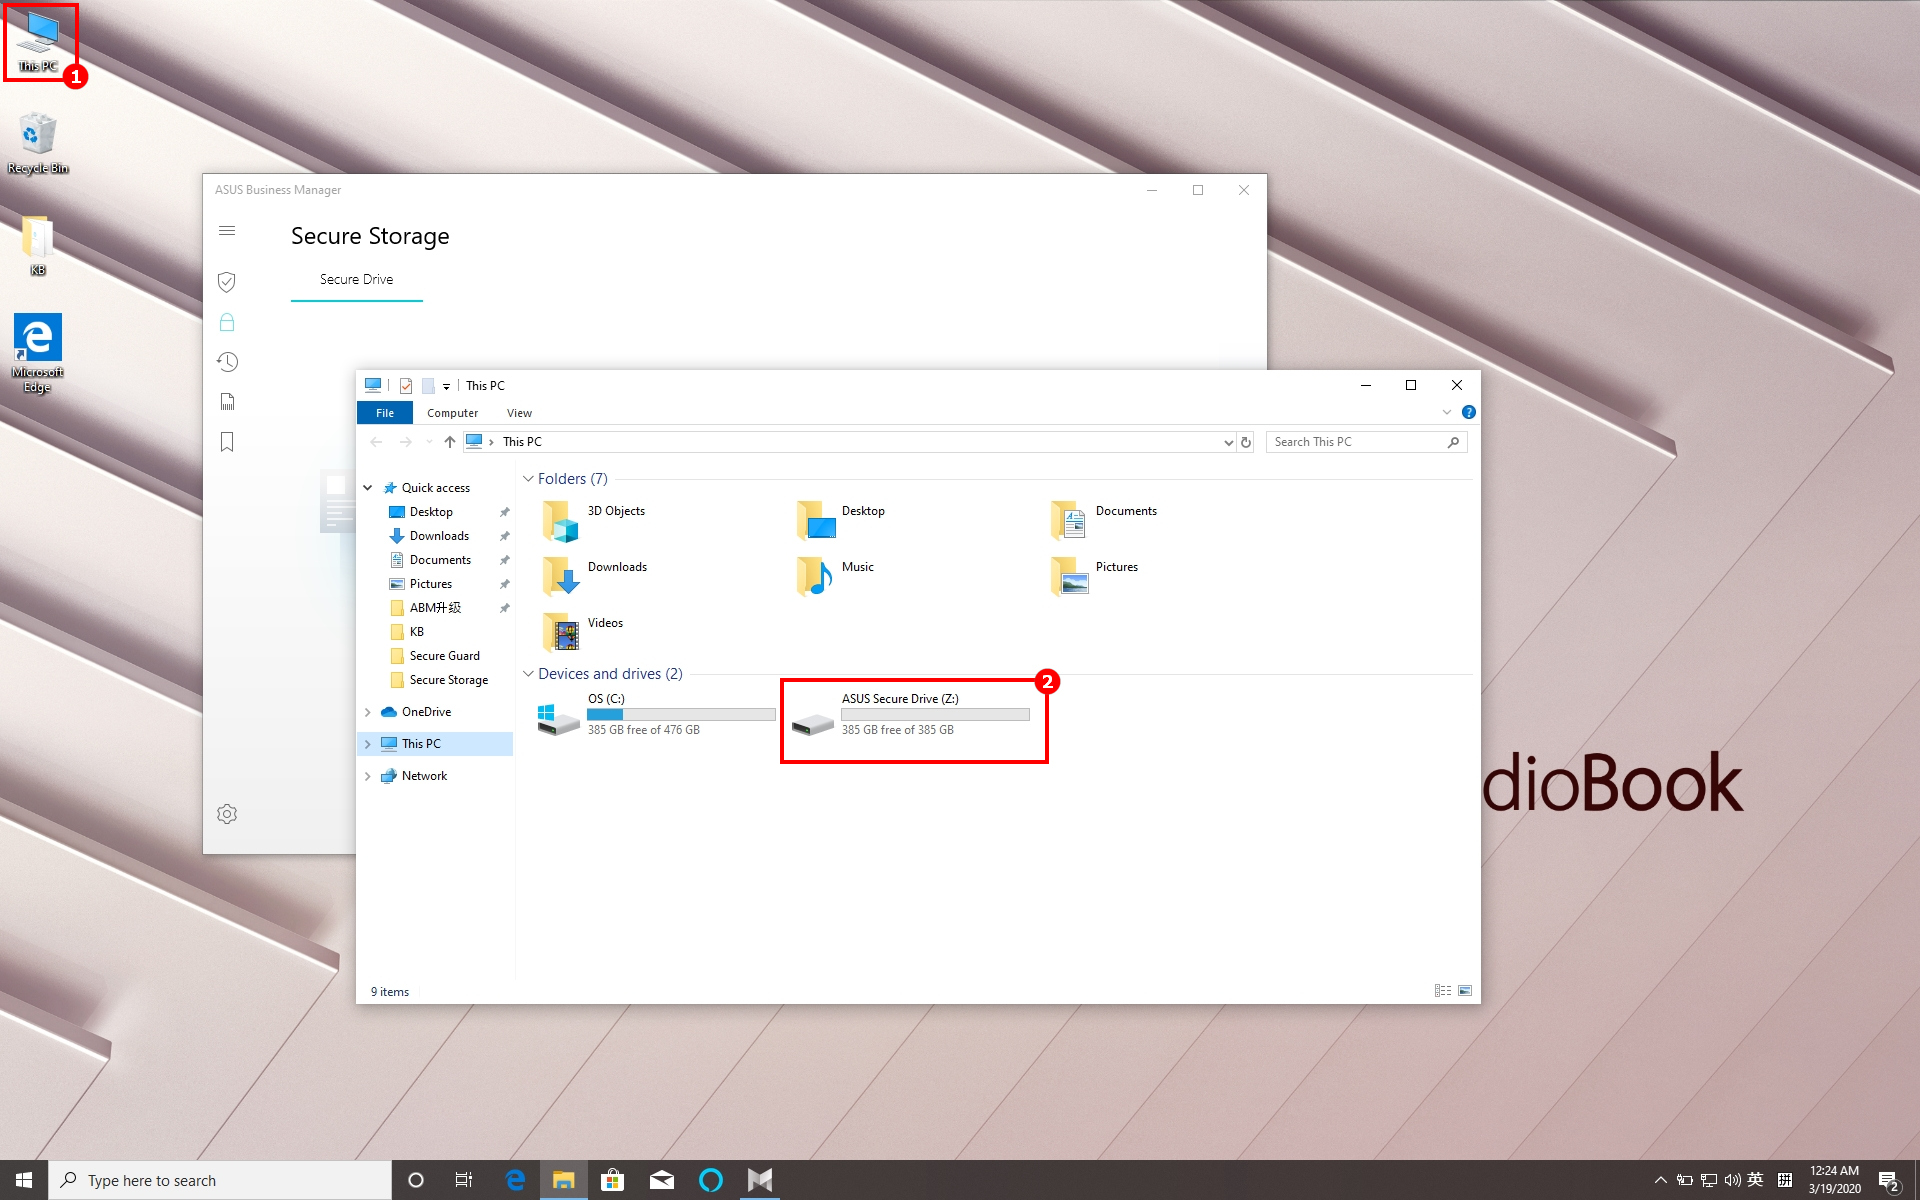
Open ①[This PC] , you will find ②[ASUS Secure Drive] , where you can store sensitive data.
Note : Be sure to remember the startup password, you will lose access to the data and settings without it.
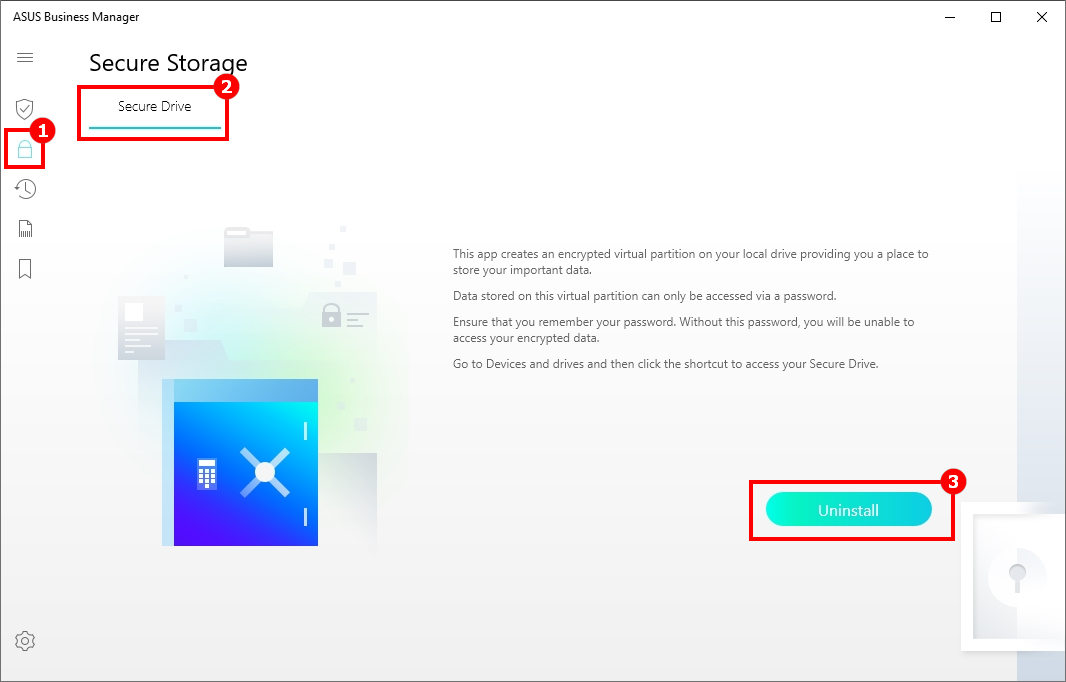
(3) Uninstall Secure Drive
- Click ①[Secure Storage] , choose ②[Secure Drive] ,click ③ [Uninstall]
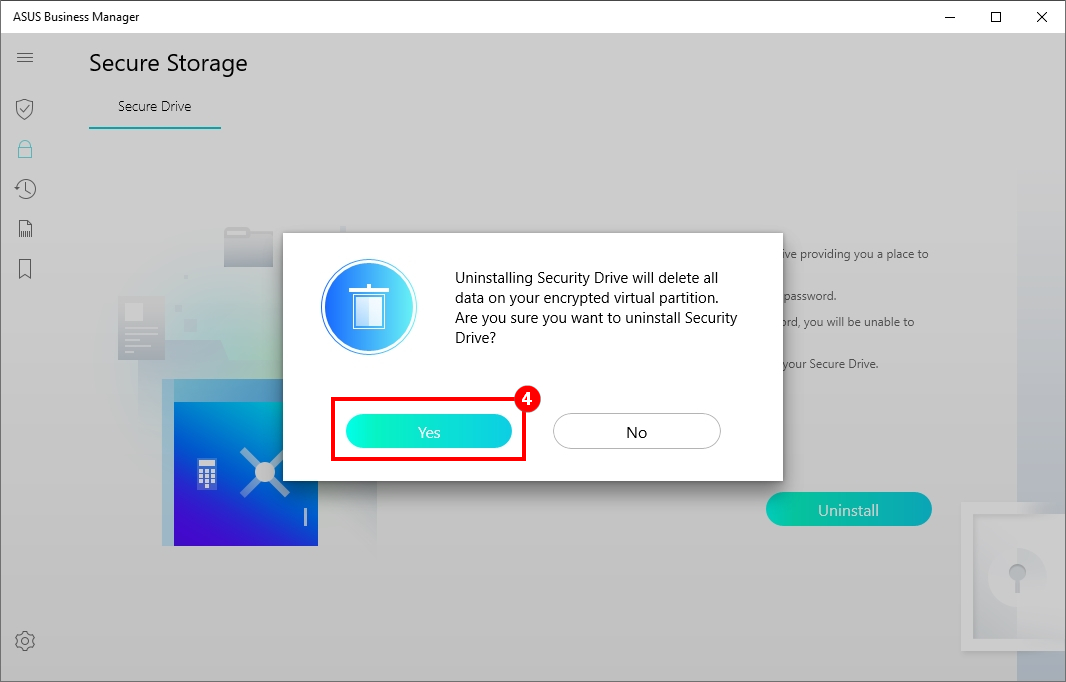
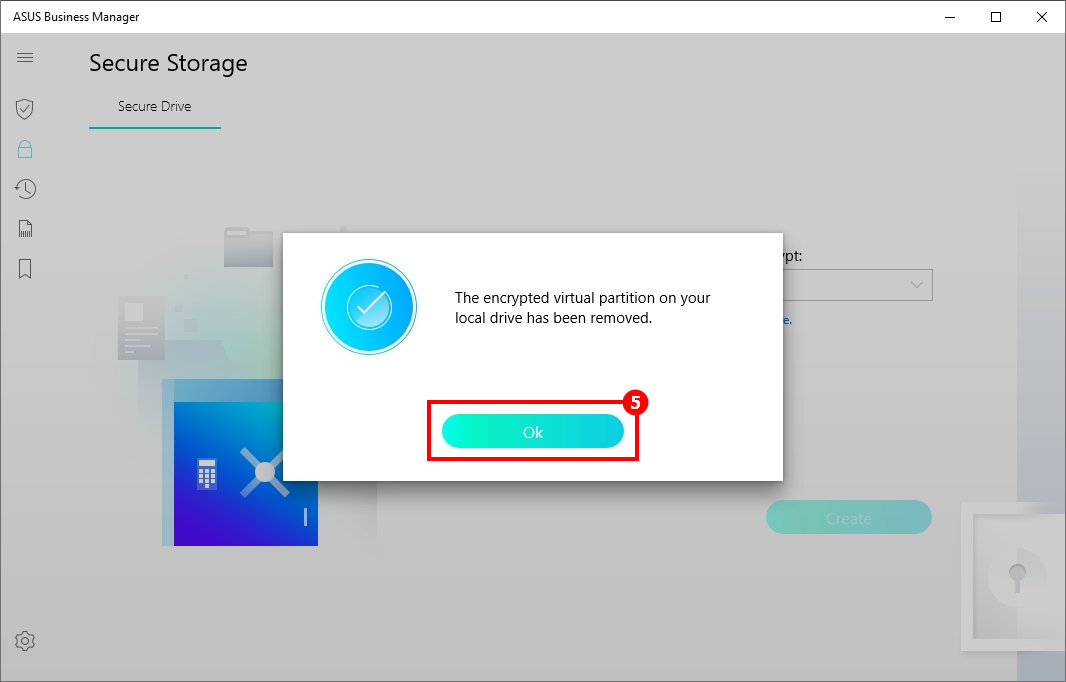
- Click ④ [Yes] on the pop-up window, wait for the system to complete the operation,and click ⑤[Ok] to remove it..
Note:Removing Secure Drive will delete all data on the encrypted virtual partition. Please backup the relevant information in advance and operate cautiously.
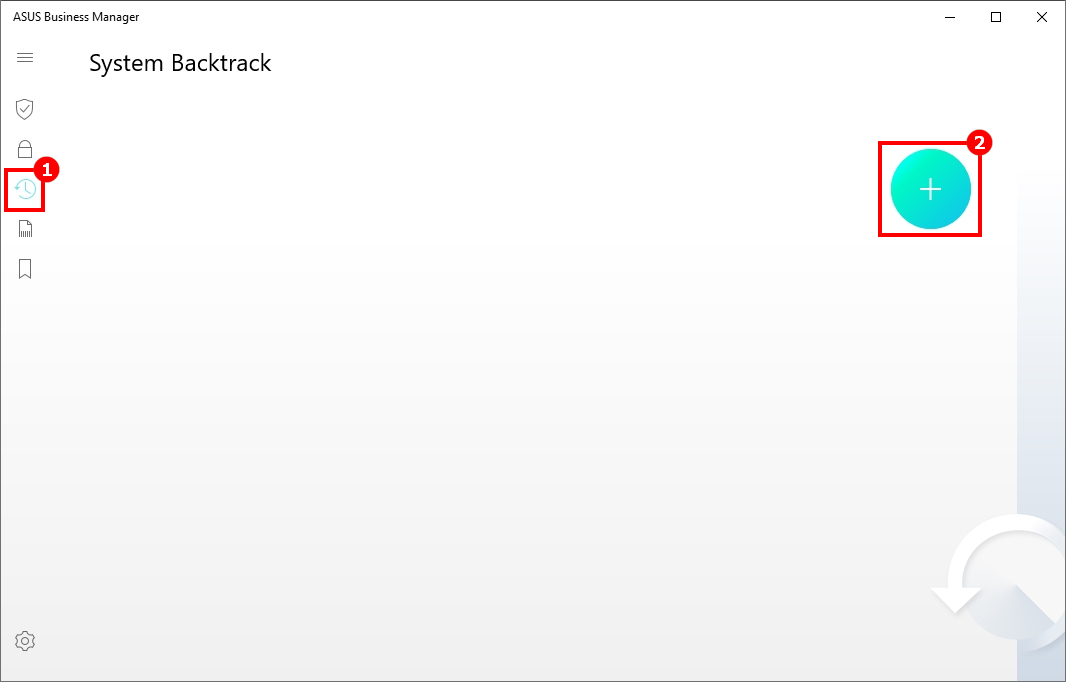
System Backtrack helps users make a restore point for their system. The system can be restored by the restore point when it is damaged.
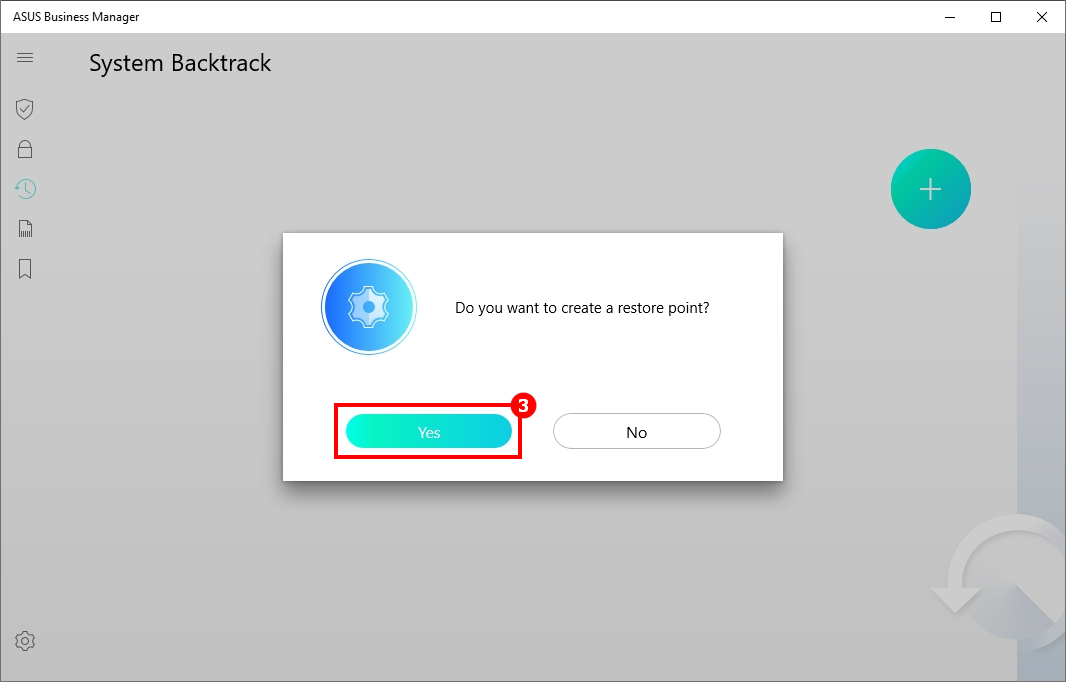
(1) Create a New Restore Point
- Click ①[System Backtrack] , click ②[+] , Click ③[Yes] to create a new restore point .
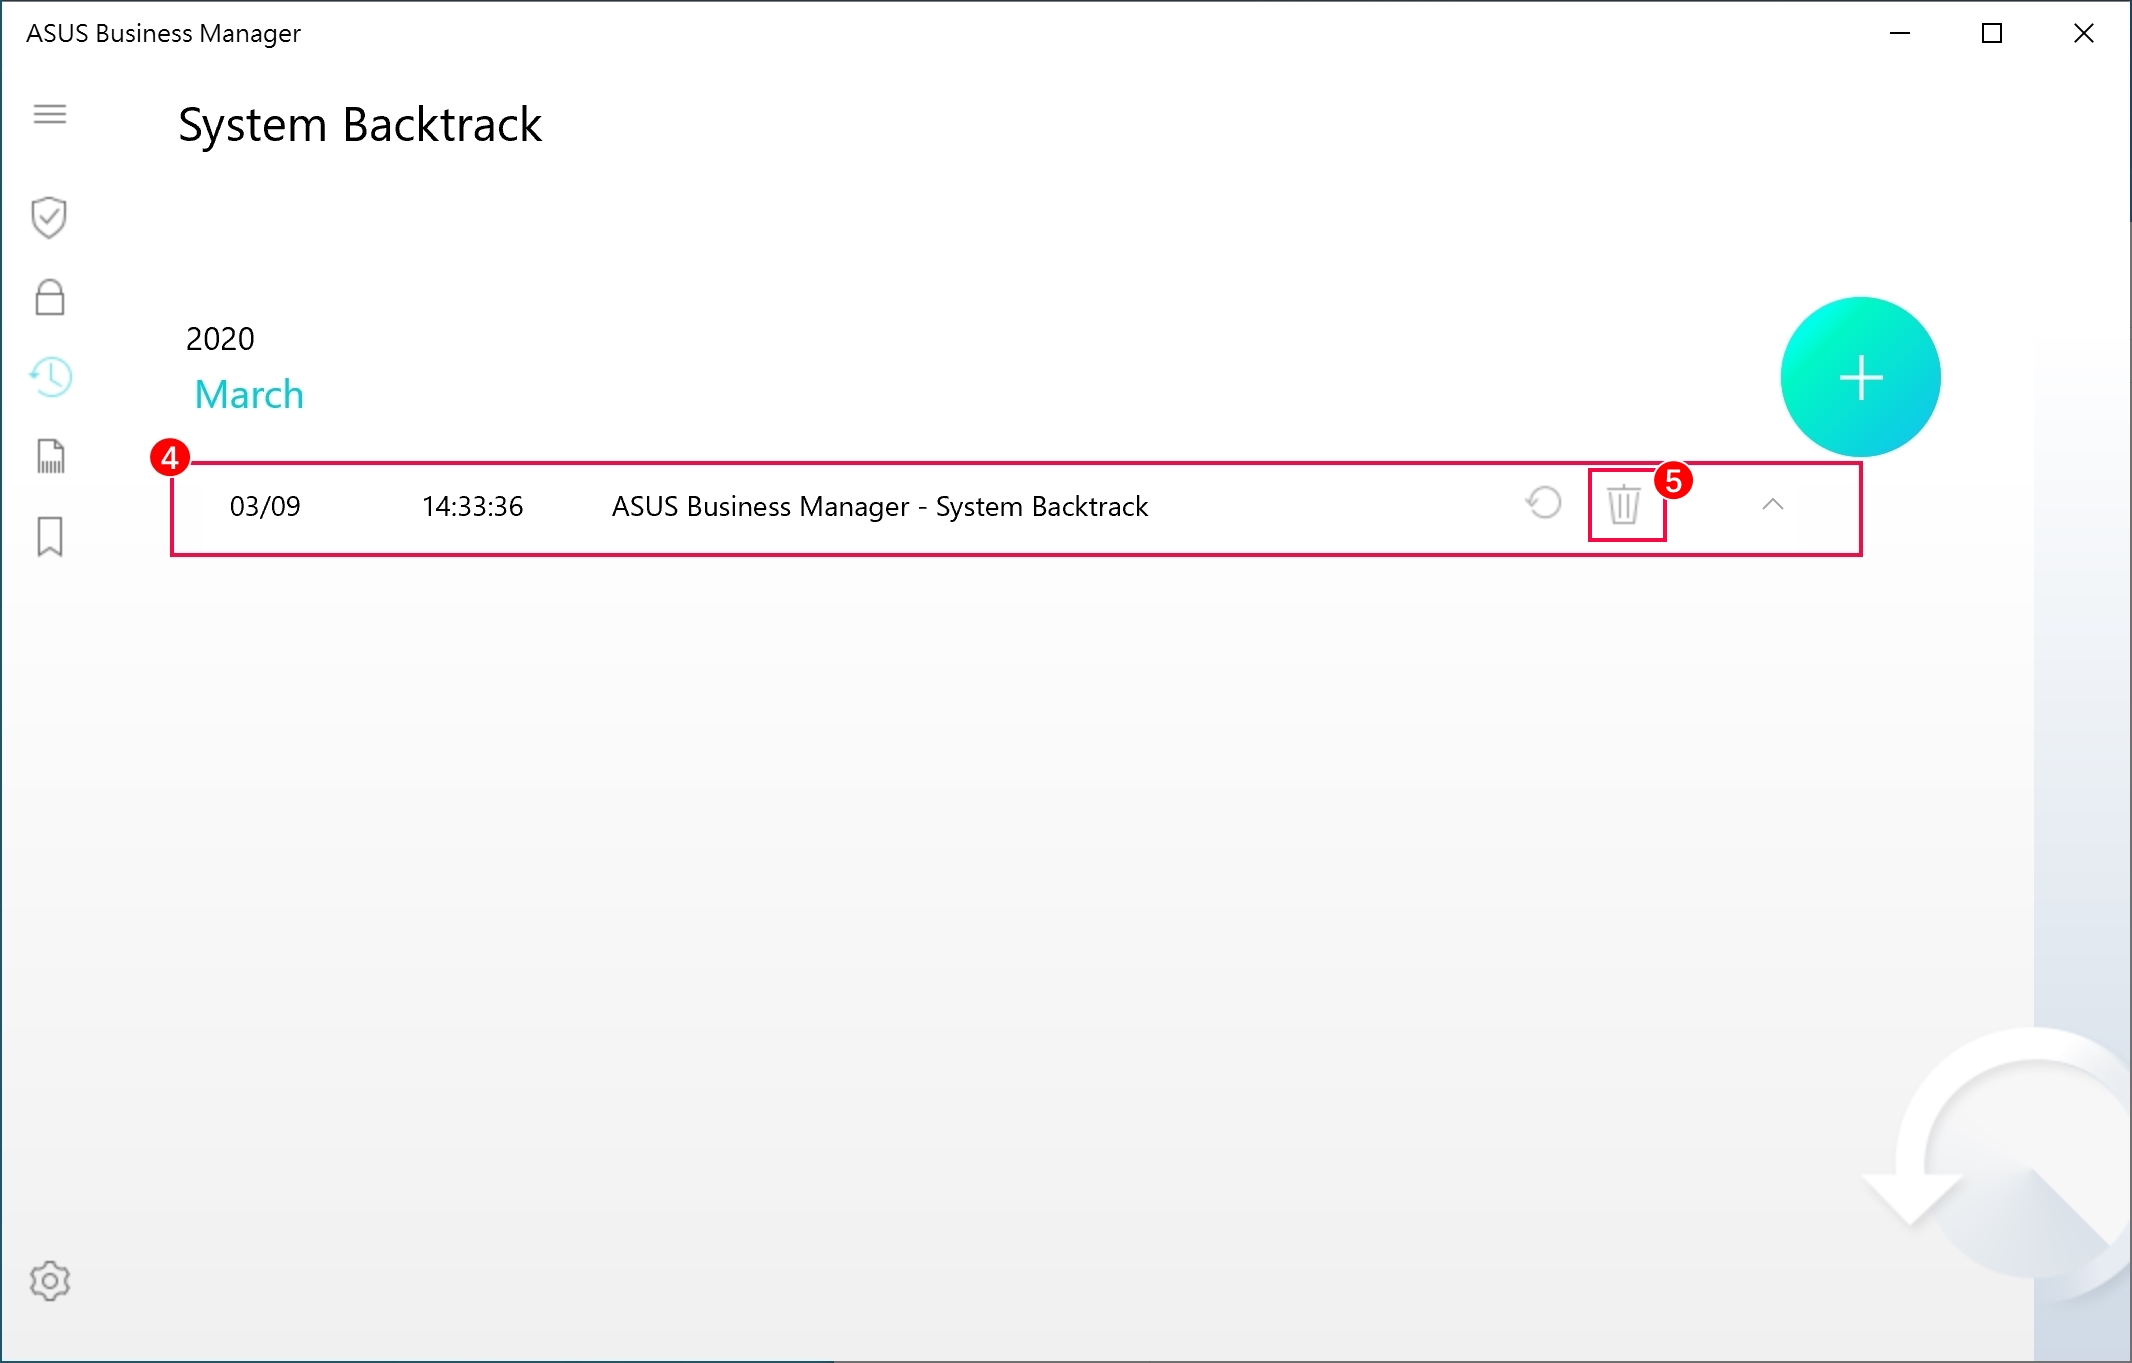
- ④ is the new restore point. Clicking ⑤[Delete Icon] can delete the restore point.
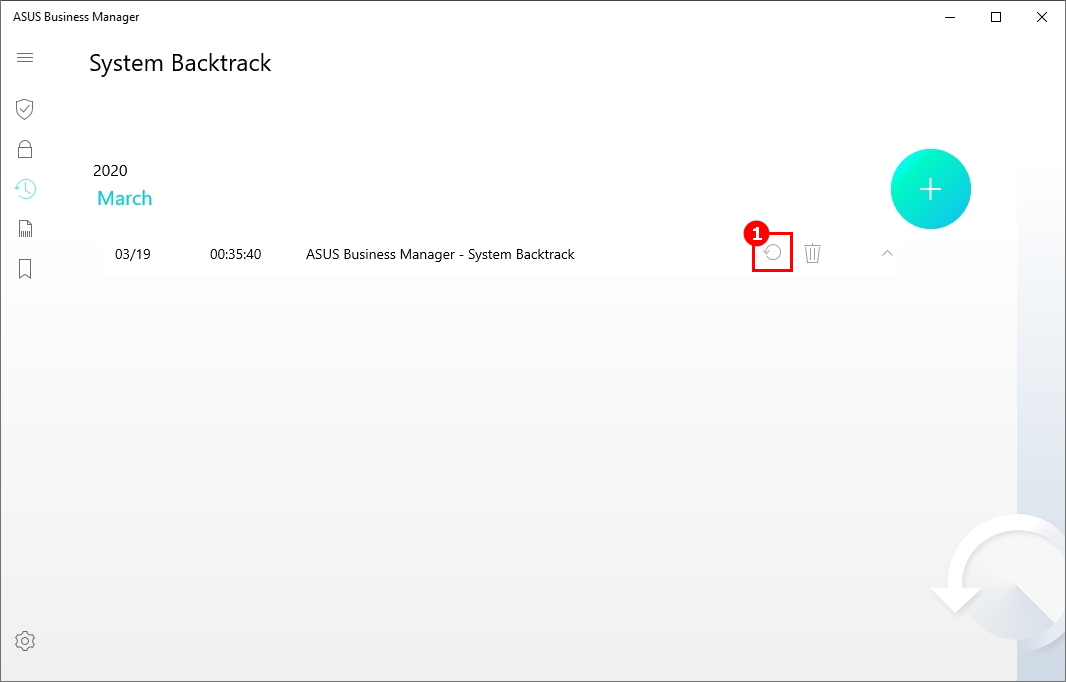
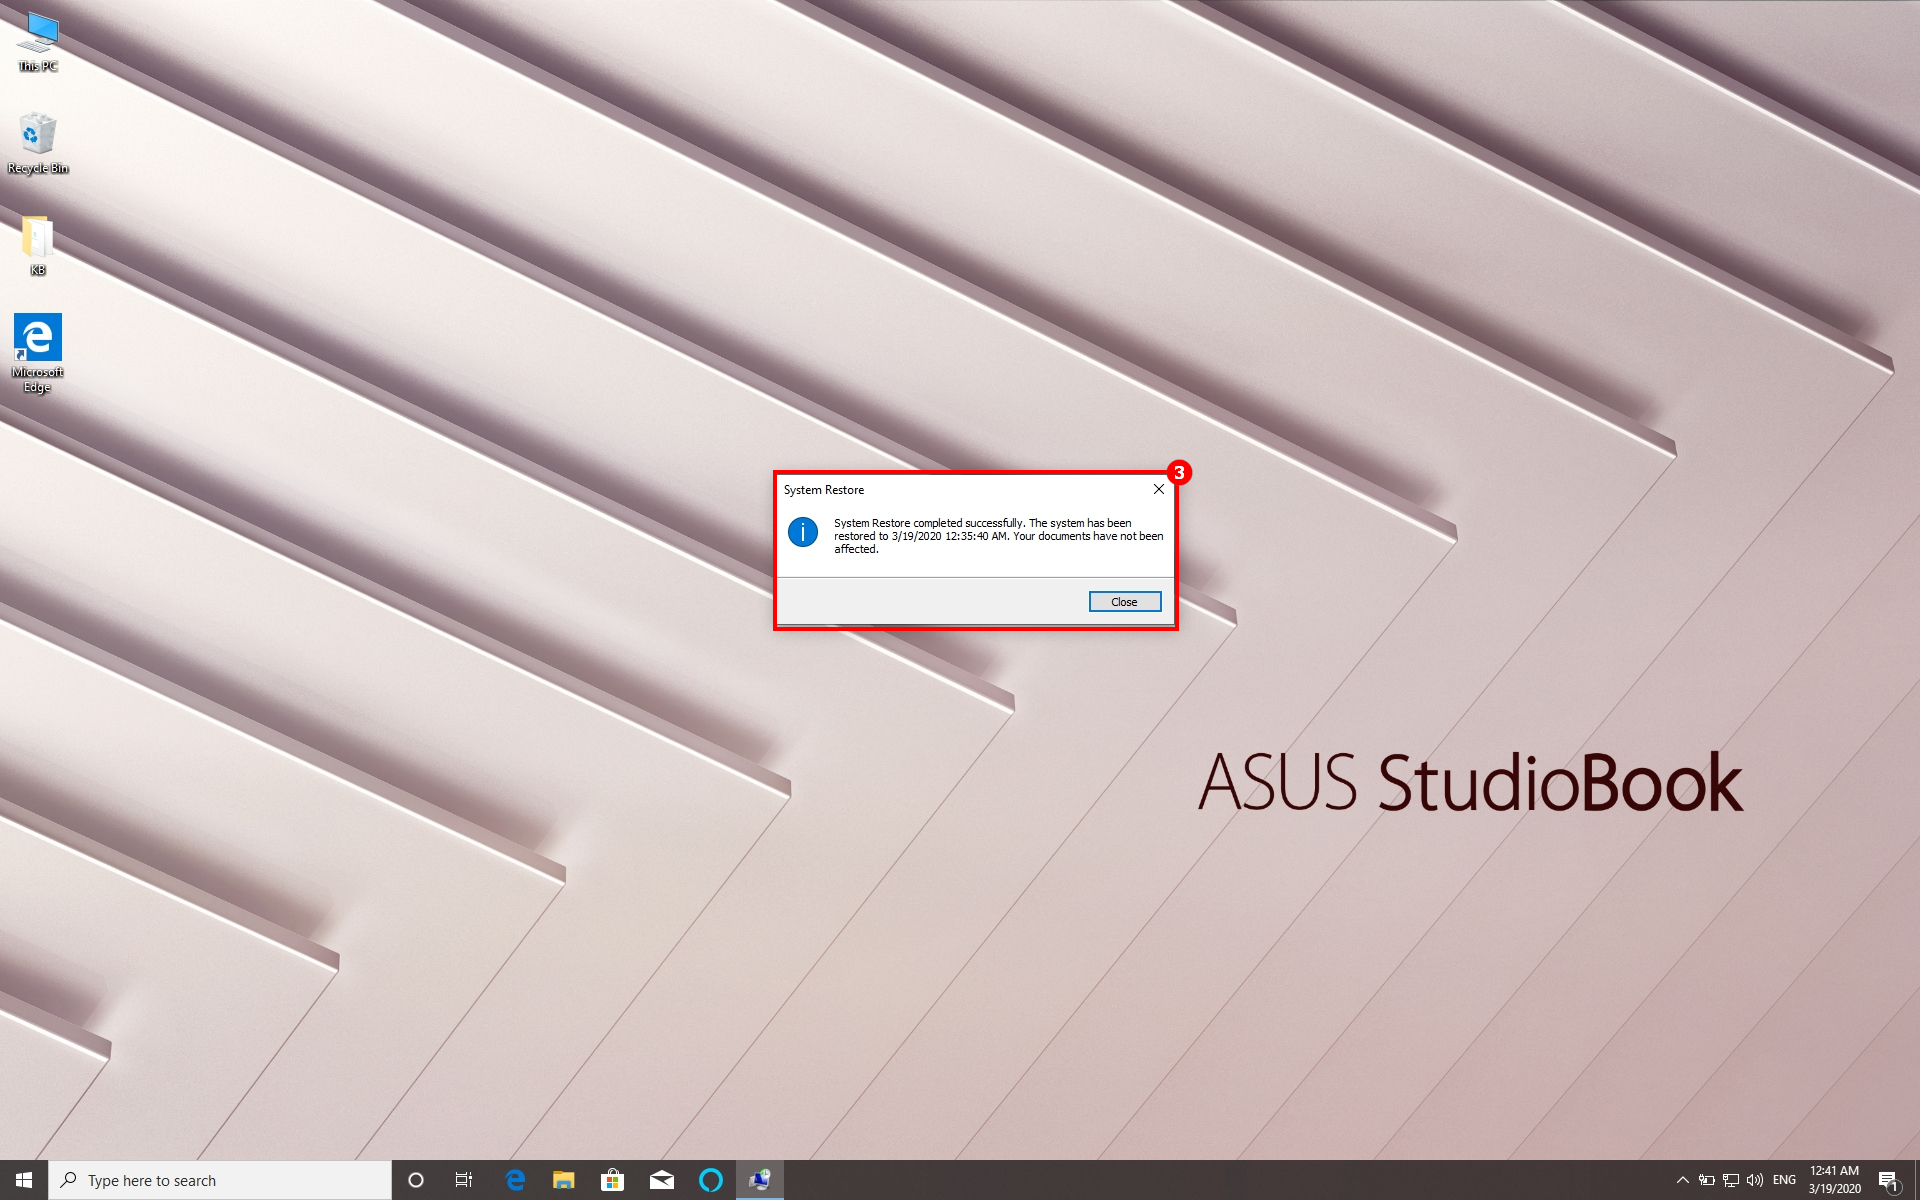
(2) Restore the System by Using the Restore Point
- Click ①[Restore Icon] ,Choose ②[Yes] to restore the system.
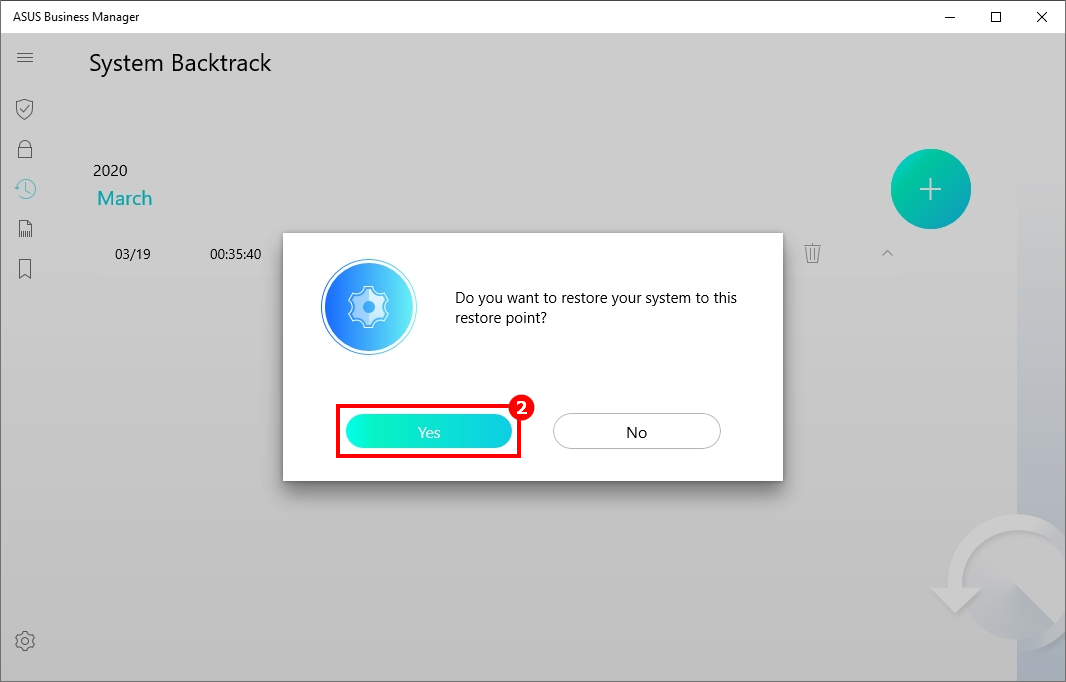
- The system will restart automatically during the process. ③[System Restore Completed Successfully]
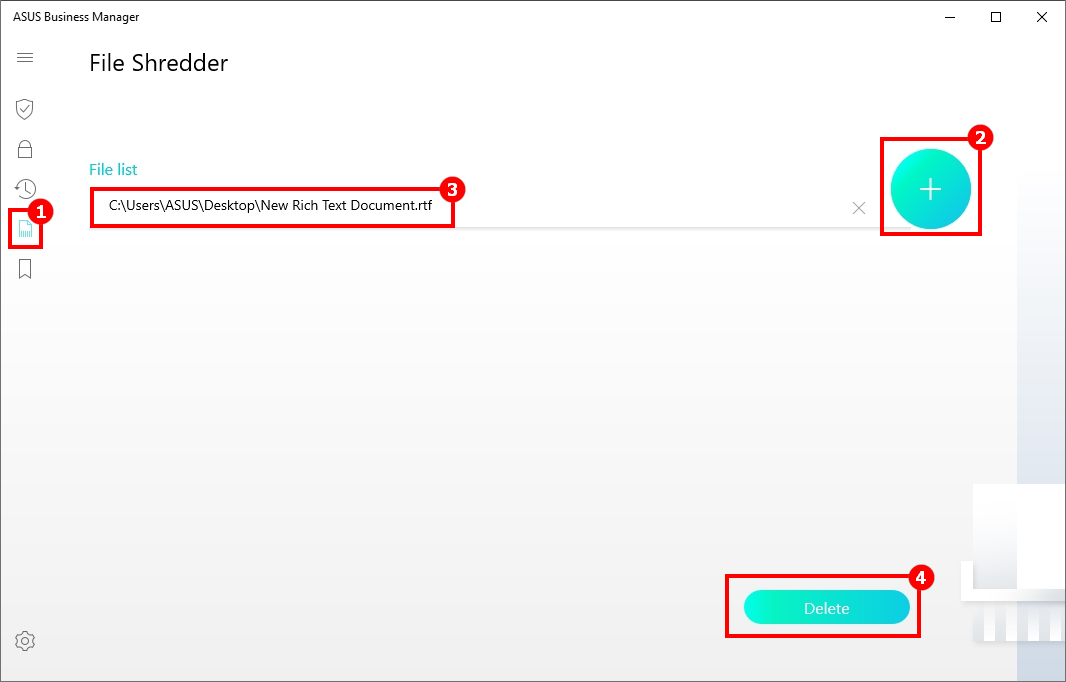
File Shredder allows you to delete files permanently.
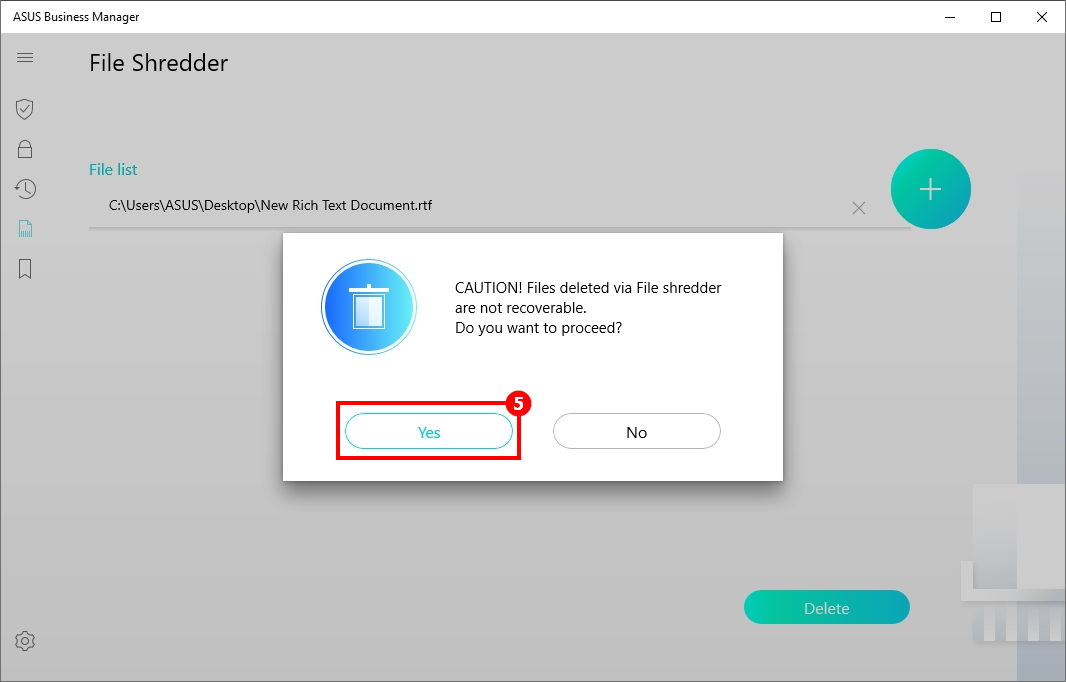
- Open ①[File Shredder] , press ②[+] to select the file that you want to delete directly , ③ is file list, click ④[Delete] , choose ⑤[Yes] to delete it.
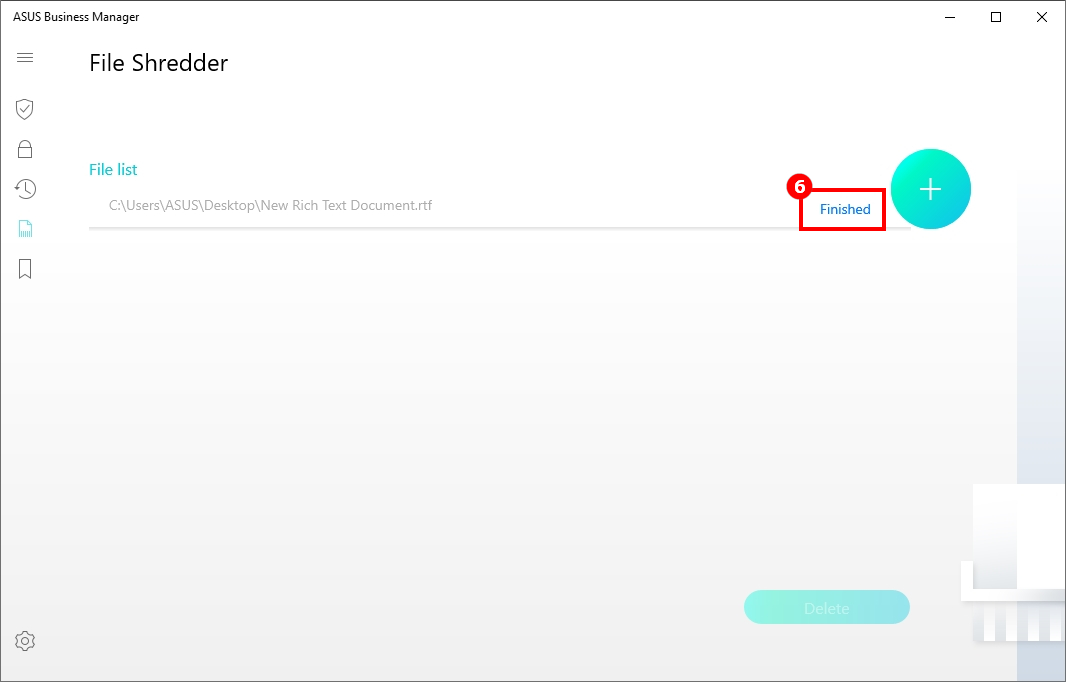
- ⑥[finished] Indicates that the files of File List have been removed.
5.5 My Logo (Currently does not support Modern Standby devices)
My Logo can change the BIOS booting image.
Downloading the BIOS file of corresponding model from the ASUS website, you can replace the booting image in the BIOS file, and the system will restart to update BIOS automatically after you change the image successfully.
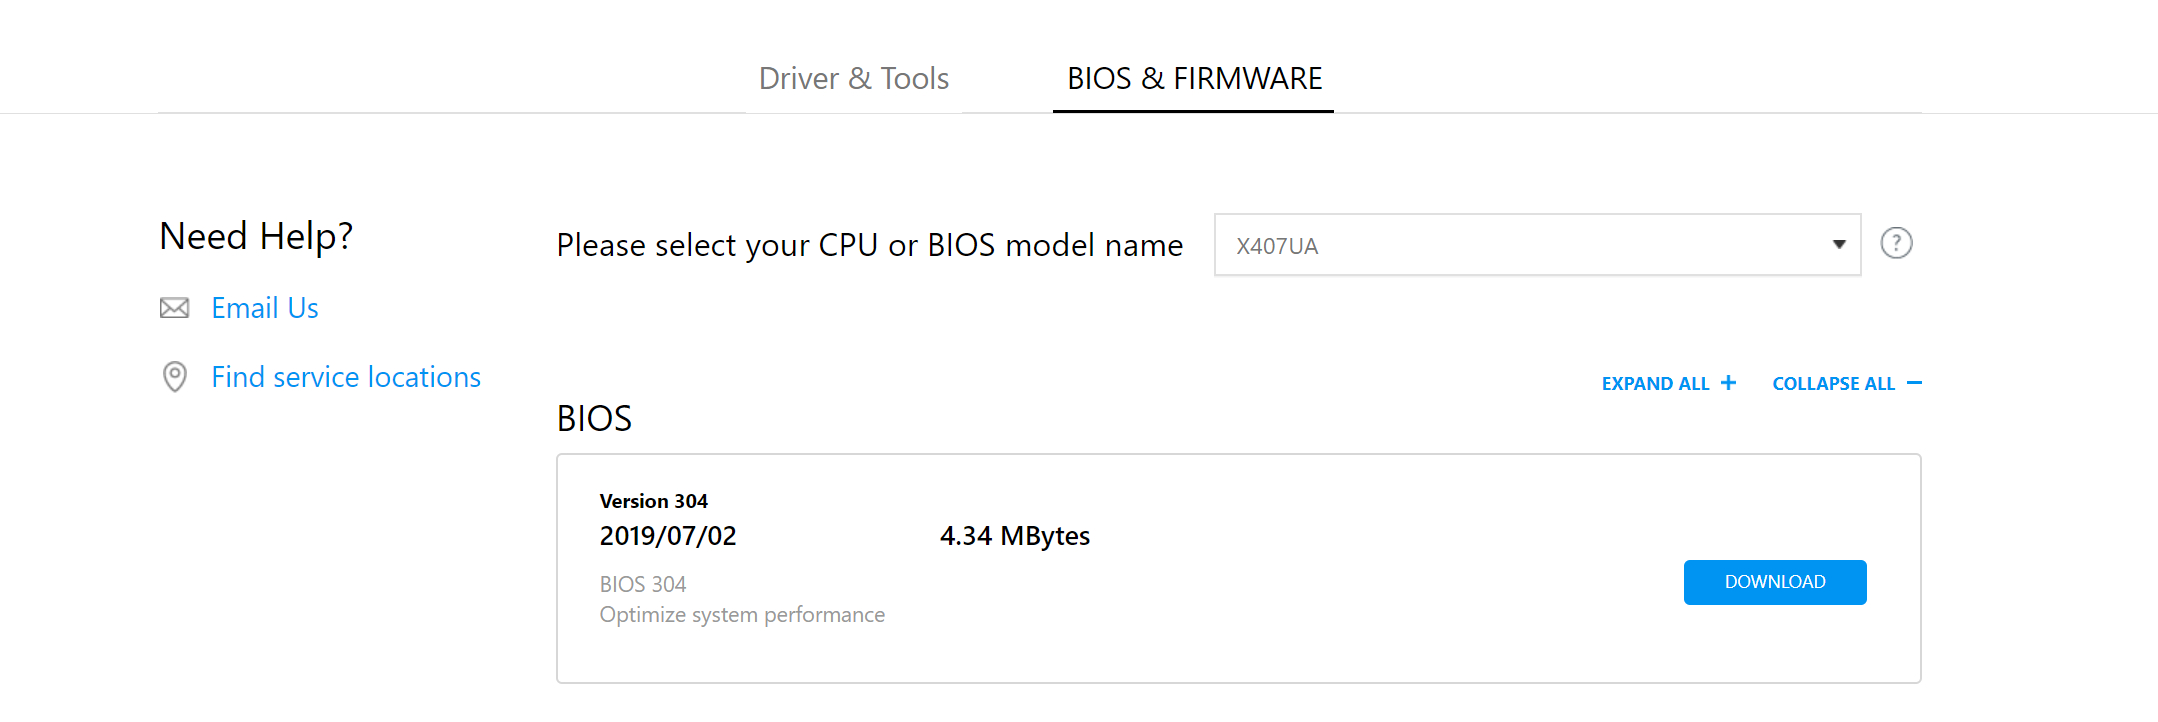
(1) Download the BIOS File
Please refer to ASUS official website Service and Support to download the BIOS file.
Please refer to this link to learn how to search and download the BIOS file on official website.
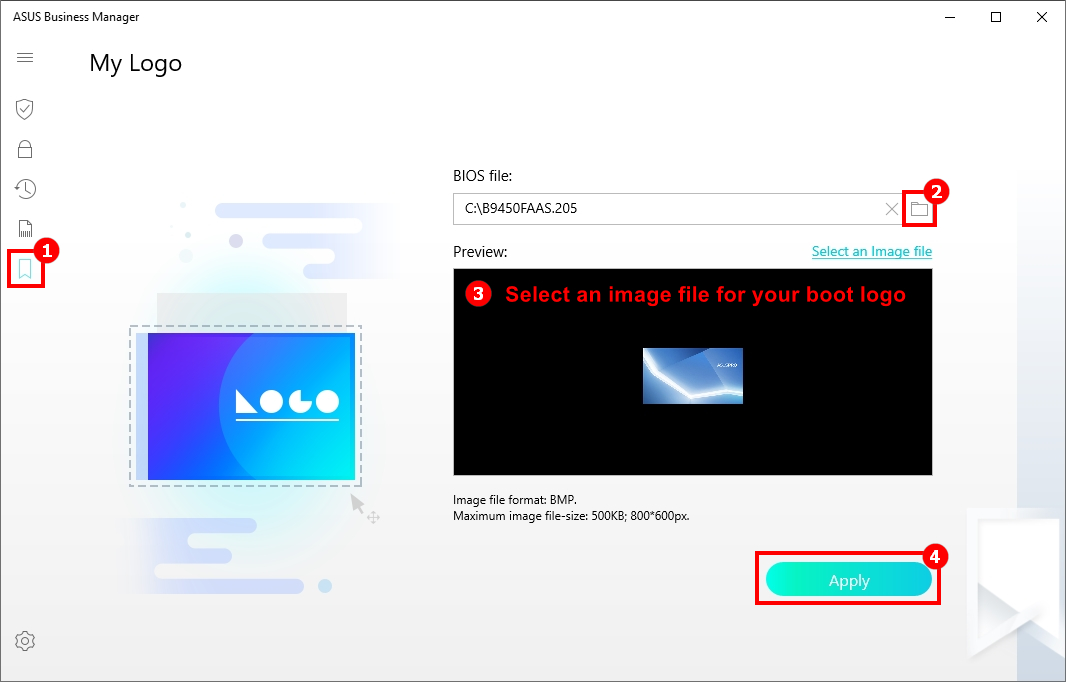
(2) Change the BIOS Booting Image
- Click ①[My Logo] , click ② to choose the BIOS file, ③ [select an image file and preview it] ,click ④[Apply] , and you will be asked to restart your computer to update the BIOS so that the settings take effect.
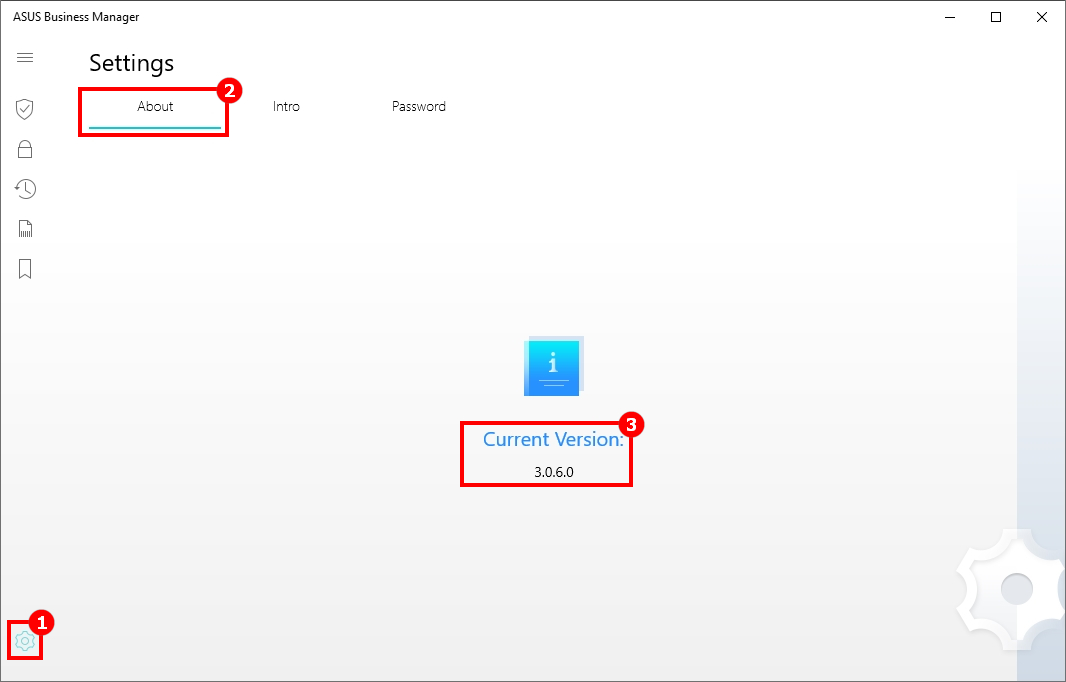
(1) Show Current Version Information
- Click ①[Settings] , choose ②[About] to show ③[Current Version]
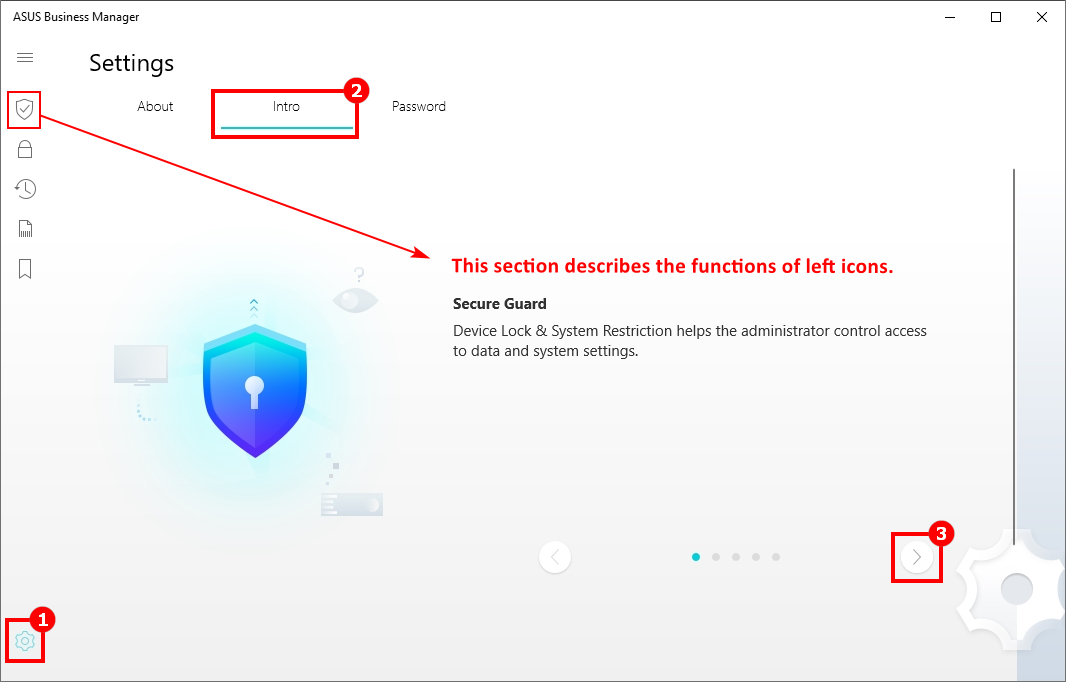
(2) Brief Introduction to Functions
- Click ①[Settings] , choose ②[Intro] to show brief introduction to functions, click ③ to flip over.
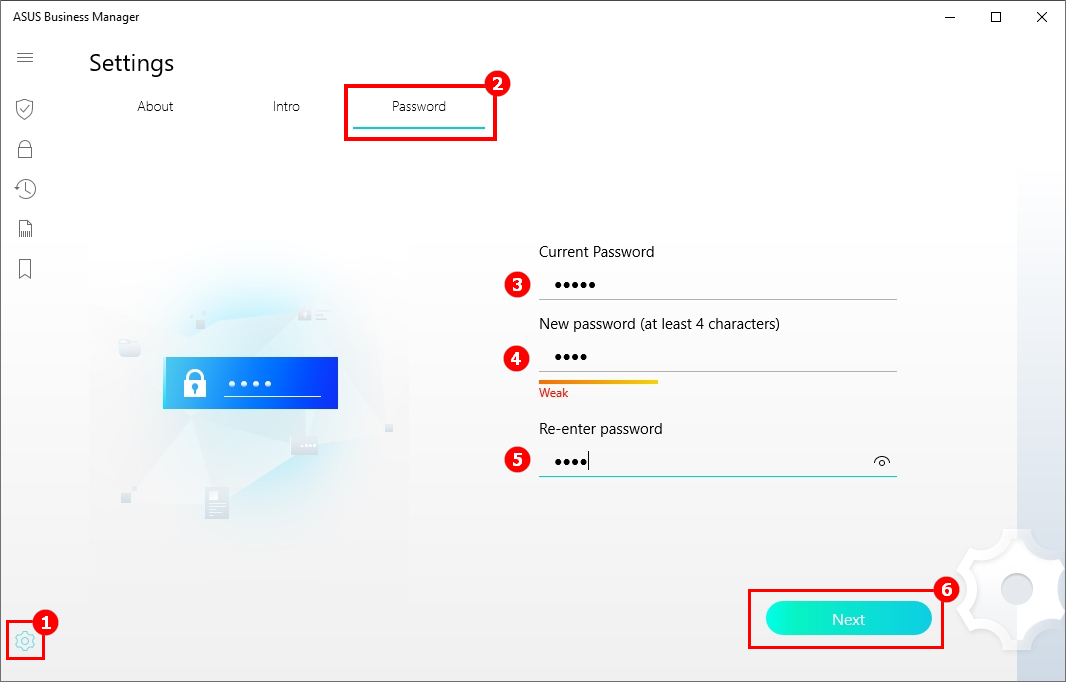
(3) Change Password
- The first time you start this App, you will be asked to create a startup password to protect the data and settings which you store in this App, and you can go to this page for updating password.
- Click ①[Settings] ,choose ②[Password] , input ③[Current Password] , input ④[New Password] , re-enter ⑤[New Password] , click ⑥[Next] to finish it.
Q&A
Q: Why does the Blue Screen or a non-response occur when I run ASUS Business Manager V3.0?
A: If your computer is not pre-installed with ASUS Business Manager V3.0, it indicates that your computer can't support this App. Please don't download and install the App by yourself to avoid the Blue Screen or non-response of system.