[Guest Network Pro] Jak nastavit síť pro hosty (Guest Network)?
Co je to Guest Network Pro?
Funkce ASUS Guest Network Pro je rozšířenou verzí funkce Guest Network (Síť pro hosty), která vám umožňuje vytvářet několikanásobné na sobě nezávislé kombinace sítí a VLAN. Tato funkce vám umožňuje používat různá přístupová oprávnění, spravovat šířku pásma a filtrovat obsah pro jednotlivé sítě. Dokonce zahrnuje i specializovanou síť pro zařízení IoT. Díky tomu získáte efektivní, bezpečné a jednoduše řiditelné síťové řešení.

K čemu potřebujeme síť pro hosty (Guest Network)?
Až úspěšně nastavíte bezdrátový router a připojíte se k internetu a budete chtít síť WiFi sdílet s rodinou a přáteli, můžete vytvořit prostředí nezávislé bezdrátové sítě prostřednictvím sítě pro hosty.
Příklad: Hostům můžete poskytnout název WiFi a heslo odlišné od své původní sítě WiFi. Tím zabráníte hostům v procházení dat sdílených na vaší síti, což přispěje k vyšší bezpečnosti vašeho připojení k internetu.
Poznámka:
1. Při přidání sítě Guest Network Pro dojde rovněž k vytvoření nové sítě VLAN.
2. Guest Network Pro je podporována na modelech řady WiFi 7 ROG a na vybraných modelech WiFi 6.
3. K využití této funkce je nutné upgradovat router ASUS na firmware verze 3.0.0.6.102_34312 nebo vyšší.
Informace ohledně aktualizace firmwaru na nejnovější verzi najdete v článku [Bezdrátový router] Jak aktualizovat firmware routeru na nejnovější verzi prostřednictvím aplikace ASUS Router
4. Filtr obsahu vychází ze služeb založených na DNS.
5. Počínaje firmwarem verze 3.0.0.6.102_35404 se název sítě změní z [Guest Network Pro] na [Network].
Jak nastavit síť pro hosty na routeru ASUS?
Svůj router ASUS můžete nastavit ve webovém uživatelském prostředí nebo v aplikaci ASUS Router.
Webové uživatelské rozhraní pro router ASUS
Krok 1: Připojte své zařízení (počítač nebo telefon) k routeru ExpertWiFi prostřednictvím kabelového nebo wifi připojení a přejděte do webového uživatelského rozhraní zadáním IP LAN routeru nebo adresy URL routeru http://www.asusrouter.com.
Krok 2: Na přihlašovací stránce zadejte uživatelské jméno a heslo a pak klikněte na [Přihlásit se].
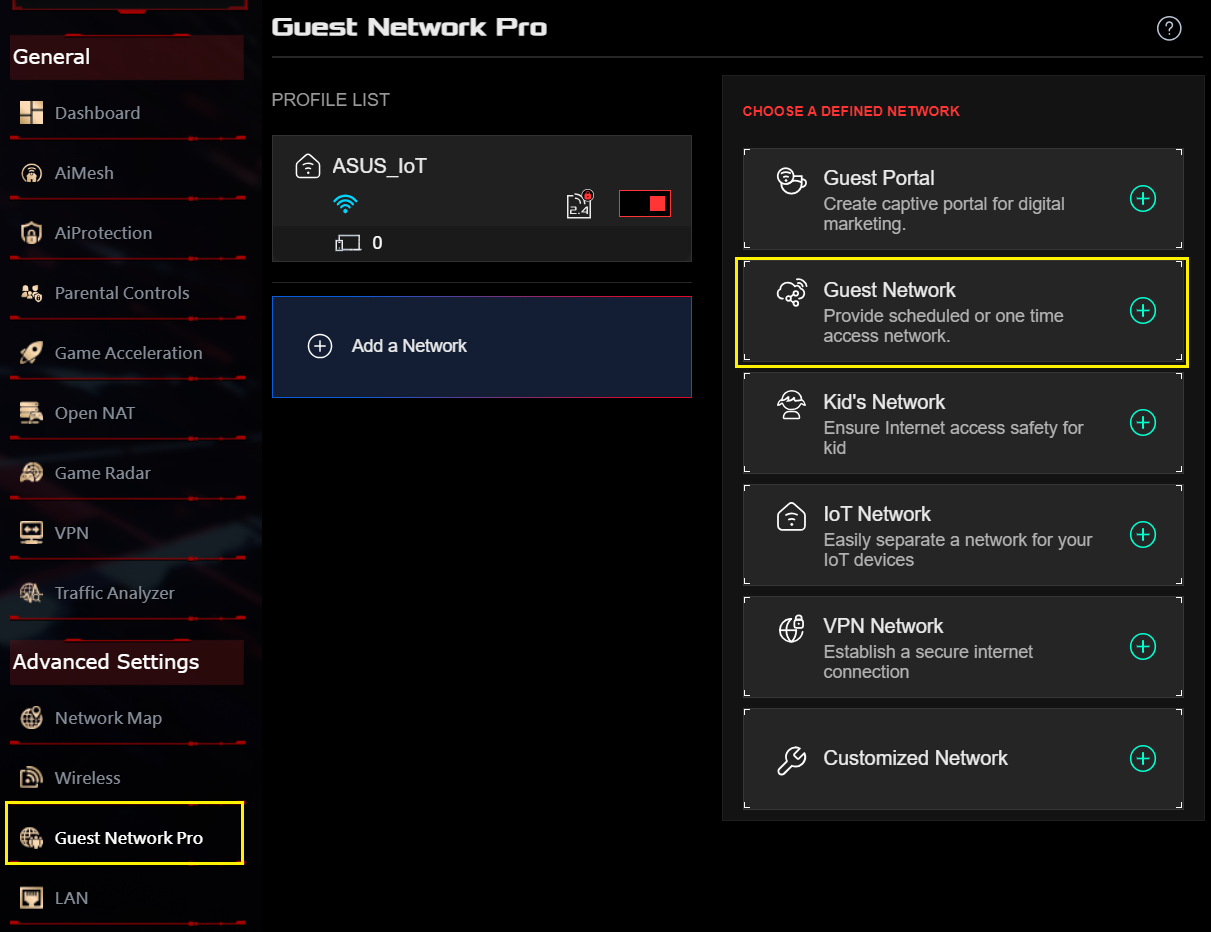
Krok 3: Přejděte do nabídky [Guest Network Pro] > [Síť pro hosty].
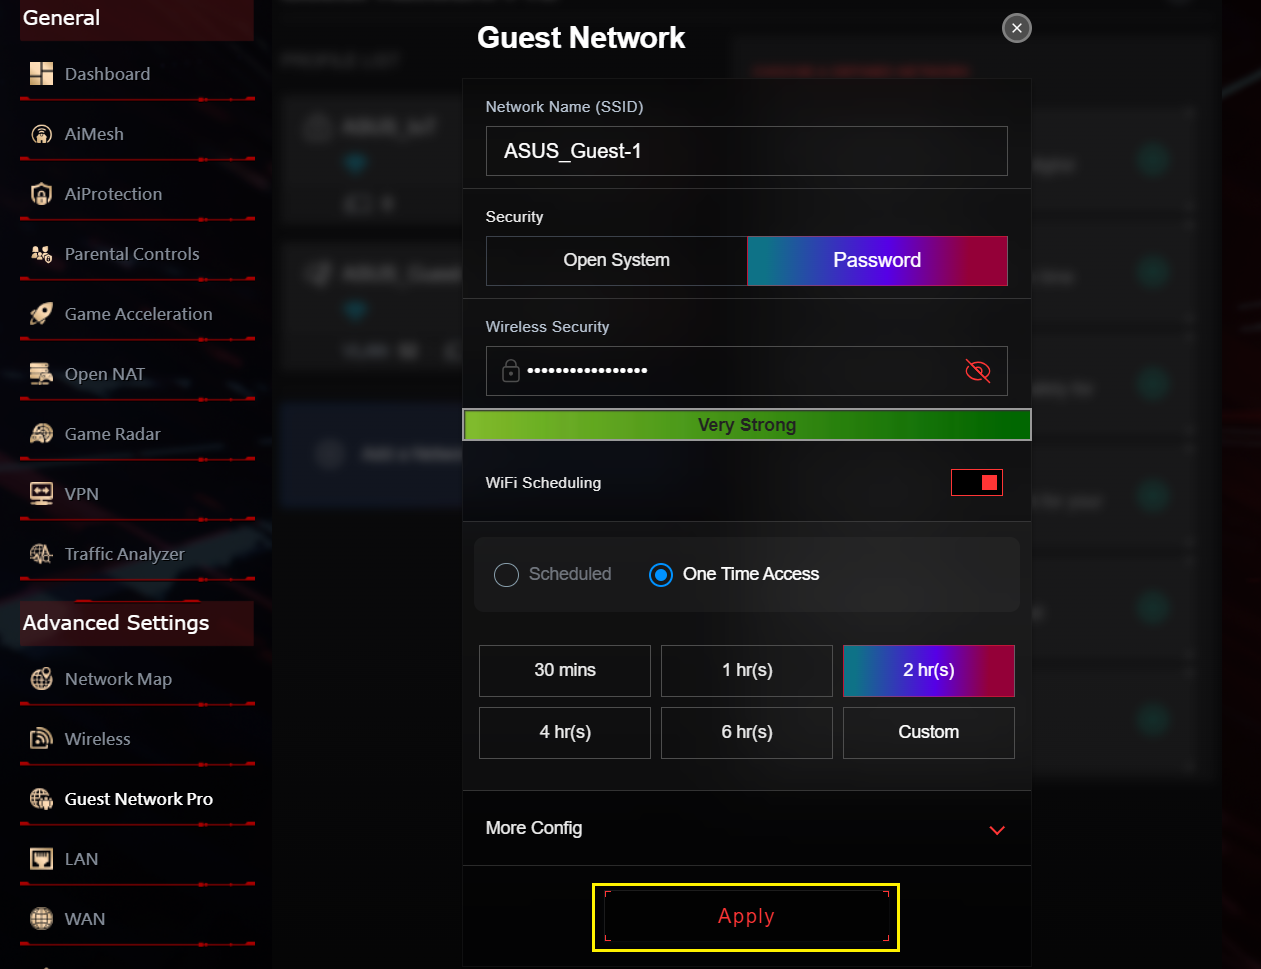
Krok 4: Zadejte potřebná nastavení a vše dokončete kliknutím na [Použít].

Aplikace ASUS Router
Krok 1: Přihlaste se do aplikace a klikněte na [Nastavení] > [Guest Network Pro] > ikona [+].
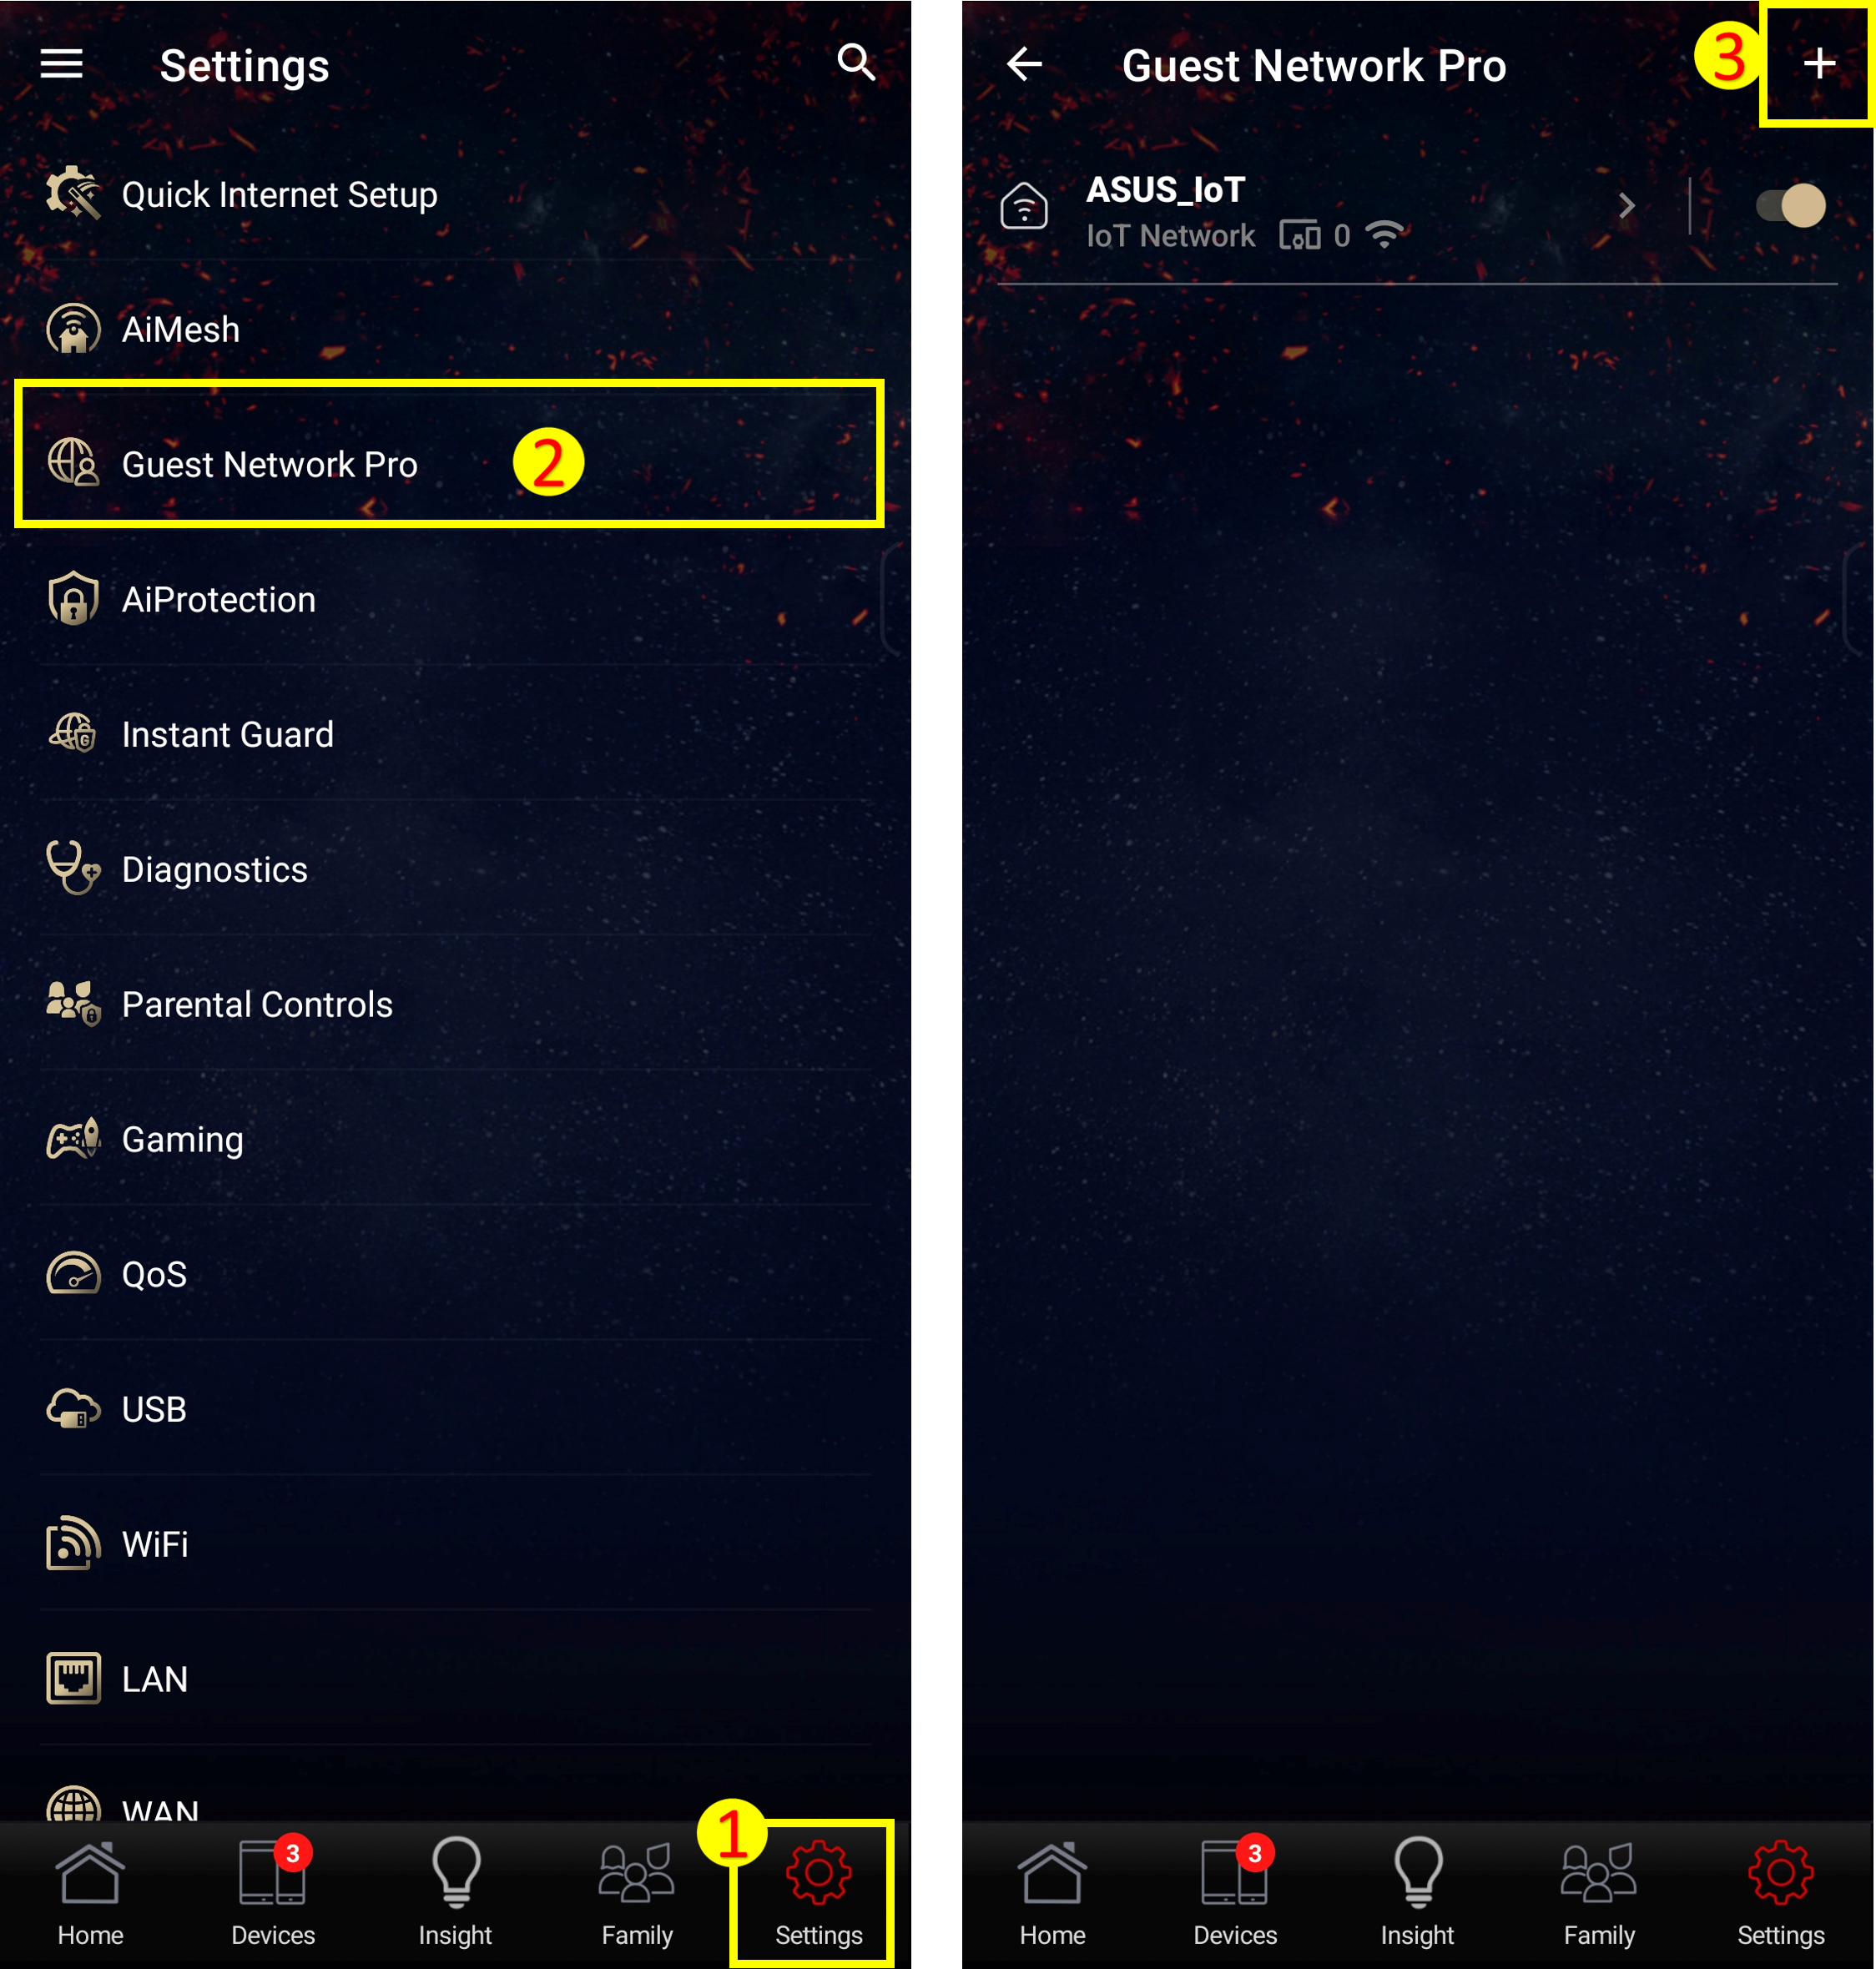
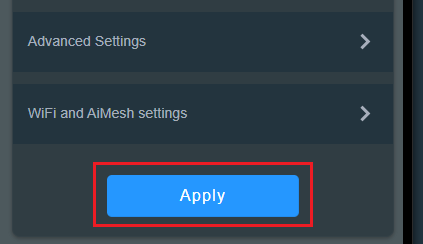
Krok 2: Klikněte na [Síť pro hosty], zadejte potřebná nastavení a vše dokončete kliknutím na [Použít].

Časté dotazy
1. Jak používat VPN na Guest Network Pro?
1. Klikněte na profil Guest Network Pro v seznamu.
2. Klikněte na kartu [VPN].

3. Aktivujte VPN.
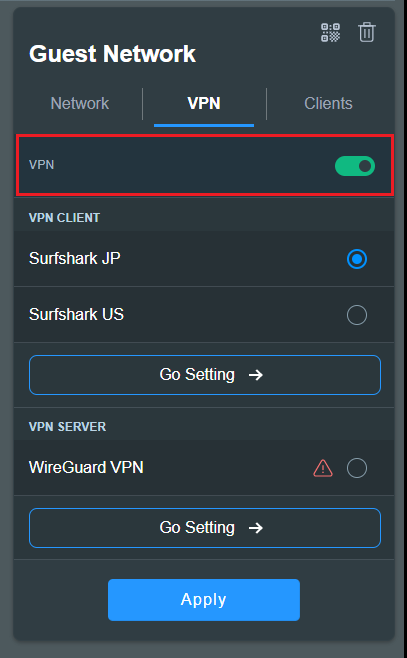
4. V seznamu vyberte VPN. (Pokud na vašem routeru žádný VPN klient není, budete jej muset nejprve vytvořit.)
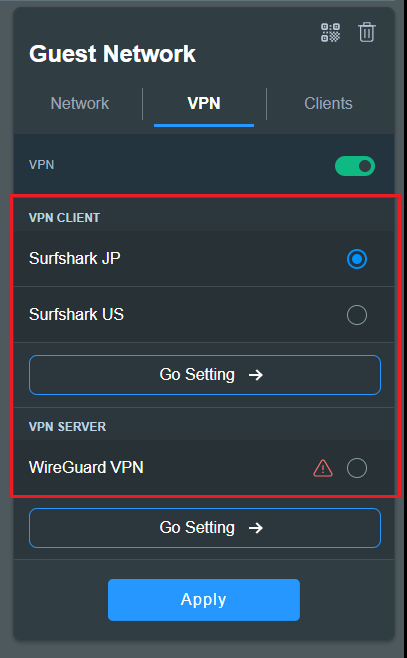
5. Nastavení uložte kliknutím na [Použít].
2. Jak přiřadit filtr pro Guest Network Pro? (Nastavení serveru DNS)
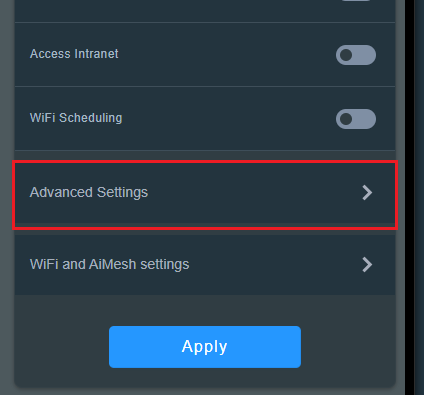
1. Klikněte na profil Guest Network Pro v seznamu.
2. Klikněte na [Pokročilá nastavení].
3. Zakažte možnost [Připojovat k serveru DNS automaticky] a klikněte na [Přiřadit] u vybraného serveru DNS, případně zadejte přizpůsobený server DNS.
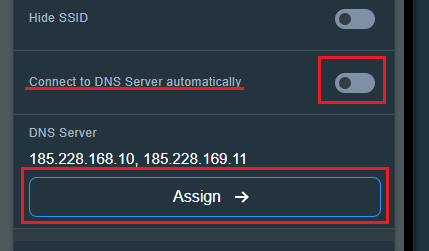
4. Nastavení uložte kliknutím na [Použít].
Jak získat utilitu nebo firmware?
Nejnovější ovladače, software, firmware a uživatelské manuály najdete v Centru stahování ASUS.
Pokud budete potřebovat ohledně Centra stahování ASUS více informací, využijte tento odkaz.