[Desktop] How to use USB BIOS FlashBack™ Update BIOS?
Product: ROG Strix GA35DX、ROG Strix G15DS、ROG Strix G35CA、ROG Strix G35CG。
●Scenario: When your computer fails to boot or the power indicator is on but the screen remains blank, you can use USB BIOS FlashBack™ to update the BIOS and attempt to resolve the issue.
Note: To use the USB BIOS FlashBack™ feature, you need to disable the ErP function in the BIOS settings beforehand. If you are unsure how to disable the ErP function, please click Here. Please note that disabling the ErP function may slightly affect the power consumption of your device.
●Requirement tools: Prepare a USB flash drive with a capacity of 1GB or more, and the file system format should be FAT16 or FAT32 MBR with a single partition. If you are unsure how to convert the format of the flash drive, please refer to this article: How to convert the format of a flash drive to FAT32.
How to update the BIOS with using USB BIOS FlashBack™
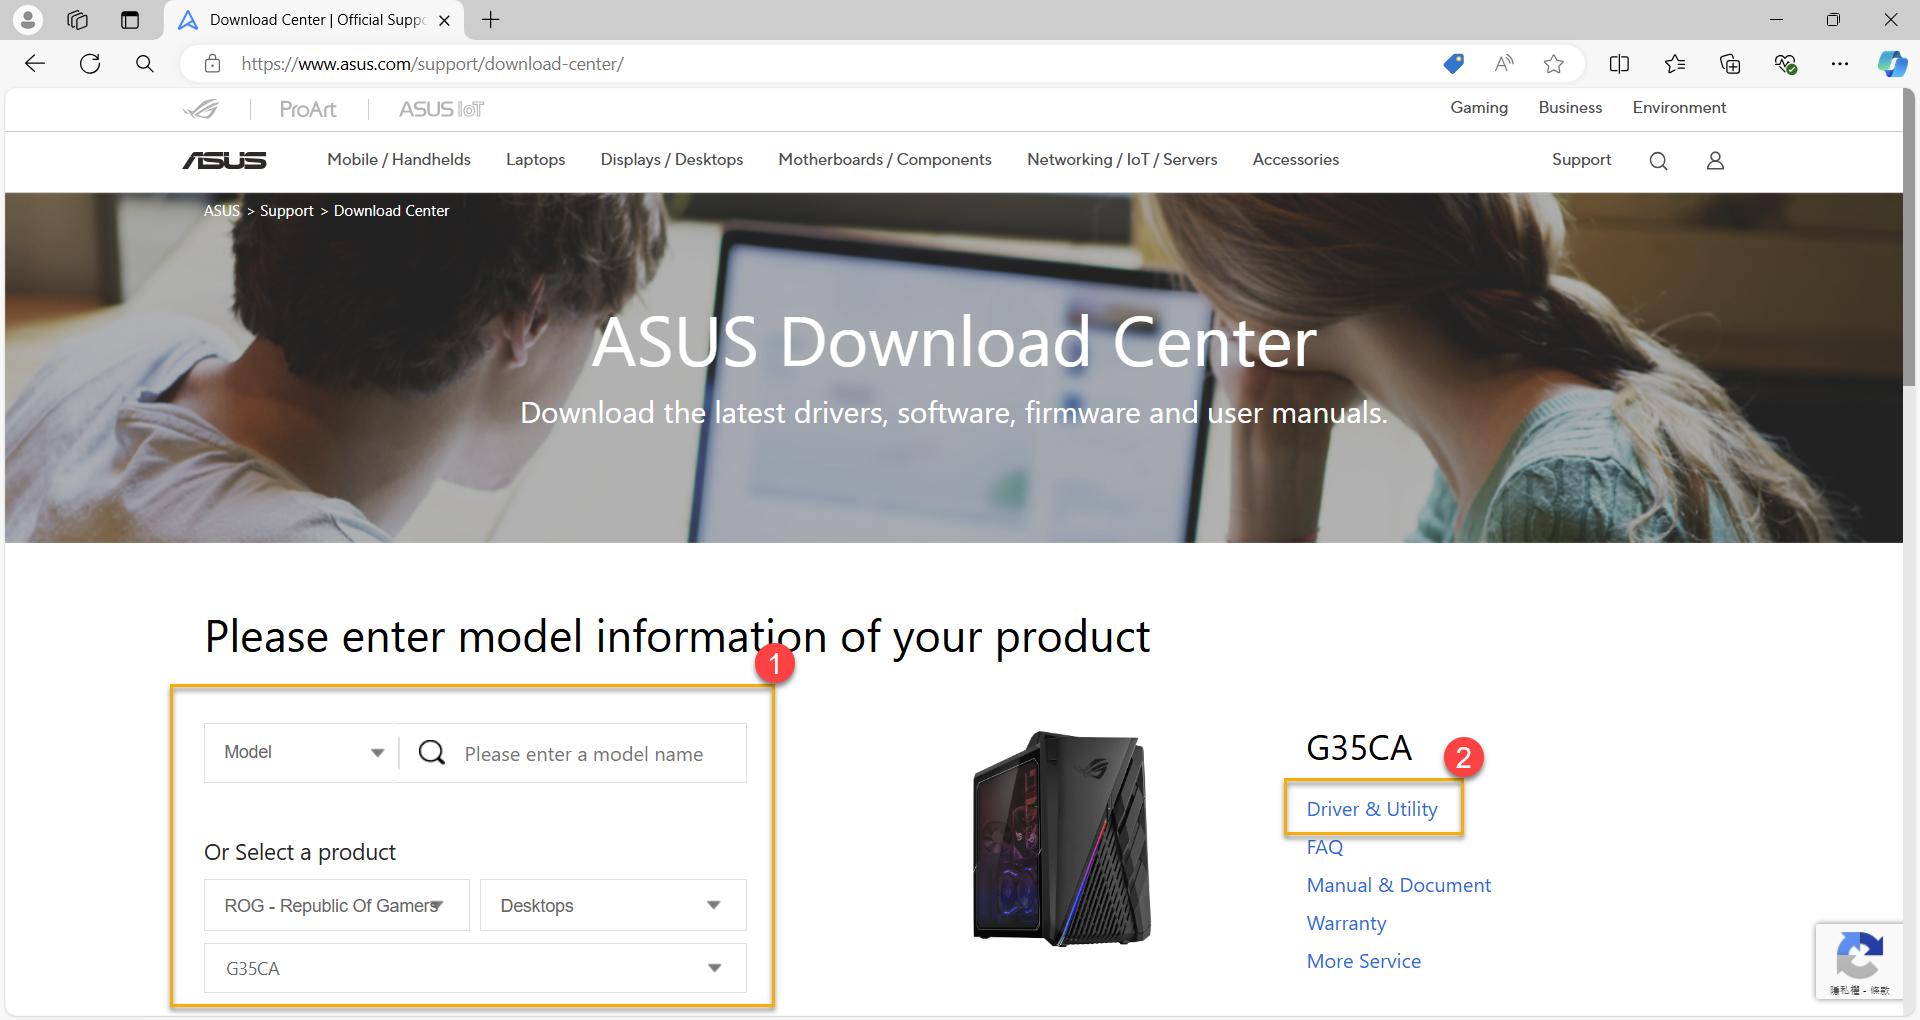
1. Go to the ASUS Download Center and download the latest BIOS version for your computer. (Using the model G35CA as an example)
Enter your product model number in the search or choose your computer model from the list①, then click on [Driver & Utility]②. If you are unsure about the name of your computer model, please refer to this article: How to find model name?
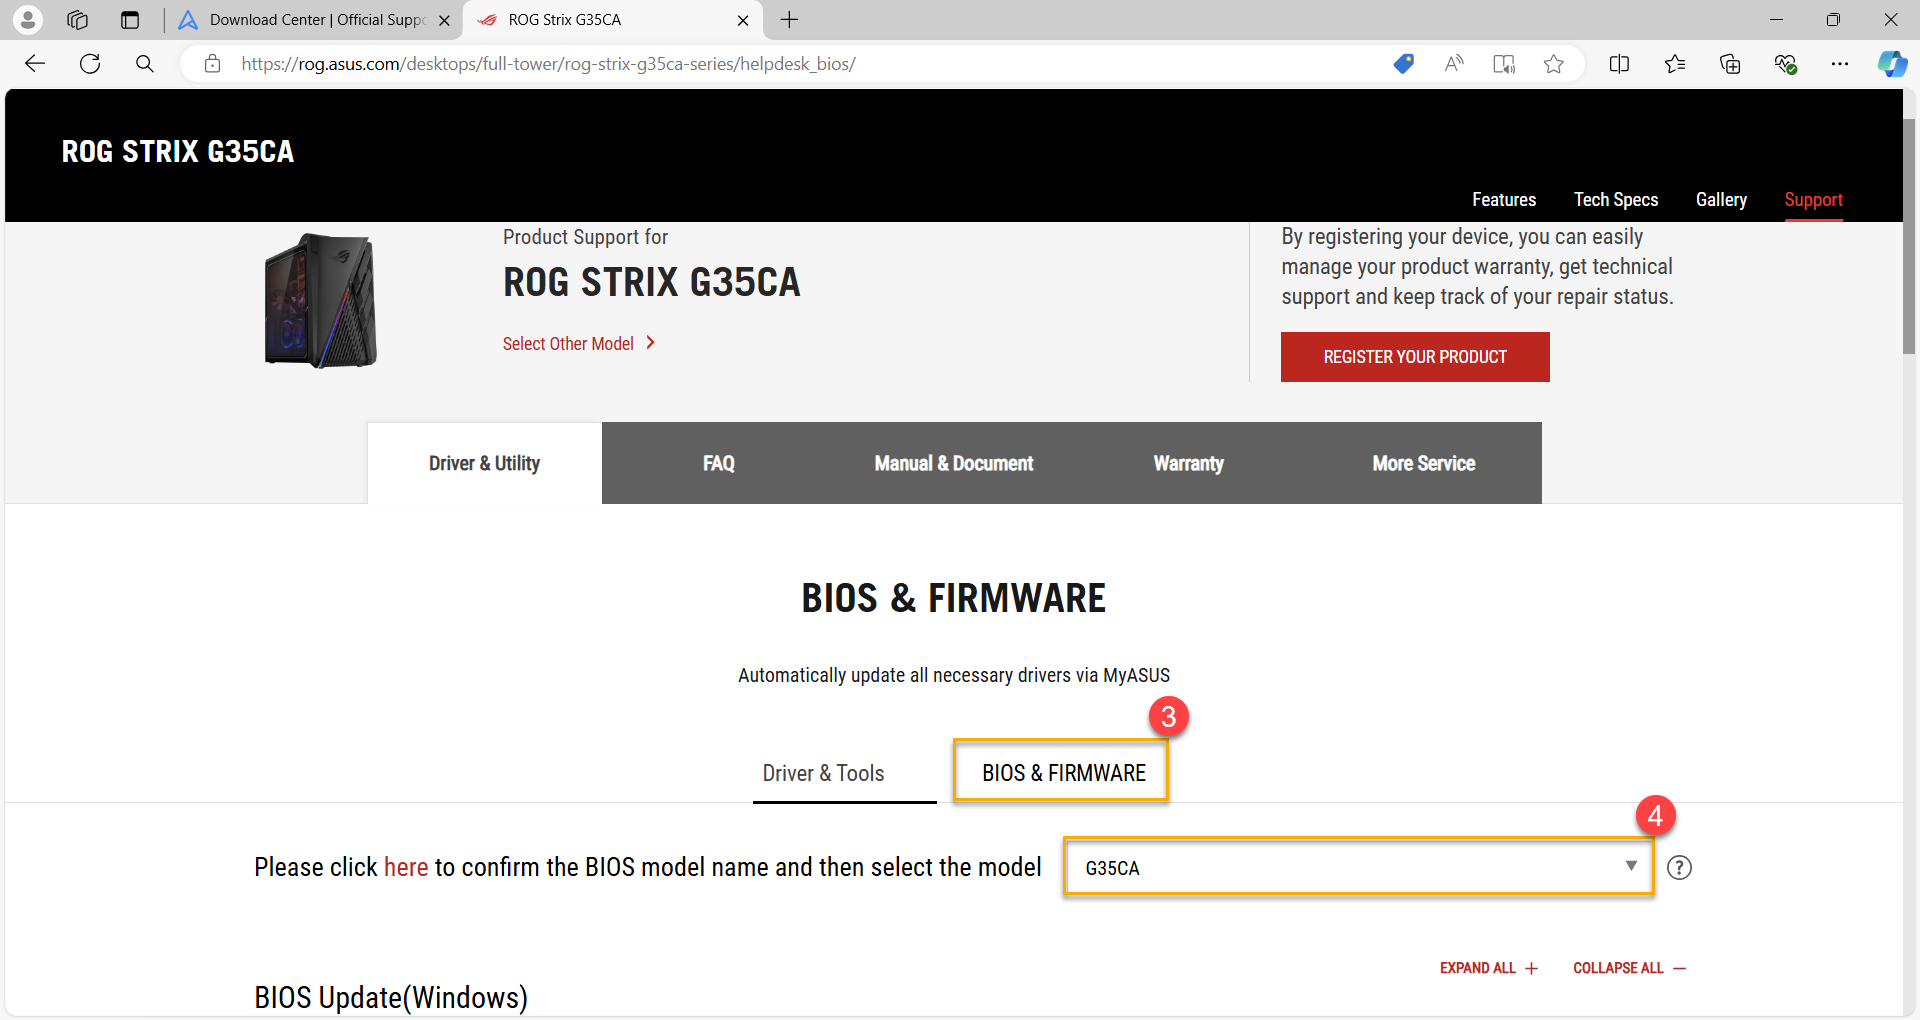
2. After accessing the product support page, click on [BIOS & Firmware]③, then select your model name④ from the dropdown menu.
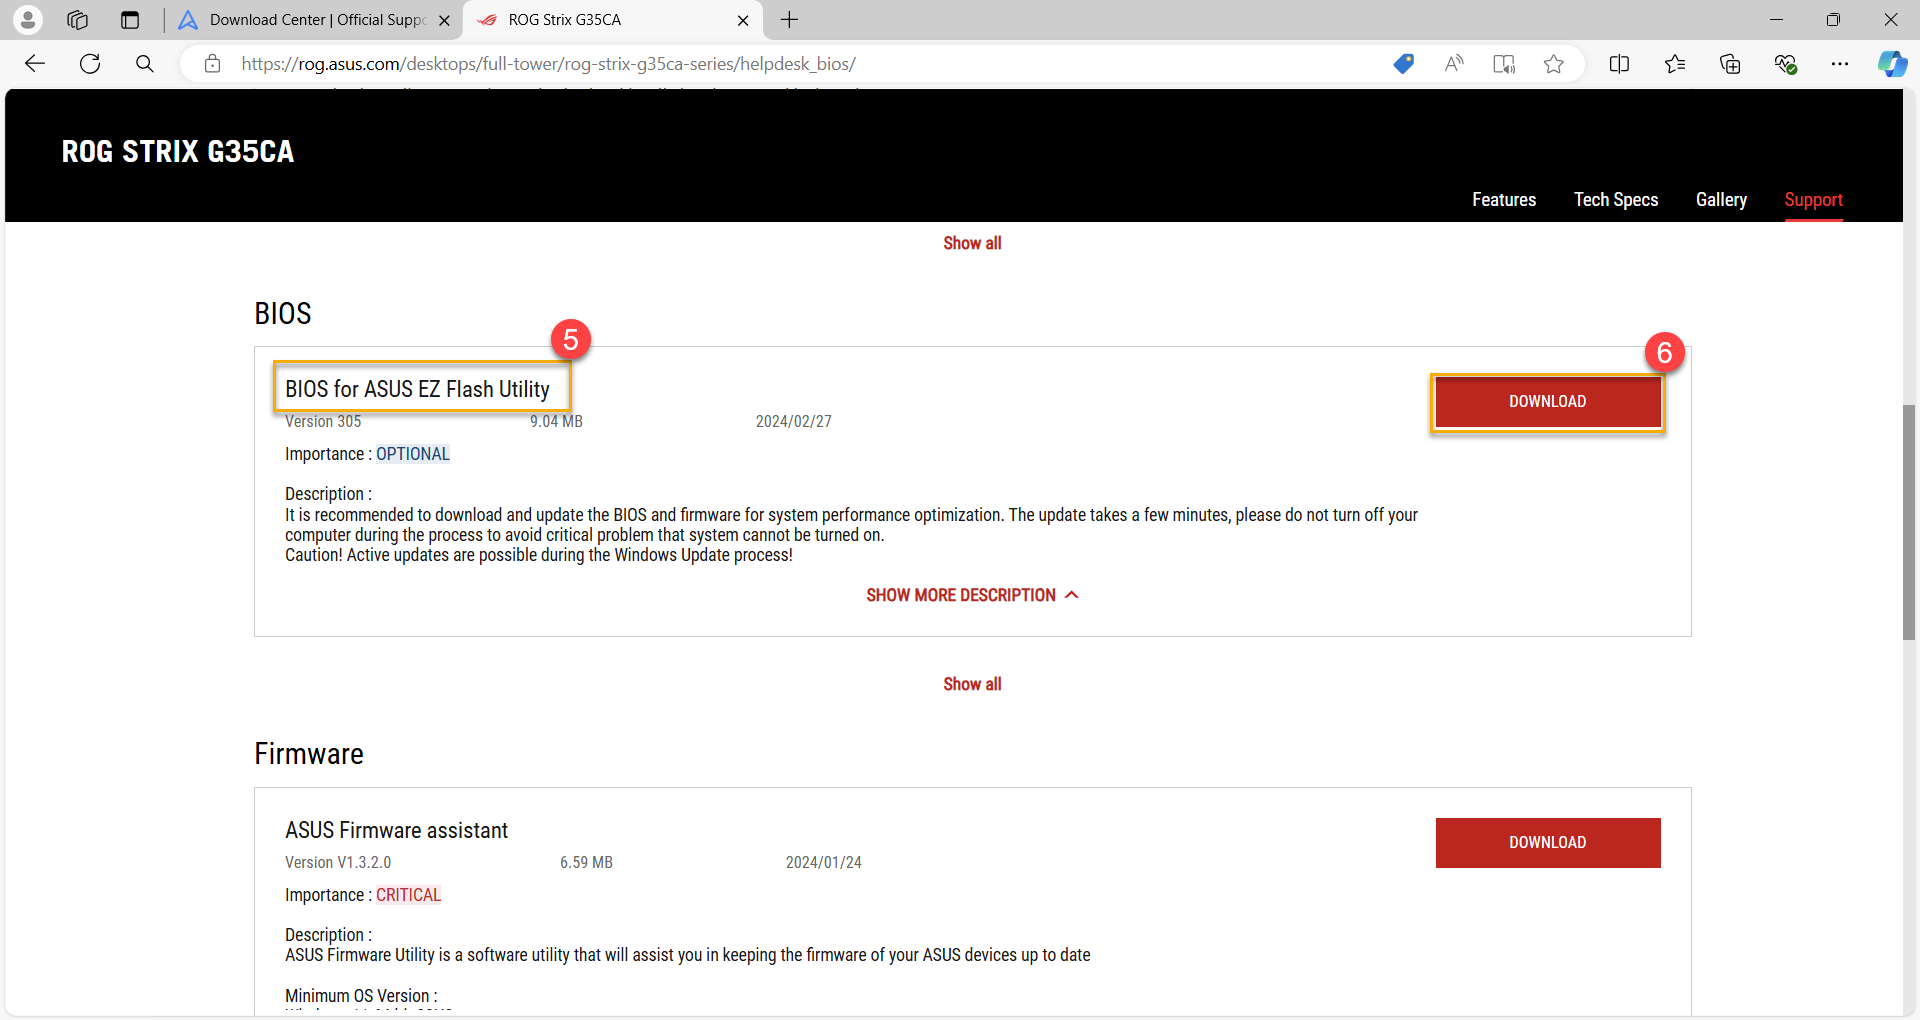
3. Locate the latest version of [BIOS for ASUS EZ Flash Utility]⑤ in the BIOS category, then click [DOWNLOAD]⑥.
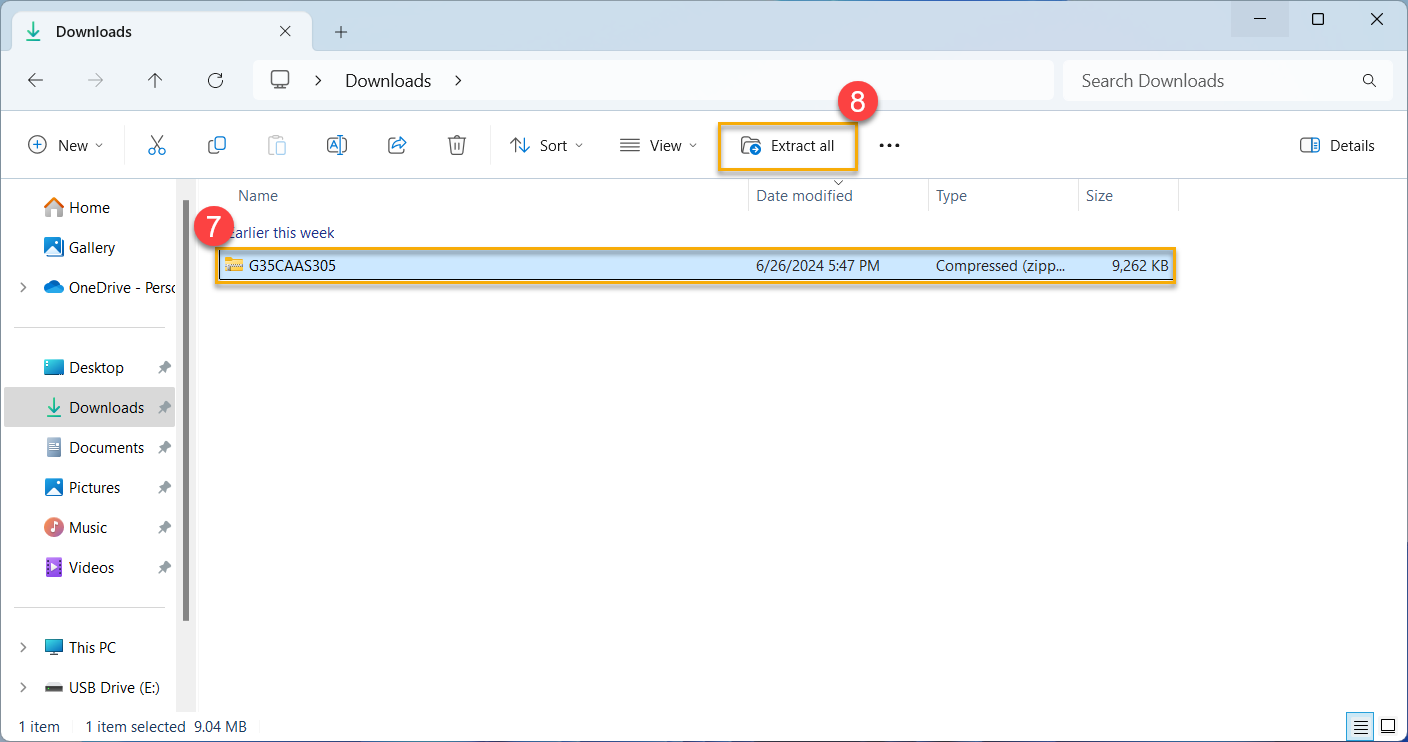
4. Once the download is complete, select the downloaded BIOS file⑦ and click [Extract all]⑧.
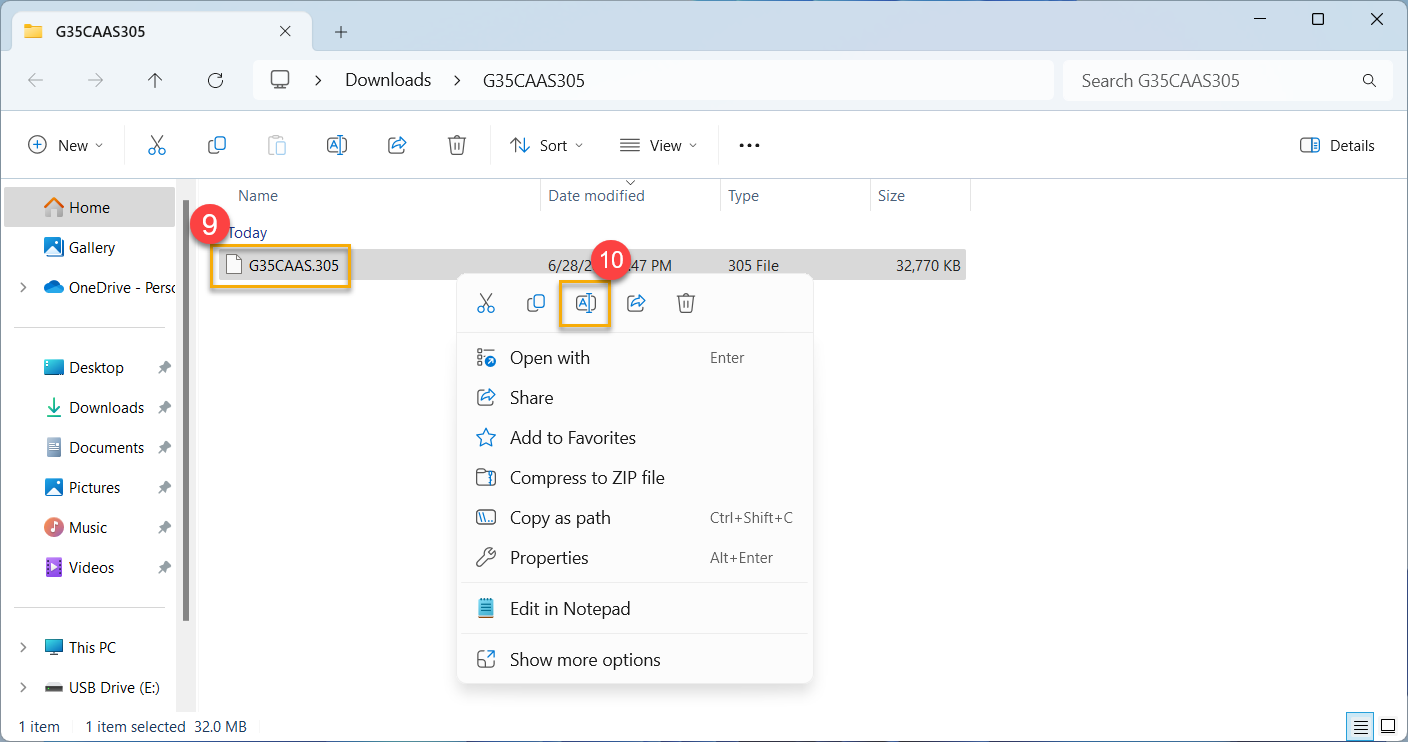
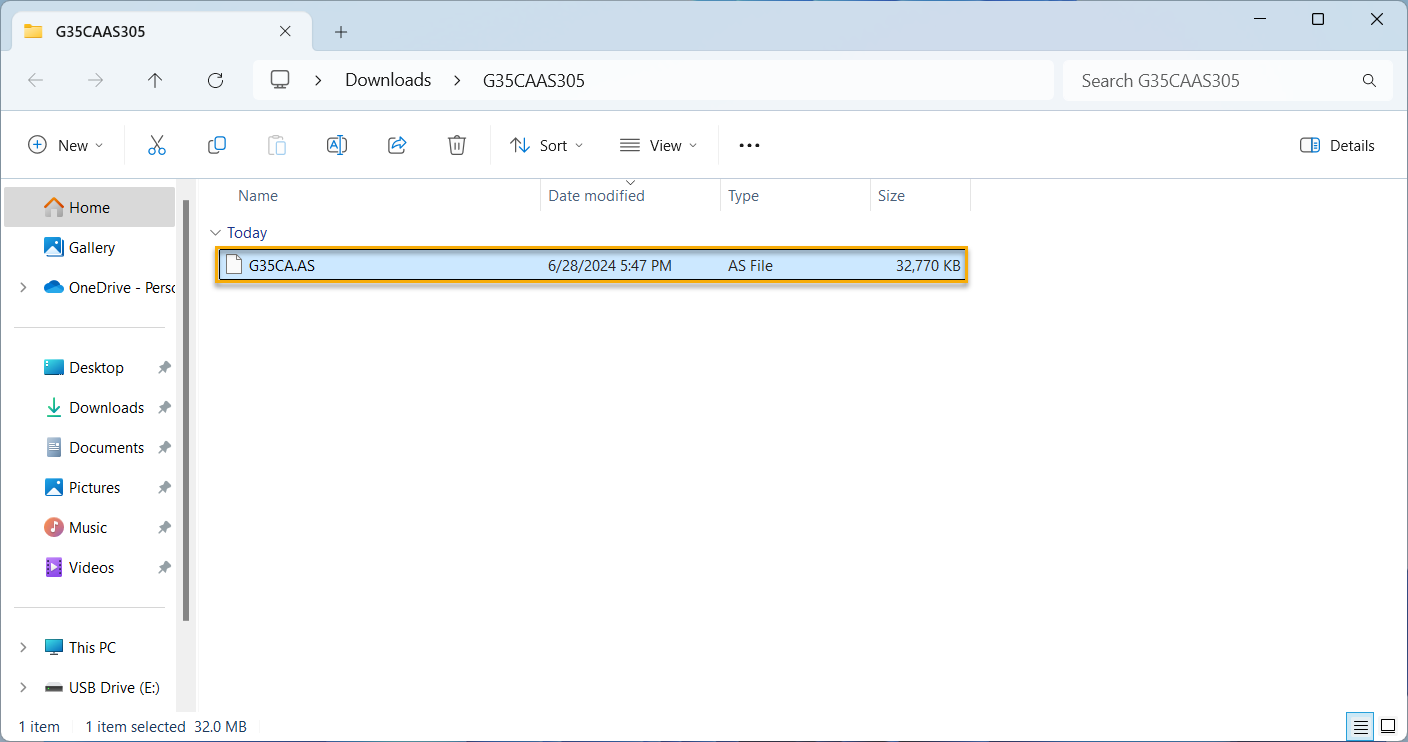
5. After the extraction is complete, rename the file extension of the BIOS file to [.AS] or [.CAP] according to the following model correspondence table.
Right-click on the extracted file⑨, then click [Rename]⑩. (Example: G35CAAS.305 → G35CA.AS)
Model | Original BIOS file name | BIOS file renamed to |
GA35DX | GA35DX-AS.XXX | GA35DX.CAP |
G15DS | G15DSAS.XXX | G15DS.AS |
G35CA | G35CAAS.XXX | G35CA.AS |
G35CG | G35CG-AS.XXX | G35CG.CAP |
6. Copy or move the renamed BIOS file (with the file extension .AS or .CAP) to the root directory of the USB flash drive.
7. Before using USB BIOS FlashBack™, make sure to shut down your computer, but do not remove the power cord.
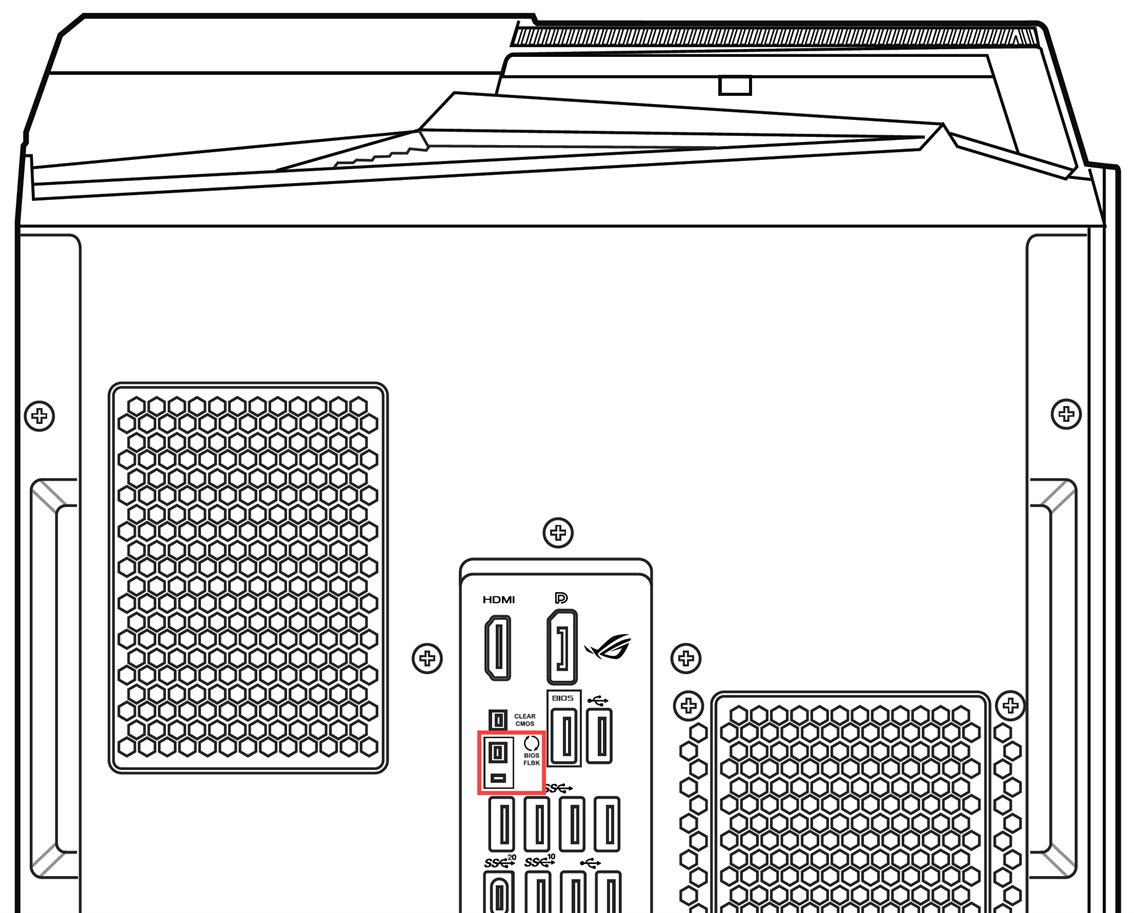
8. Connect the USB flash drive to the USB BIOS FlashBack™ port on the rear panel of your computer. If you are unsure where the USB BIOS FlashBack™ port is located, please refer to the user manual for your model.
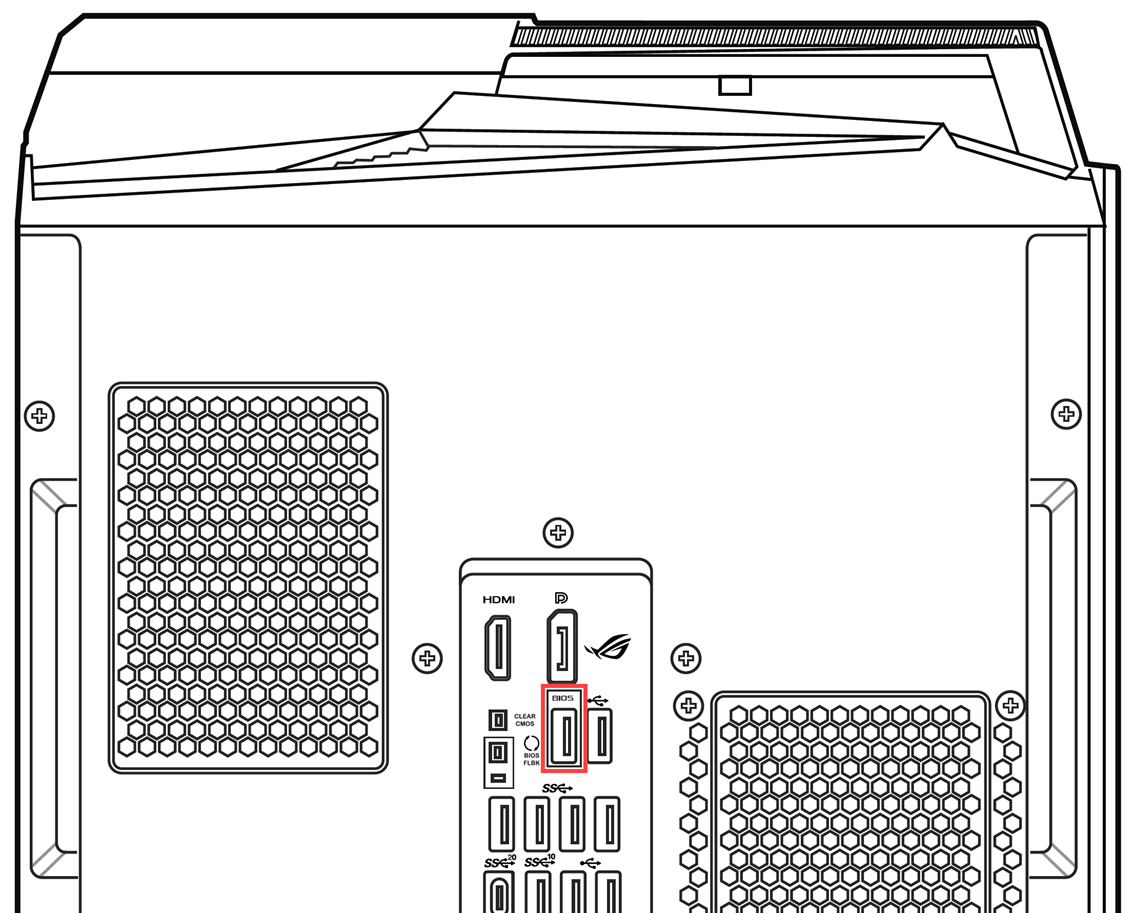
9. Press and hold the BIOS FlashBack™ button on the rear panel for about 3 seconds until the BIOS FlashBack™ indicator light flashes 3 times, indicating that the BIOS FlashBack™ process has started.
Note: The update time may vary depending on the size of the BIOS file, but it is estimated to be completed within 8 minutes. During the process, do not remove the USB flash drive, disconnect the power, or power on the computer, as this may interrupt the update and cause failure to boot.
10. When the BIOS FlashBack™ indicator light goes off, it means that the BIOS update is complete.
Note: If the BIOS update fails (update process interrupted, computer unable to boot, BIOS FlashBack™ indicator light flashing for more than 5 seconds and remaining constantly on), please double-check that the computer model and the downloaded BIOS file model are consistent, and repeat the steps for BIOS update. If the issue persists, please contact your local ASUS service center for further assistance.
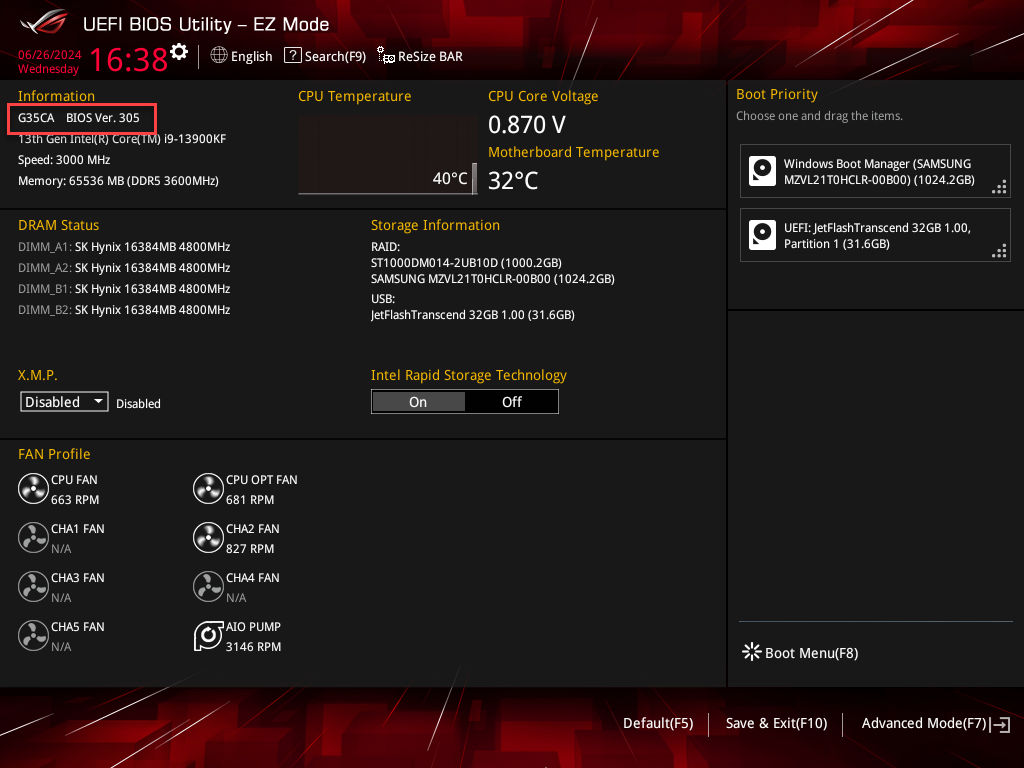
11. You can enter the BIOS setup page again to verify if the updated BIOS version matches the downloaded version. Learn more about How to Enter the BIOS Configuration screen.
How to disable the ErP function in the BIOS setup
1. Access the BIOS setup page on your computer.
While the device is completely powered off, press and hold the [F2] key or [Del] key on your keyboard, and simultaneously press the power button to start the computer. Once the BIOS setup appears, you can release the [F2] key. Learn more about How to Enter the BIOS Configuration screen.
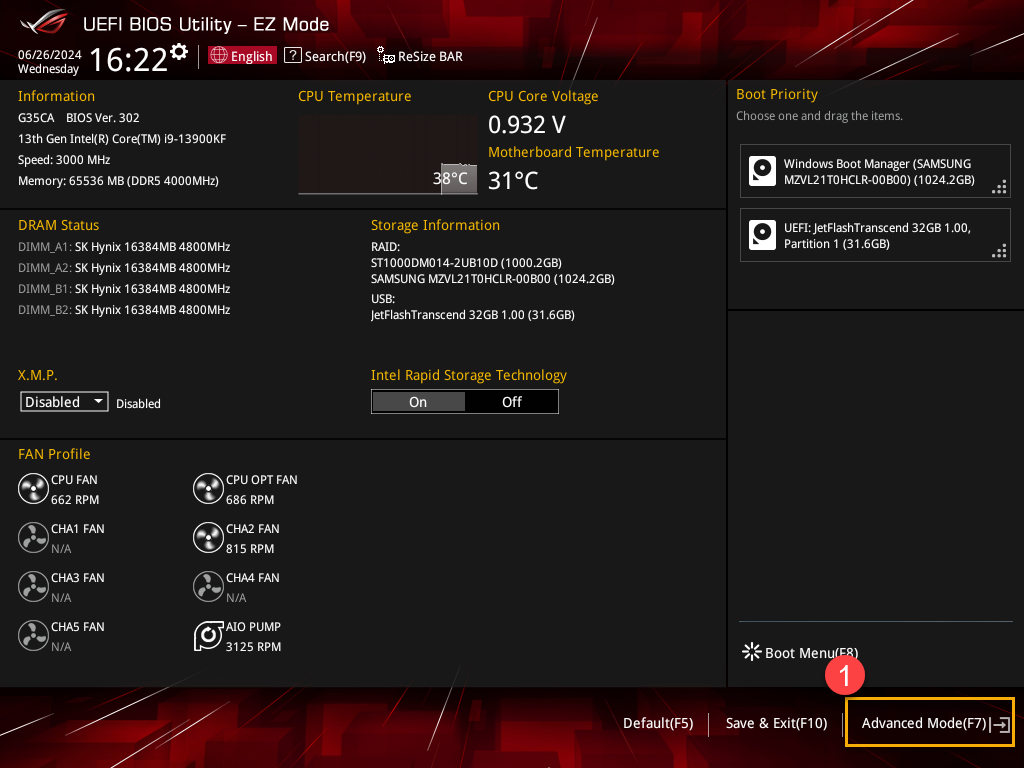
2. After entering the BIOS configuration, use the shortcut key [F7] or click [Advanced Mode]① with your mouse.
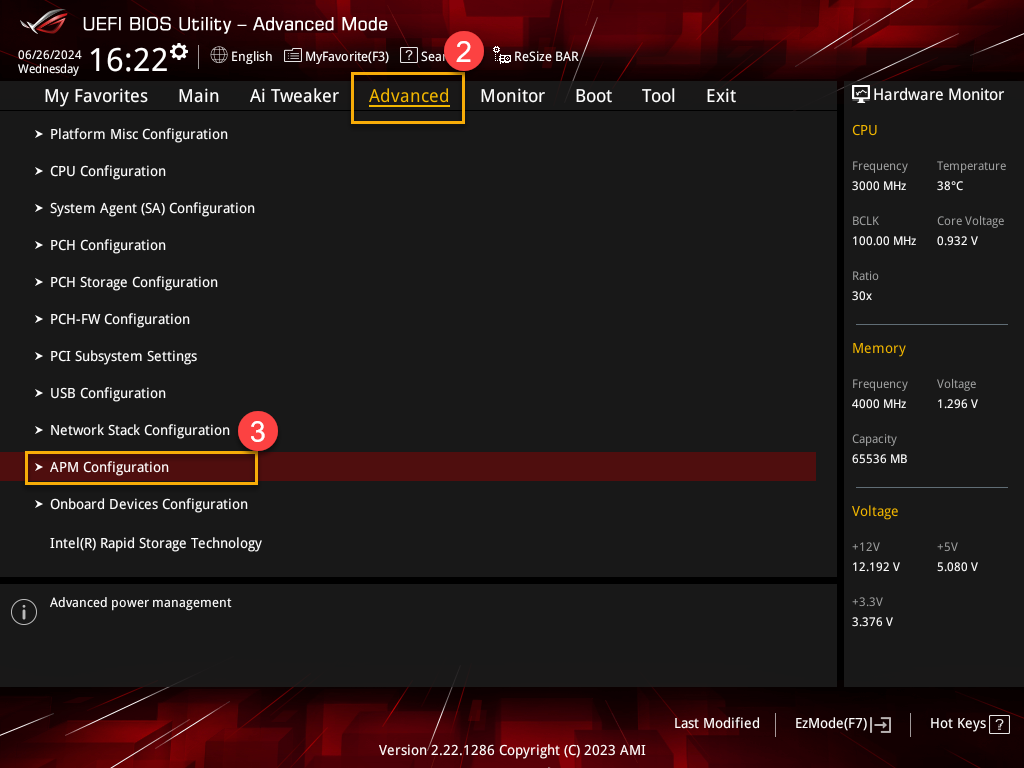
3. In the Advanced Mode, select the [Advanced]② item, then choose the [APM Configuration]③ option.
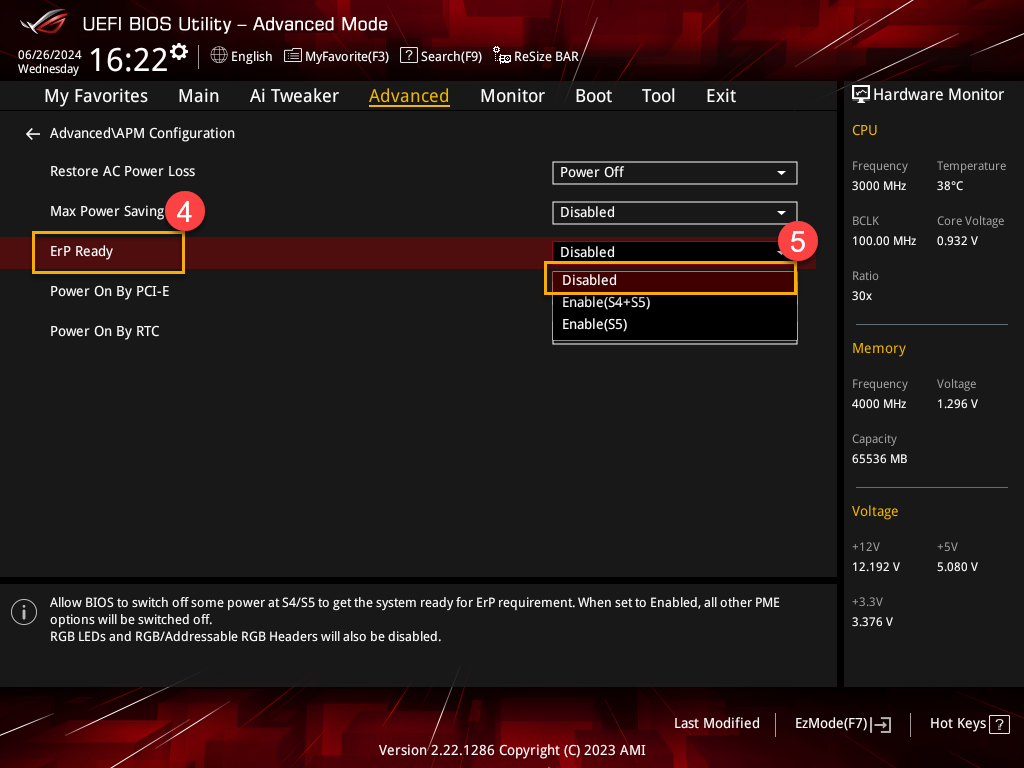
4. In the APM Configuration, select [ErP Ready]④, and set it to [Disabled]⑤.
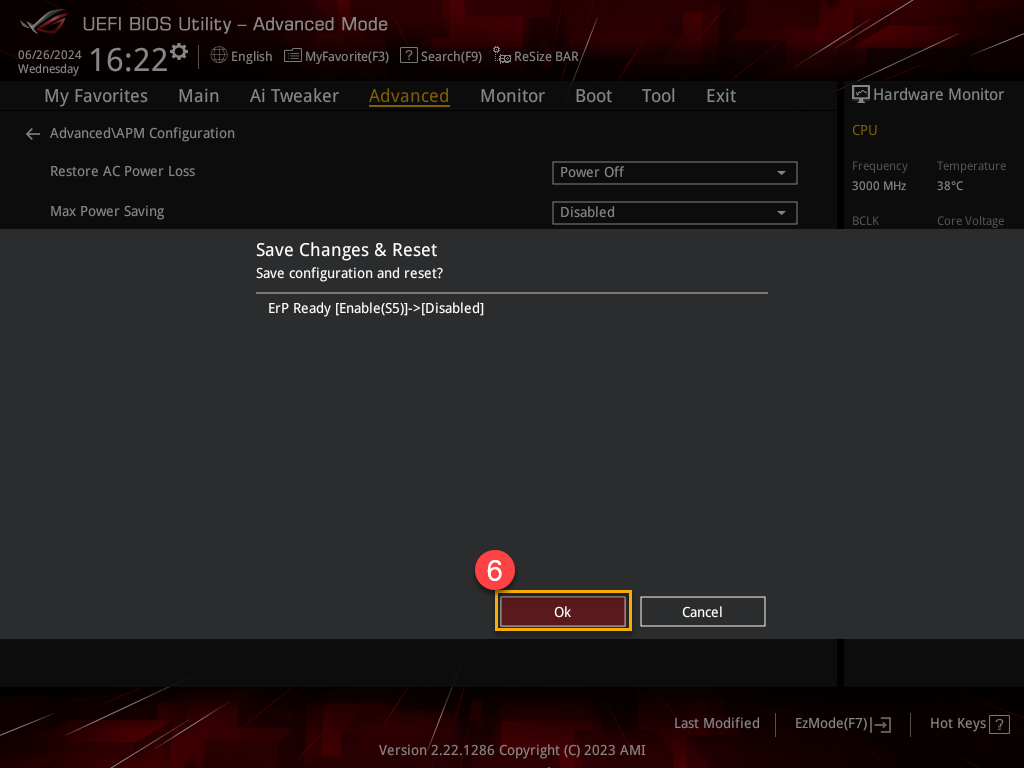
5. In the end, save the settings and exit. Press the [F10] key on your keyboard, then click [OK]⑥. The computer will restart and complete the ErP function settings change.