[TUF Gaming SSD Enclosure] How to install SSD in TUF Gaming A2?
Preparation:
- TUF Gaming A2
- Attached Hex key
- M.2 PCIe NVMe SSDs or SATA SSDs (2280/2260/2242)
Instruction steps:
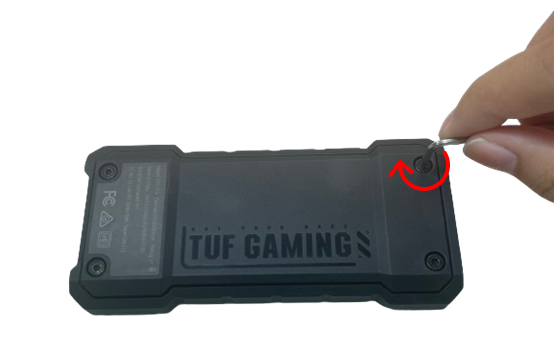
1. Use attached hex key to unscrew 4 screws counterclockwise to open TUF Gaming A2.
*Hex Key Spec
| Hex Width Across | 2-0.1+0.05 mm |
| Length of short arm | 18 mm |
| Length of long arm | 54 mm |
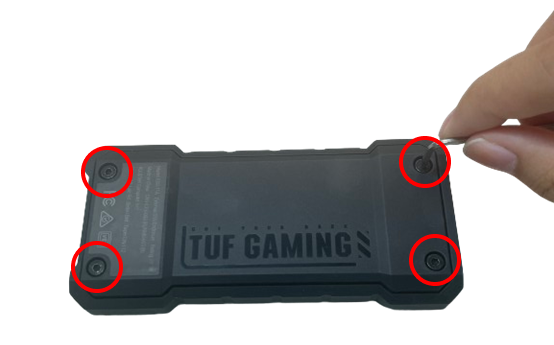
2. Flip TUF Gaming A2 over to open the cover.

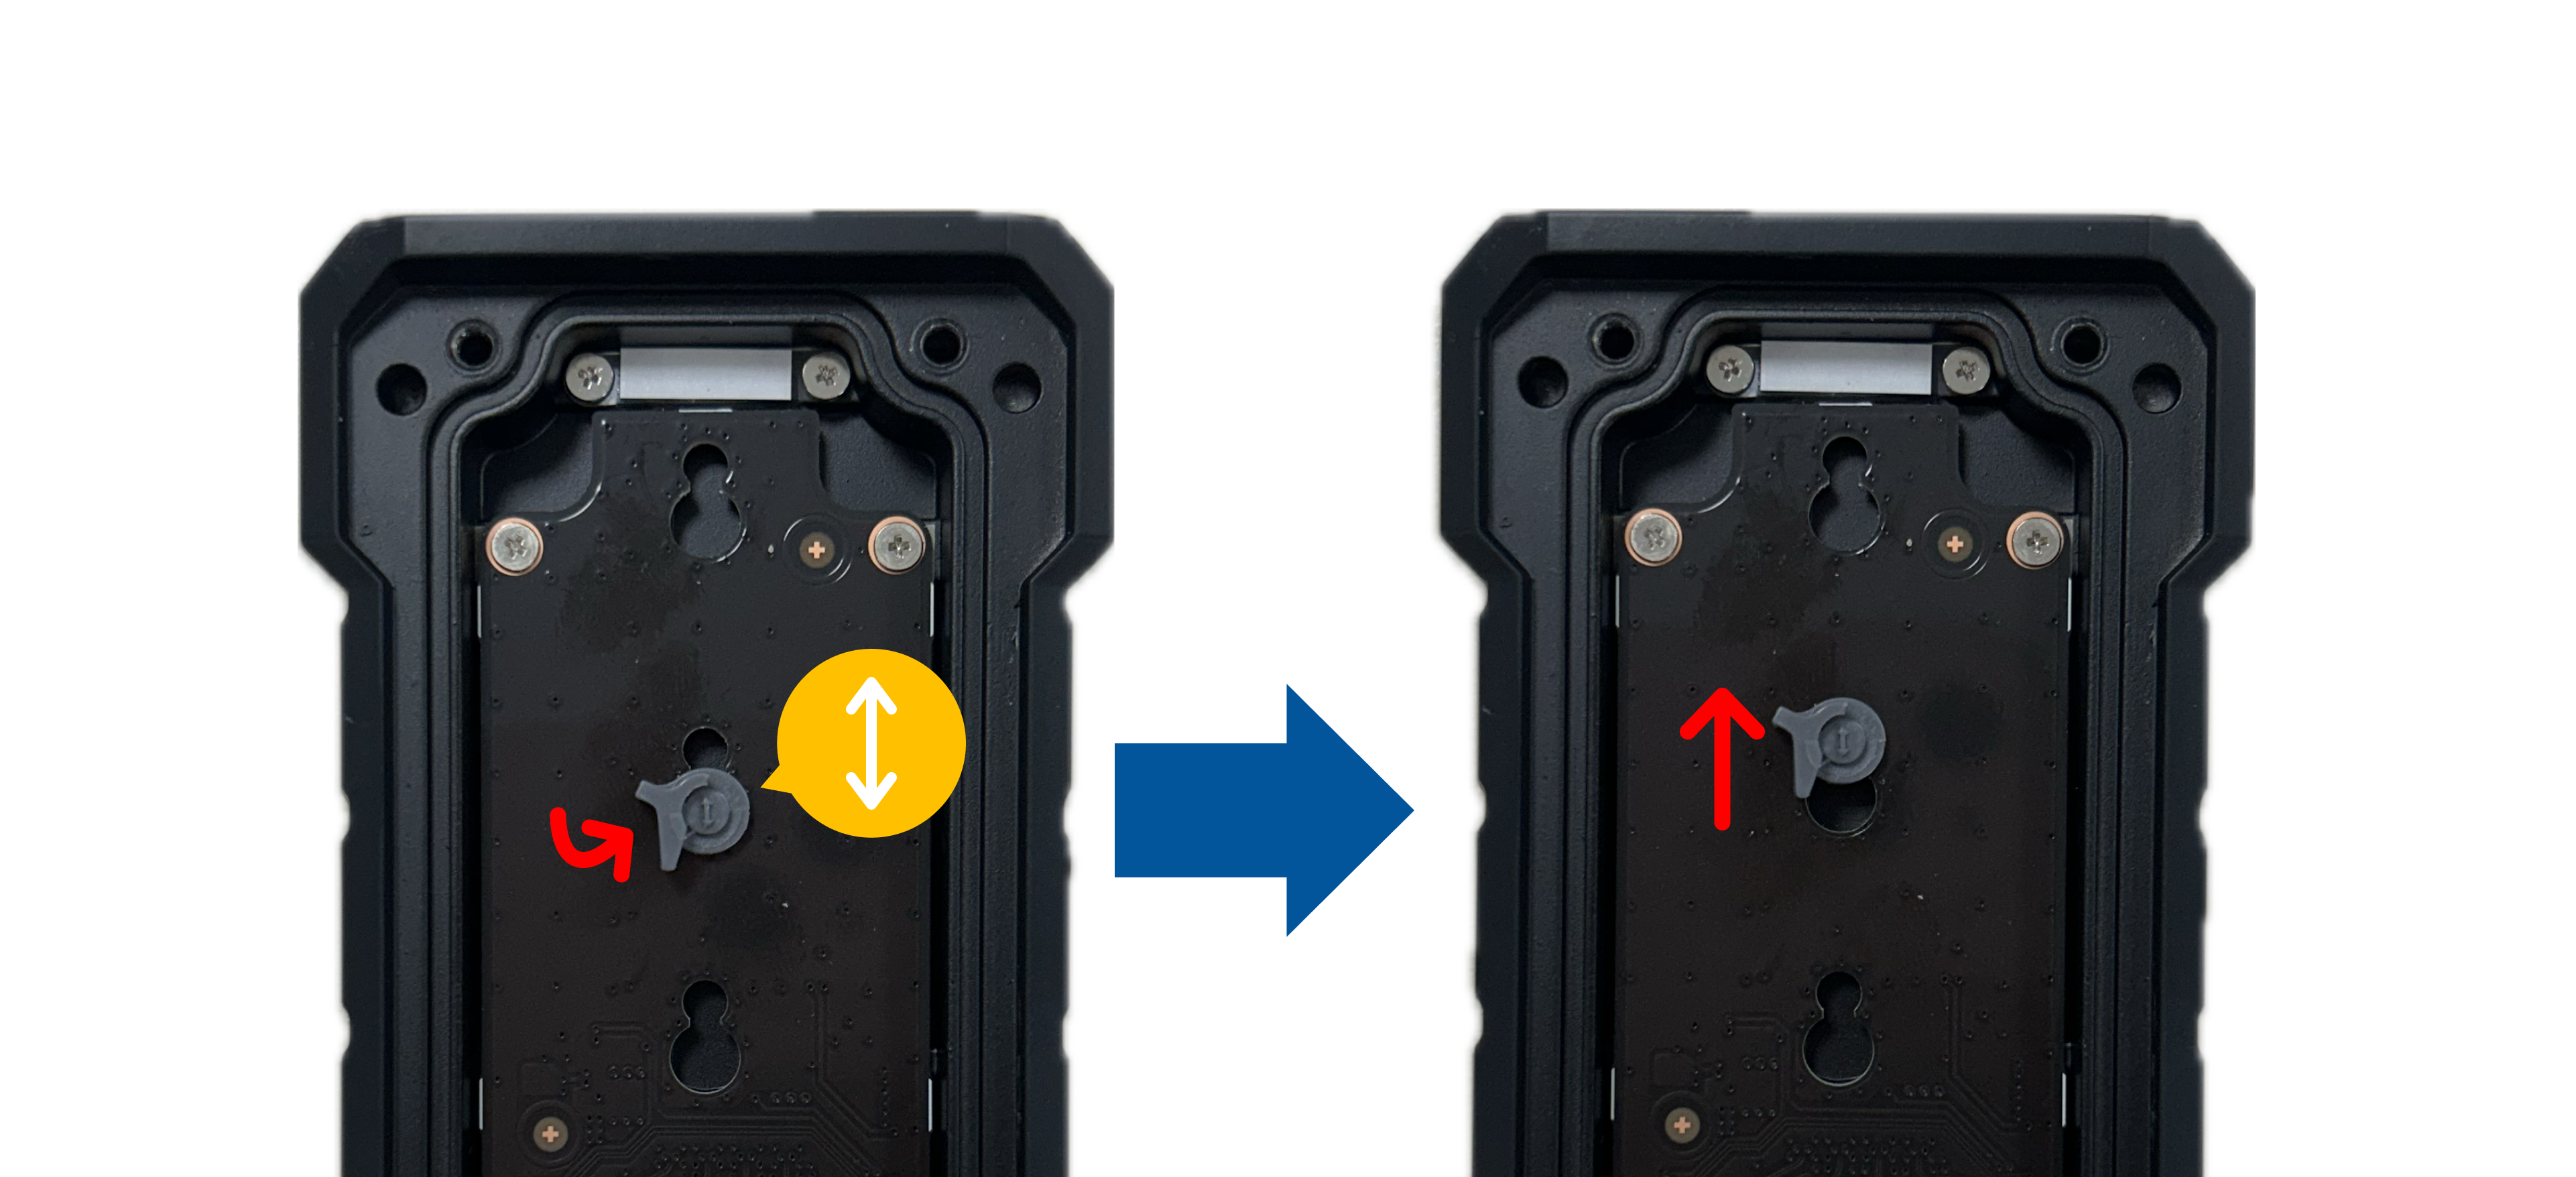
3. TUF Gaming A2 supports 2242, 2260, and 2280 M.2 SSDs. Move the Q-Latch to fit your SSD’s size.

3-1. Rotate the Q-Latch arrow to a vertical position and push downward to remove it. 
3-2. Place the Q-Latch in the position suitable for your SSD size, then rotate the arrow to a vertical position and push it upward to secure it.
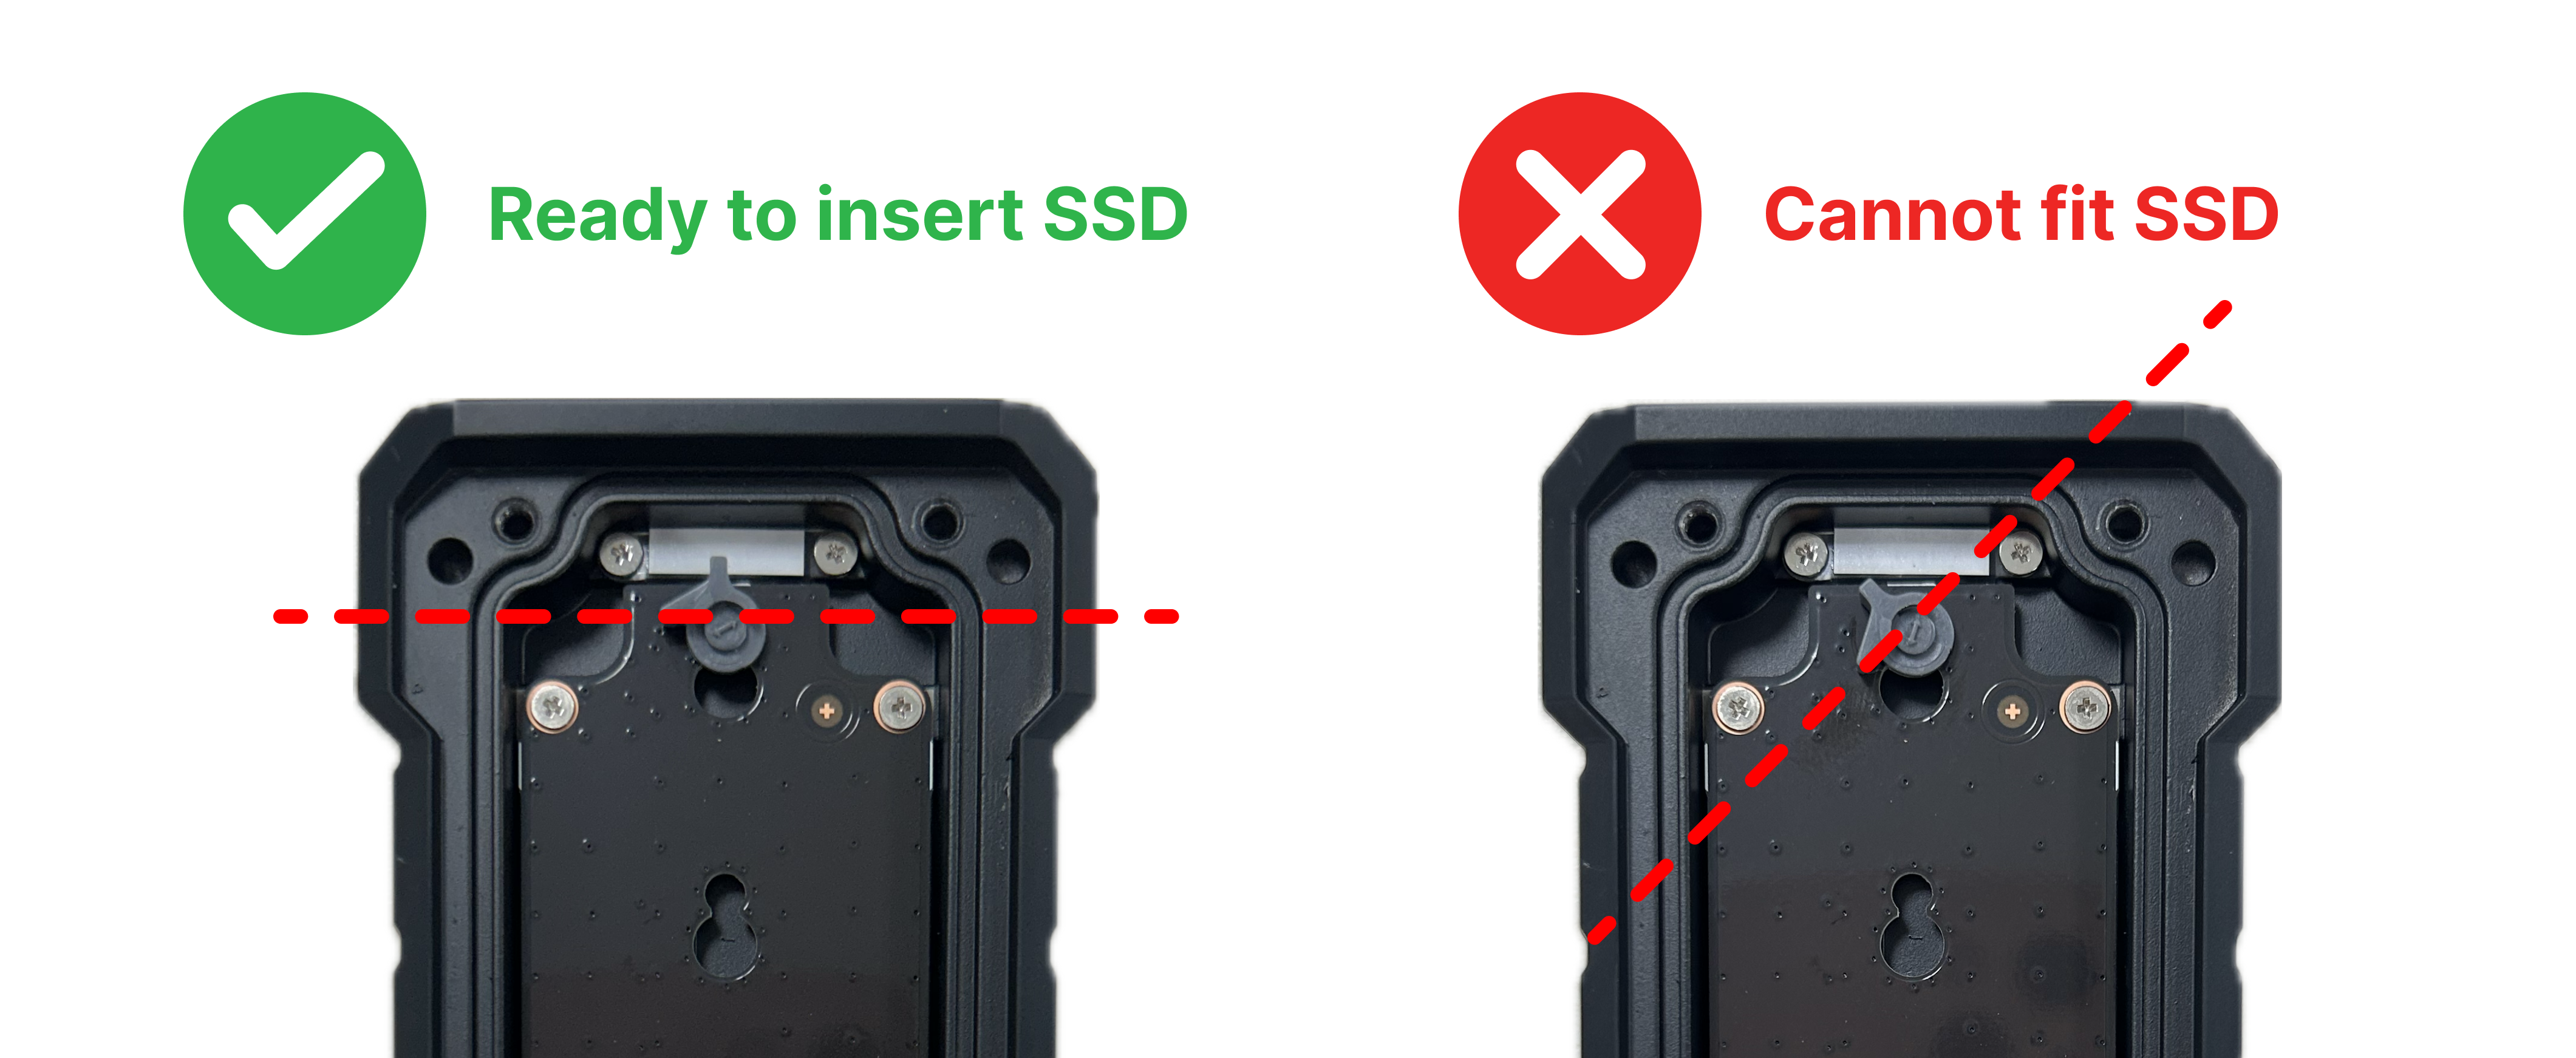
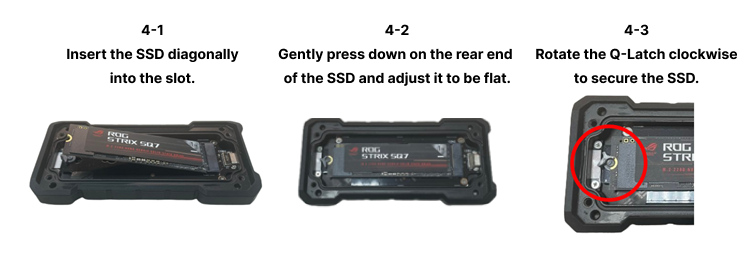
4. Install your SSD.
Following takes 2280 M.2 SSD for example.
When installing your SSD, please make sure two sides of the Q-latch are horizontal. (Shown as following)
5. Place the cover on and align it with the four corner screw holes. Use a hex wrench to clockwise-tighten the four screws to complete the installation.
Note: Ensure that the screws are fully tightened and secure. The screws should not protrude above the cover.
To provide you more detailed instruction, you can also click ASUS YouTube video link to know more about How to Install and Set Up TUF Gaming SSD Enclosure.
FAQ:
Q1. Does TUF Gaming A2 support M.2 PCIe NVMe2230 SSDs?
A1. No, TUF Gaming A2 does not support M.2 PCIe NVMe 2230 SSDs.
It supports M.2 NVMe PCIe & SATA SSDs in B+M key, M key. Both in 2242/2260/2280 form factor.
You can move the Q-Latch to fit your SSD’s size.
Q2. Why can't I close the cover of the case after installing an SSD module?
A2. Please be aware that TUF Gaming A2 cannot fit SSD with heatsink.
Also, please ensure that the screws are fully tightened and secured, as shown in the left picture below.

Q3. Will TUF Gaming A2’s water resistance capability be interfered?
A3. For the best water resistance effects, please ensure the screws are fully screwed and secured, as shown in Q2.
Note: If contact with drinks, chemical liquids or other foreign objects, TUF Gaming A2 stands a chance of diminishing its water resistance capability.
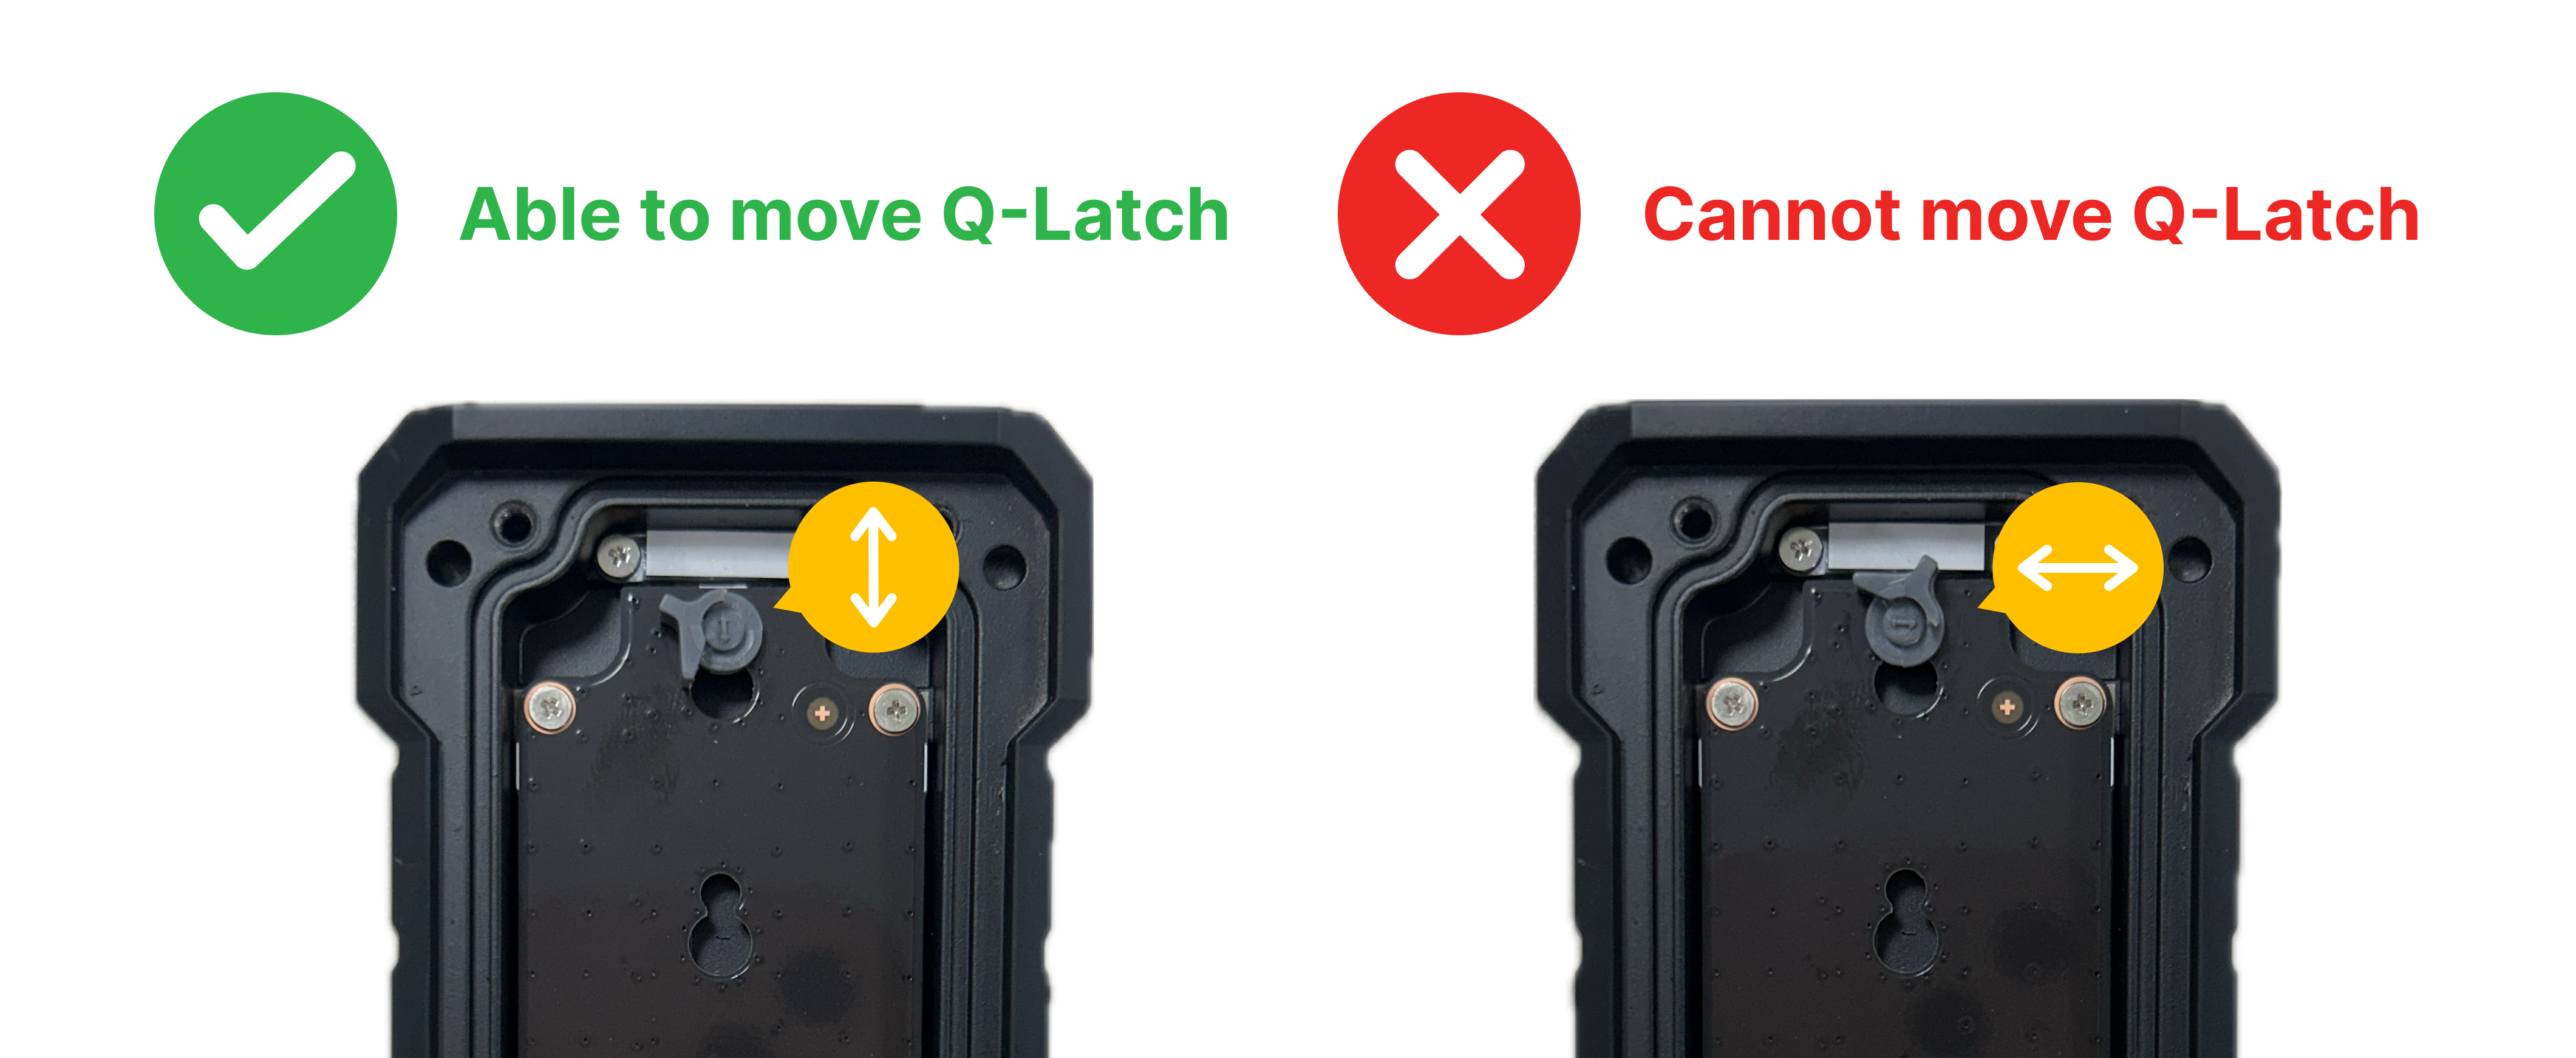
Q4. Why can't I remove the Q-Latch?
A4. Please ensure that the Q-Latch is rotated to the correct position. As shown in the diagram below, rotate the arrow on the Q-Latch to a vertical position and then push downward to remove it.
