Zenbook DUO (UX8406MA/UX8406CA) Exclusive Feature Frequently Asked Question (FAQ)
ASUS Zenbook DUO (UX8406MA) features a dedicated Bluetooth keyboard, built-in stand, and apps like ScreenXpert and Control Panel to maximize the productivity of your dual screens.
Zenbook DUO For detailed parameters, please refer to: ASUS Zenbook DUO (2024) UX8406|Laptops For Home|ASUS Global
- How to use the computer
- Screen gesture introduction
- Exclusive ScreenXpert function
- Zenbook DUO exclusive Bluetooth keyboarden
- Q&A
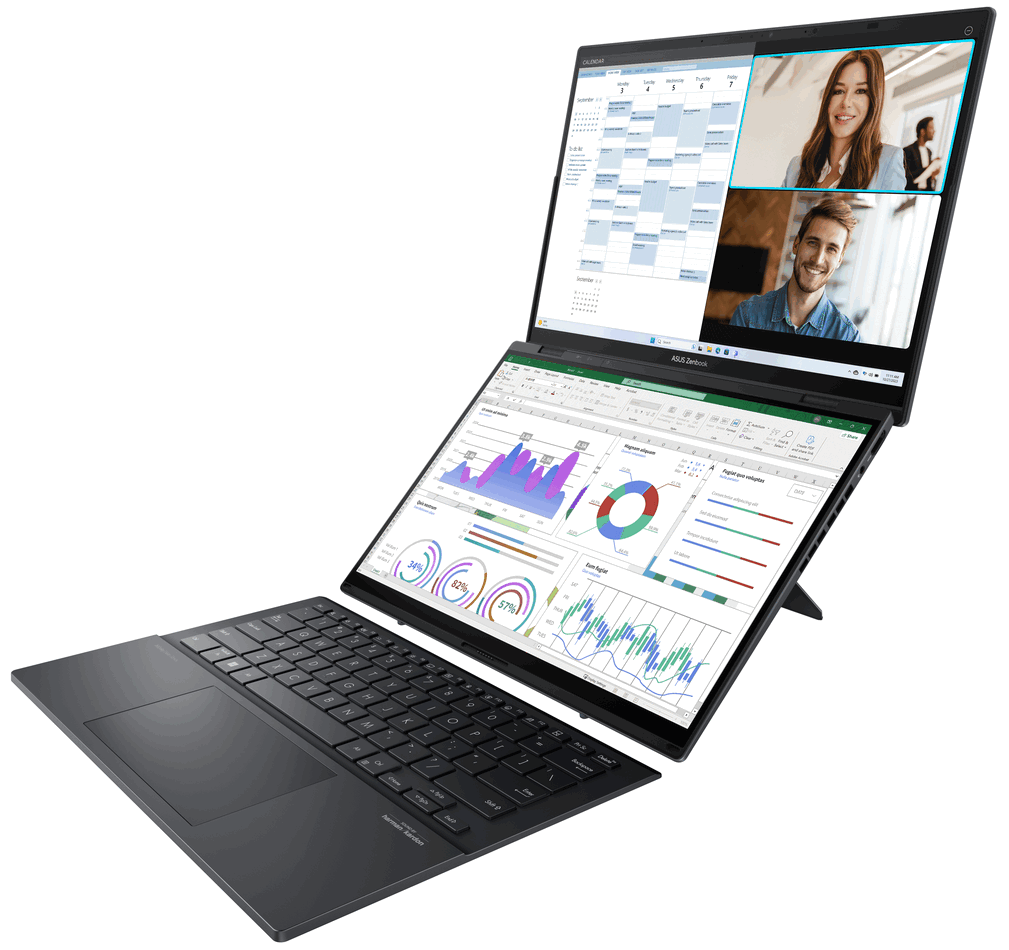
(1) Dual-screen mode (with Bluetooth keyboard)
When the Kickstand at the bottom of the computer is unfolded, both screens will be displayed at the best angle. While you're in an online meeting to share your latest knowledge, Zenbook DUO's dual-screen mode allows you to focus on your work in real time without constantly switching tabs or windows.
(2) Sharing mode
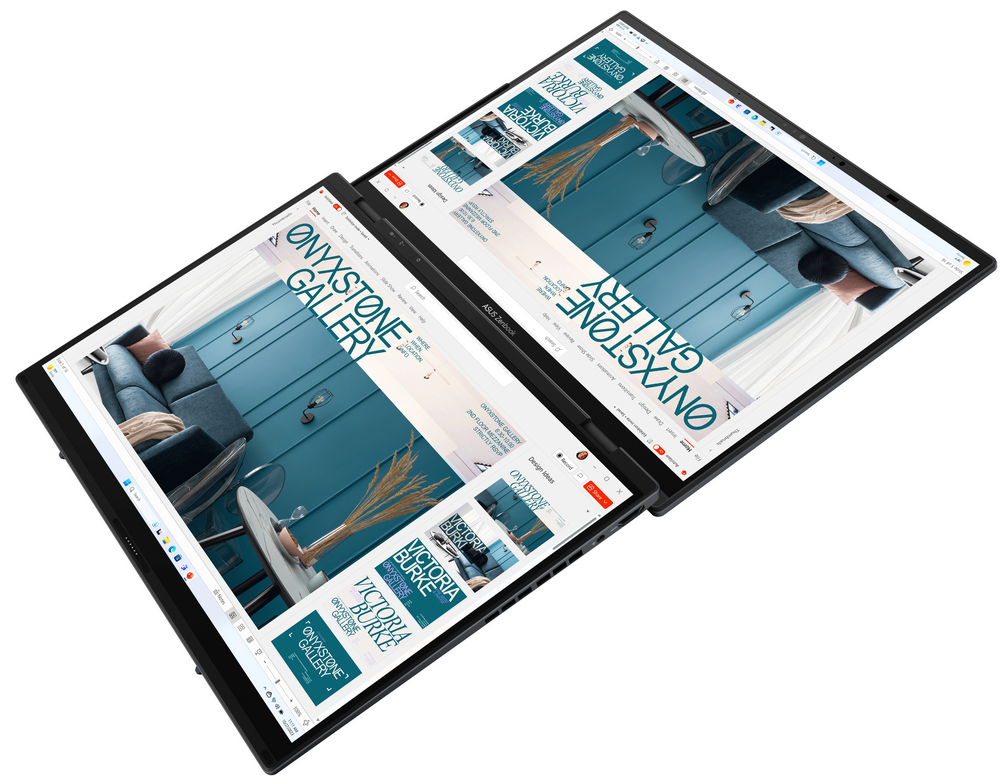
When you discuss design details with clients face-to-face, Zenbook DUO's Sharing mode allows everyone to view the screen and focus on the content.
※ This function needs to be used with ScreenXpert, please refer to 3-(3) in this document for detailed steps.
(3) Stylish sleeve support mode
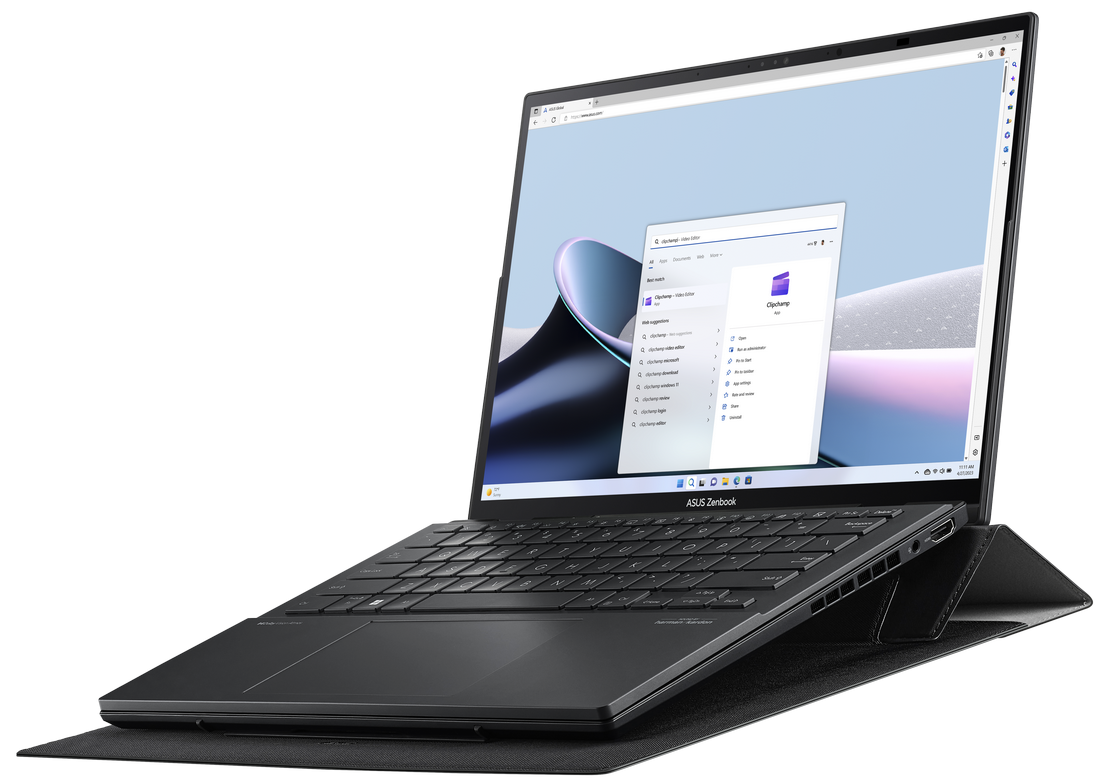
Multi-function Laptop sleeve bag (Optional) not only does it protect your computer with a silky leather feel, but it can be easily folded to fit the Zenbook DUO on top of it. The multi-functional laptop sleeve bag not only raises the keyboard by 12° for two-handed typing, but also raises the Zenbook Duo to allow for quick cooling of air circulation.
※ Multi-function laptop sleeve bag (optional) with space to store ASUS Pen 2.0 (optional).
(4) Laptop Mode (with Bluetooth keyboard)
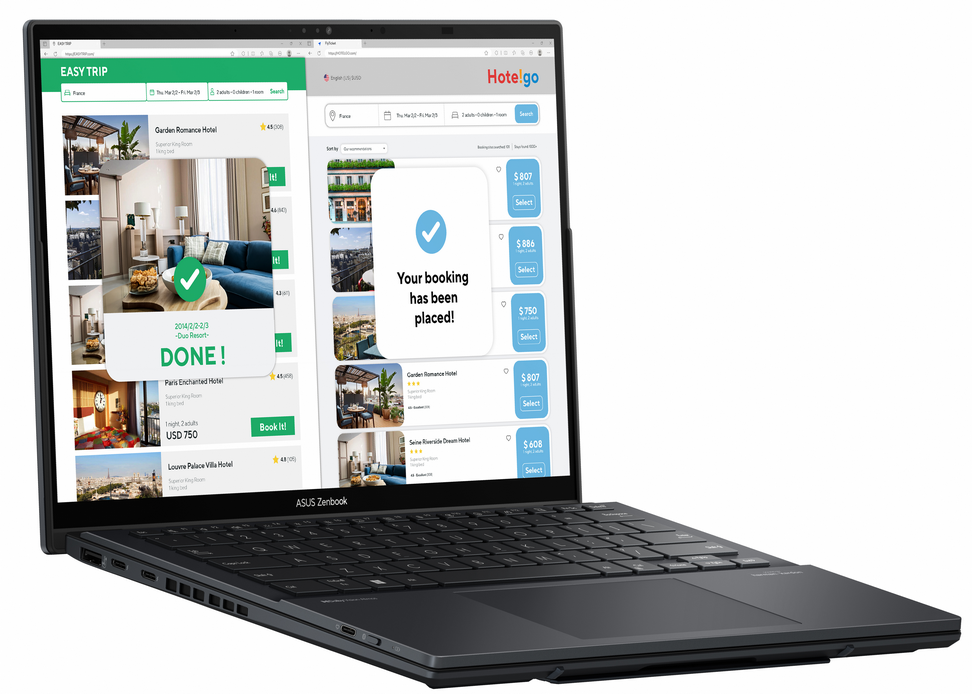
Configure the ASUS ErgoSense Bluetooth keyboard and touchpad on the lower screen to enjoy the experience of traditional laptop usage.
(5) Desktop Mode
The Kickstand at the bottom of the computer is unfolded, and the computer is placed vertically, and the Zenbook DUO enters Desktop mode. Display your productivity apps on one screen while displaying reference data, files, or research sources on another.
※ In desktop mode, the computer will be slightly larger than 180°, this posture will be more stable.
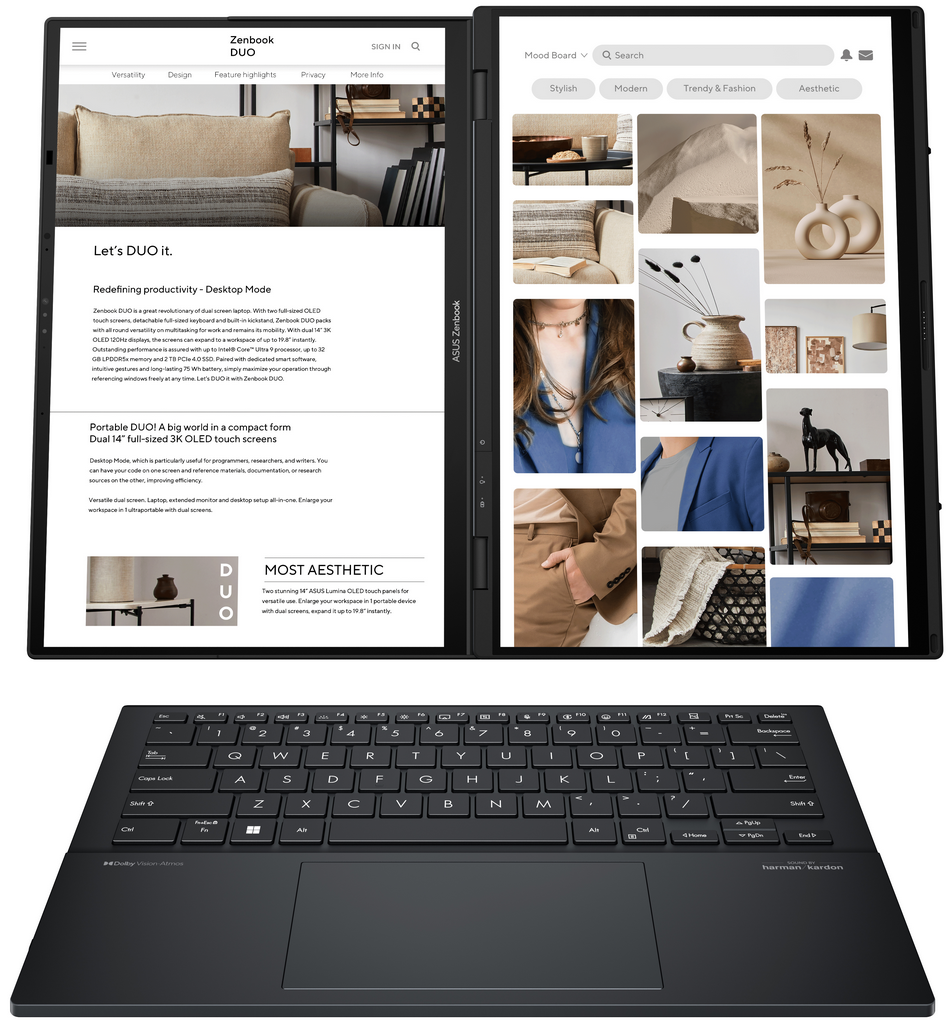
(6) Laptop Mode (with virtual keyboard)
The lower screen can be configured as a full-size virtual keyboard. With two screens, you can be more productive and enjoy more immersive entertainment.
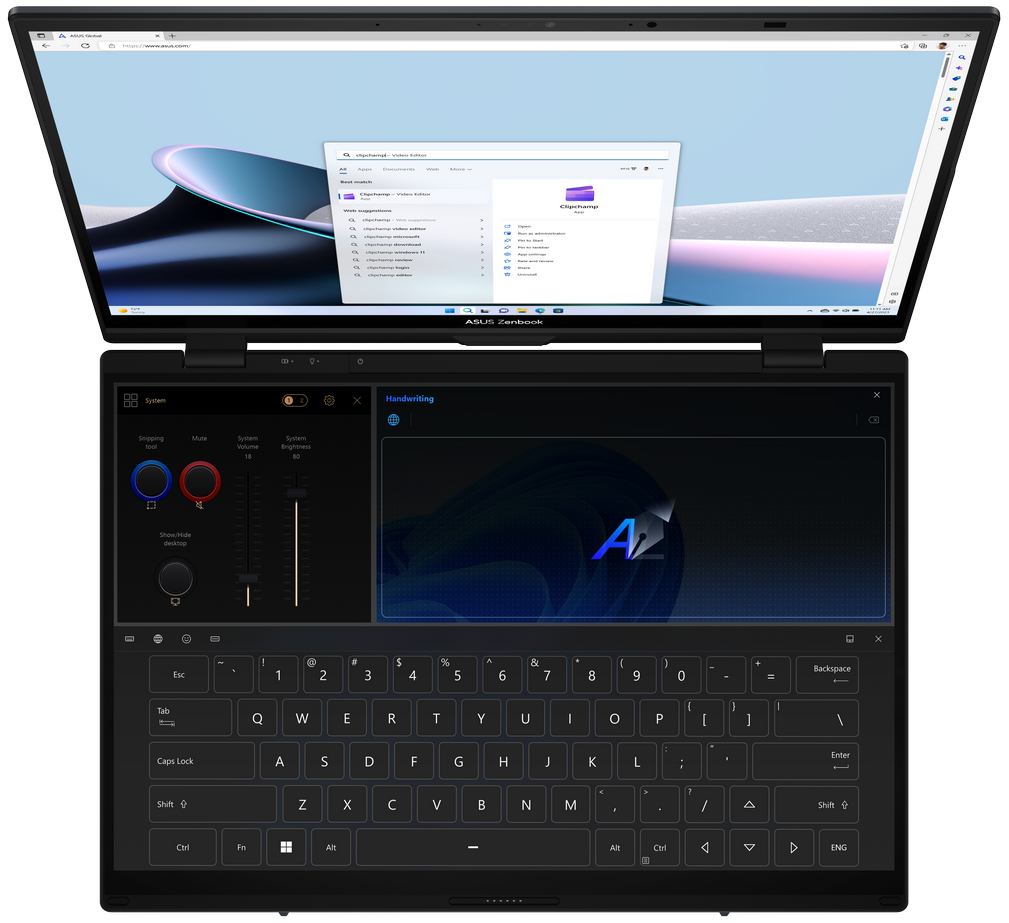
2. Screen gesture introduction
Screen Gestures need to be used with ScreenXpert, for details, please refer to: [Notebook] ScreenXpert 3 - Introduction | Official Support | ASUS Global
If you encounter fluency or other problems when using screen gestures, please update the latest version of the BIOS and ScreenXper before using it.
(1) Six-finger control mode
On the second screen of the Zenbook DUO, tap the screen with six fingers to wake up the virtual keyboard, and swipe up again to display the virtual keyboard on the full screen. Swipe down with six fingers to turn off functions in order they are on, and swipe down with six fingers in the lower third of the second screen to turn off all functions directly.
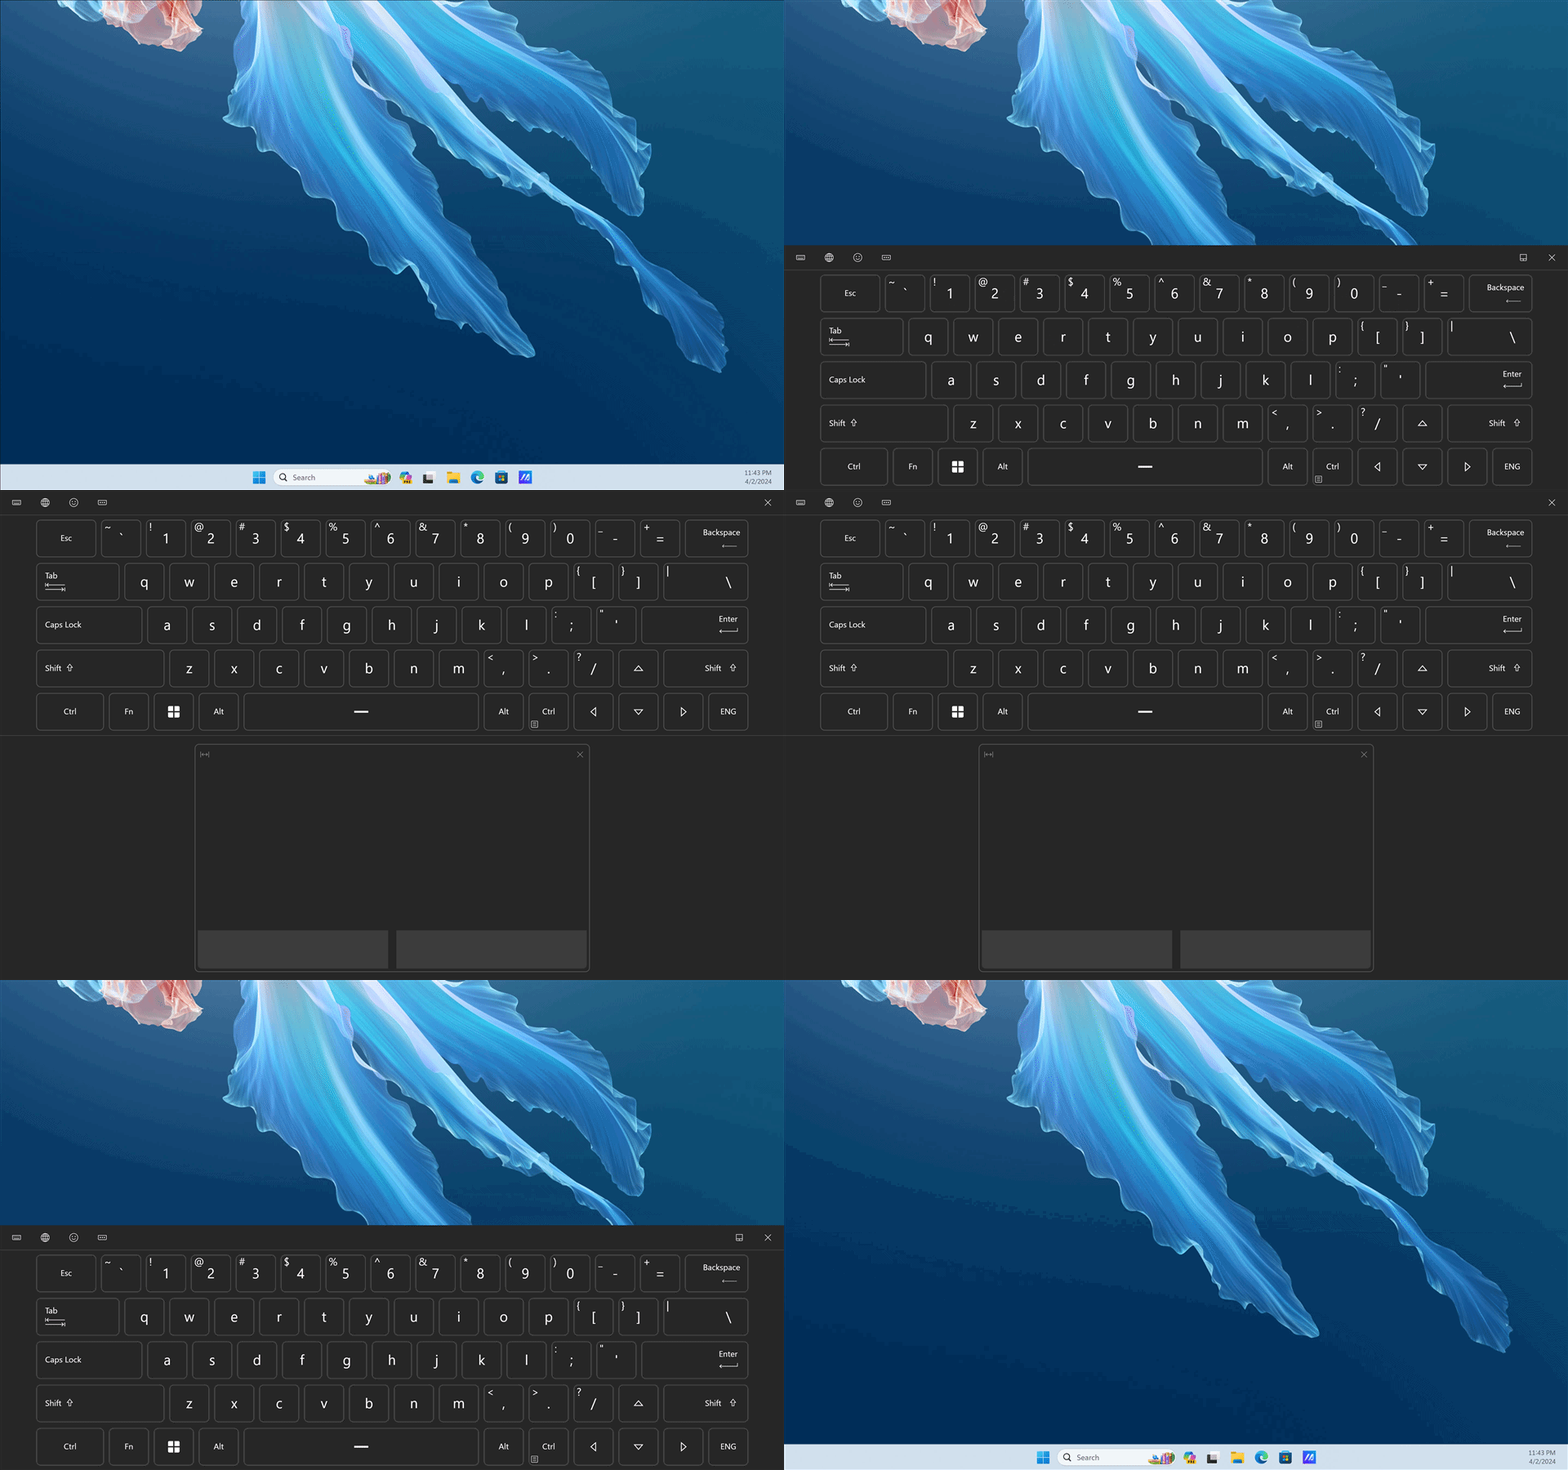
(2) Two-Finger Control Mode - Gadget Switch
Before using this function, you need to turn on the gadget in ScreenXpert first, please place the gadget on the second screen as shown below, and the virtual keyboard needs to be turned on during the placement process. The placement is complete, and you can quickly switch the gadget with two fingers. The next time you use the six-finger function, the gadget will be opened first, and you will need to swipe up again to open the virtual keyboard.

If gadget doesn't appear on the second screen, place it on the second screen manually.

※ The gadget needs to be placed in the same position to support the two-finger switching function.
※ If you only want to use the virtual keyboard function, please click the [X] to turn off the small function, and then use six functions to turn on the virtual keyboard function only.
Control Panel supports personalized settings, please refer to: ASUS Control Panel - Introduction | Official Support | ASUS Global
(3) Five-finger control mode
For example, if you open MyASUS, you can use five fingers to expand the folder on the screen to display the folder on the full screen.
If you use five fingers to shrink on the screen, the folder will be displayed full-screen on the home screen.
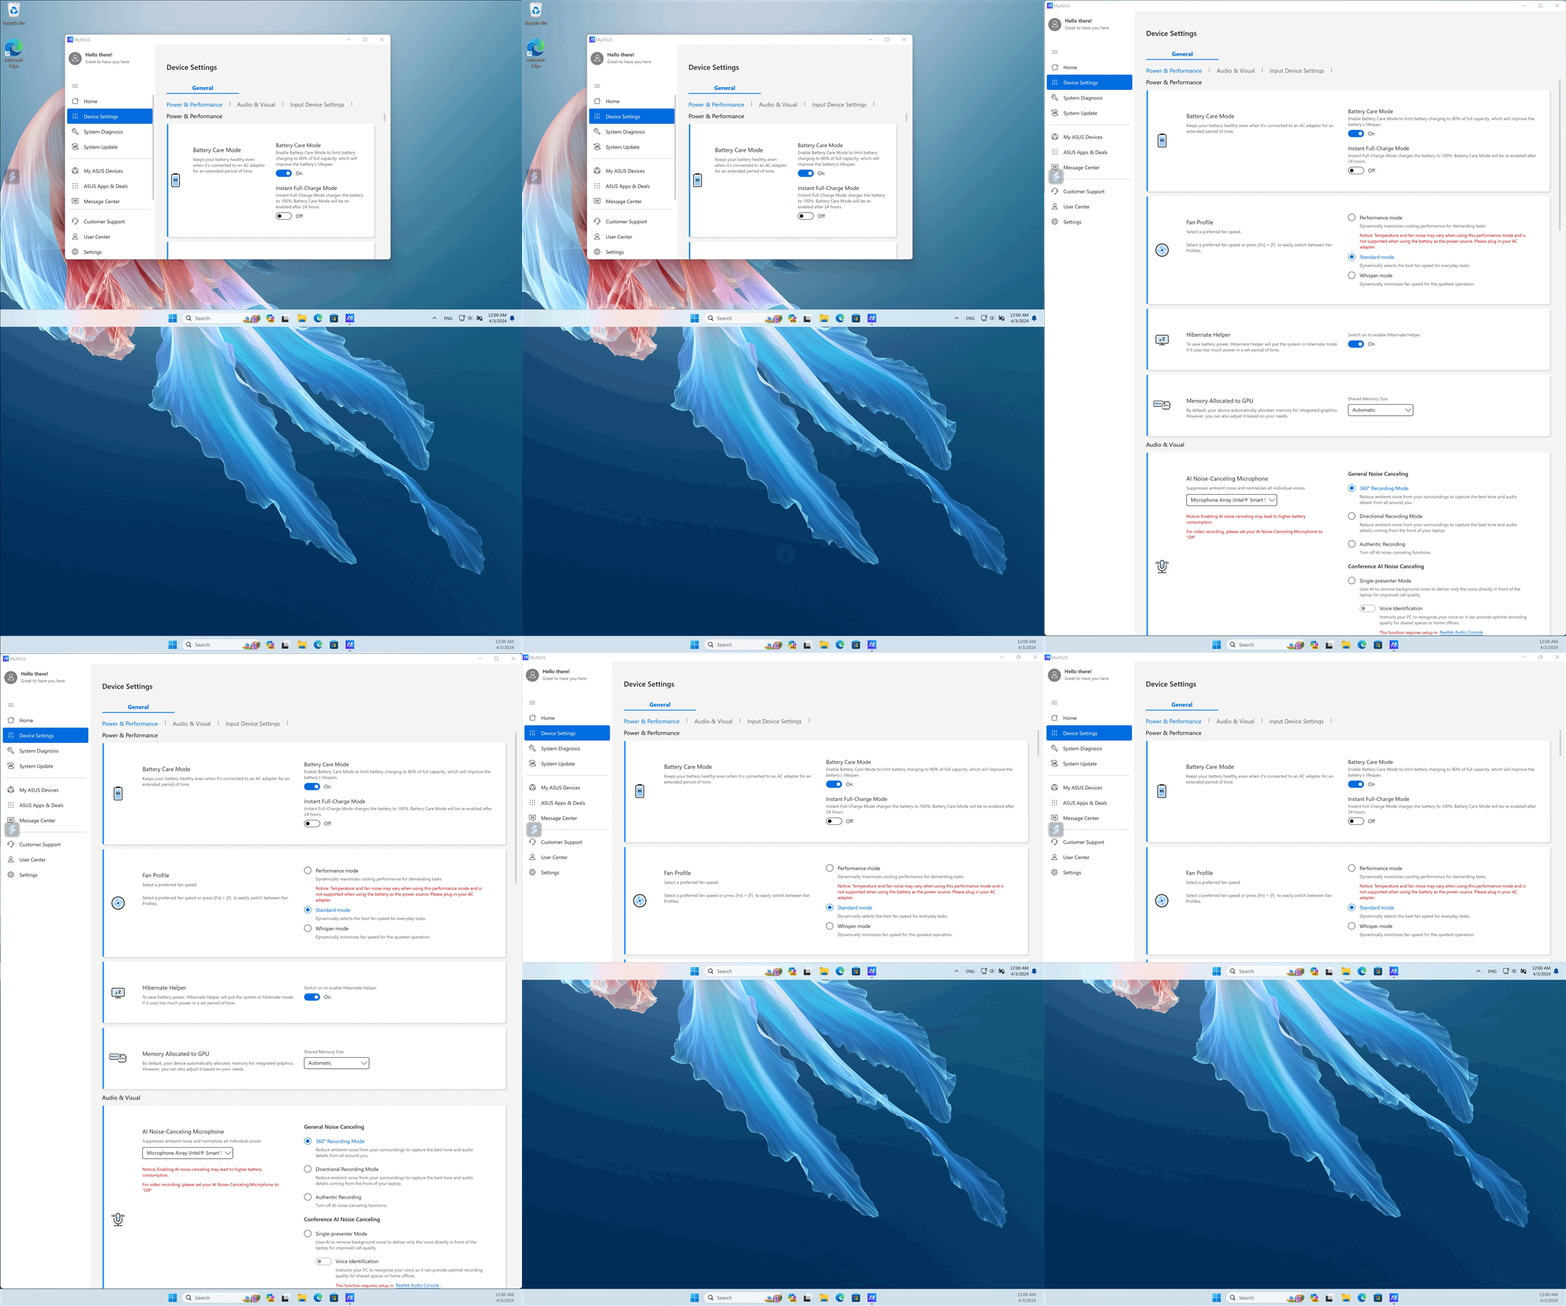
(4) Three-finger control mode
On the second screen of the Zenbook DUO, tap the screen with three fingers to wake up the virtual touchpad. The virtual touchpad allows you to move around at will, and turning it off and back on will remain the same as when it was last turned off.
(5) One-finger control mode
You only need to use one finger, drag the window and slide it gently, and the window can be displayed on another screen in full screen.

3. Exclusive ScreenXpert function
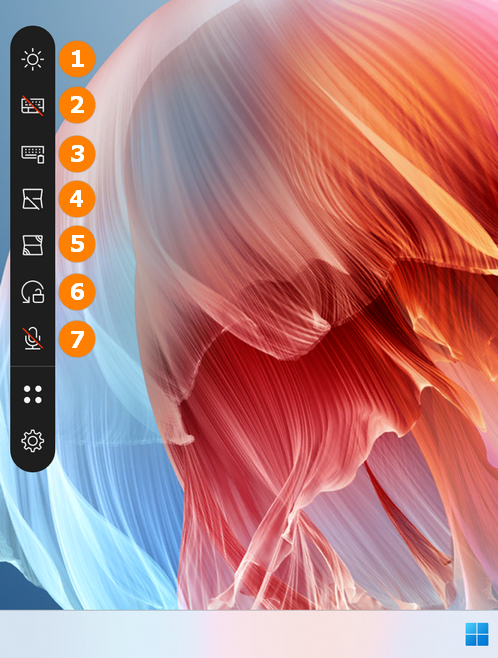
After turning on ScreenXpert, from top to bottom, it is: ①Brightness adjustment, ②Virtual keyboard switch, ③Exclusive Bluetooth keyboard status, ④Switch on the second screen, ⑤Sharing mode, ⑥Rotate lock, ⑦Microphone switch.
※ Virtual keyboard switch - If your computer is not connected to a Bluetooth keyboard, the virtual keyboard will automatically turn on when you tap the text box with your finger.
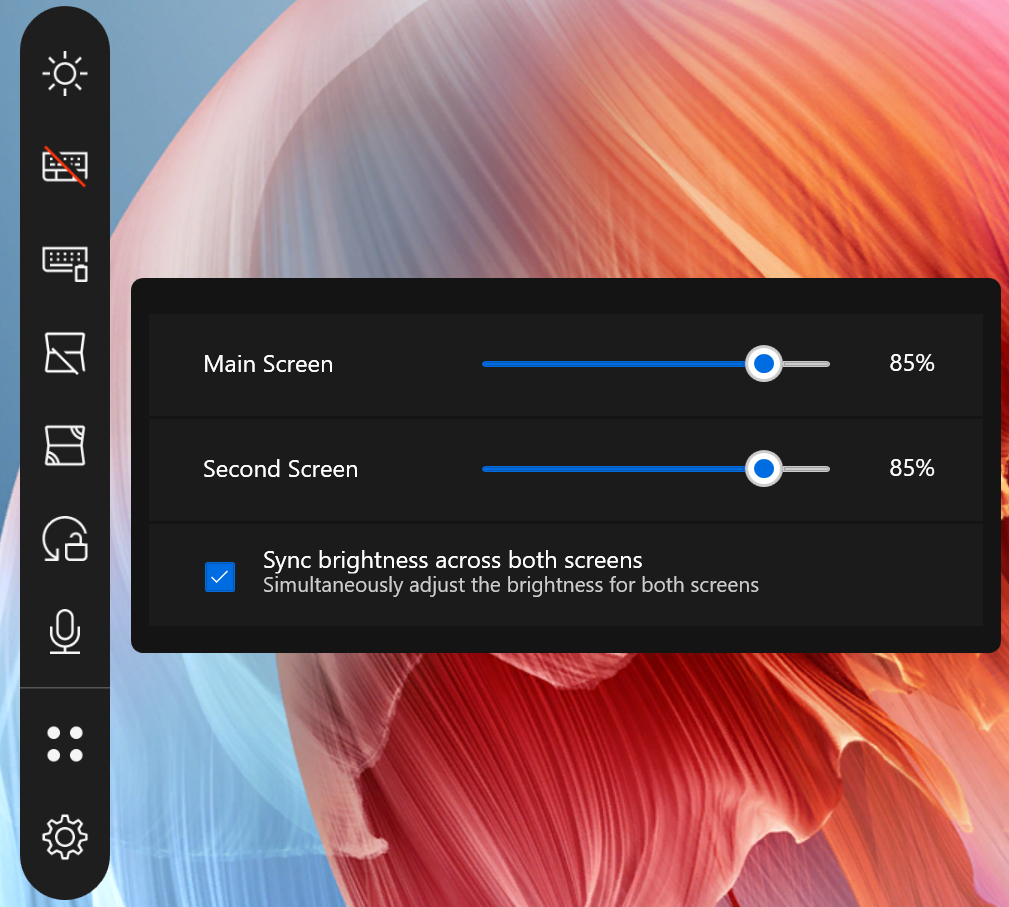
(1) ①Brightness adjustment
Click [Brightness adjustment], you can quickly and manually adjust the brightness of the home screen and the second screen. When you turn on [Sync Brightness across both screens], the brightness of both screens will be adjusted synchronously.
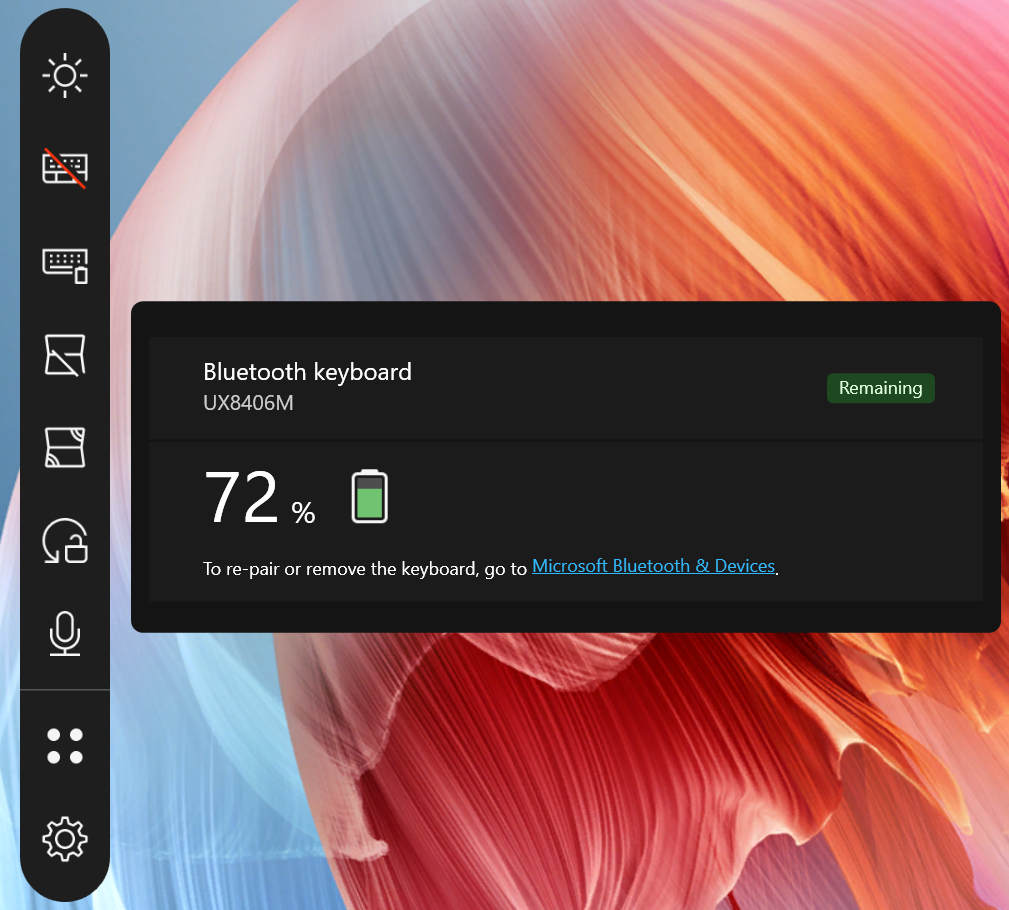
(2) ③Exclusive Bluetooth keyboard status
Tap [Exclusive Bluetooth Keyboard Status] to display the real-time battery level of the Bluetooth keyboard. If you have not yet connected the Zenbook DUO Bluetooth keyboard, you will be guided to connect the Bluetooth keyboard.
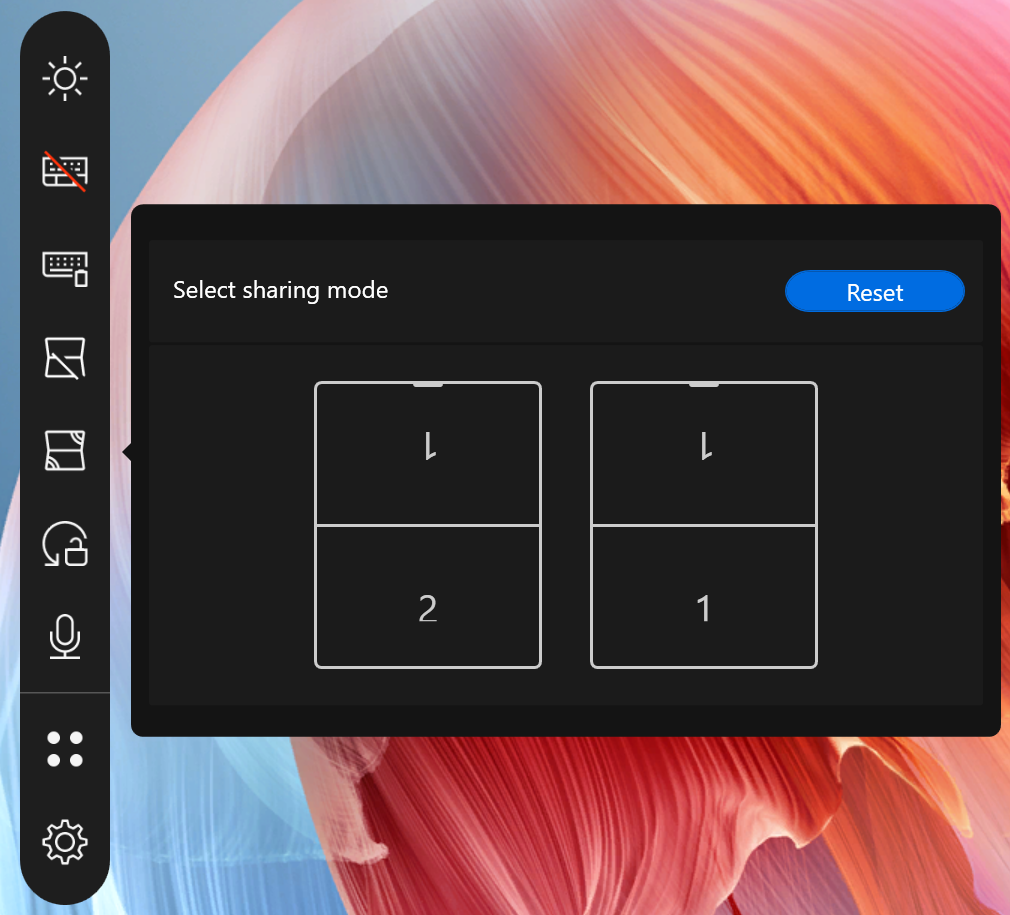
(3) ⑤Sharing mode
Click [Sharing mode], select the mode you want, and tap. If you don't want to use [Sharing mode], tap [Reset] to restore the default screen settings.
4. Zenbook DUO Exclusive Bluetooth Keyboard
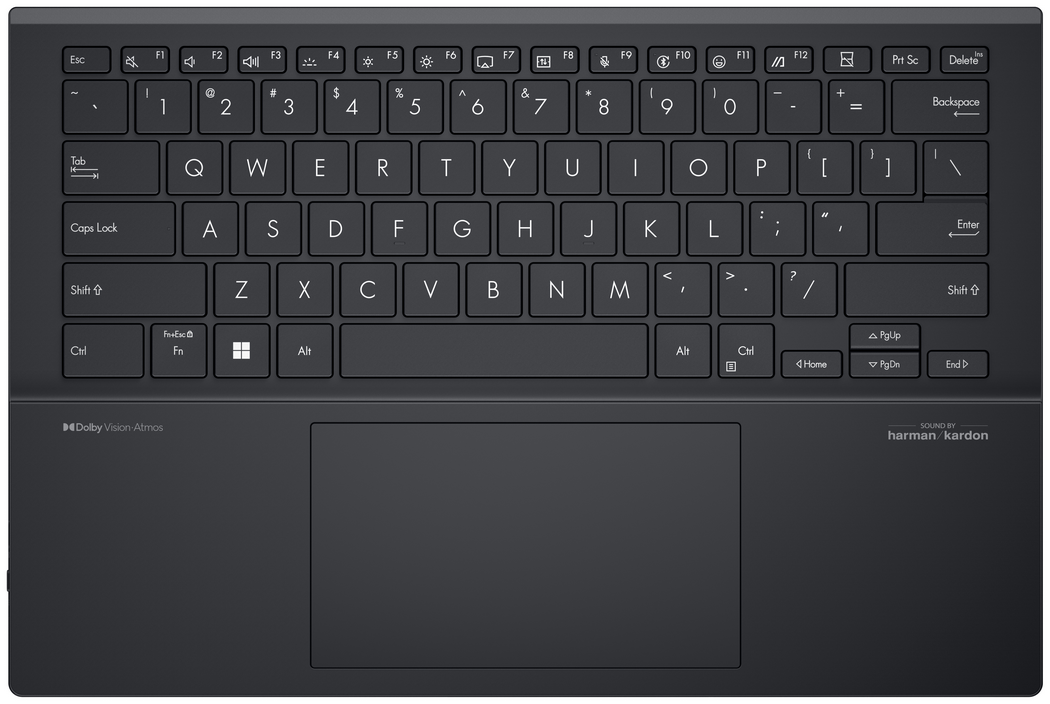
Zenbook DUO Exclusive Bluetooth Keyboard has POGO PIN port, USB-C port, charging indicator and Bluetooth on/off key.
※ The Zenbook DUO Exclusive Bluetooth keyboard can be connected to an ASUS computer, so you can use all functions. Connecting to non-ASUS computers may result in restrictions on the use of shortcuts or certain keys (Fn).
※ The keyboard can be charged through POGO PIN and USB-C interface.
※ The USB-C port does not support the data transfer function of the Bluetooth keyboard.
(1) Connect to the Zenbook DUO Bluetooth keyboard
※ Before connecting the Bluetooth keyboard, please go to MyASUS and update your computer driver to the latest status. If you encounter problems during the connection process, please refer to: [Windows 11/10] Troubleshooting - Bluetooth Functionality Anomaly Issue | Official Support | ASUS Global
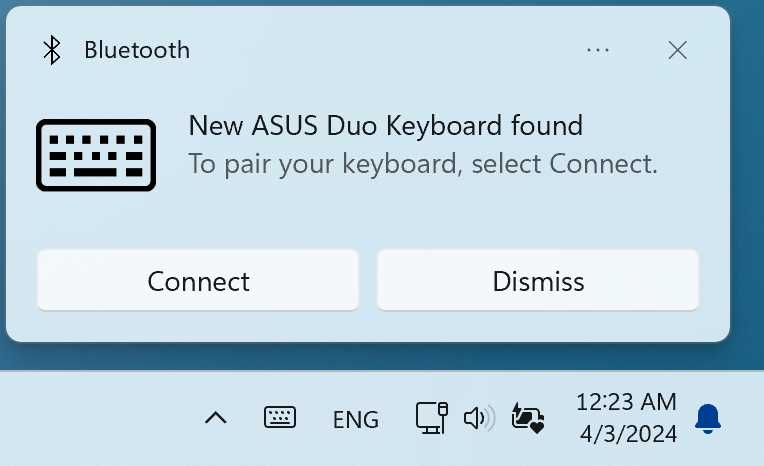
Press and hold the F10 button on the keyboard until the indicator starts to flash blue, and a pop-up window will appear in the lower right corner of the computer home screen, click [Connect].
※ If there is no pop-up window, please go to Windows Settings -> Bluetooth and devices -> Add device and manually connect the Bluetooth keyboard.
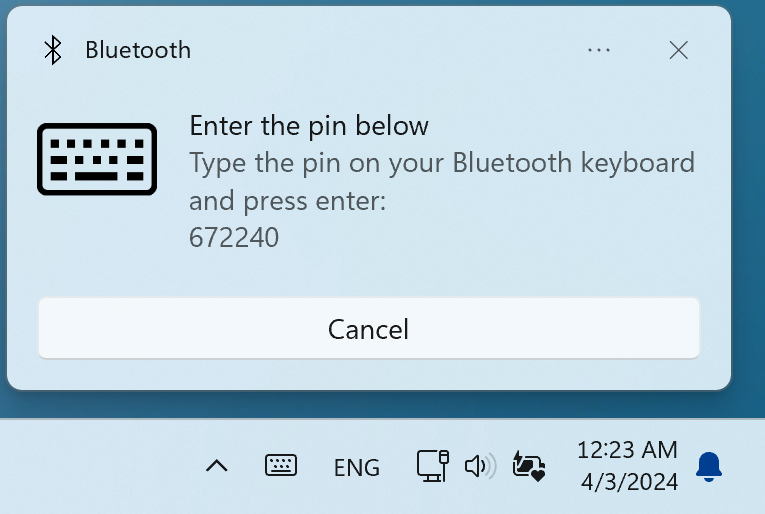
On the Bluetooth keyboard, enter the PIN code in order, and then press the Enter key on the Bluetooth keyboard to complete the connection.
(2) Take the Zenbook DUO Exclusive Bluetooth keyboard from the computer.
The keyboard is magnetically attached to the second screen, and the place with the greatest suction power is at the bottom of the keyboard. It is recommended that you lift the keyboard from the upper corners of the Bluetooth keyboard and remove it.
(3) Zenbook DUO's Exclusive Bluetooth keyboard backlight.
You can use the shortcut key F4 or Fn+F4 to switch the backlight of the Bluetooth keyboard, turning on the backlight will increase the power consumption. With the backlight off and fully charged, the Bluetooth keyboard can be used for more than 24 hours.
(4) Charging of the Zenbook DUO Exclusive Bluetooth Keyboard.
The Zenbook DUO Exclusive Bluetooth Keyboard can be placed on the second screen, connected to the POGO PIN, or charged via the USB-C port.
※ When the battery level of the Zenbook DUO Exclusive Bluetooth keyboard is less than 5%, there will be a pop-up window in the lower right corner of Windows to remind you to charge.
Q1: Will the Bluetooth keyboard scratch the screen?
A1: The Zenbook DUO exclusive Bluetooth keyboard has been rigorously tested and will not damage your screen. But before you place the Zenbook DUO Exclusive Bluetooth keyboard or close the computer screen, please make sure that there are no other clutter on the screen and keyboard.
Q2: There will be reflections during the use of the second screen.
A2: You can use the multi-function laptop sleeve bag (optional) to raise the angle of the second screen to reduce reflection. You can also turn on the Kick Stand and use both screens at the best angle with the Zenbook DUO's exclusive Bluetooth keyboard.
Q3: Zenbook DUO (UX8406MA) is on the lock screen, and the second screen is not displayed.
Q3: This status is set by Microsoft, and the second screen is not displayed when the screen is locked, which can also effectively reduce power consumption.
Q4: Why do the two screens have color difference?
A4: Very slight chromatic aberration is normal, this is because the two screens are not at the same angle when in use.
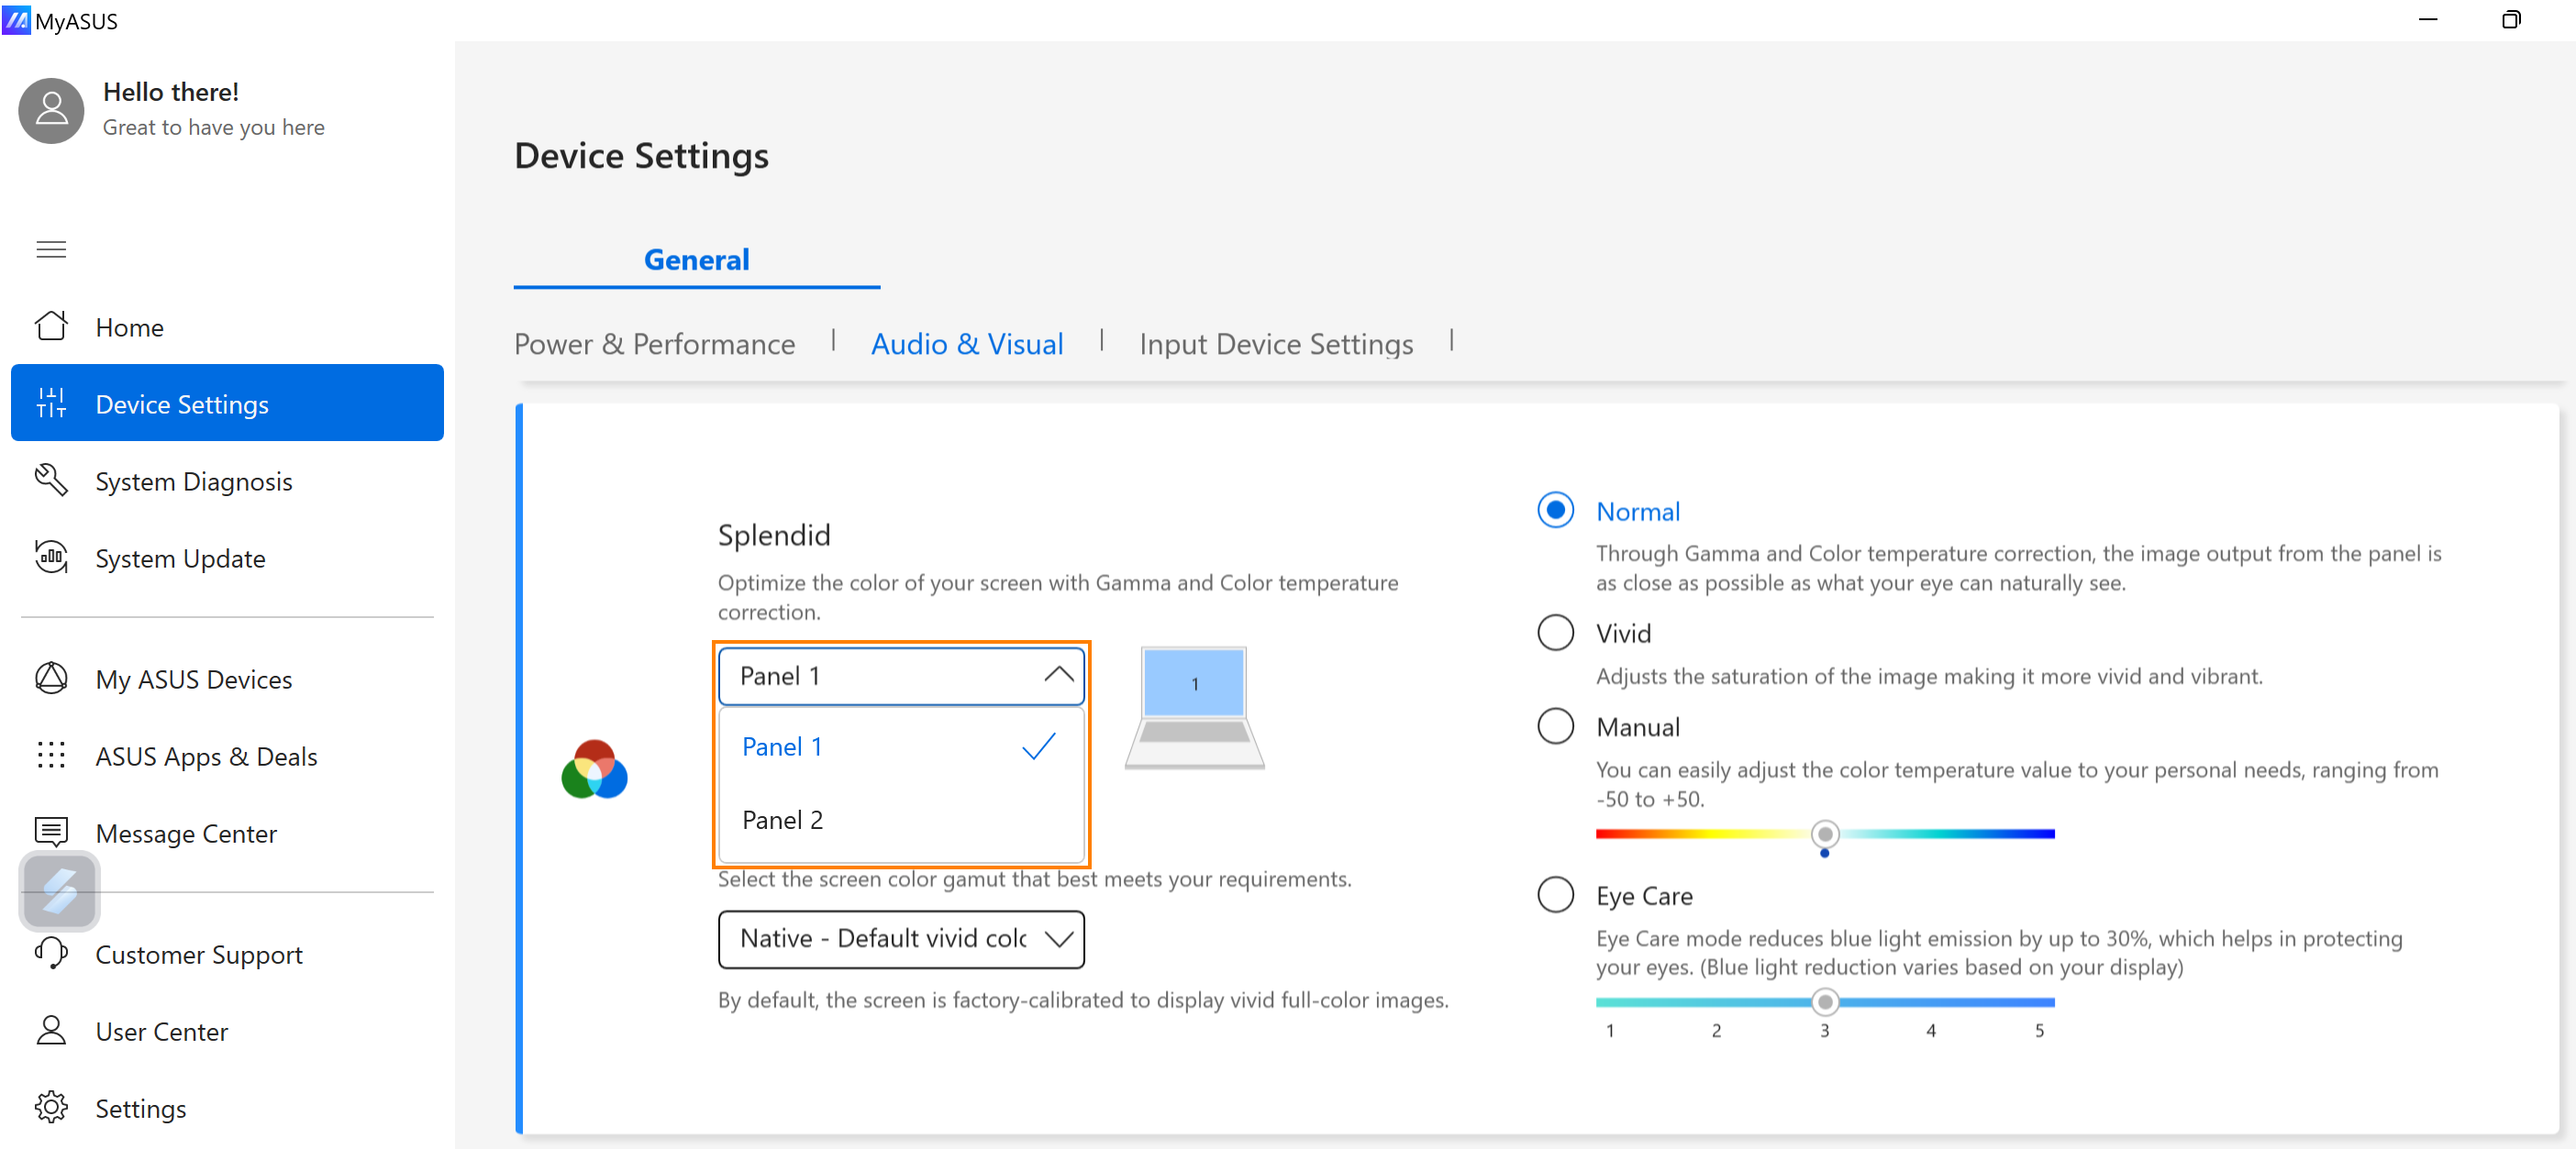
If you feel that the color difference is obvious, please go to MyASUS -> Device Settings -> Audio & Vision -> Splendid to check whether the Splendid mode of the two panels is the same.
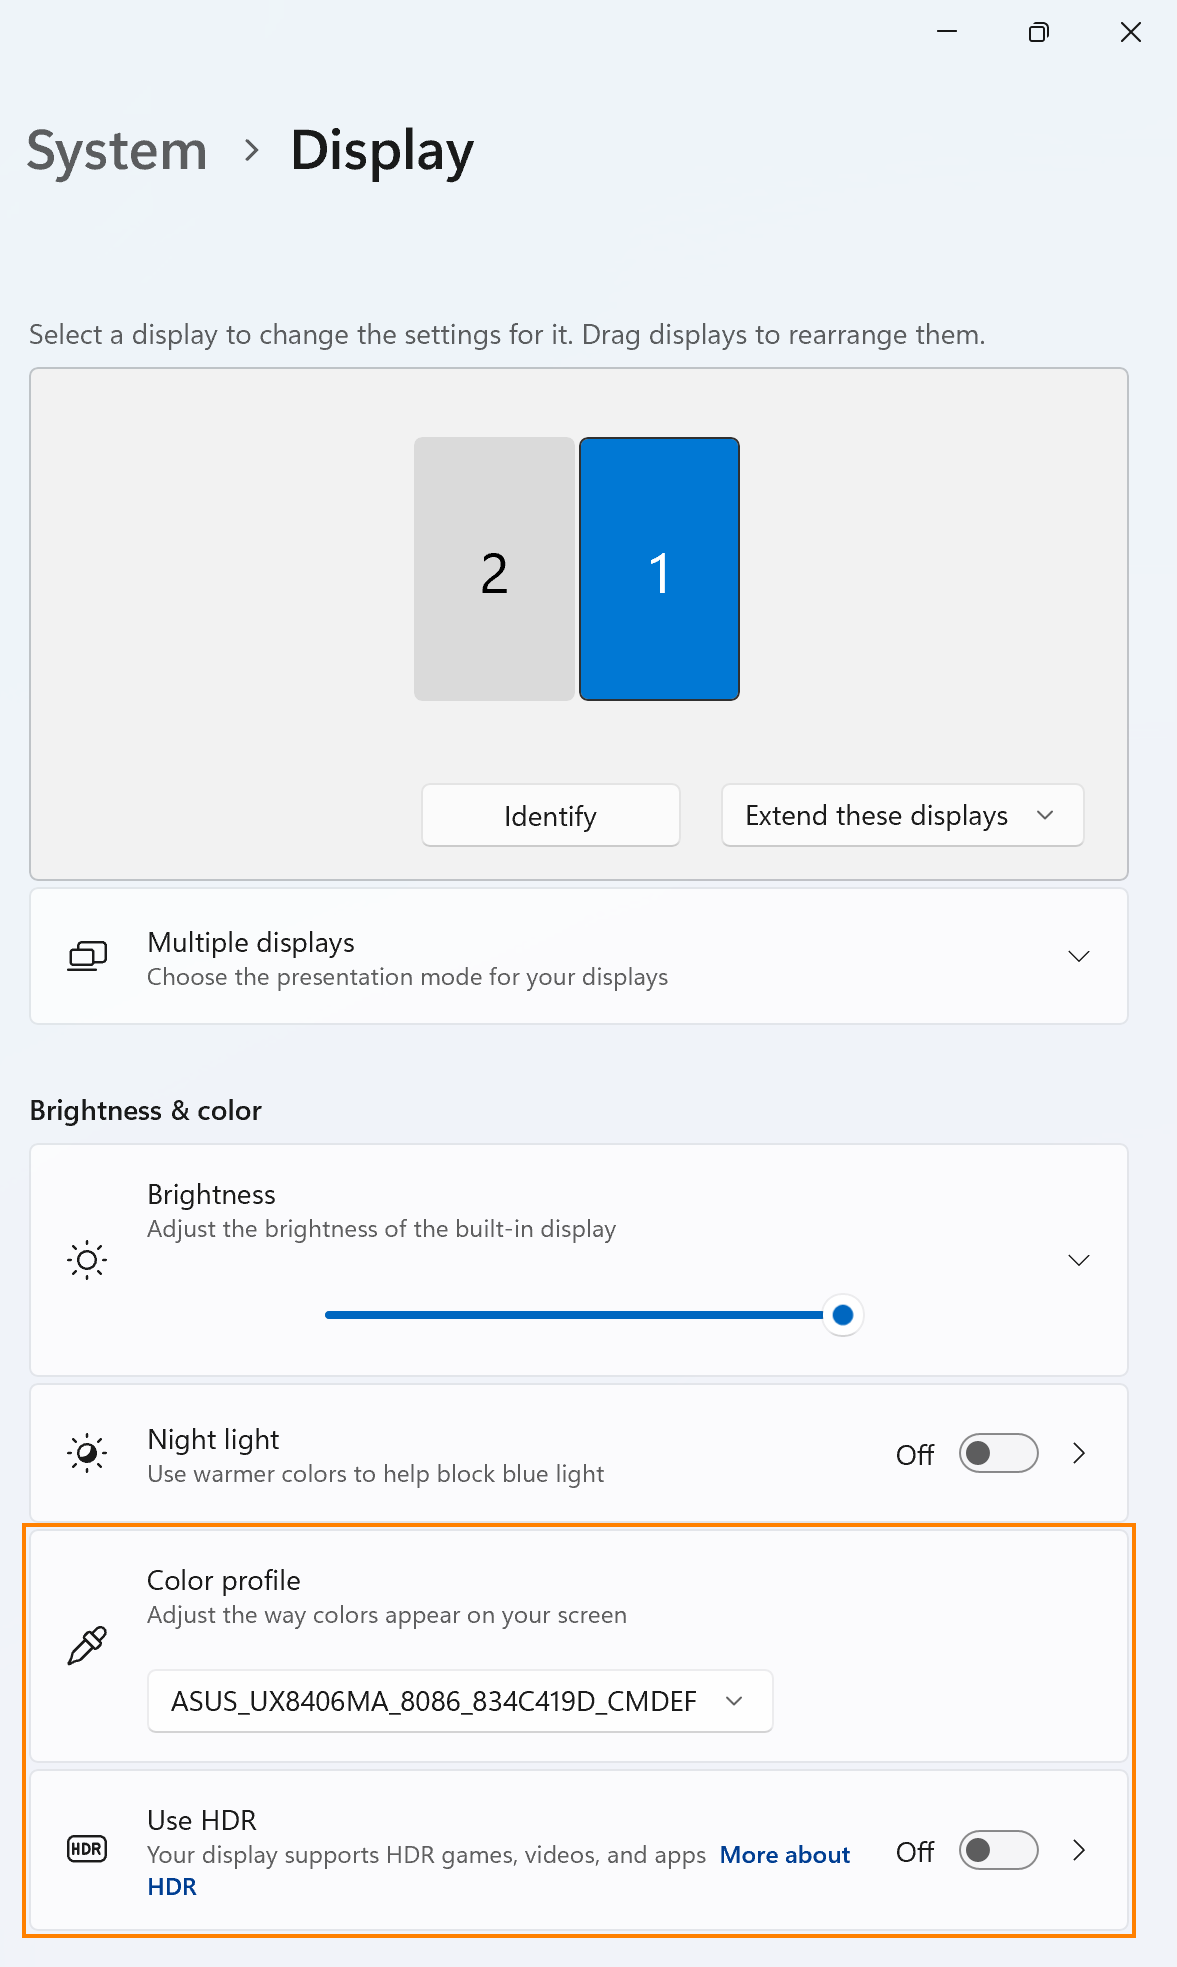
Or you can also go to Windows Settings -> Monitor -> Color profile & Use HDR to check if the two screens are the same.
Q5: Why is the second screen of my Zenbook DUO (UX8406MA) black and no screen?
A5: Please check whether the [Switch on the second screen] function is turned on in ScreenXpert.
Or please switch Windows Settings -> System -> Display -> Extend these displays.
Back to Table of Contents