Relative Topices
AURA Wallpaper Creator Introduction
Aura Wallpaper Creator introduction
Application Install& Uninstall
AURA Wallpaper Creator introduction
Aura Wallpaper Creator is an extension application of Aura Wallpaper. It is an editing application that integrate with ROG Aura lighting effect and Aura Wallpaper. It also provides various editing tool and allow user to select their wallpaper to create a highly-customized Aura Wallpaper lighting effects.
Supports ROG and TUF series Gaming laptop and desktop, and require Windows 10 and above operating system version.
The Aura Wallpaper Creator has been integrated into the Armoury Crate application. Users need to configure the Aura Wallpaper Creator settings through the Armoury Crate application.
Supported Version: Armoury Crate application version must be higher than V5.4.0 above.
*Please refer to Link for more details about Armoury Crate Introduction.
Application Install& Uninstall
How to get AURA Wallpaper Creator,please refer to [Aura Wallpaper Creator FAQ].
How to uninstall AURA Wallpaper Creator,please refer to Link.
Please refer to [Aura Wallpaper Introduction] to launch Aura Wallpaper application, and then click [Design Wallpaper] to launch Aura Wallpaper Creator.
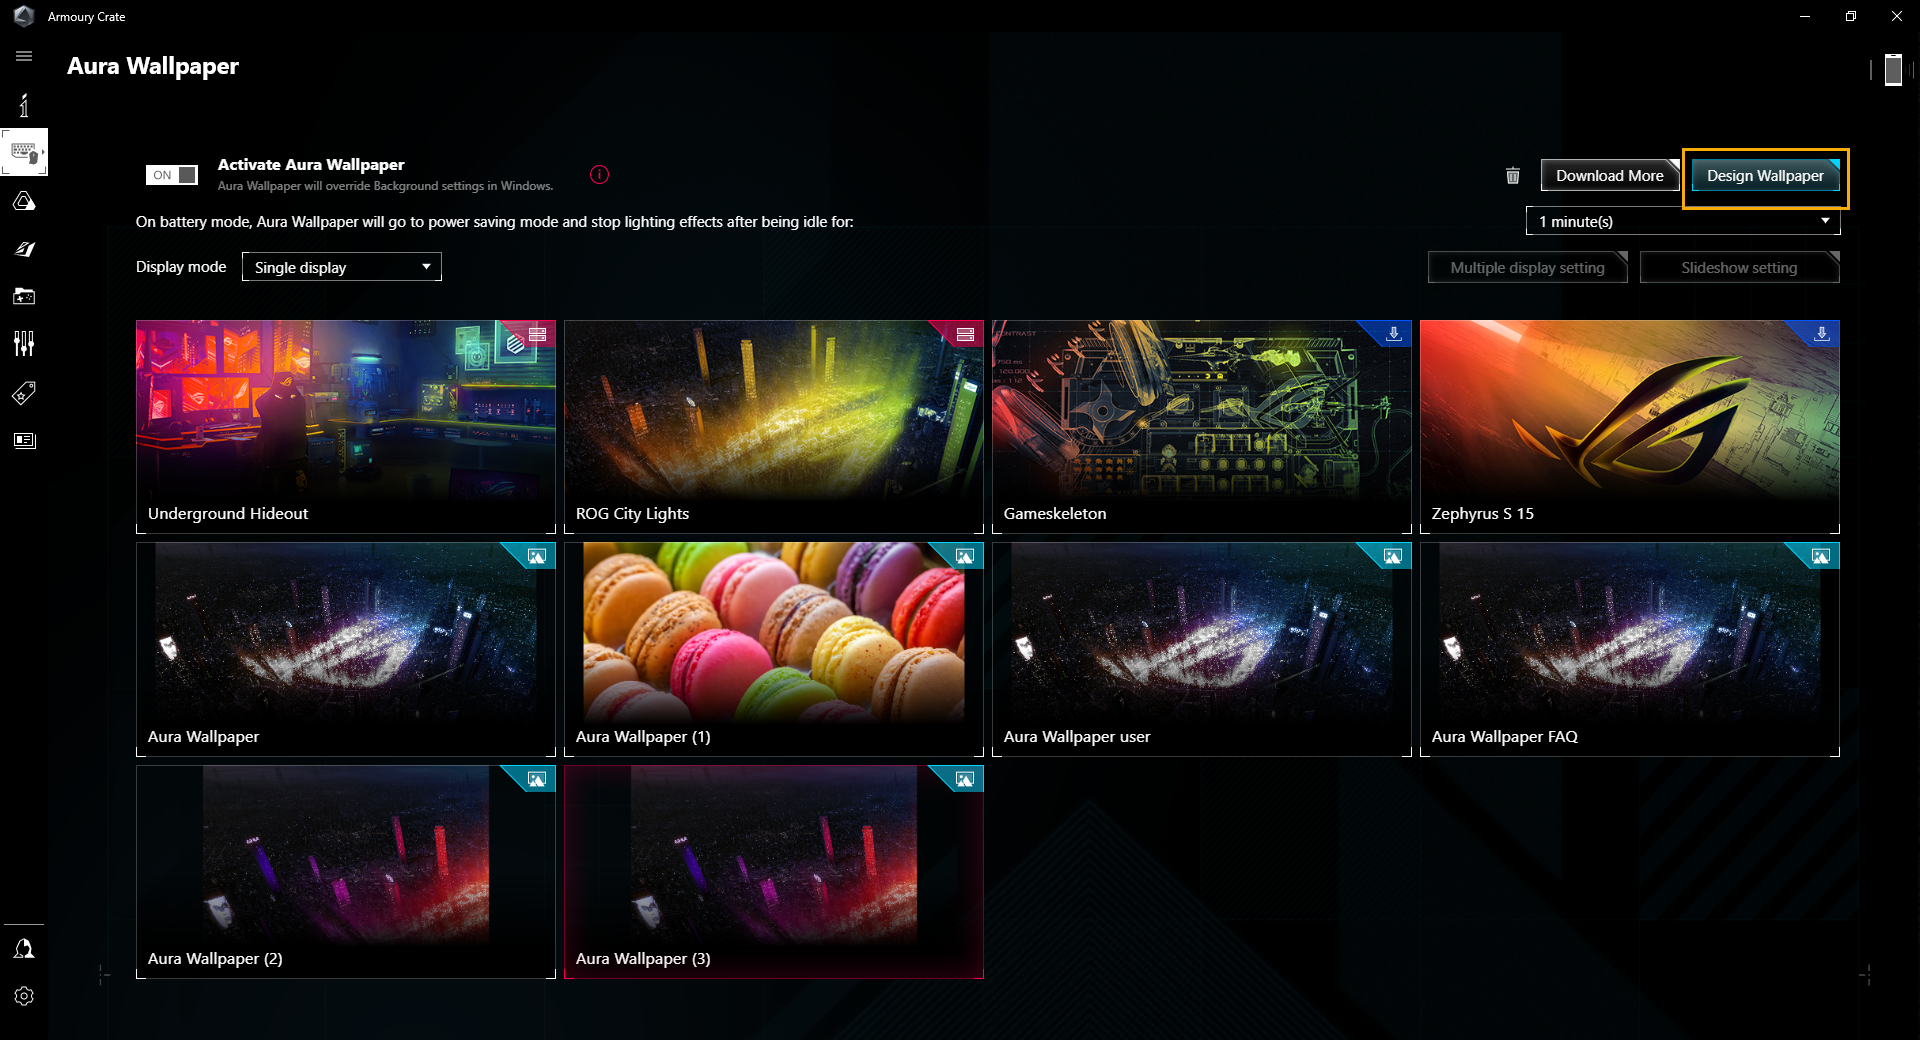
AURA Wallpaper Creator Homepage
A System Management
B Lighting Zone Editing Tools
C Lighting Zone Editing Area
D Lighting Zone and Layer Management
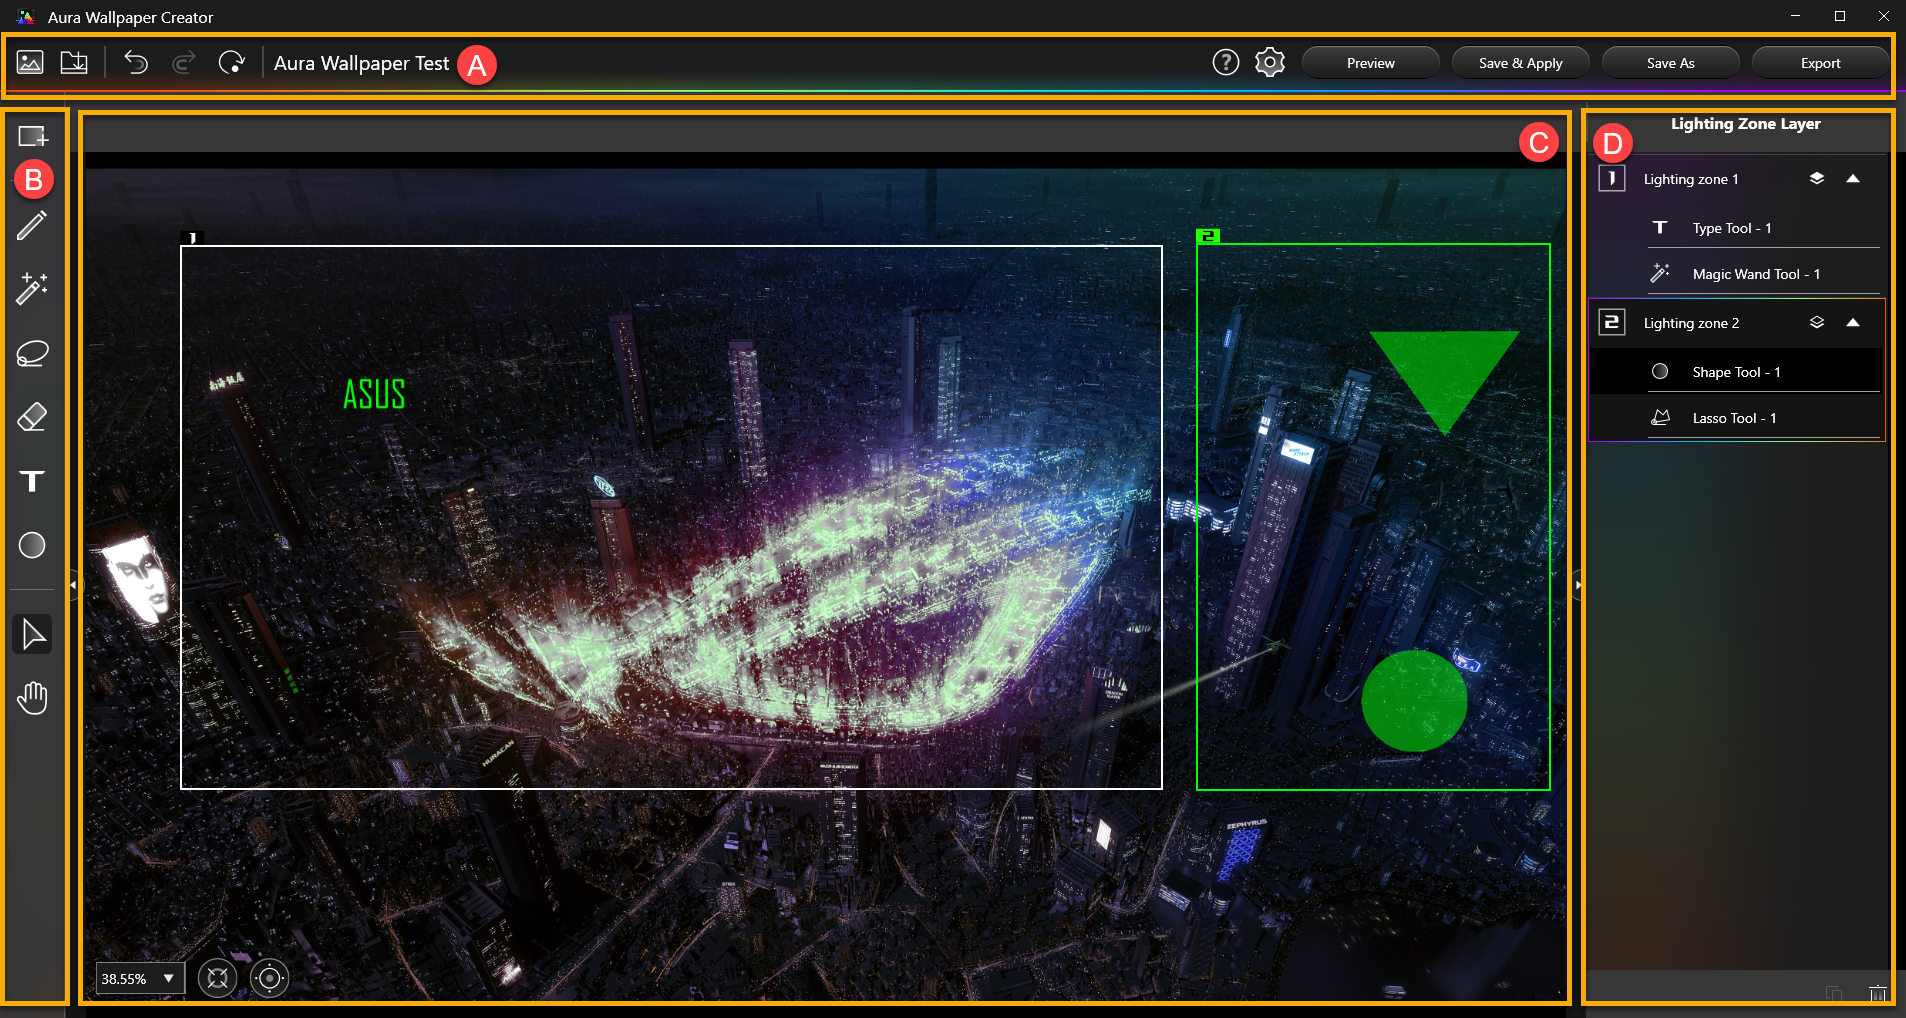
A System Management
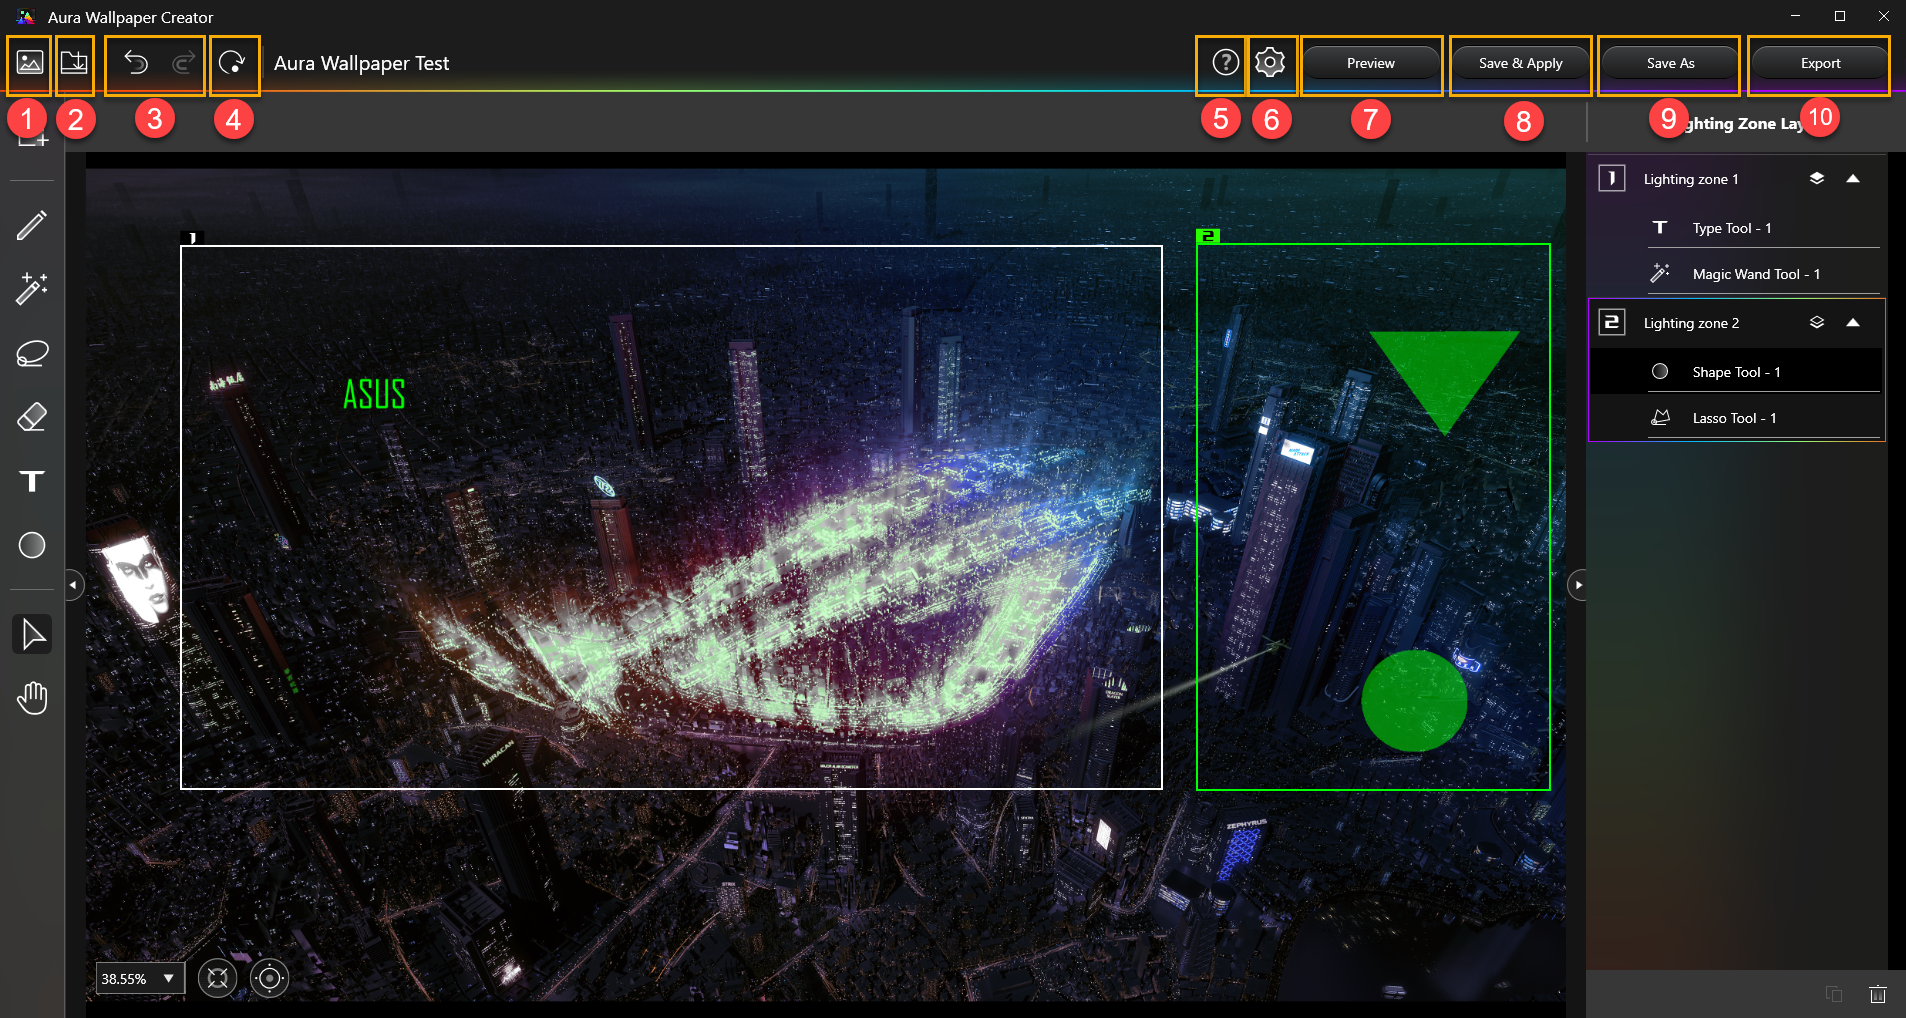
①Open Image: User can import their own image files. (Support .png .jpg .gif .bmp format)
②Import: To Import a Aura Wallpaper format file.
③Undo/Redo: Click to restore the last or next action of the editing operation.
④Clear All: To clear all changed lighting zones and layers in the editing area.
⑤Help: Provide more information about AURA Wallpaper Creator's feature highlights、quick tips and shortcut keys.
⑥Settings: Provide information about AURA Wallpaper Creator edition.
⑦Preview: Preview the lighting effects for edited lighting zone and layer currently.
⑧Save & Apply: Save the currently edited file and apply it directly.
⑨Save As: Save the currently edited file into a new file.
⑩Export: Export and save the currently edited file.
B Lighting Zone Edit Tools
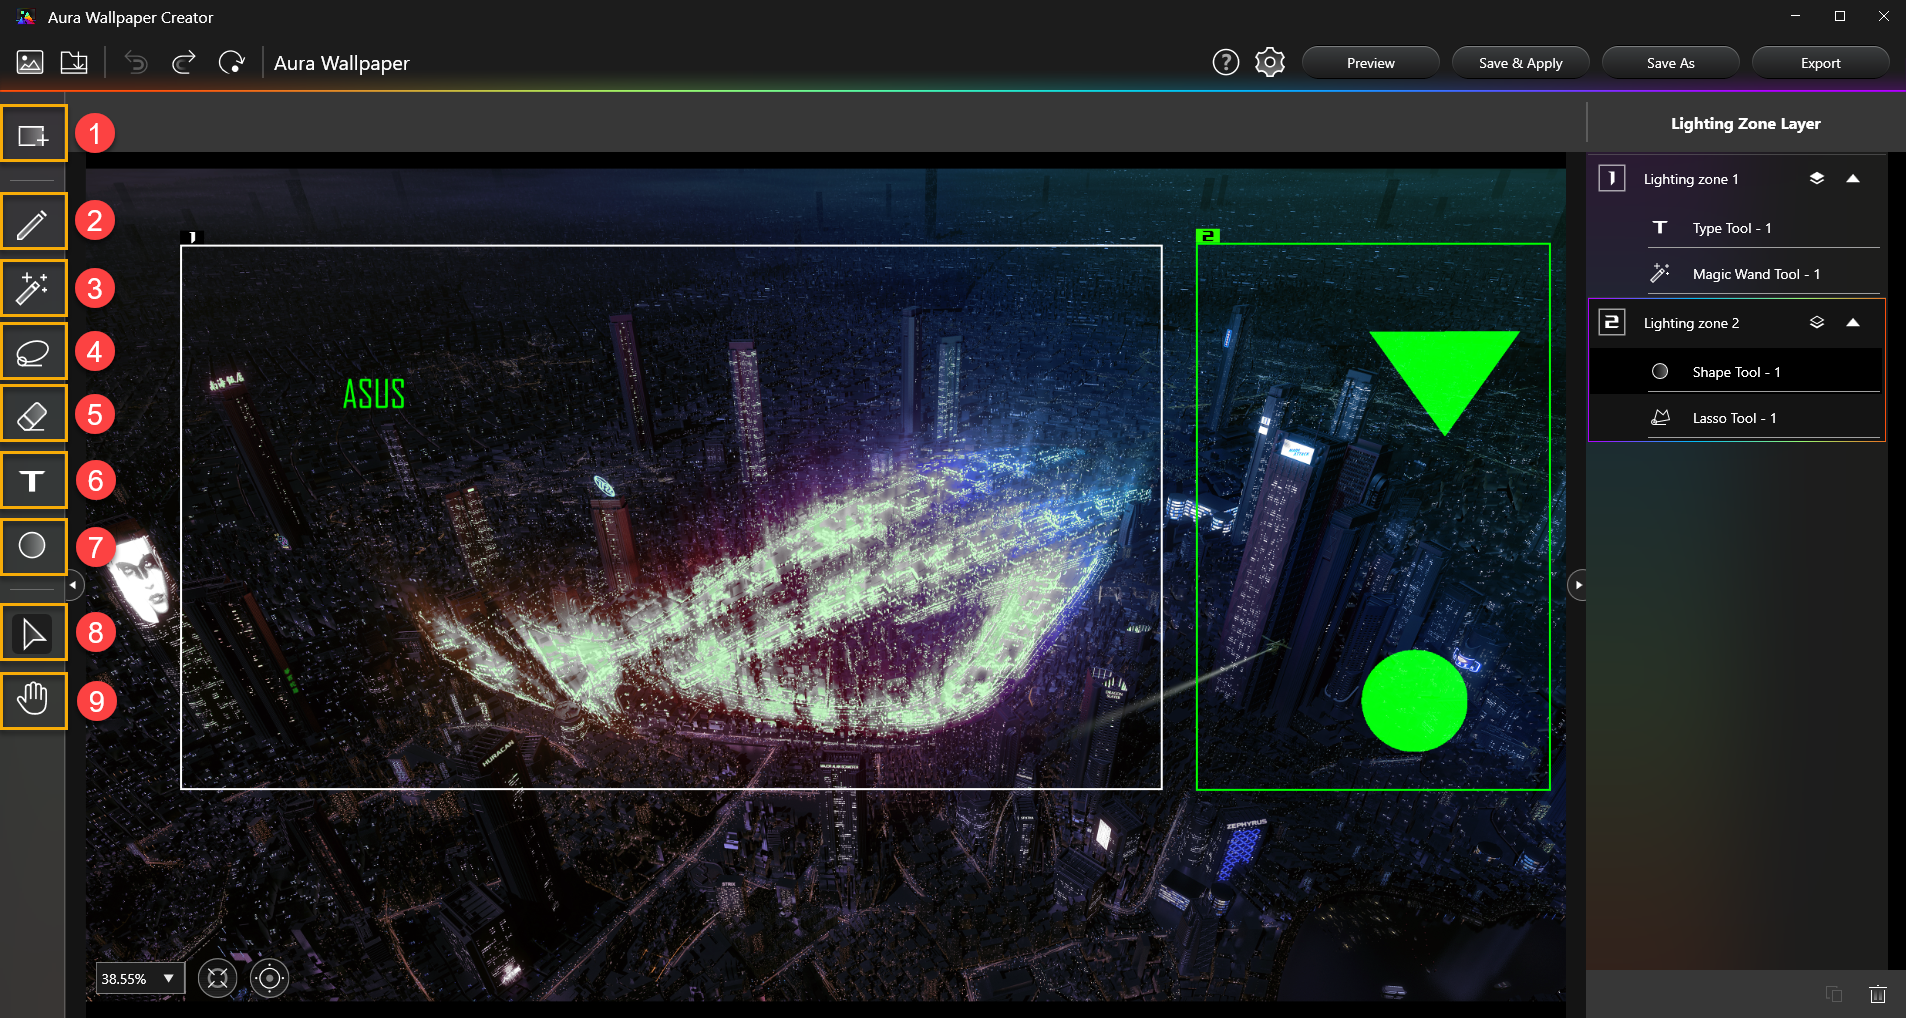
①Create New Lighting Zone: To create a new lighting zone, users can select any range in the editing area to create a light area.
②Brush Tool: Using Brush Tool to draw in selected lighting zone.
③Magic Wand Tool: Select an area with the same color gamut within a lighting zone to create a layer lighting effect.
④Lasso Tool: Using Lasso Tool to draw a graphic or polygonal lighting effect in a selected lighting zone.
⑤Eraser Tool: Using Eraser Tool to erase the selected lighting zone content.
⑥Type Tool: Insert text as a lighting effect layer.
⑦Shape Tool: Provides a variety of basic graphics for user to apply.
⑧Object Selection Tool: Using Object Selection Tool to move and adjust layer object within selected lighting zone.
⑨Background Repositioning Tool: Using Background Repositioning Tool to move background image.
C Lighting Zone Edit Area
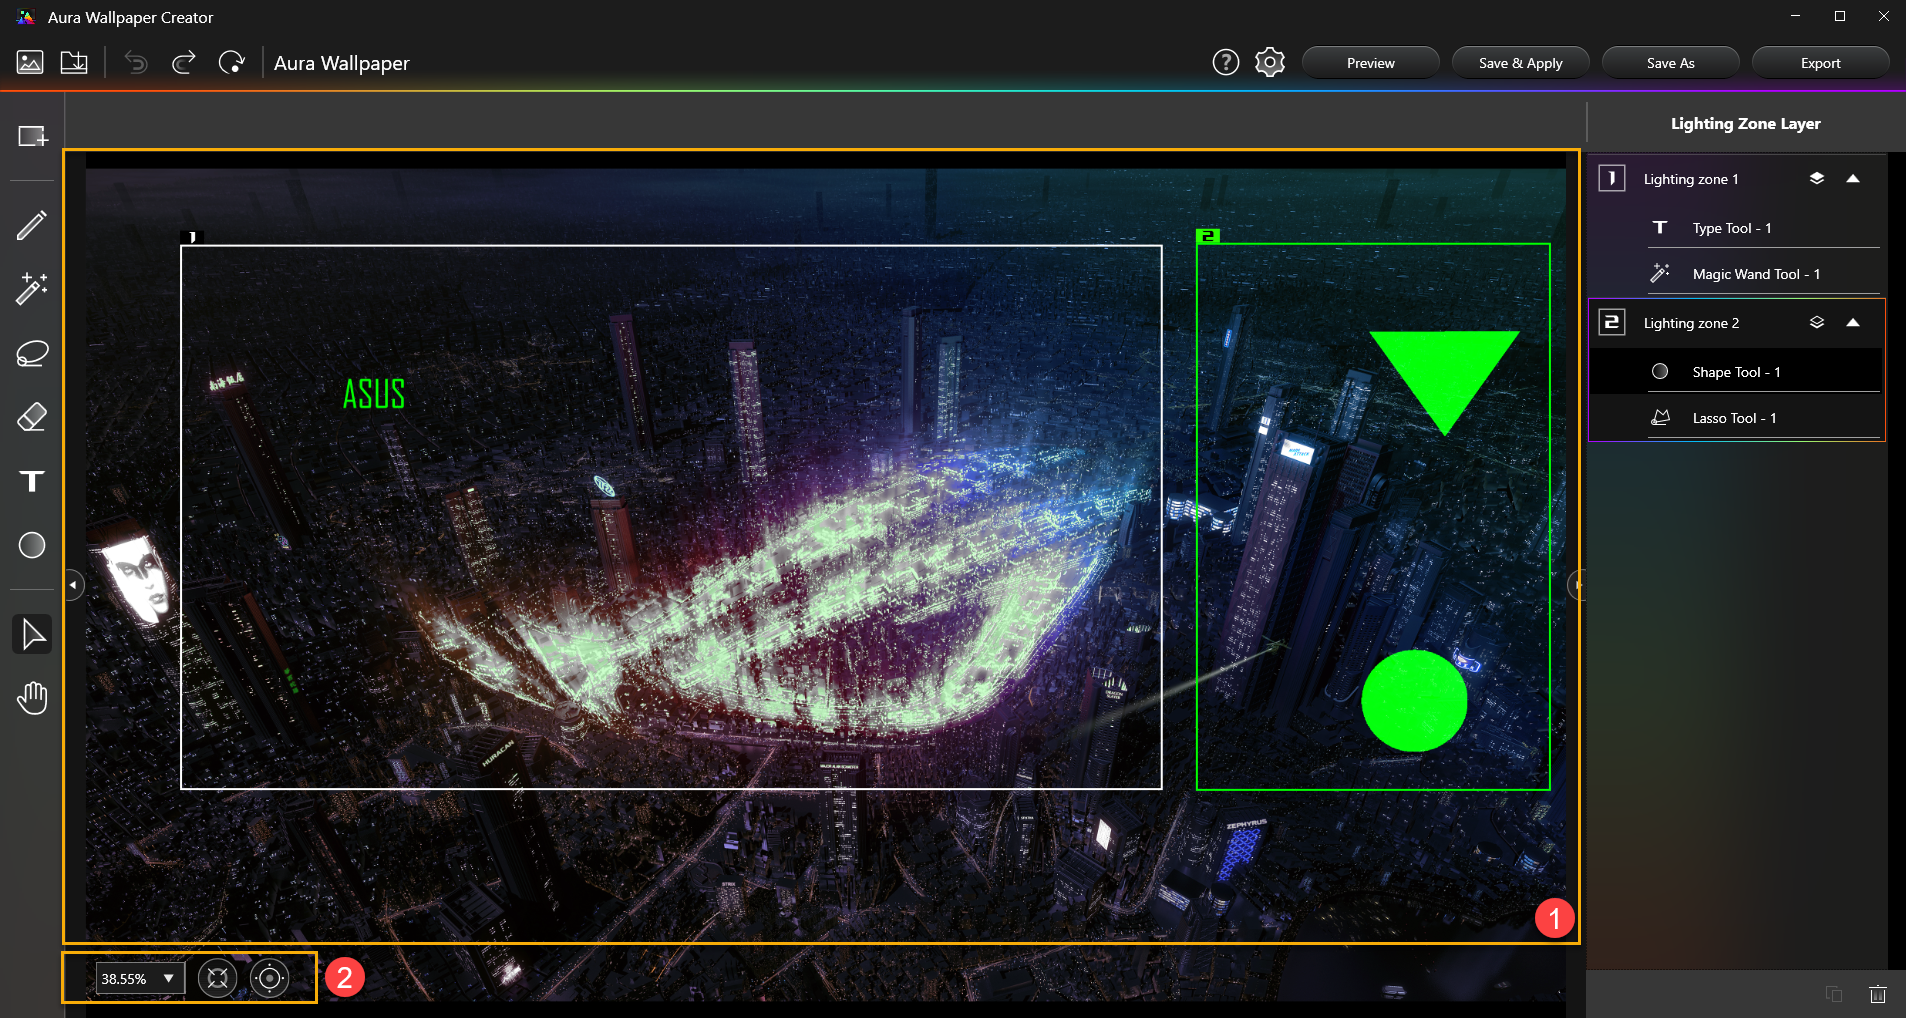
①Edit Area: To create and edit the area range of the lighting area or layer.
②Edit layout management: To adjust the edit area for zoom-in or zoom-out.
D Lighting Zone and Layer Management
All created lighting zone and layers will be listed here.
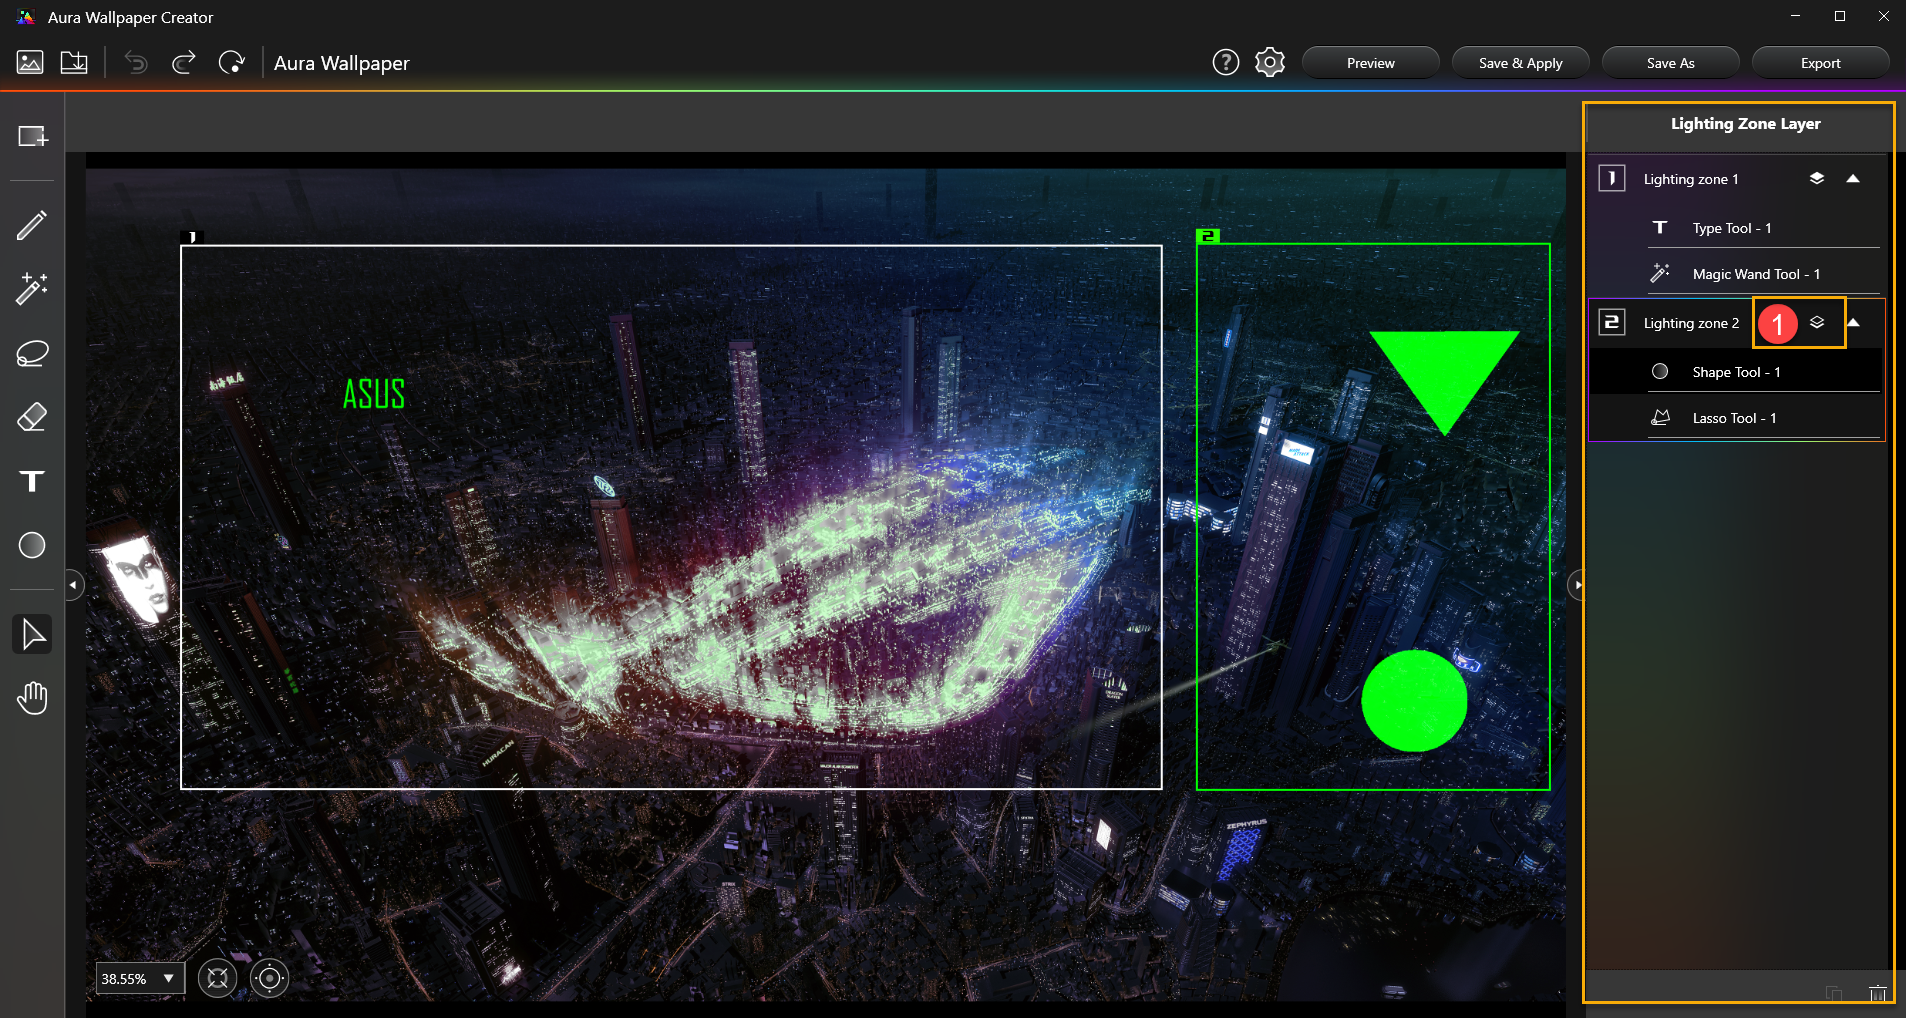
①Layer locked: Unlock object layers for editing. Then you can copy, delete, and rename the layers.
Q1: Why I can not re-edit text content of type tool effect?
A1: Once text lighting effect created, it will be unable to re-edit text content. If require modifying text content, please create a new text lighting effect.