Relatív témák
[Gaming NB] Az AMD chipset illesztőprogramjainak telepítési eljárása
Az alábbiakban az AMD chipset-illesztőprogramok telepítésének részletes lépései találhatók. Ezek a lépések akkor alkalmazhatók, ha az ASUS hivatalos weboldaláról töltötte le az illesztőprogramokat. Az illesztőprogramok frissítése hozzájárul a rendszer stabilitásához és optimalizálásához, ezért ajánlott rendszeresen ellenőrizni, hogy a legújabb verziókat használja-e az eszközéhez.
Ha nem tudja, hogyan töltse le az illesztőprogramokat, olvassa el ezt a cikket: Hogyan keressünk és töltsünk le illesztőprogramokat.
Az AMD chipset illesztőprogramok letöltésekor az ASUS hivatalos weboldaláról kétféle fájltípussal találkozhat. Kérjük, válassza ki a megfelelő telepítési módszert az illesztőprogram fájltípusa alapján:
Alkalmazás formátumú illesztőprogramok telepítése (.exe)
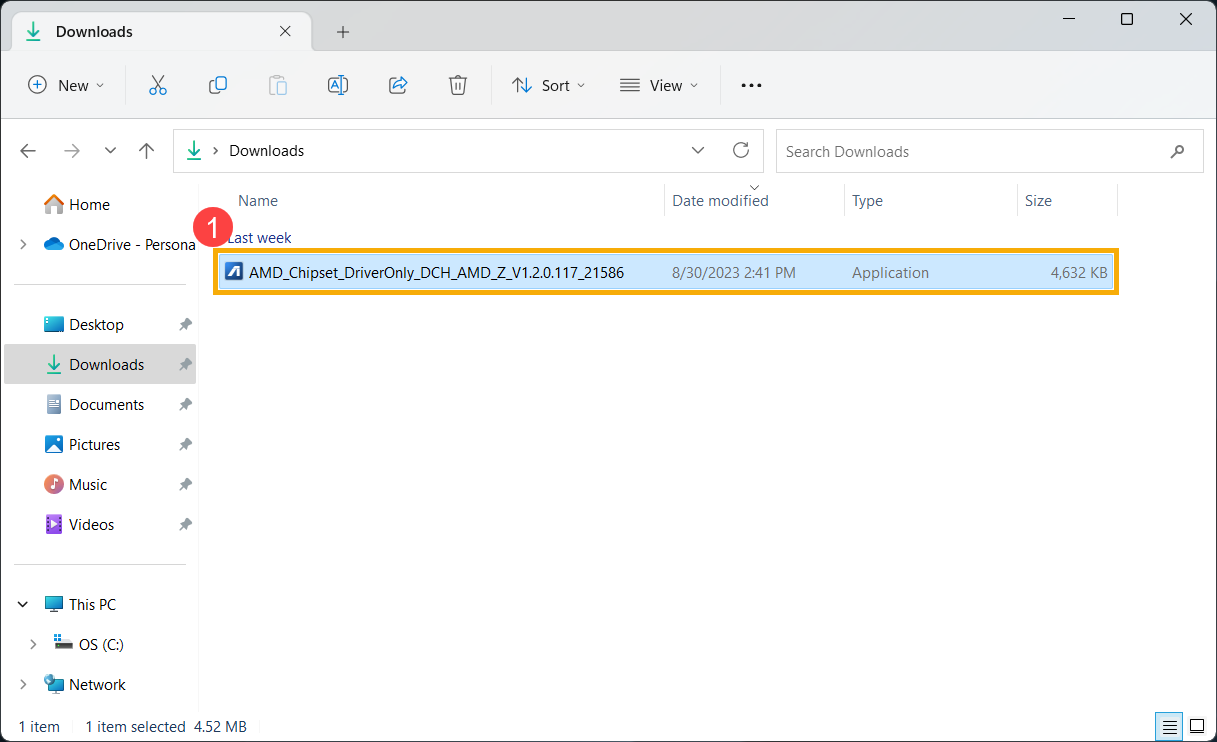
- Kattintson duplán az AMD chipset illesztőprogramjára, amelyet az ASUS-tól① töltött le, majd indítsa el a telepítési folyamatot.
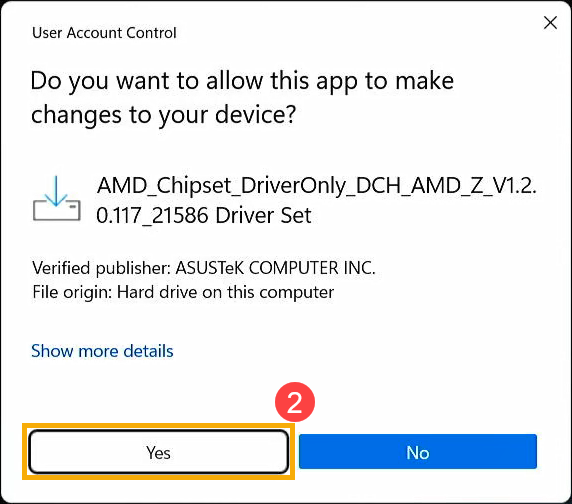
- Ha megjelenik a Felhasználói fiókvezérlés ablak, kattintson az [Igen]② gombra.
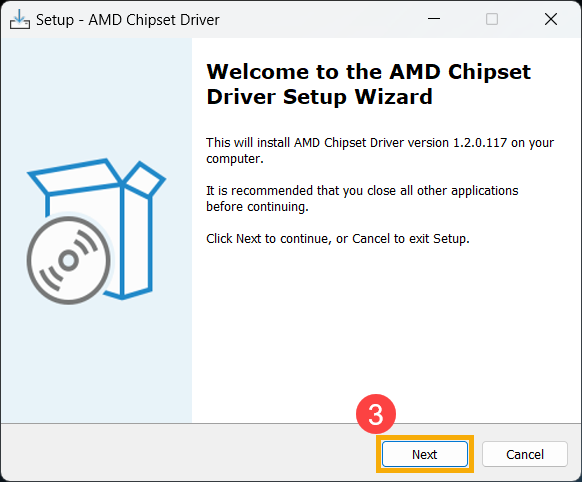
- A telepítőprogram megnyitása után kattintson a [Tovább]③ gombra a telepítés folytatásához.
- Olvassa el a szoftver licencszerződést, majd jelölje be az [Elfogadom a szerződést] jelölőnégyzetet.t]④ and click [Next]⑤ to continue.
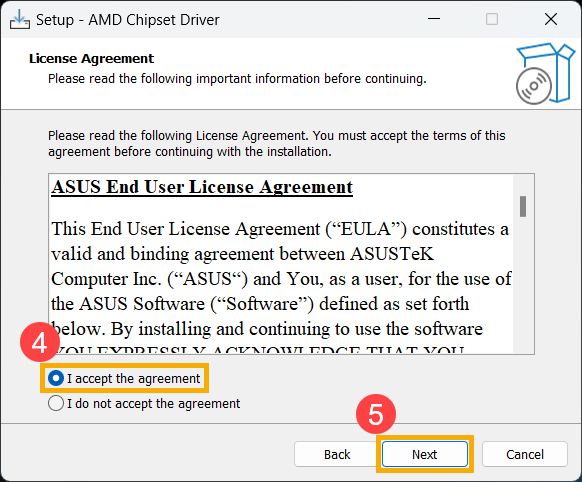
- Select [Install]⑥ and click [Next]⑦.
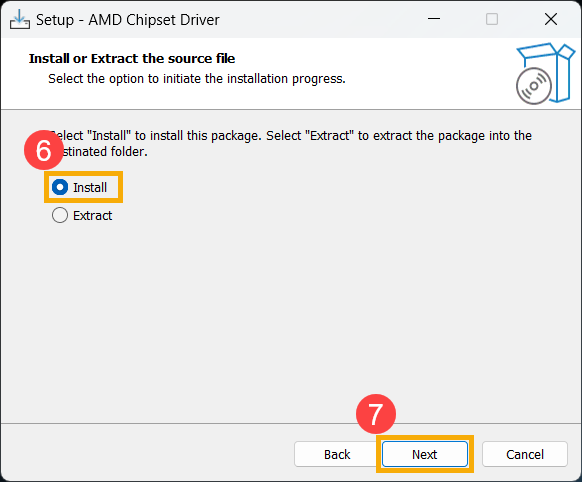
- Review the important information provided and click [Next]⑧ to proceed with the installation.
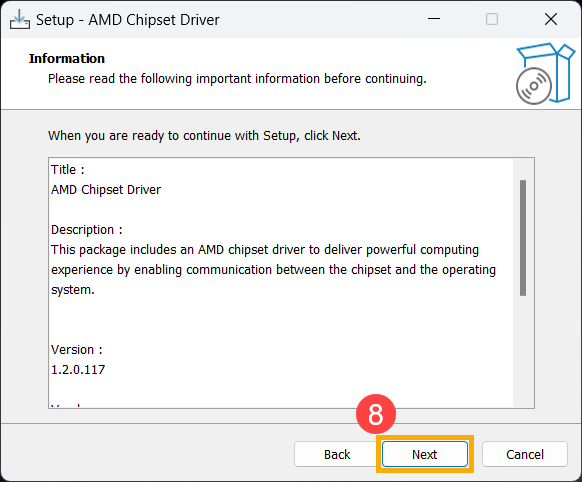
- The installation process is prepared. Click [Install]⑨ to start installing the driver.
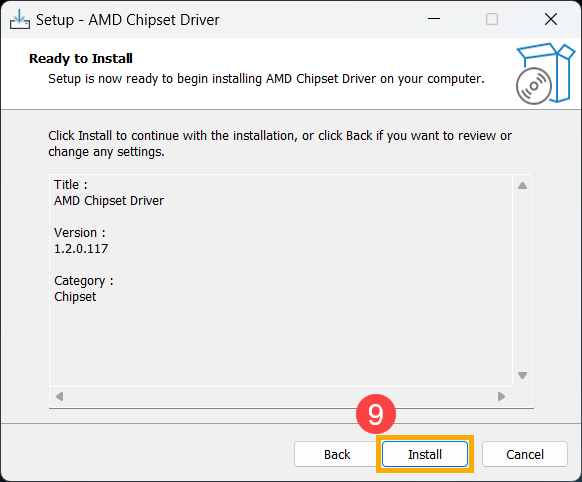
- After installation, your computer may need to restart. Select [Yes, restart the computer now]⑩, and then click [Finish]⑪. Your computer will restart.
Please note: Ensure you've saved your data before restarting to prevent data loss.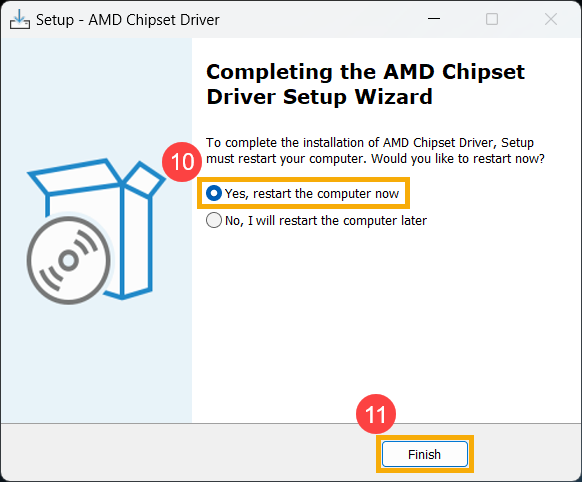
Installation for Drivers in Compressed (Zipped) Folder Format (.zip)
If you've downloaded AMD chipset drivers from the ASUS official website in a compressed format, you need to first remove any previously installed AMD drivers from your computer using AMD's official removal tool. Then, you can proceed to install the new drivers. Follow these steps:
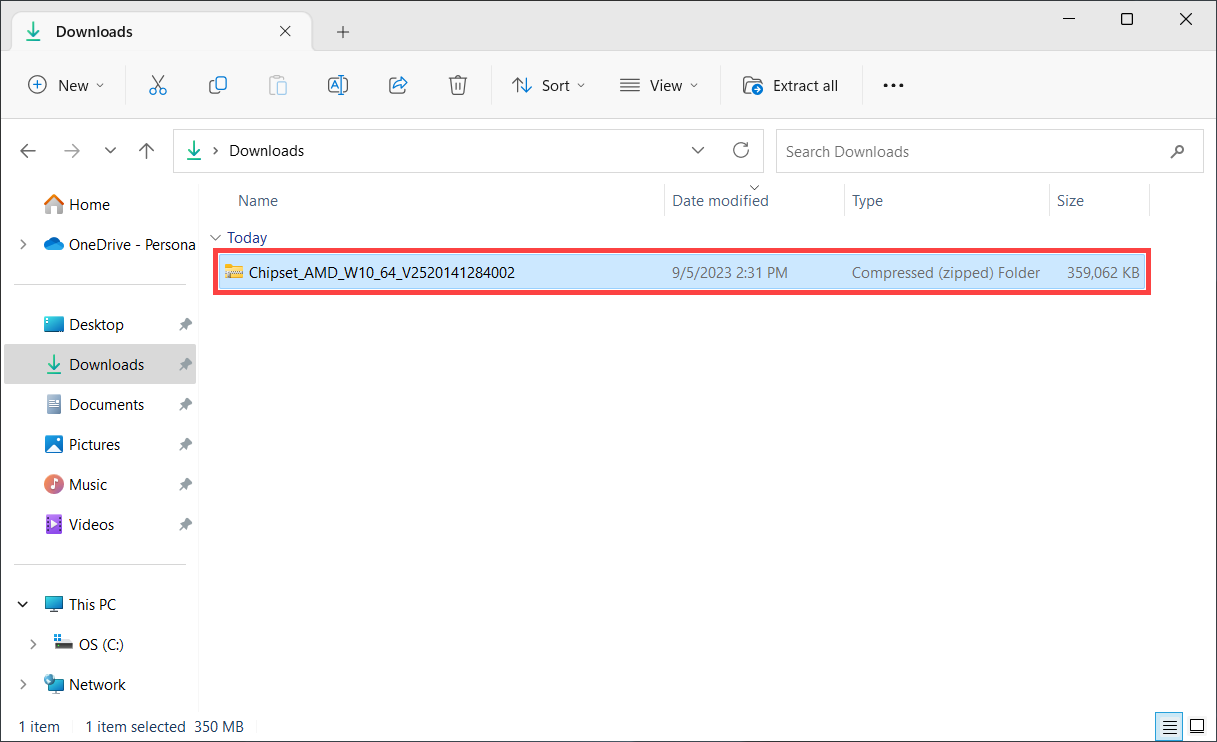
- First, please refer to the AMD Cleanup Utility's instruction article to download the AMD Cleanup Utility.
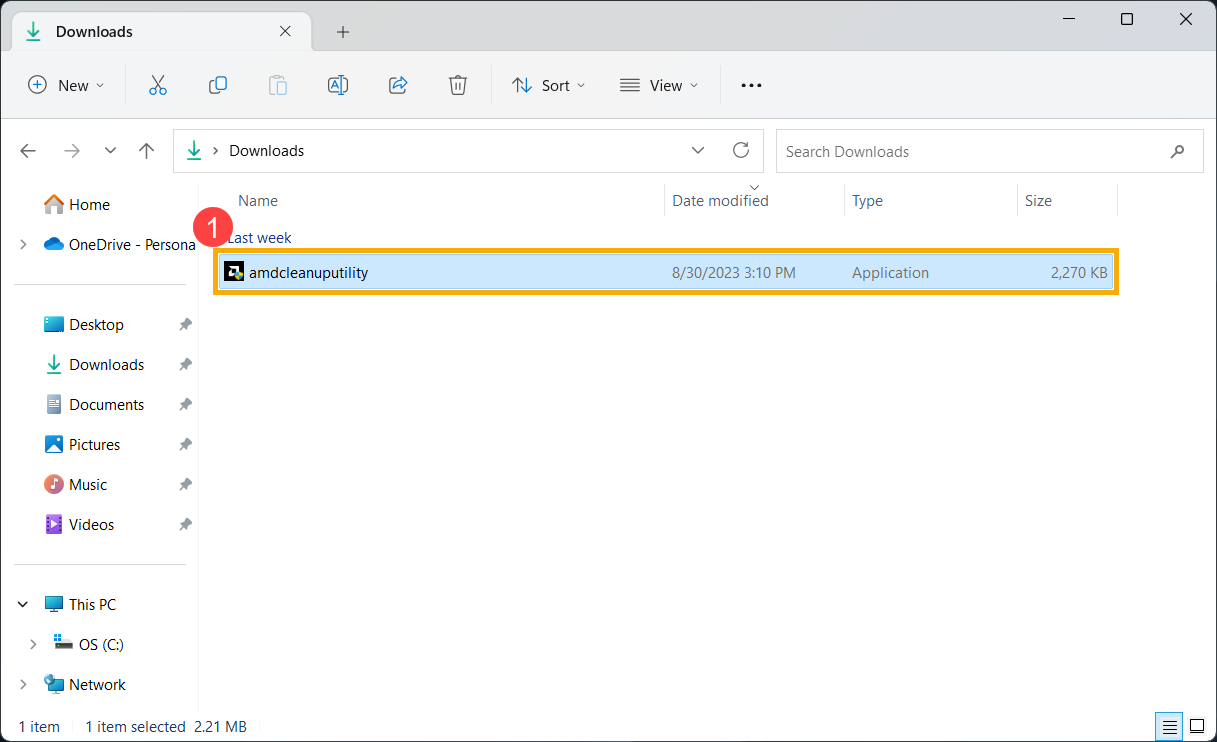
- After the download is complete, double-click the amdcleanuputility application①.
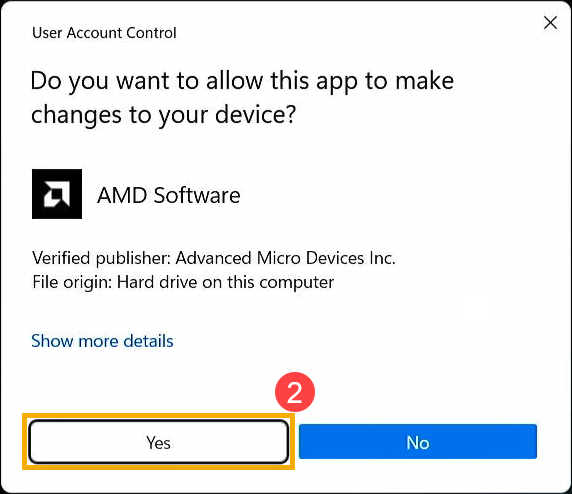
- If the User Account Control window appears, click [Yes]②.
- When prompted, it's recommended to run this in Windows Safe Mode for the best results. Click [Yes]③, and your computer will restart and enter Safe Mode.
Please note: Ensure you've saved your data before restarting to prevent data loss.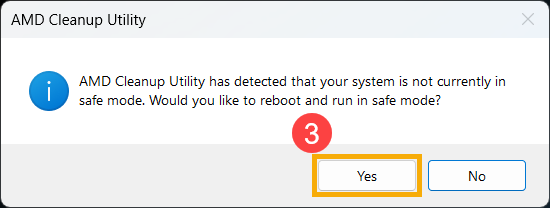
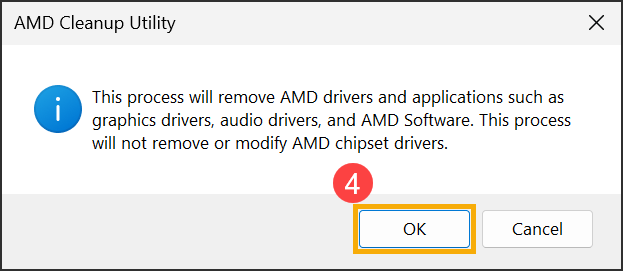
- When your computer enters Safe Mode and displays the prompt, click [OK]④ to start removing AMD drivers.
- When the AMD Cleanup Utility successfully completes its task, you'll see the following prompt. Click [Finish]⑤ to close the window.

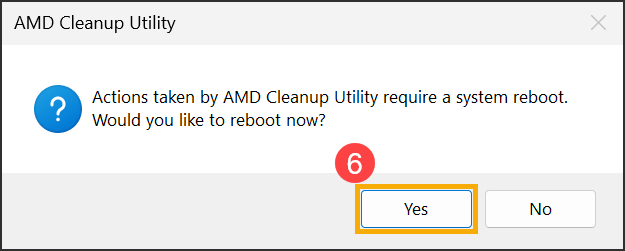
- After the uninstallation is complete, your computer will need to restart. Click [Yes]⑥ to restart your computer.
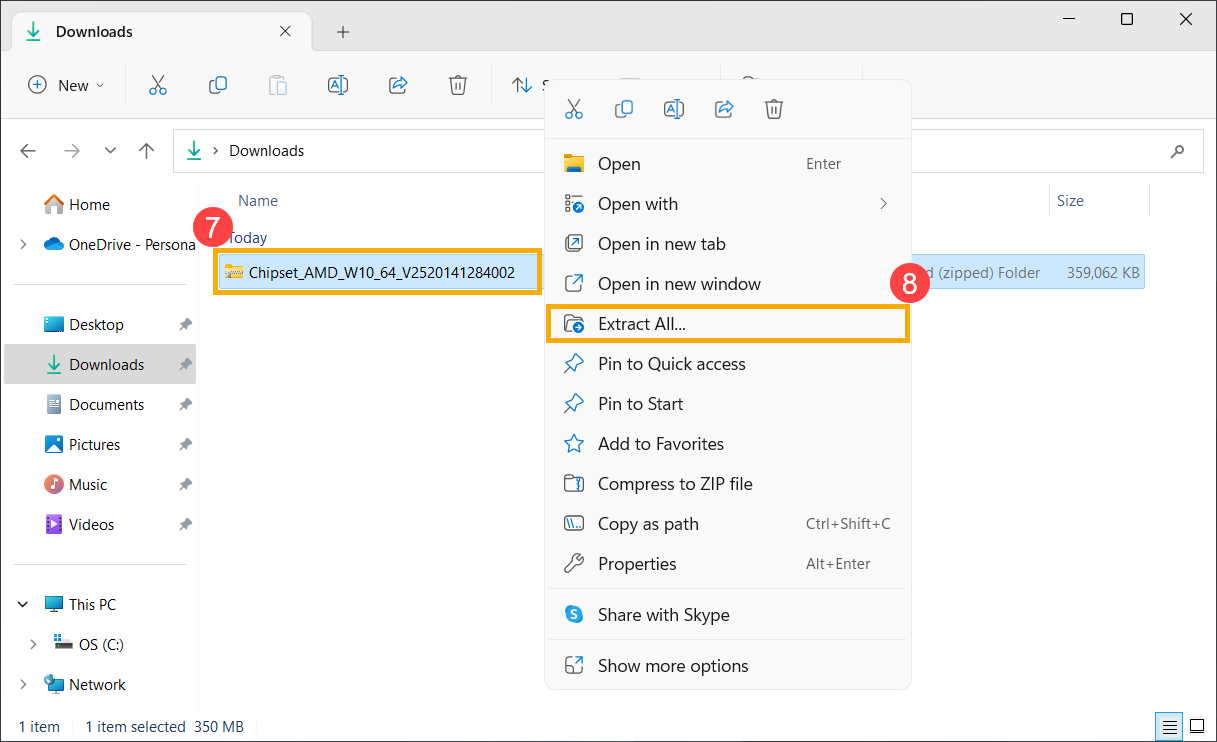
- With the previously installed AMD drivers removed, you can now begin installing the new drivers. Right-click on the AMD chipset driver file⑦ and select [Extract All]⑧.
- Click [Extract]⑨.
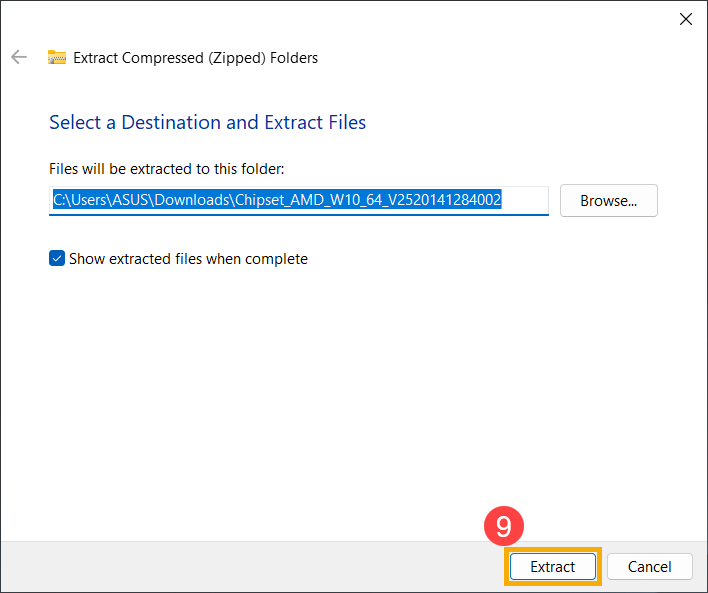
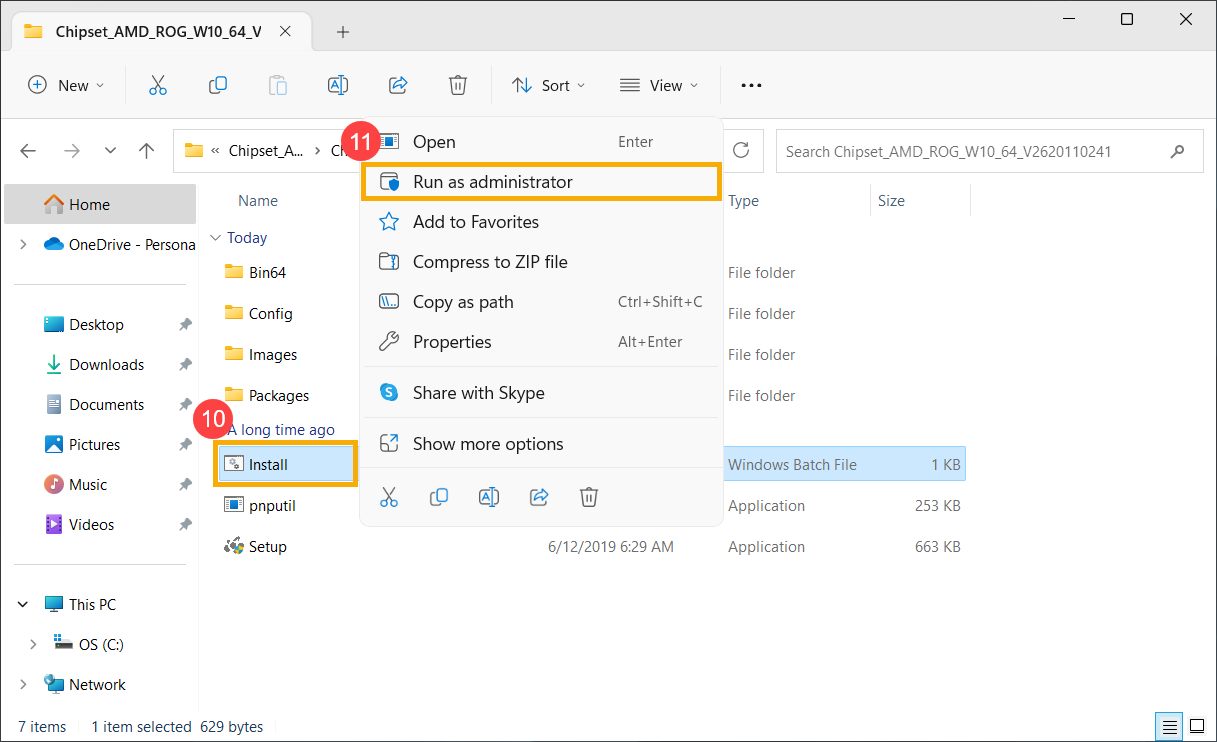
- Once the extraction is complete and the AMD chipset driver folder is open, right-click on the [Install] Windows batch file⑩, and then select [Run as administrator]⑪.
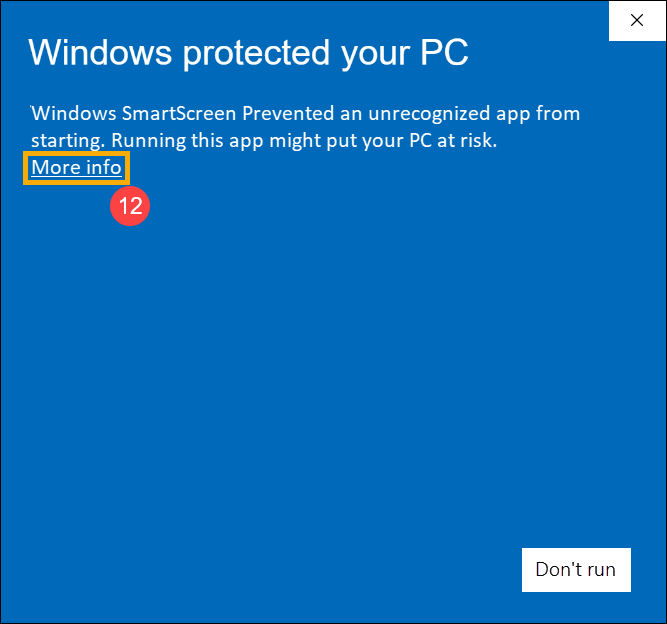
- If you see a “Windows protected your PC” prompt, click [More info]⑫.
Click [Run anyway]⑬.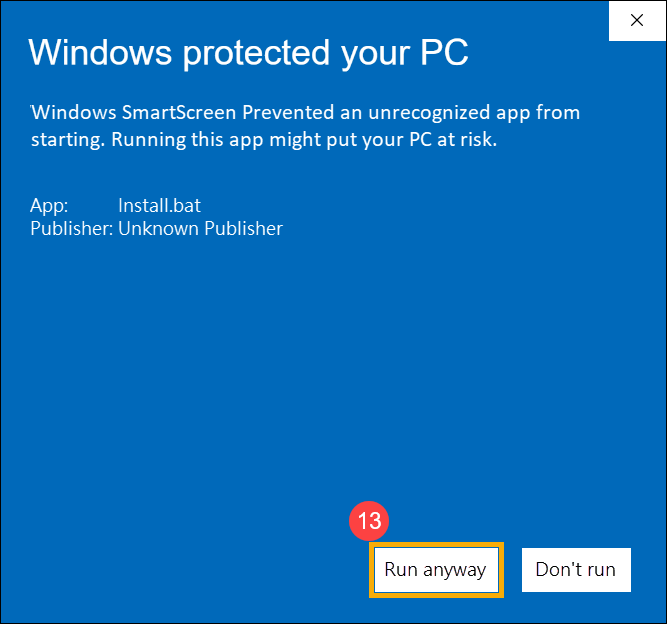
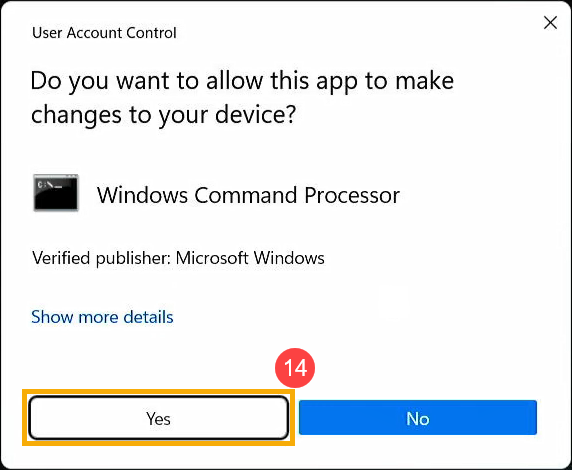
- If the User Account Control window appears, click [Yes]⑭.
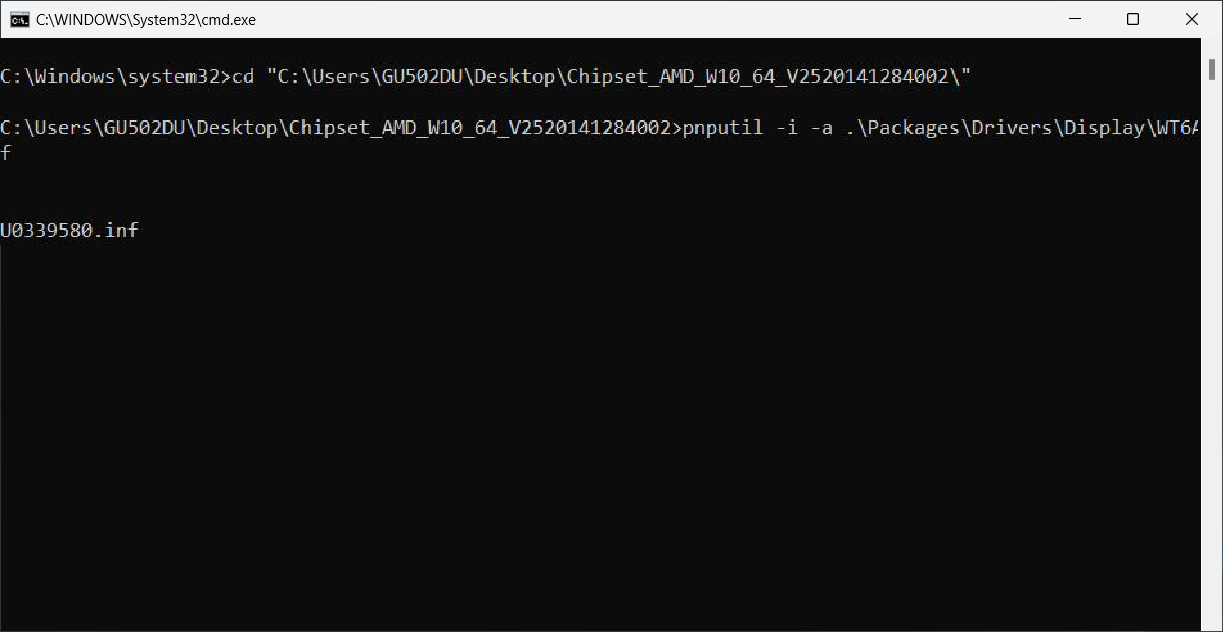
- The system will begin installing the AMD chipset driver.
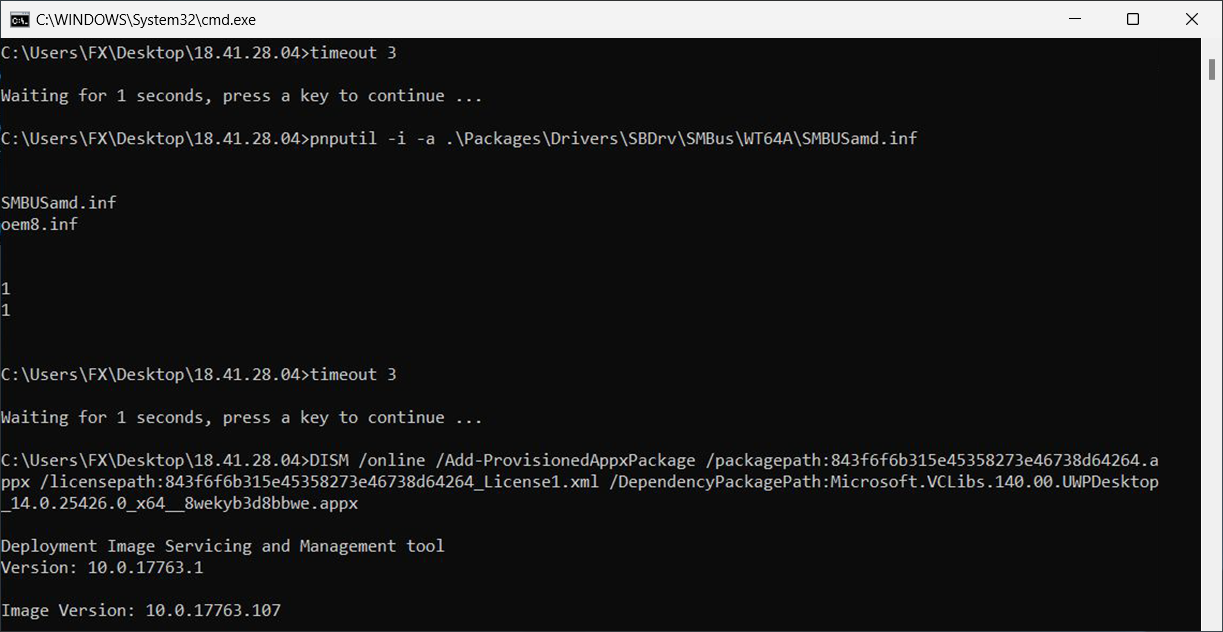
- Installation successful. Please restart your computer first to complete the setup.
If your issue remains unresolved, please contact ASUS Customer Support for further assistance.
