Vastaavat aiheet
[Windows 11/10] Connect to a wired network (Ethernet network)
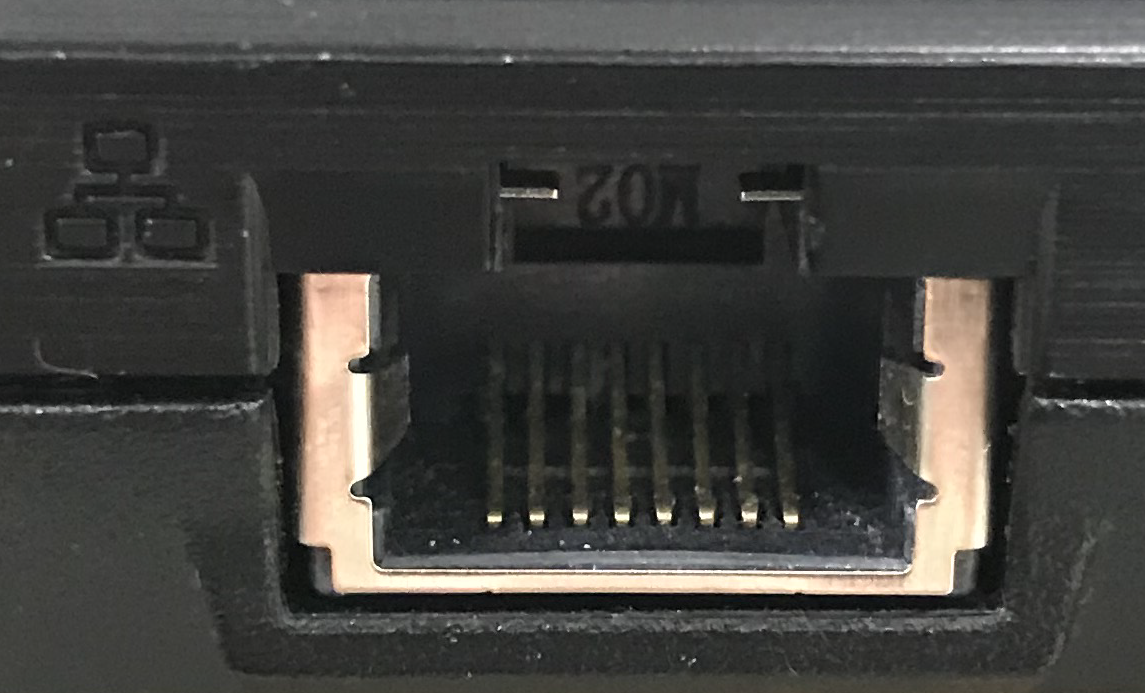
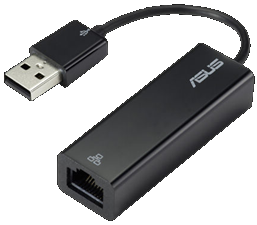
Some laptop models may not have a network port (RJ-45 connector) due to the thin and light design, so you need a USB Ethernet cable (USB to Ethernet adapter) to access the Internet with the wired network. This article describes how to use User name/Password your Internet service provider (ISP) gave you to access the Internet.
Please go to the corresponding instruction based on the current Windows operating system on your computer:
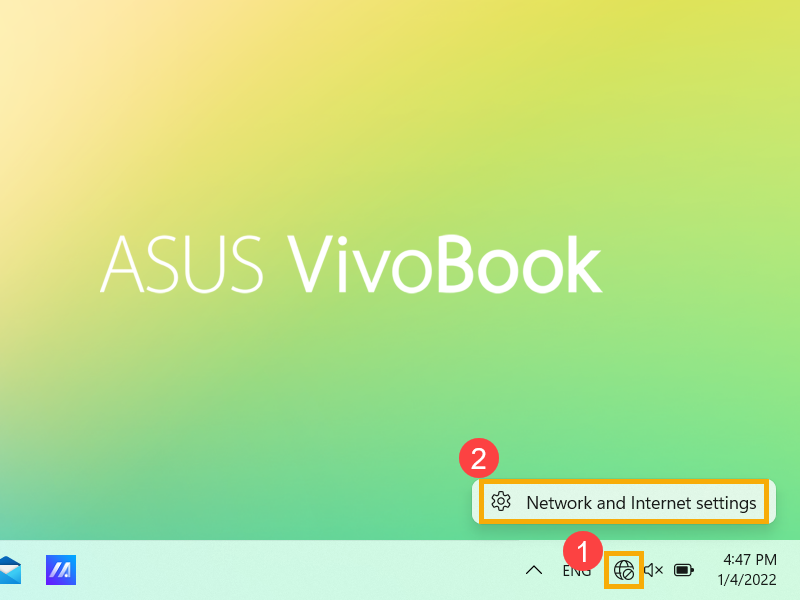
- Right-click the [Network]
 icon on the taskbar①, then select [Network and Internet settings]②.
The icon that appears depends on your current connection state. ( : No internet connection,
  : Internet access with Wi-Fi network,
  : Internet access with Ethernet network)
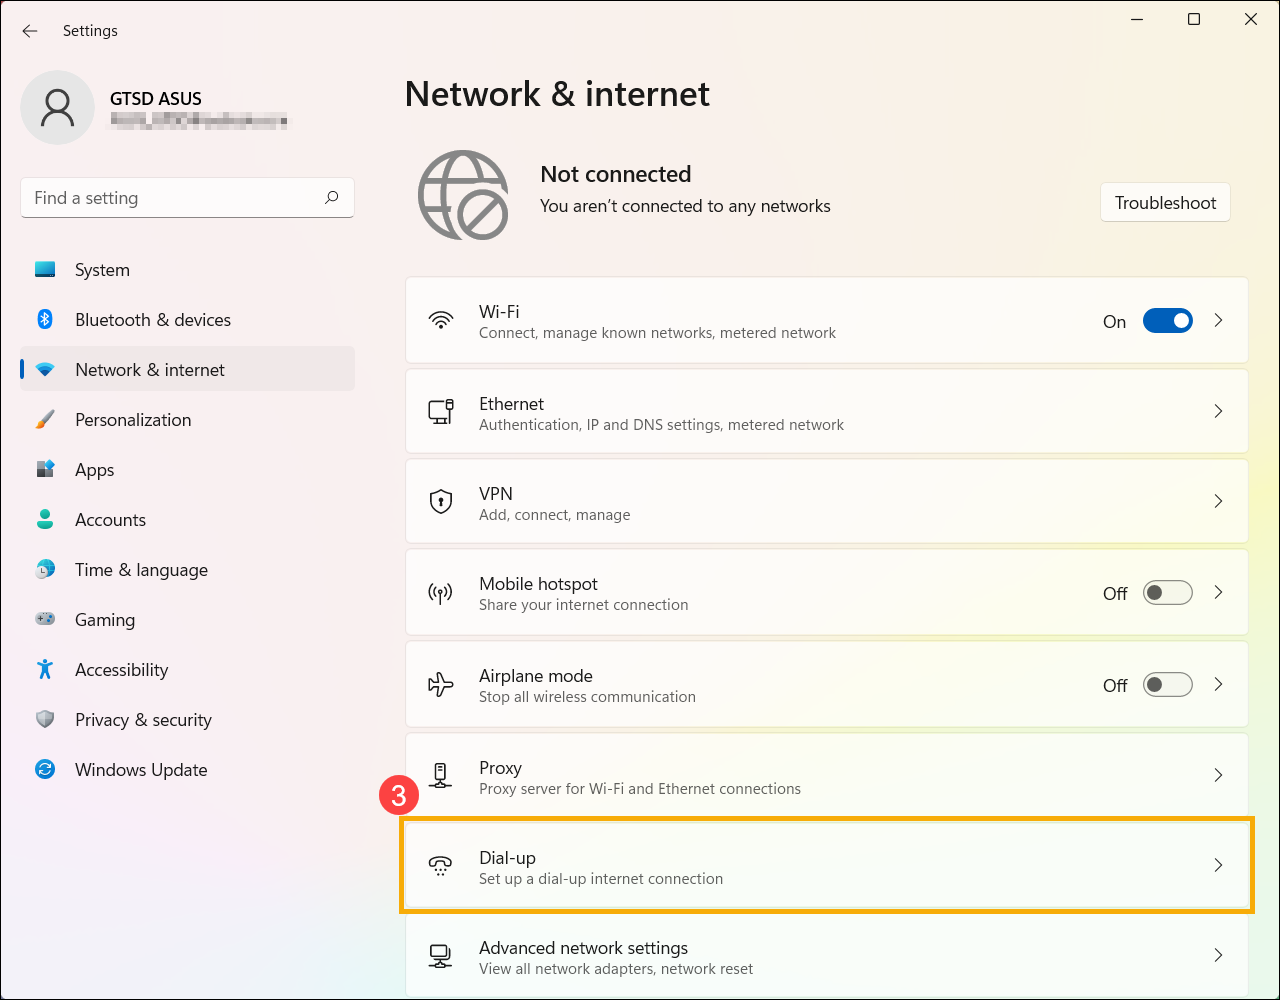
- Select [Dial-up]③.
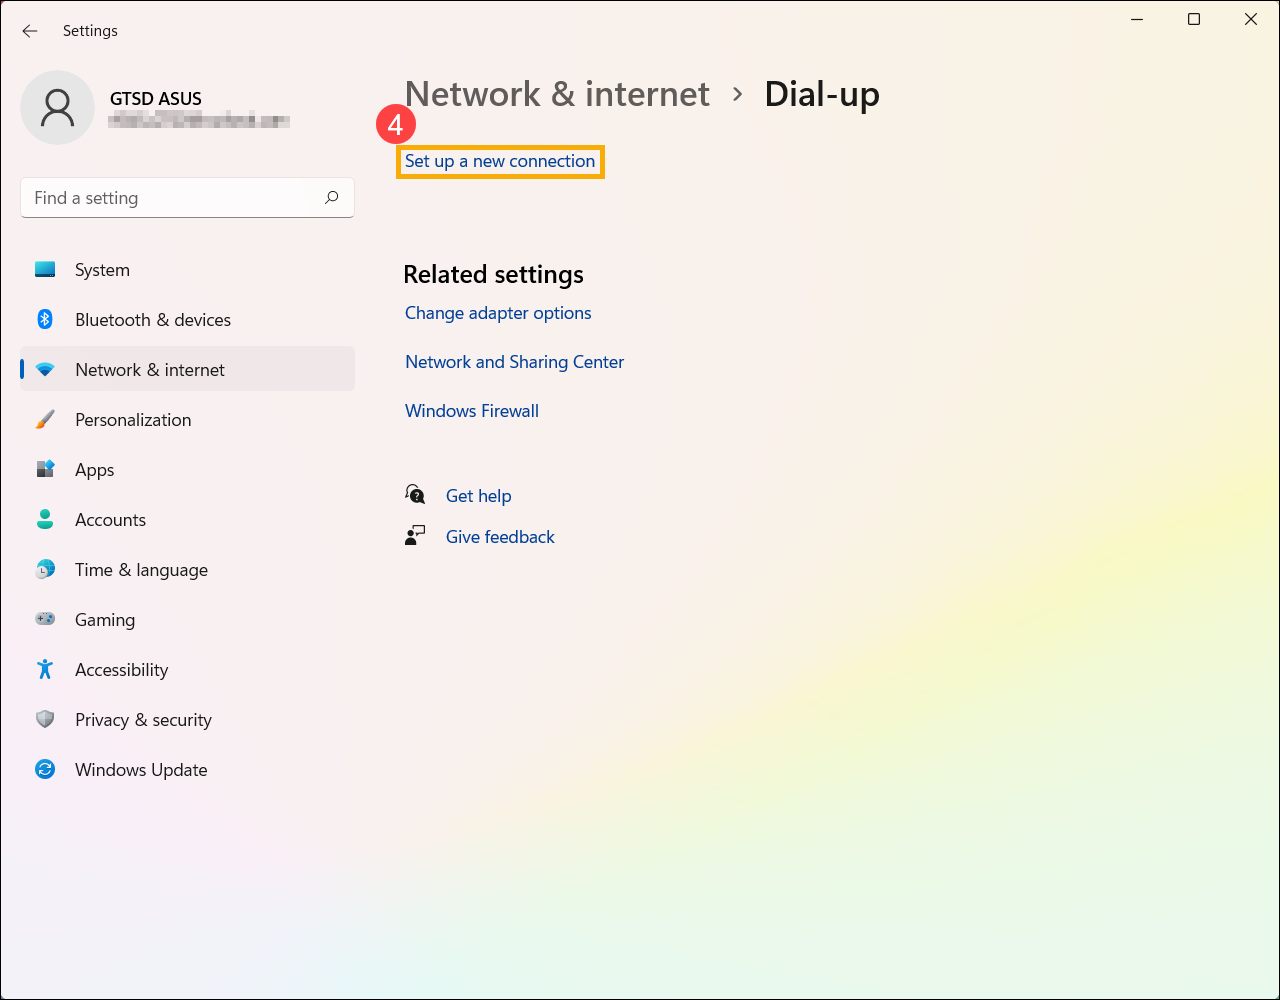
- Select [Set up a new connection]④.
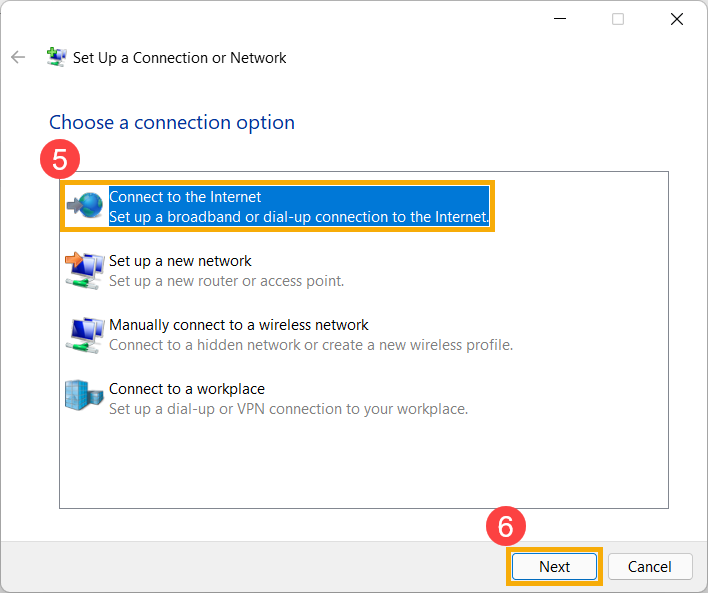
- Choose [Connect to the Internet]⑤, then select [Next]⑥.
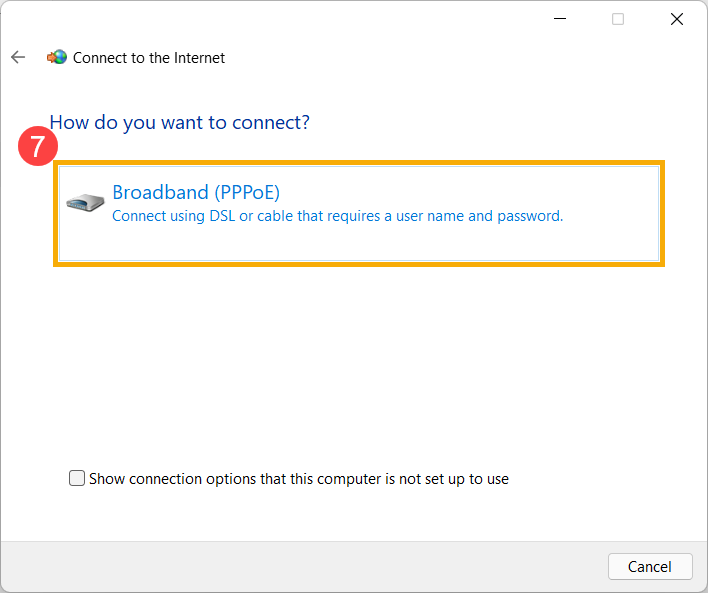
- Select [Broadband (PPPoE) ]⑦.
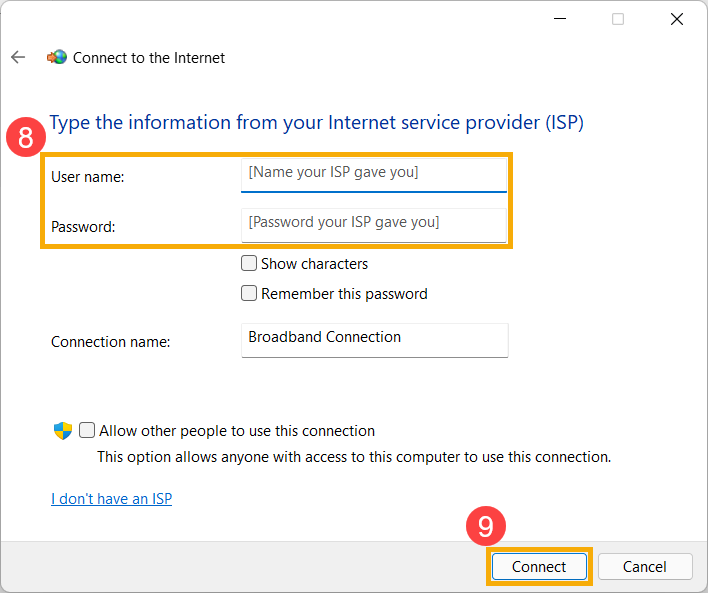
- Type the User name and Password from your Internet service provider (ISP)⑧, then select [Connect]⑨.
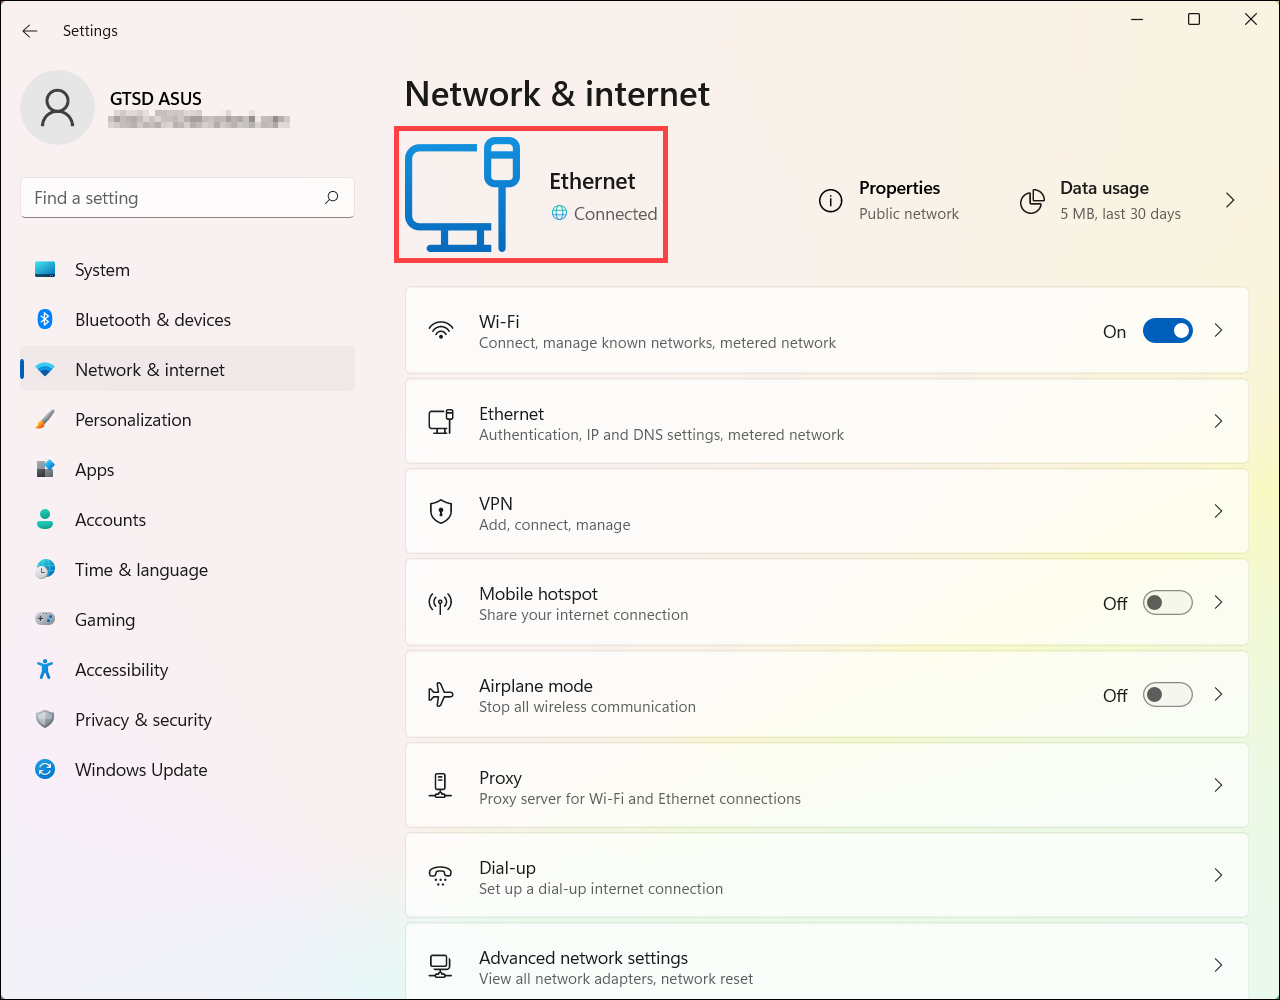
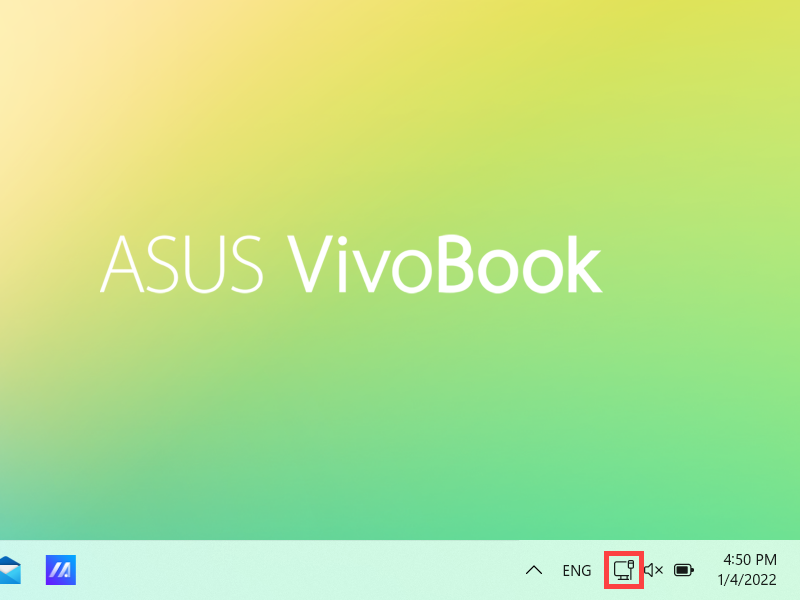
- After the connection is successful, Network and Internet settings will display the wired network you set up, and the network icon changes to
 .
. 
- Right-click the [Network]
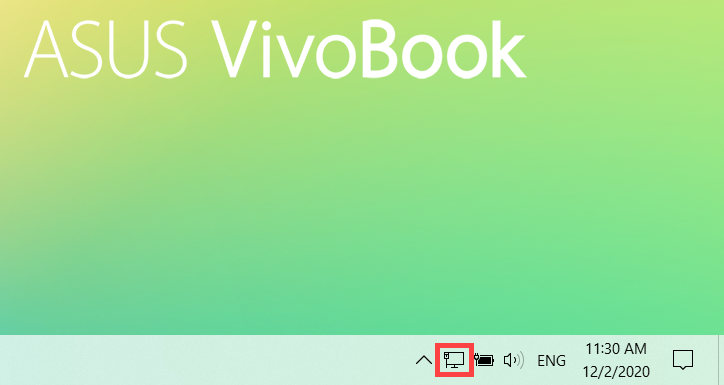
 icon on the taskbar①, then select [Open Network & Internet settings]②.
The icon that appears depends on your current connection state. ( : No internet connection,
  : Internet access with Wi-Fi network,
  : Internet access with Ethernet network)
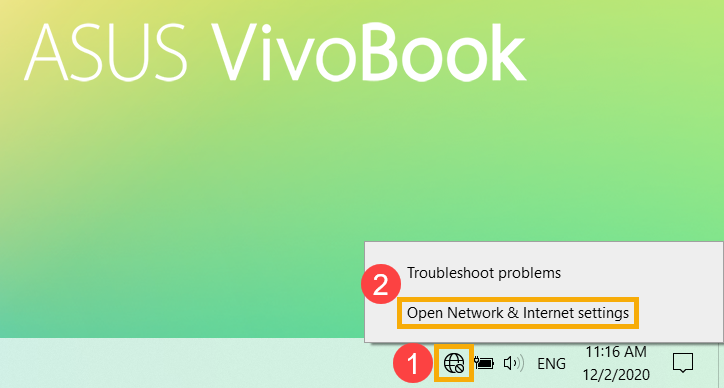
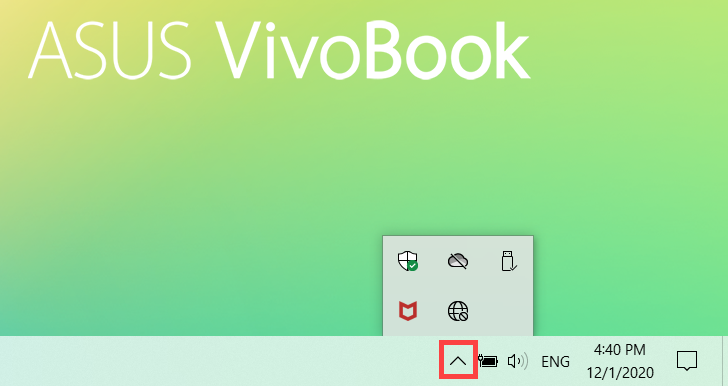
If you don’t see one of the network icons shown in above image, please select the Up arrow to see if it appears there.
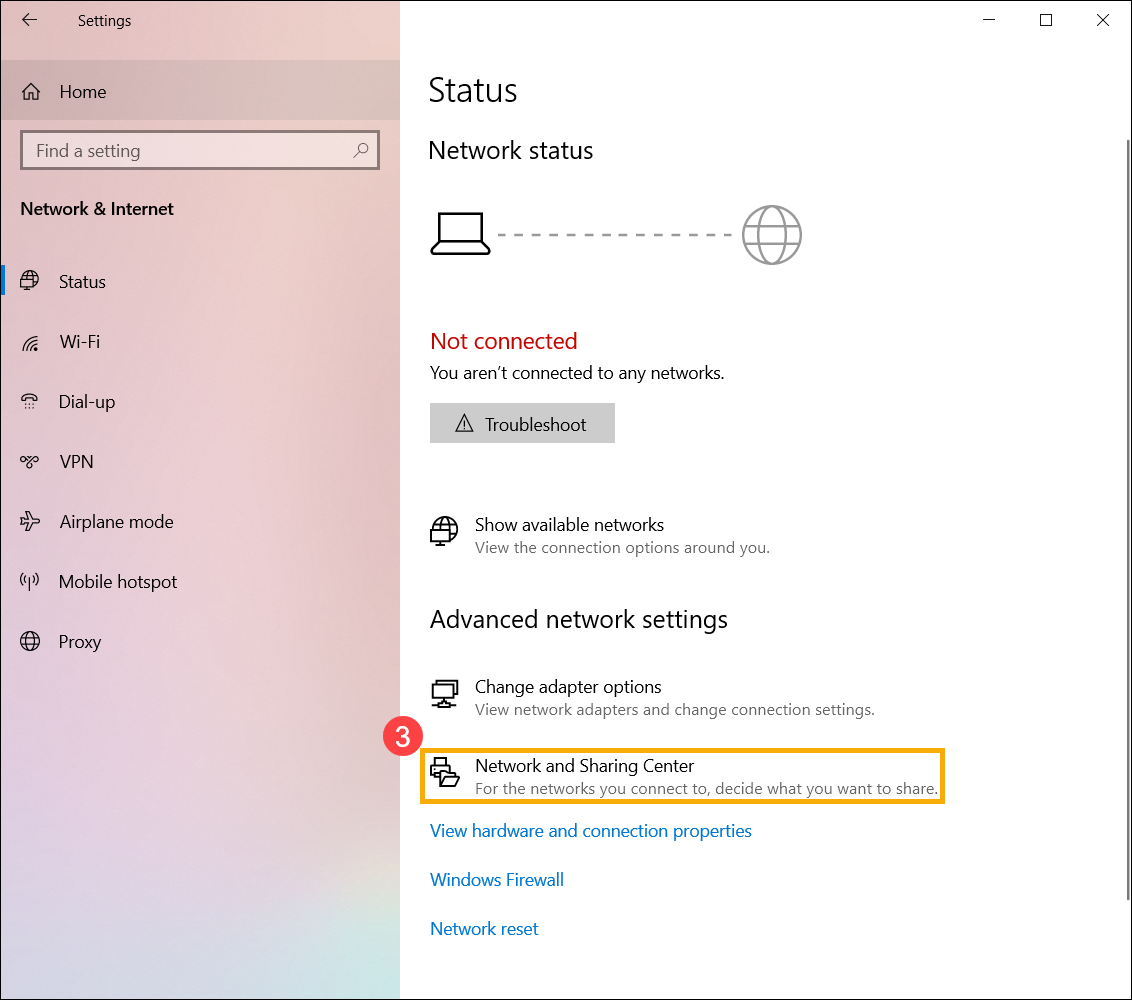
- Select [Network and Sharing Center]③.
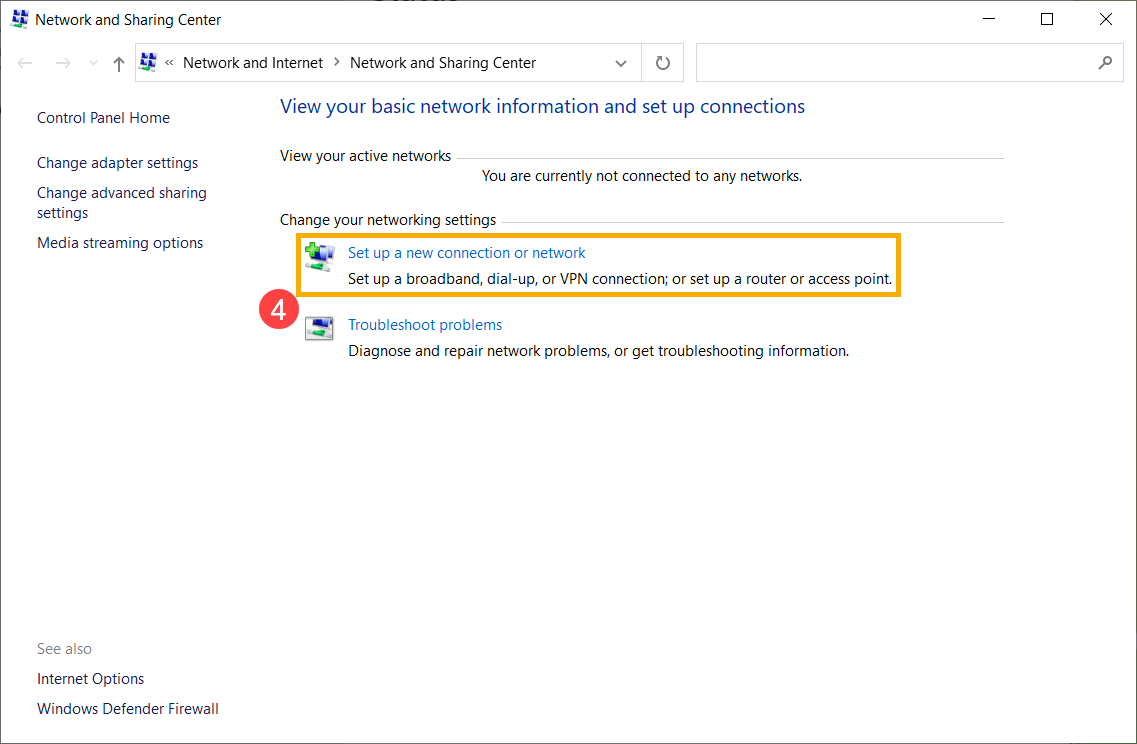
- Select [Set up a new connection or network]④.
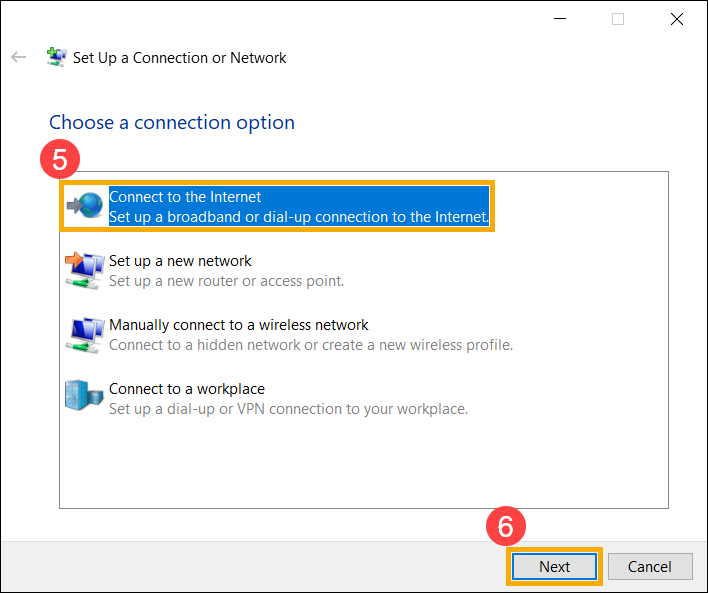
- Choose [Connect to the Internet]⑤, then select [Next]⑥.
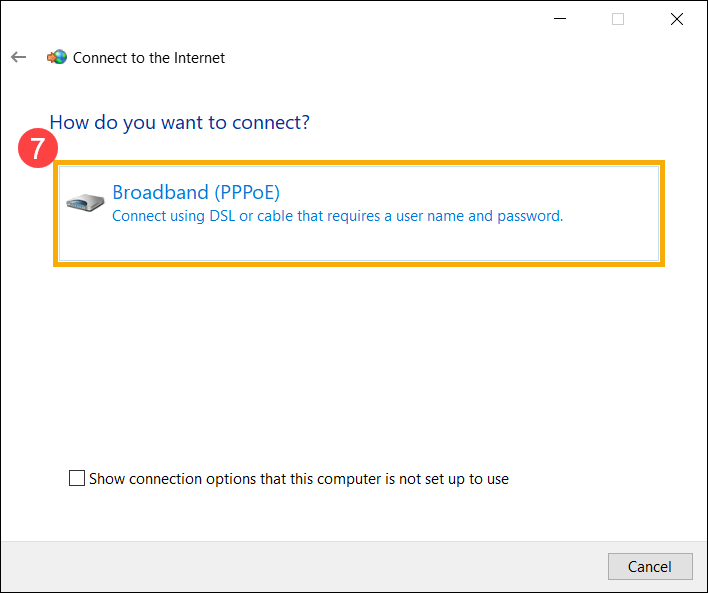
- Select [Broadband (PPPoE) ]⑦.
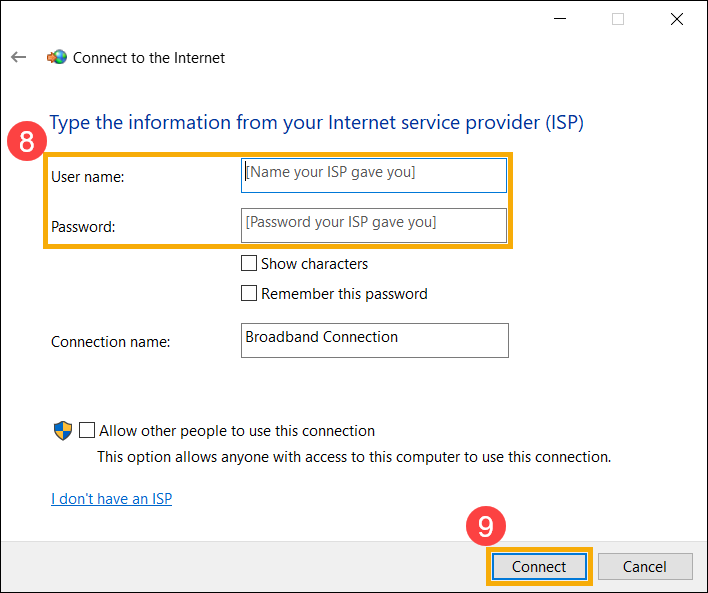
- Type the User name and Password from your Internet service provider (ISP)⑧, then select [Connect]⑨.
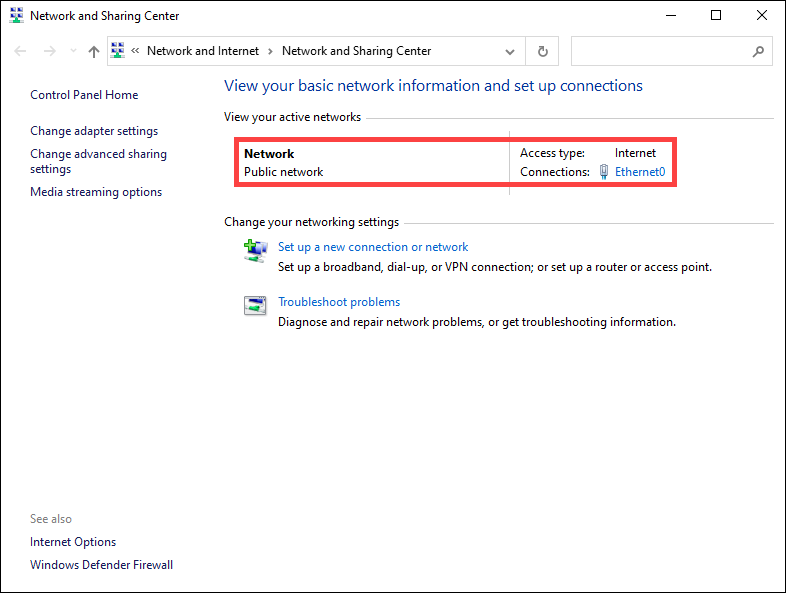
- After the connection is successful, Network and Sharing Center will display the wired network you set up, and the network icon changes to
 .
. 