المواضيع ذات الصلة
[Guest Network Pro] How to set up Guest Network?
What is Guest Network Pro?
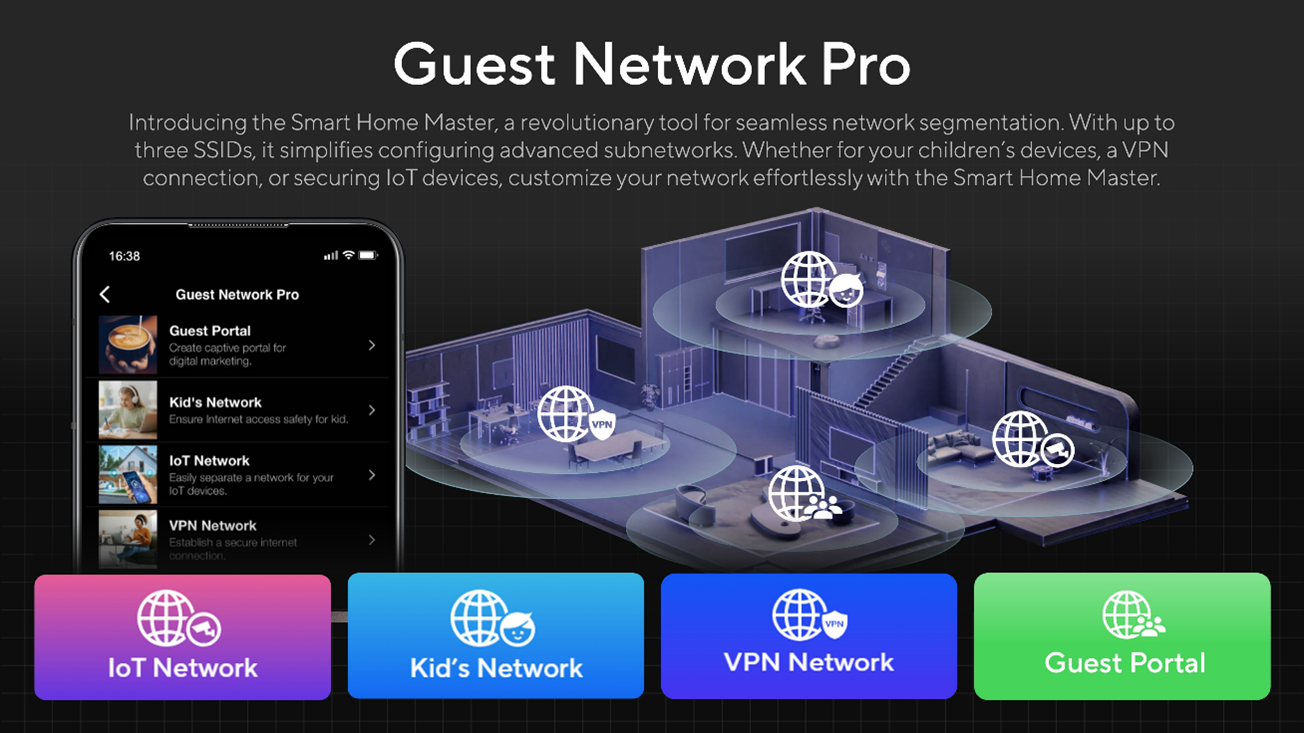
ASUS Guest Network Pro is an enhanced version of the Guest Network, allowing you to create multiple independent networks and VLAN combinations. It enables different access permissions, bandwidth management, and content filtering for each network, and even includes a dedicated network for IoT devices. This provides you with an efficient, secure, and easy-to-manage networking solution.
Why We Need Guest Network?
When you have successfully set up a wireless router and connected to the Internet, and want to share the WiFi with your family and friends, you can create an independent wireless network environment through the guest network.
For example: provide guests with a different WiFi name and password from your original WiFi, to prevent guests from browsing data shared on your network and increase the security of your network connection.
Note:
1. Adding a Guest Network Pro also creates a new VLAN network.
2. Guest Network Pro is supported on WiFi7 ROG series models and select WiFi 6 models.
3. This feature requires upgrading your ASUS router to firmware version 3.0.0.6.102_34312 or above.
For instruction about how to update the firmware, please refer to [Wireless Router] How to update the firmware of your router to the latest version
4. Content filter is powered by DNS based services.
5. Starting from firmware version 3.0.0.6.102_35404, the name will change from [Guest Network Pro] to [Network].
How to set up Guest Network with an ASUS router?
You can set up your ASUS router via Web GUI or ASUS Router app.
ASUS Router Web GUI
Step 1: Connect your device (laptop or phone) to the router via wired or WiFi connection and enter your router LAN IP or router URL http://www.asusrouter.com to the WEB GUI.
Step 2: Enter your login username and password on the login page and then click [Sign In].
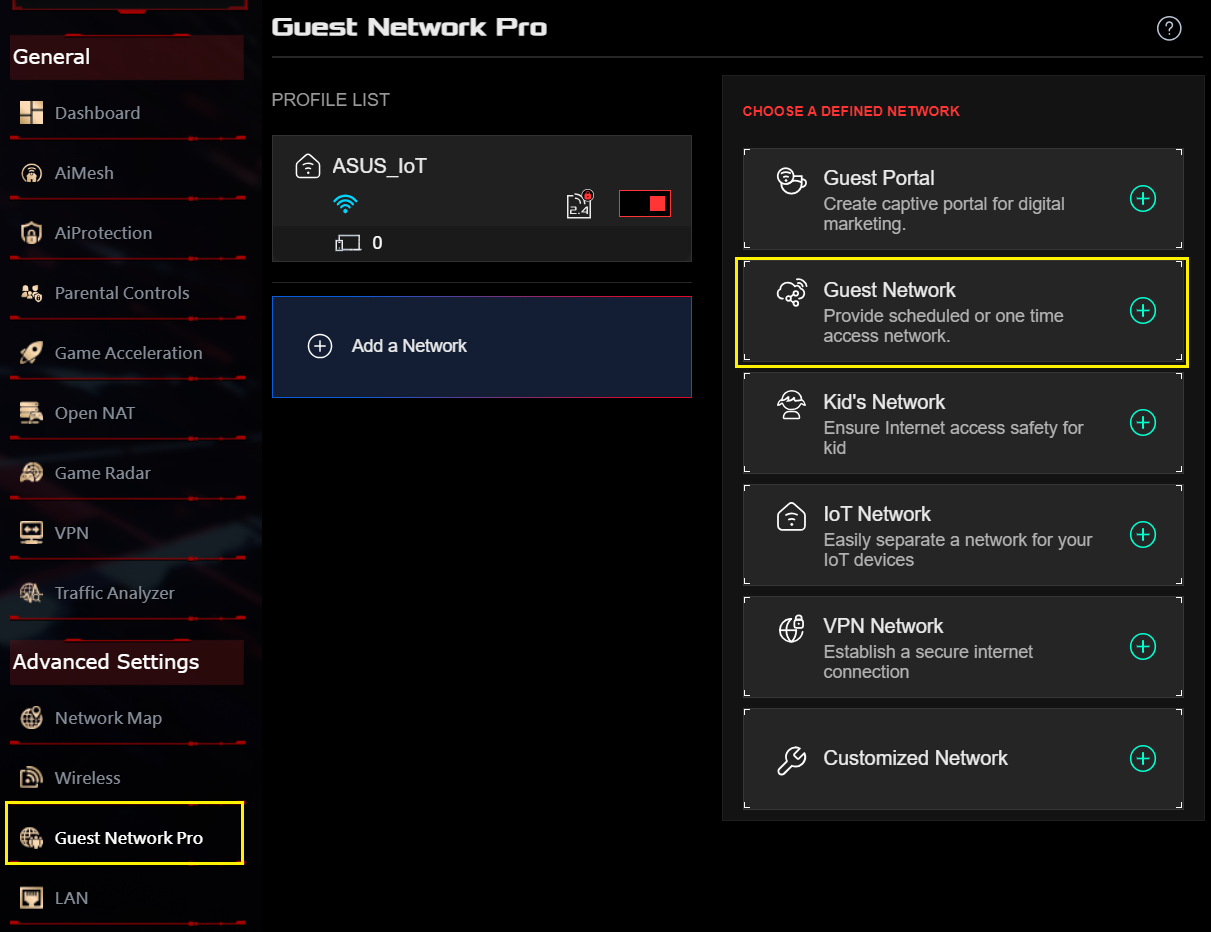
Step 3: Go to [Guest Network Pro] > [ Guest Network].
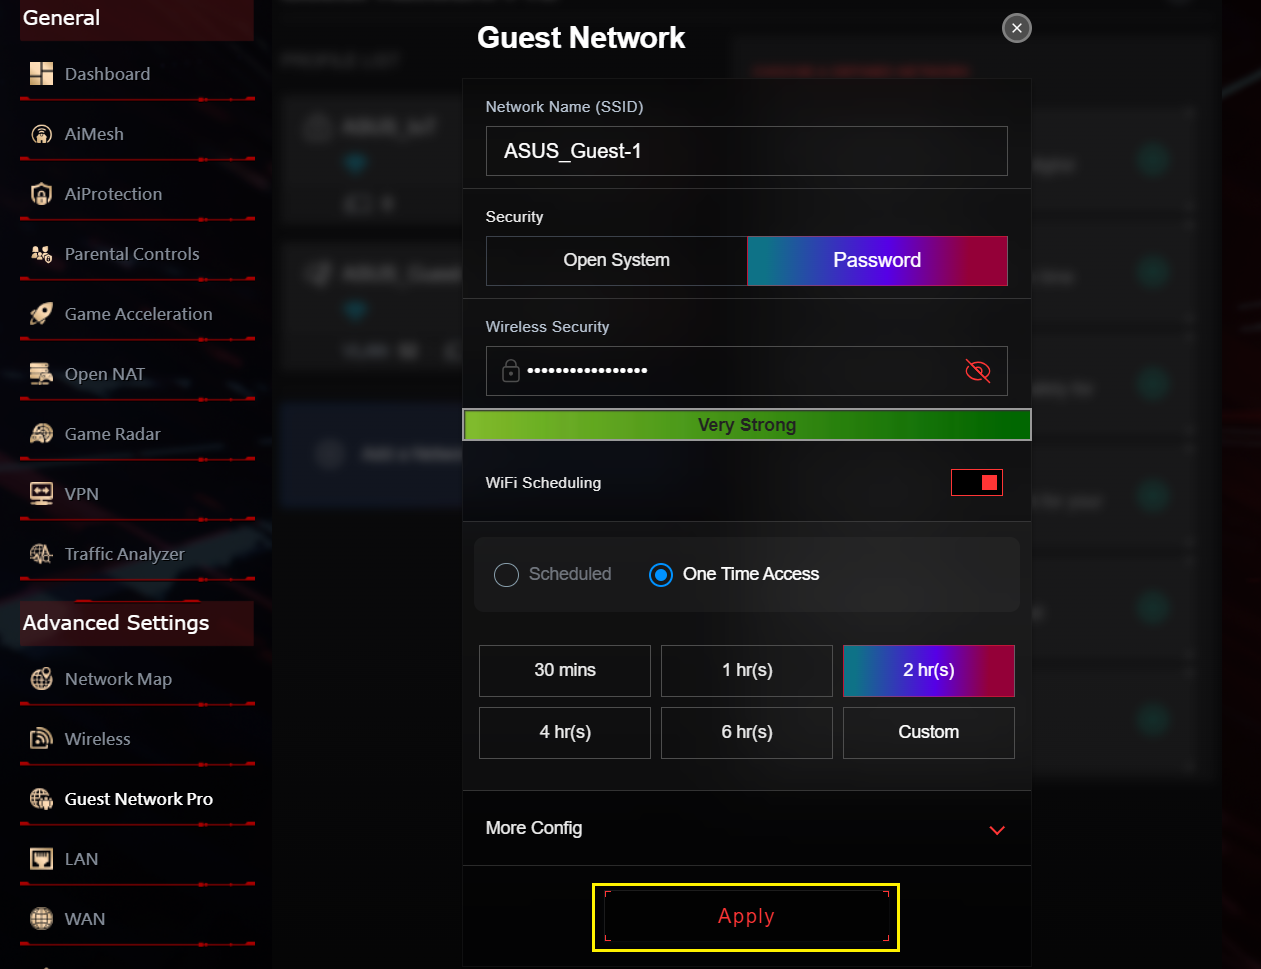
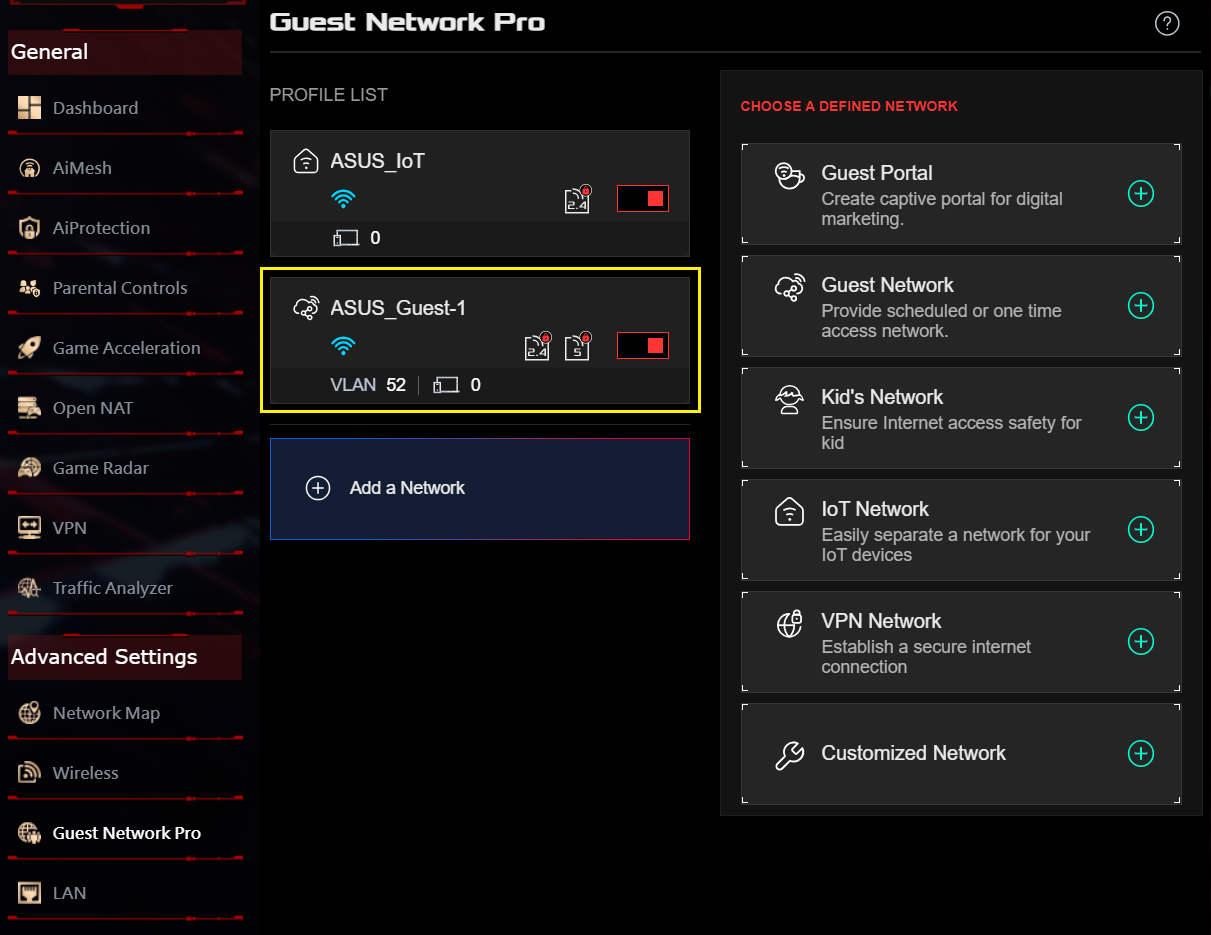
Step 4: Enter the required settings and click [Apply] to finish.
ASUS Router App
Step 1: Login to App and click [ Settings ] > [ Guest Network Pro ] > [ + ] icon.
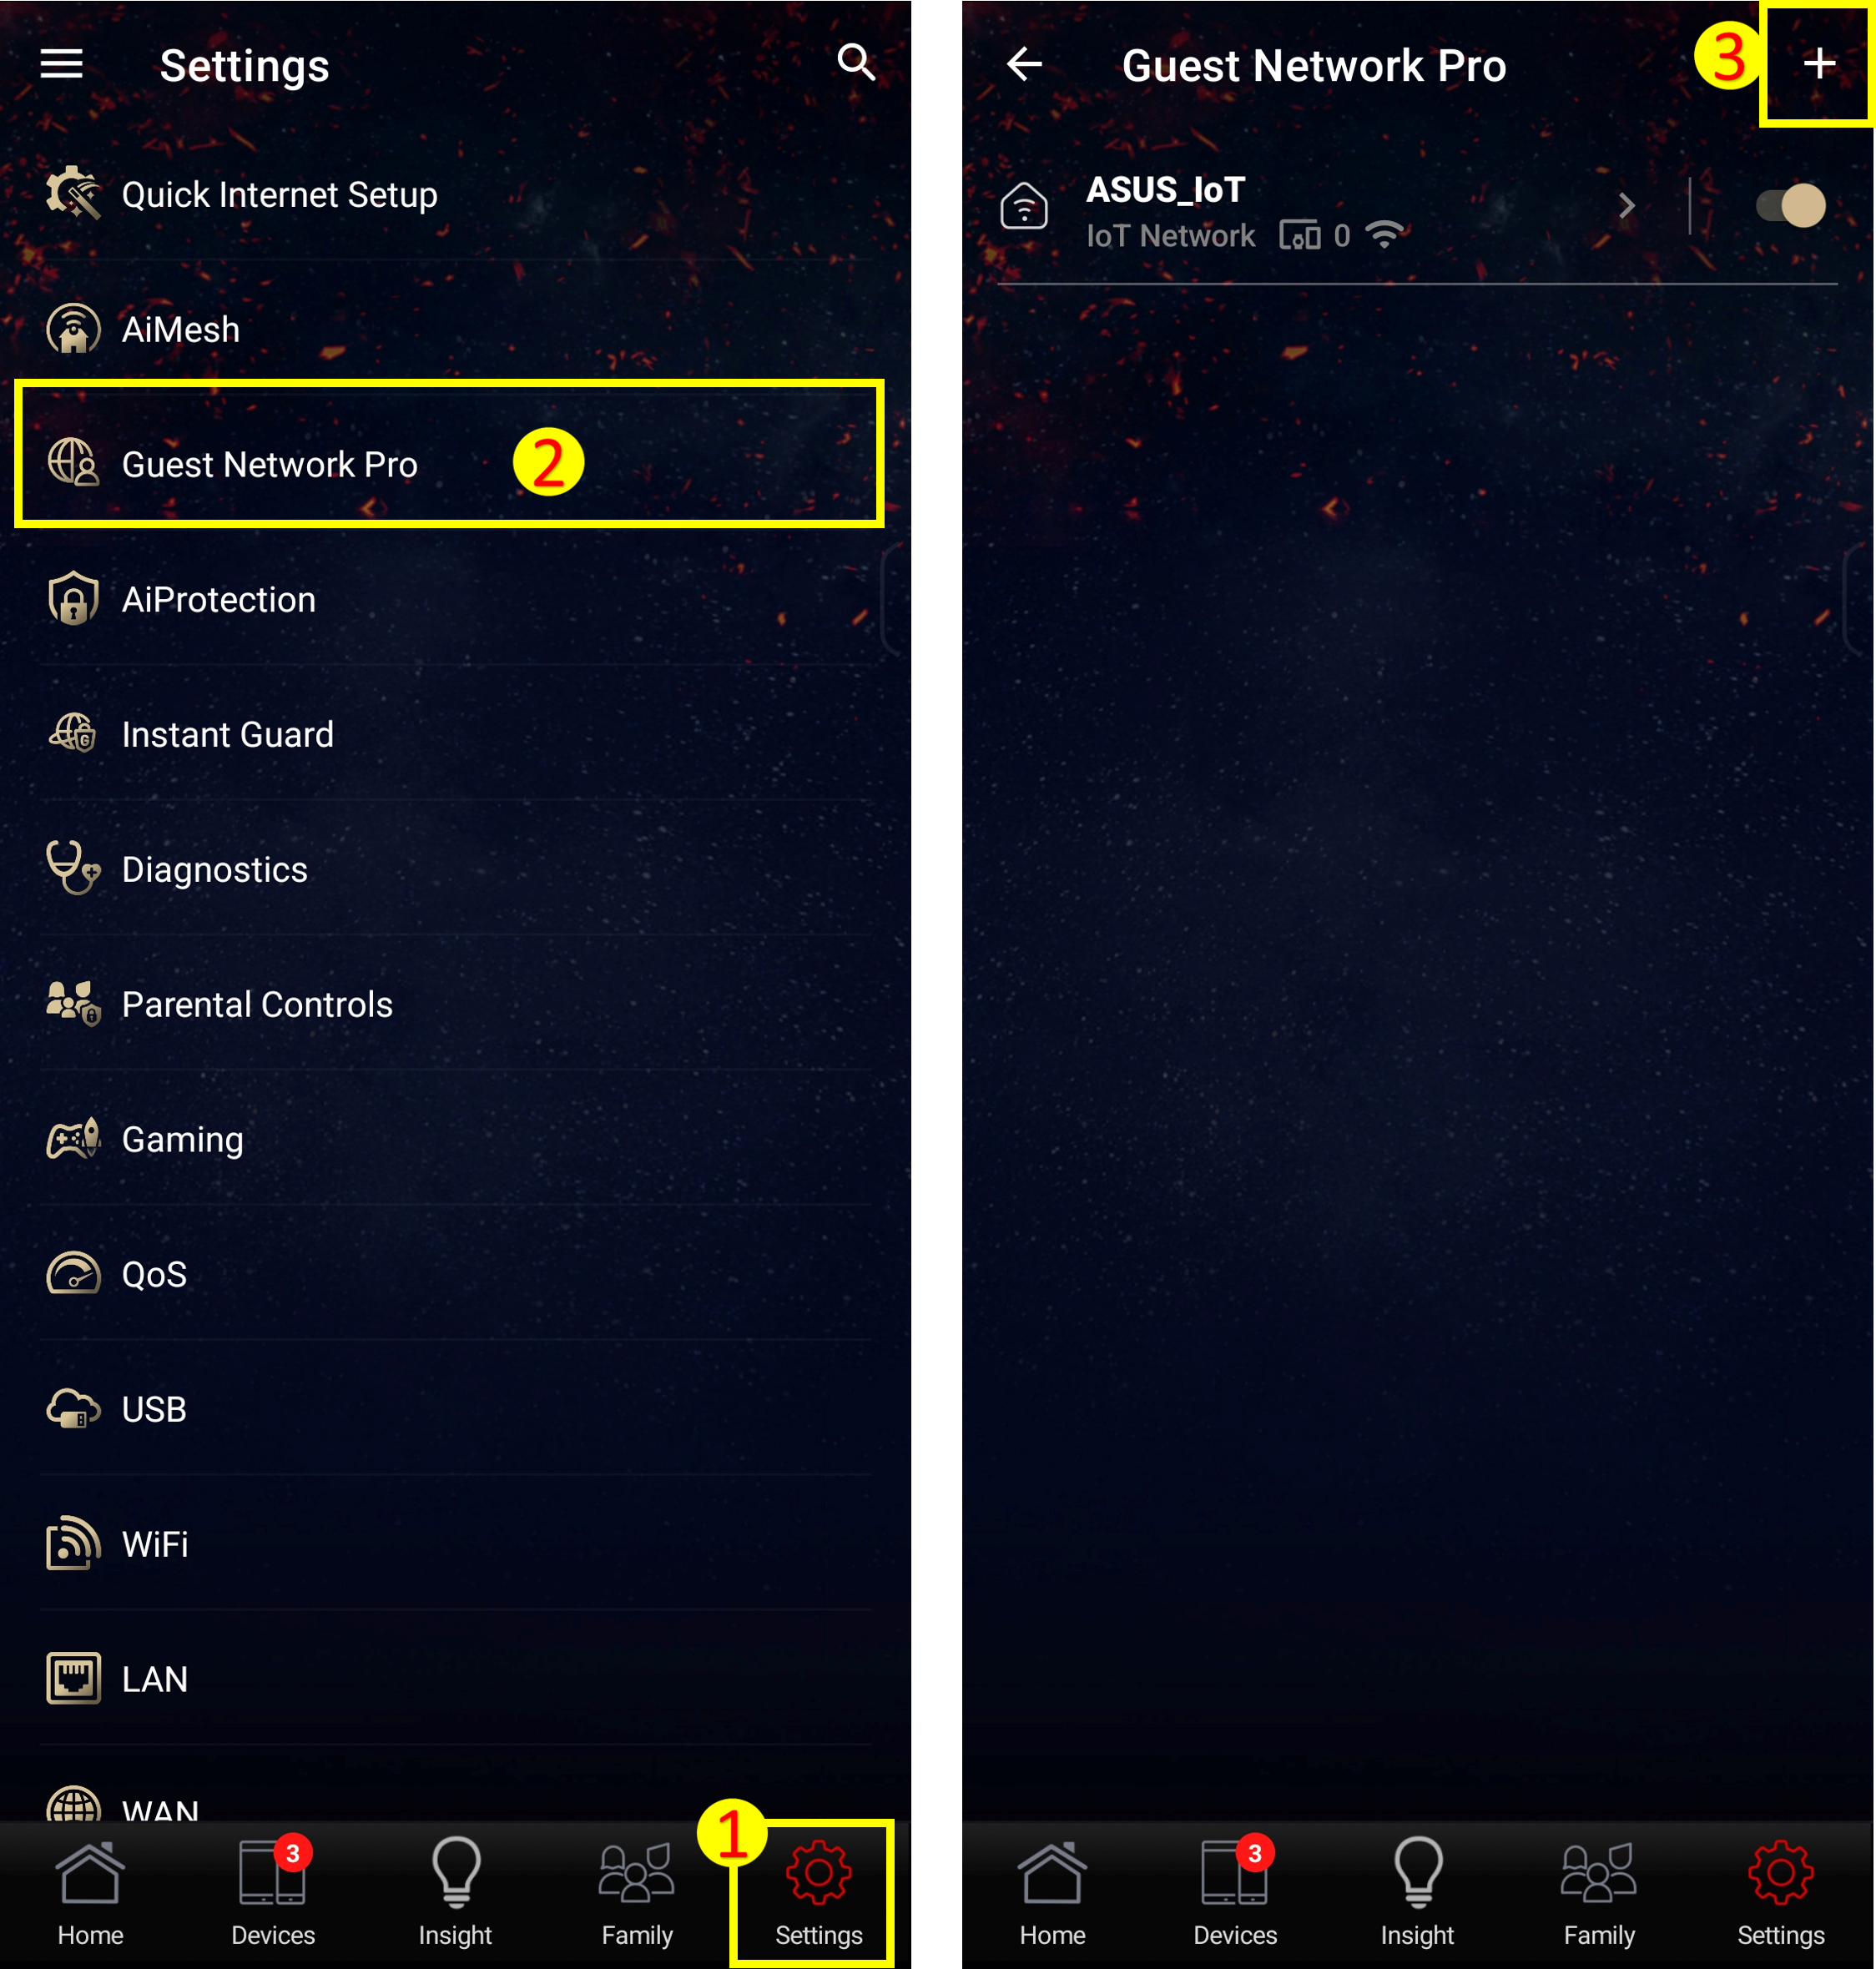
Step 2: Click [ Guest Network ], enter the required settings and click [ Apply ] to finish.

FAQ
1. How to assign VPN on Guest network pro?
1. Click a guest network pro's profile on list.
2. Click [ VPN ] tab.
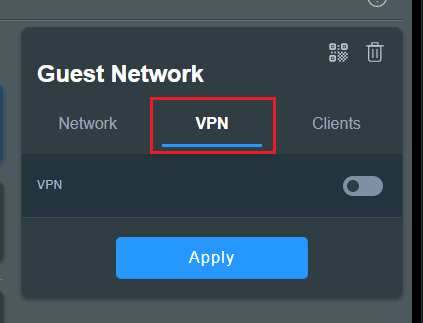
3. Enable VPN.
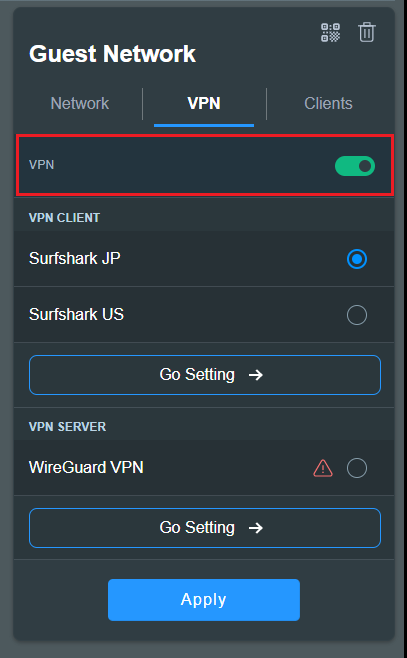
4. Select a VPN on list. (If there is no VPN client on your router, you will need to create one first.)
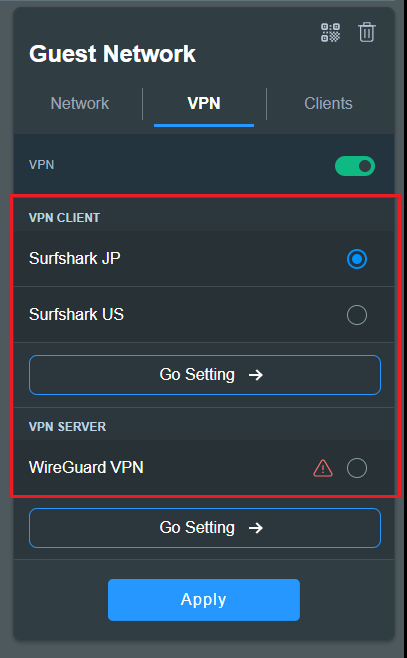
5. Click [Apply] to save the setting.

2. How to assign filter on Guest network pro?(set DNS server)
1. Click a guest network pro's profile on list.
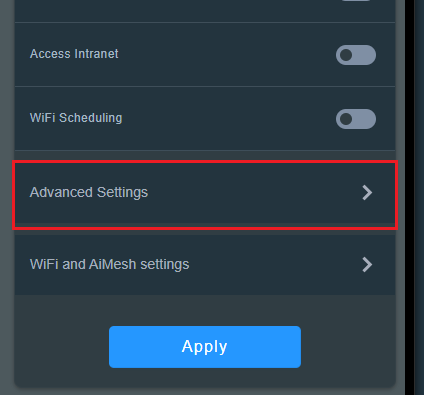
2. Click [Advanced settings].
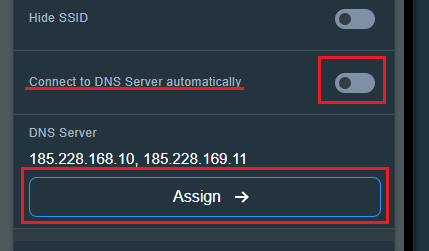
3. Disable [Connect to DNS server automatically], and click [assign] a DNS server you want, or you can input customized DNS server.
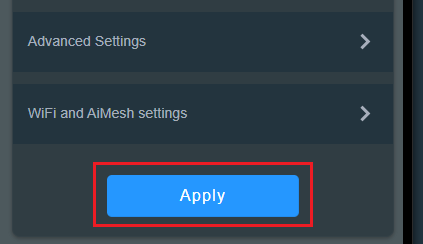
4. Click [Apply] to save the setting.
How to get the (Utility / Firmware)?
You can download the latest drivers, software, firmware and user manuals in the ASUS Download Center.
If you need more information about the ASUS Download Center, please refer this link.


