[VPN] How to set up IPsec VPN connection in Windows 10 (Firmware support is available for 3.0.0.4.386_4xxxx)
IKEv2 is a feature only available in firmware versions 3004.386.4xxxx and above, please find for a router that supports such firmware versions. You can download the latest firmware in the ASUS Download Center.(LINK)
[Wireless Router] How to update the firmware of your router to the latest version ? (WebGUI)
To set up ASUS Router
2. Set up username and password for VPN client
To set up Windows 10 PC
1. To add a necessary registry setting
2. Install Certification in Windows
To set up ASUS Router
1. Connect your computer to the router via wired or WiFi connection and enter your router LAN IP or router URL http://www.asusrouter.com to the WEB GUI.

For more details, please refer to How to enter the router setting page(Web GUI)
2. Click [VPN] from the left Advanced Settings > [VPN Server] page.
3. Turn on IPsec VPN Server
Note: Please make sure your WAN IP is public IP address and suggest to configure the DDNS for your network.
4. Enter credentials in the Pre-shared Key field.
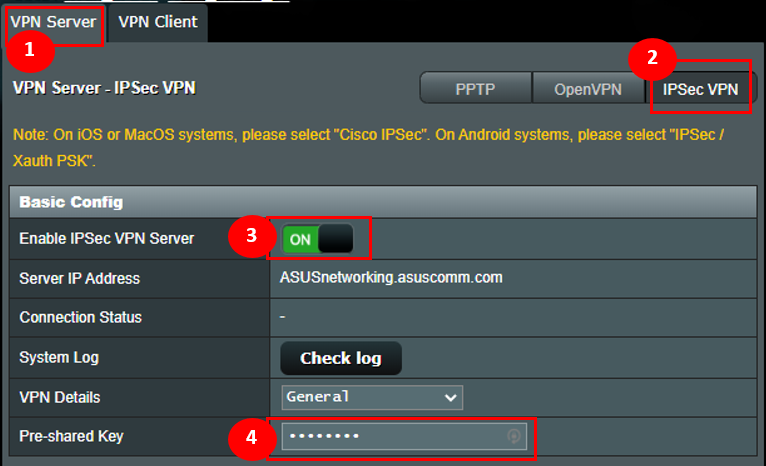
Step 2. Set up username and password for VPN client
1. Enter the username and password for accessing to the VPN server.
2. Choose “V2” option for Supported IKE version.
3. Click the [+] icon then click Apply to save.

1. Export button will be available after clicking apply.
2. Choose [For Windows].

3. Click Export button, then you will download the certification file named cert ikev2_cert_windows.der.
To set up Windows 10 PC
1. Press the Windows Key +
+ at the same time to bring up the Run box.
2. Type in: [regedit] and click OK.
Note: Click Yes if asked if you'd like to allow the app to make changes to your PC.

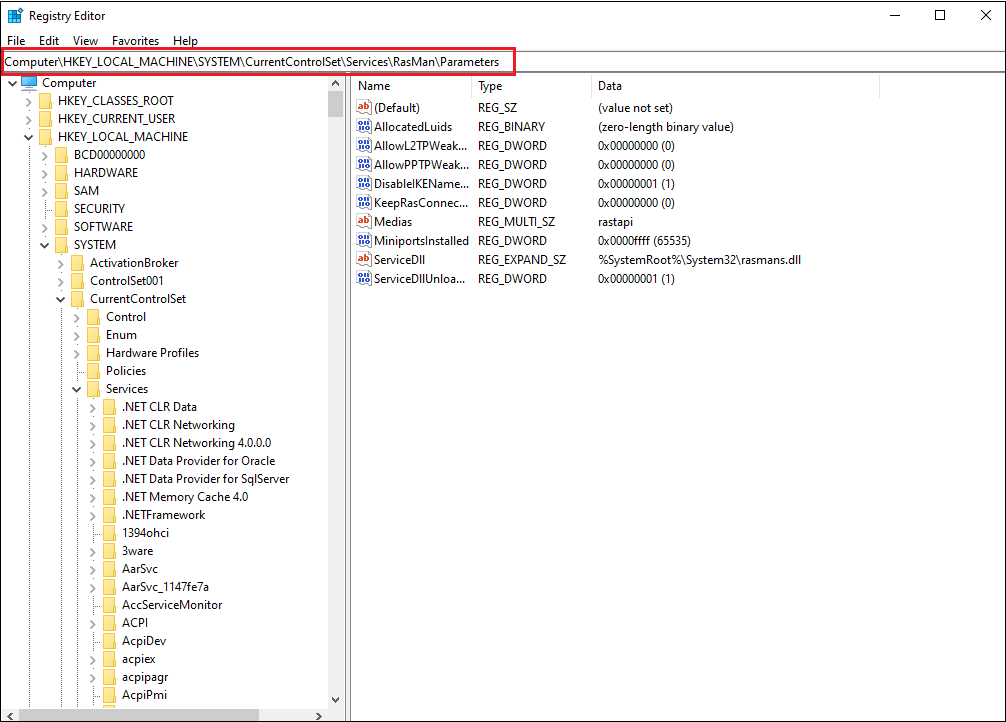
3. In the left pane, locate and click the folder: HKEY_LOCAL_MACHINE\SYSTEM\CurrentControlSet\services\RasMan\Parameters
4. Click the Edit menu and hover your cursor over New. Click DWORD Value.
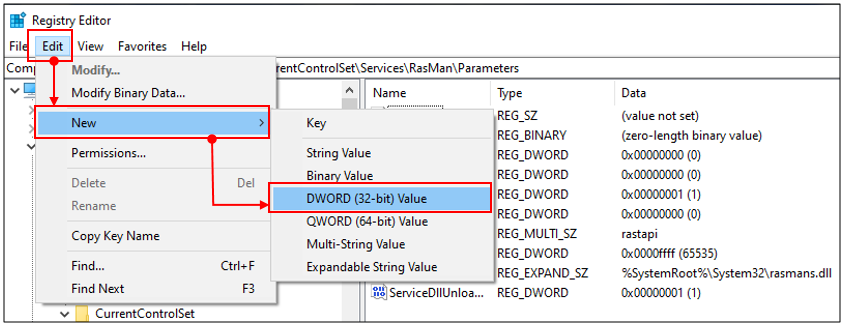
A new registry will appear in the right pane, named DisableIKENameEkuCheck,

and set Value to 1.

5. Reboot the computer.
1. Double click the certification file.

2. Click “Install Certification”
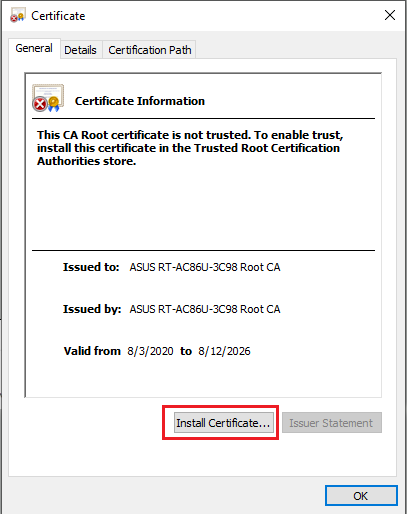
3. Choose “Local Machine” and click Next.
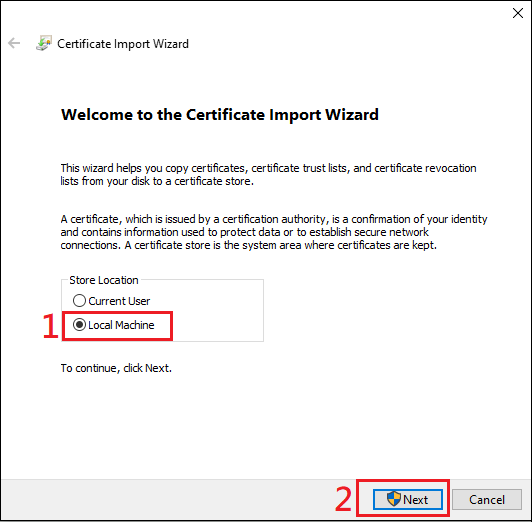
4. Choose “Place all certificates in the following store” and click “Browse”.
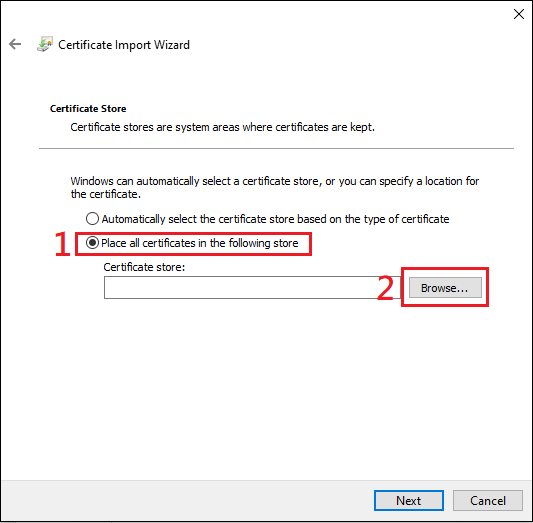
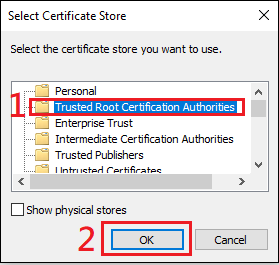
5. Choose “Trusted Root Certification Authorities” and click ok.
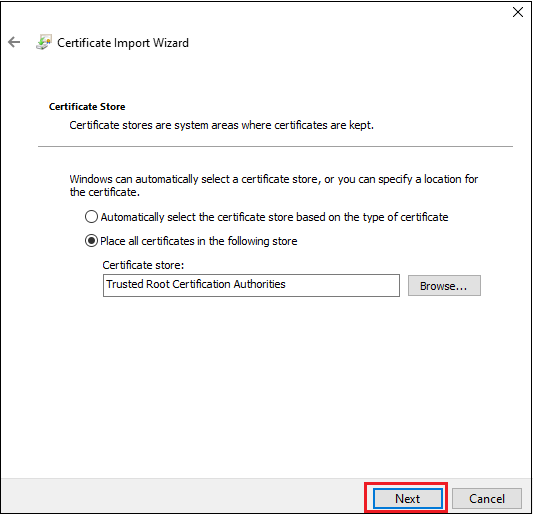
6. Then click “Next”
7. Click Finish.
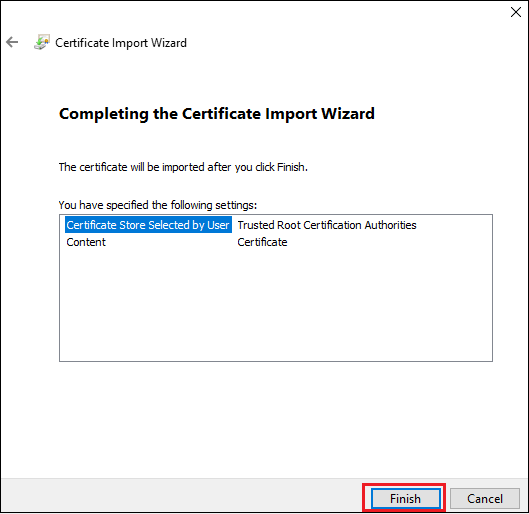
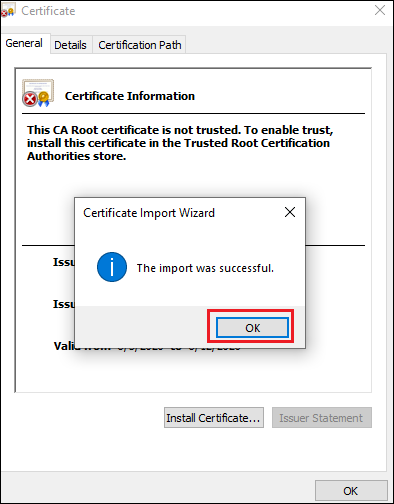
8. Double click the certification file to check. You can see as below if installed the certification successfully.
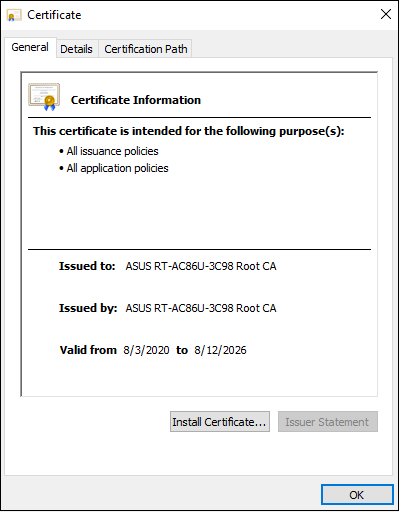
Step 6. Build up VPN connection
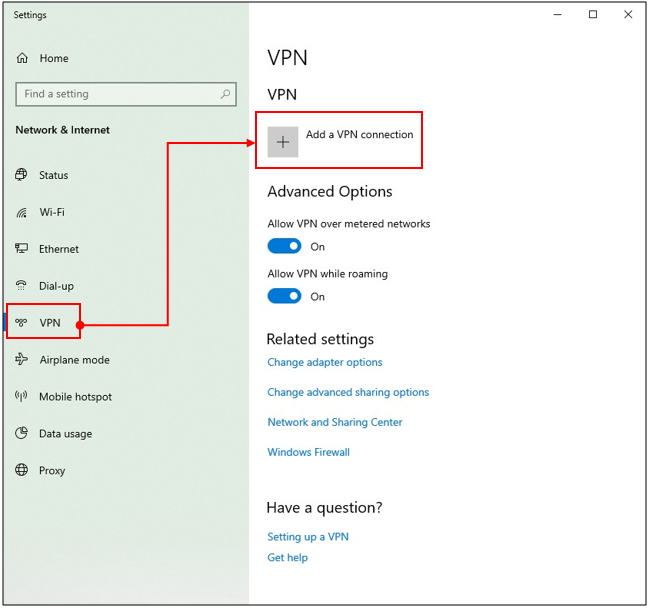
1. Open Network & Internet settings

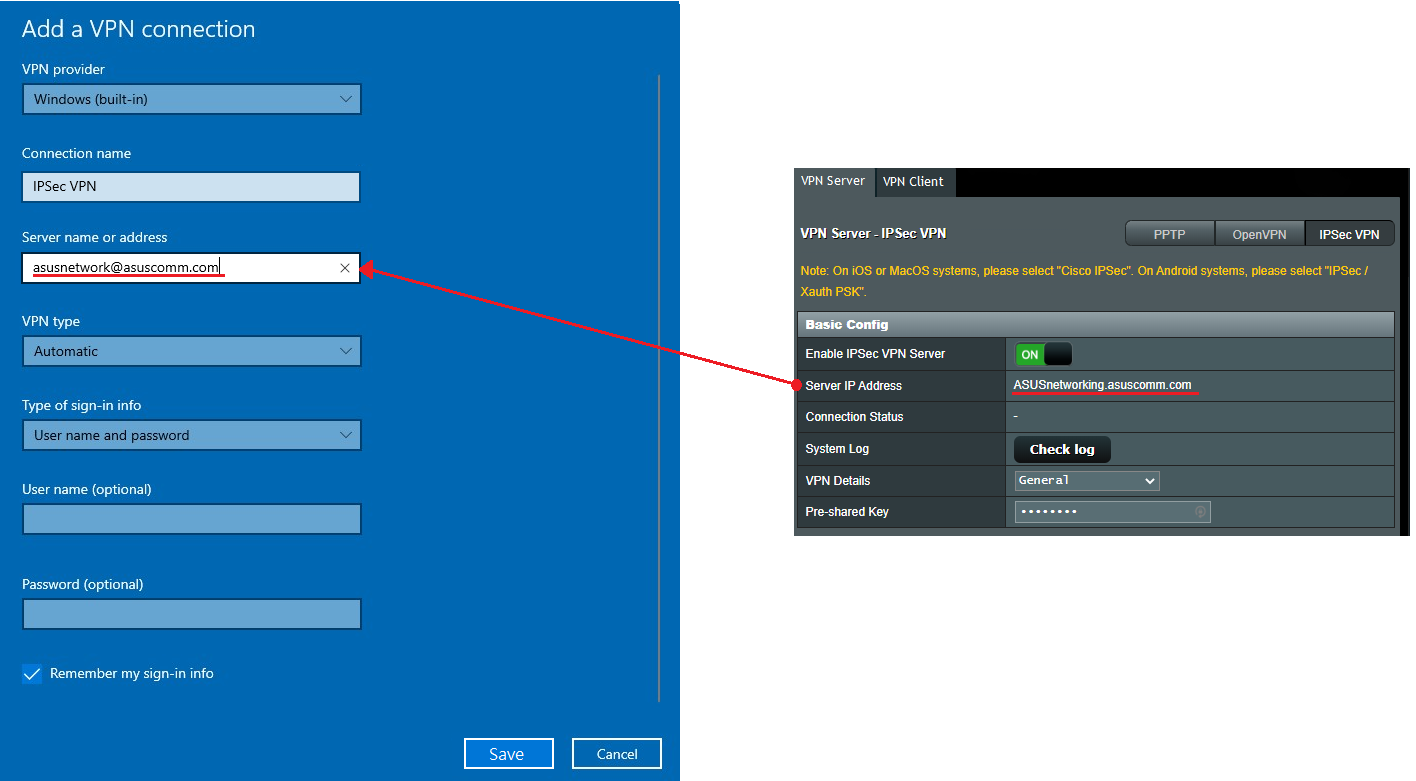
2. Go to VPN setting page. Click [+] button to add VPN connection.
3. In the Server Name or Address field on the VPN configuration screen, enter the domain name or IP address displayed in the Server IP Address field on the VPN Server page. Click save to finish setting.
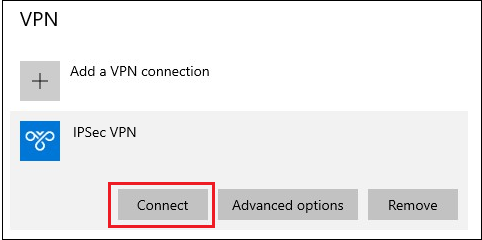
4. Click “Connect” button over the VPN profile you created.
5. Enter the username and password, then click OK to connect to VPN server. Completed!

Note:
1. If you connect to the router from the Internet through IPSec VPN and cannot access the server inside the LAN, disable or check the LAN server’s firewall settings.
2. If you set up the IPSec VPN connection with your mobile device or PC connected to your router at the same time, when it completes, you may connect to other devices on the LAN through IPSec VPN without the Internet access. If this occurs, disable Wi-Fi on your mobile device or PC and then connect to Internet via the 3G/4G mobile network. Now you are in a different network. Try connecting to the VPN again.
3. There can only be a maximum of 8 clients with IPSec connections.
4. One IPsec account/password can only allow one client to connect (max up to 8 rules of account/password).
5. IPsec needs account/ password to connect, not support free login.
How to get the (Utility / Firmware)?
You can download the latest drivers, software, firmware and user manuals in the ASUS Download Center.
If you need more information about the ASUS Download Center, please refer this link.