[LCD Monitor] ASUS ZenScreen MB249C C-clamp arm and partition hook setup
A step by step how to video of ASUS ZenScreen MB249C C-clamp arm and partition hook kit that facilitates a more intuitive setup. Between the built-in kickstand, c-clamp stand, and partition hook kit, you can quickly set up the MB249C in your home office, a shared office space, your living room, or wherever the day takes you.
Adjusting the monitor
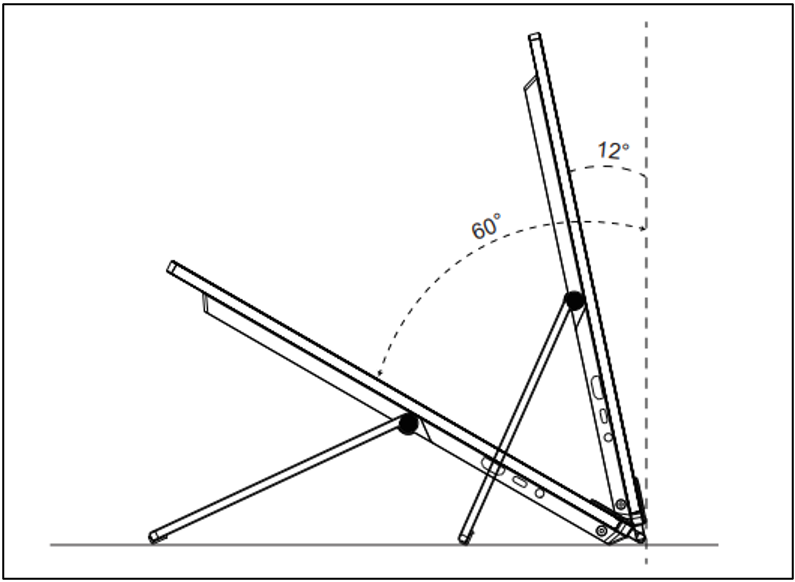
1.1 Using of handle
• You can adjust the monitor to the best Angle for you.
• The monitor’s Angle is between 12 and 60 degrees.
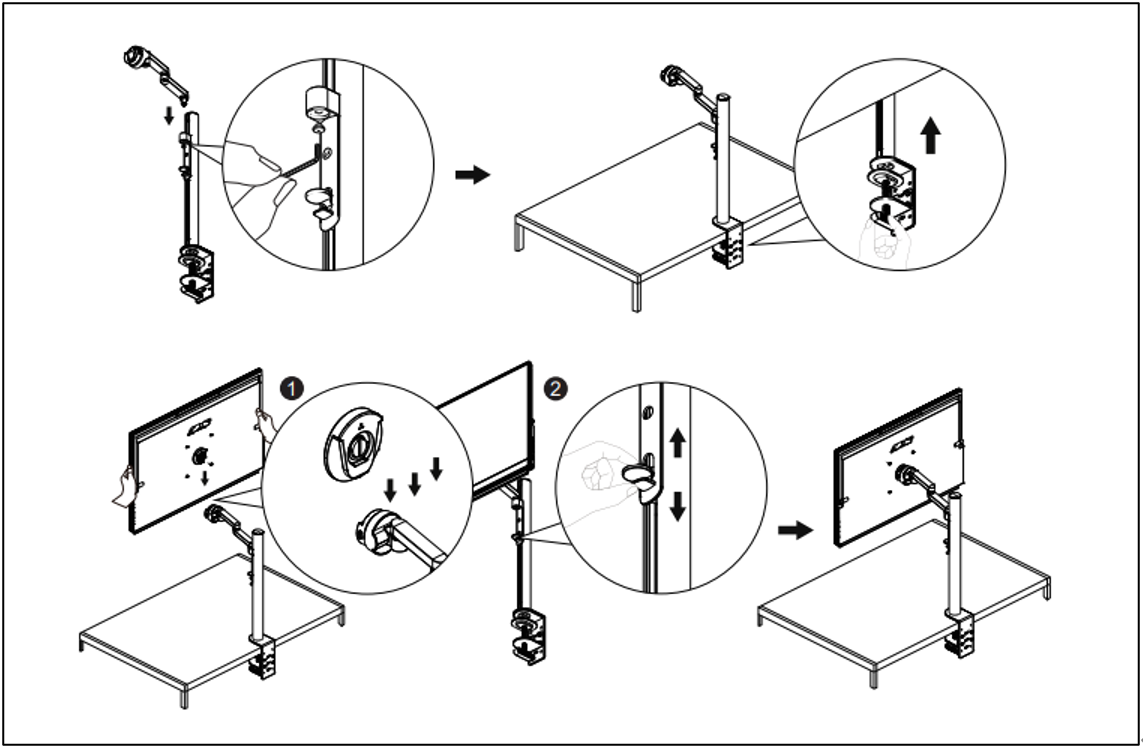
1.2 Locking bracket
1. Secure the head of the support using an L-shaped screwdriver. And you can adjust the height by pinching the switch.
2. Attach the bracket to the desktop.
3. Attach the tripod to the head of the bracket.
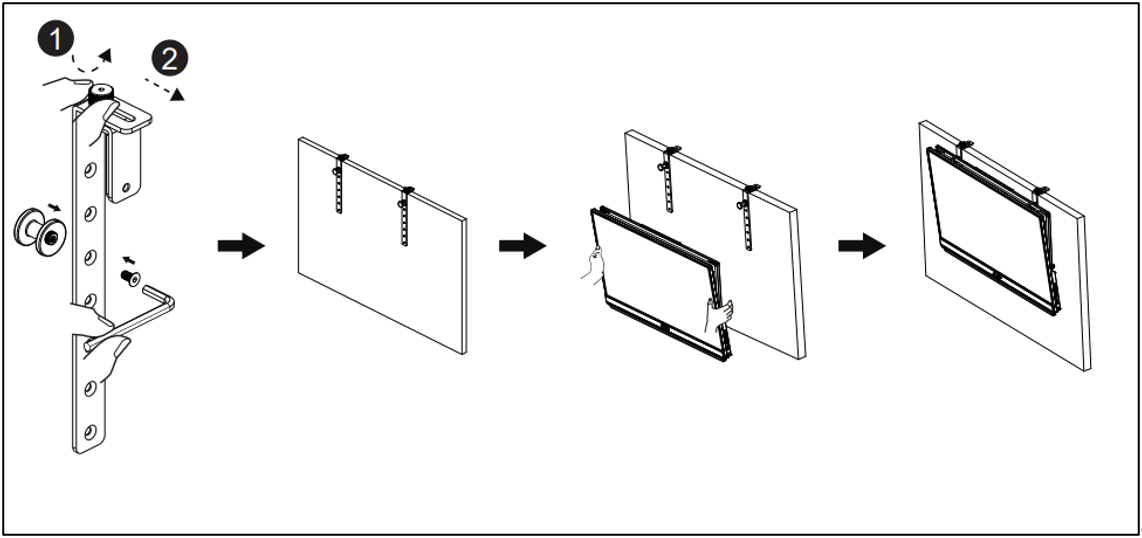
1.3 Using of hooks
1. Adjust the hook and screw, and then lock it to the baffle.
2. Hang the handle of the monitor on the hook.
You can adjust and lock the screws according to the thickness.
1.4 Assembly bracket
• For optimal viewing, we recommend that you look at the full face of the monitor, then adjust the monitor to the angle that is most comfortable for you.
1. Hold the stand to prevent the monitor from falling when you change its angle.
2. Adjust the monitor follow the pictures for the most comfortable viewing for you.
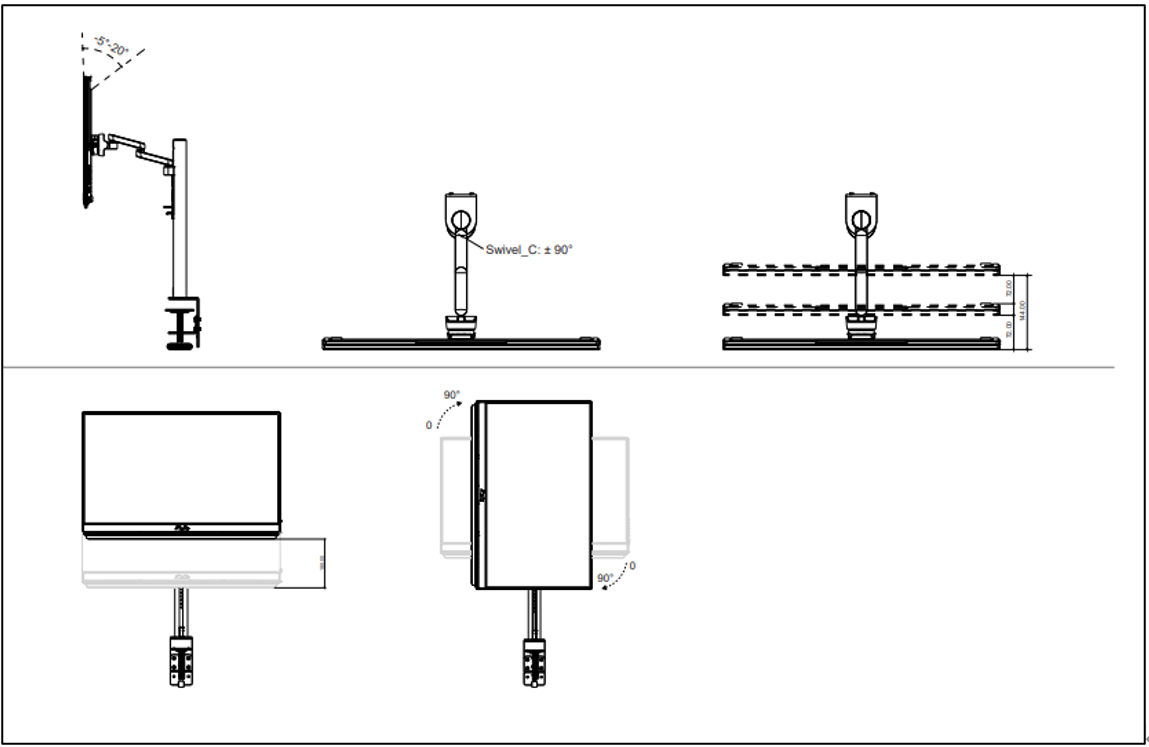
*It is normal that the monitor slightly shakes while you adjust the viewing angle.